Showing posts with label Fussy Cutting. Show all posts

Thursday, July 28, 2022

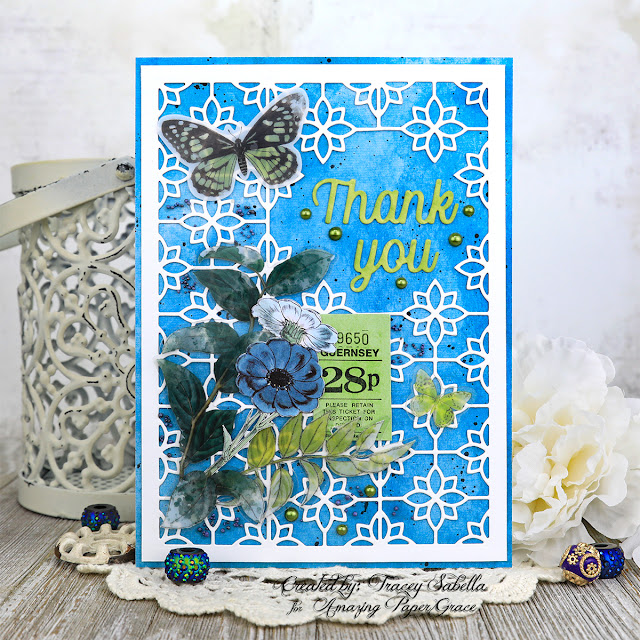
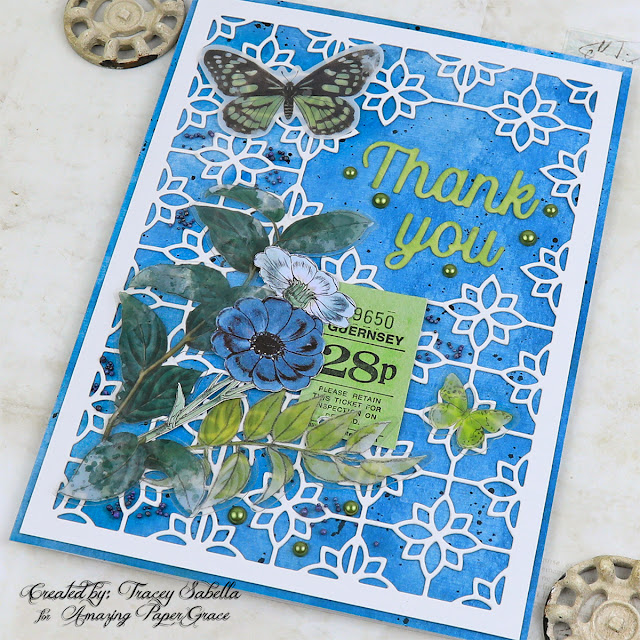
Summer Thank You Card for Amazing Paper Grace

 
Welcome to my creative space!

With summer in full swing, I wanted to design something with beautiful sky blues to feature the Amazing Paper Grace 'Thank You for Your Kindness' die set (S5-513) from The Right Words Collection for this lovely thank you card.

There is just something special about sending a handcrafted thank you note. Lately I've been thinking that I should have a few more of these heartfelt cards ready to send, and this die set is just what I needed with the wonderful sentiment words that create: thank you; thank you for your kindness; and you are so kind. The beautiful background die included with this set is so versatile and can be used as a single strip, or repeat cut to create an entire background like you see here. I wanted the sentiment to pop, so cut out the background section that would have been behind the thank you.

I hope you'll scroll down through the "Tips and Techniques" section below for close-ups and all the details on how to create this beautiful thank you card.

Thank you Amazing Paper Grace for providing the dies used in this project.

Tips and Techniques
I cut the background by lining up the dies for a repeat pattern three times and yes, on the repeat, there is a line down the center of each flower which adds charm to the design. 

Designer Tip: Cut the paper about 1/2 inch larger than you need on each side, so if the design isn't quite centered, you can trim it so that the edges are perfectly even. So for example, if you want a 5x7" base, cut it to 6x8", as long as it will fit into your die cutting machine. 

I've used paper and embellishments from the 49 and Market Sectrum Sherbet Tidal Wave Collection including the acetate leaves. The flowers and ticket are fussy cut from the included image sheet in the 6x8" paper pack.
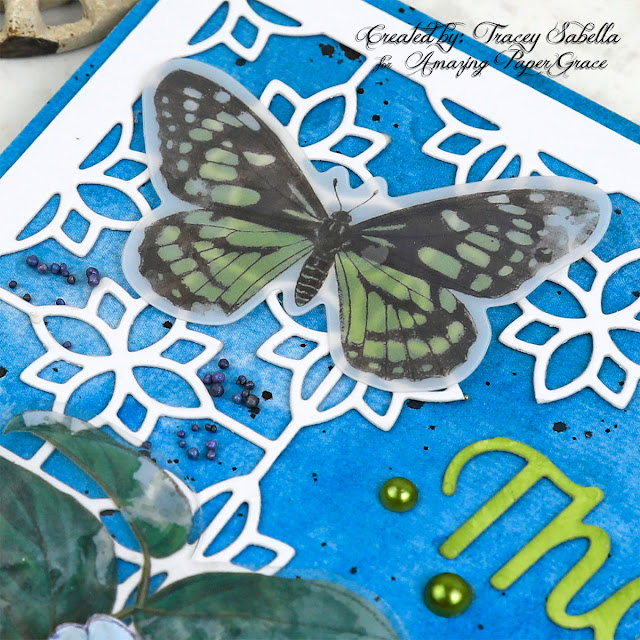
This sweet butterfly is also from the acetate leaves pack. The background paper is spattered with black ink to add visual texture. I've also added green flat back pearls and blue prills for physical texture as well.
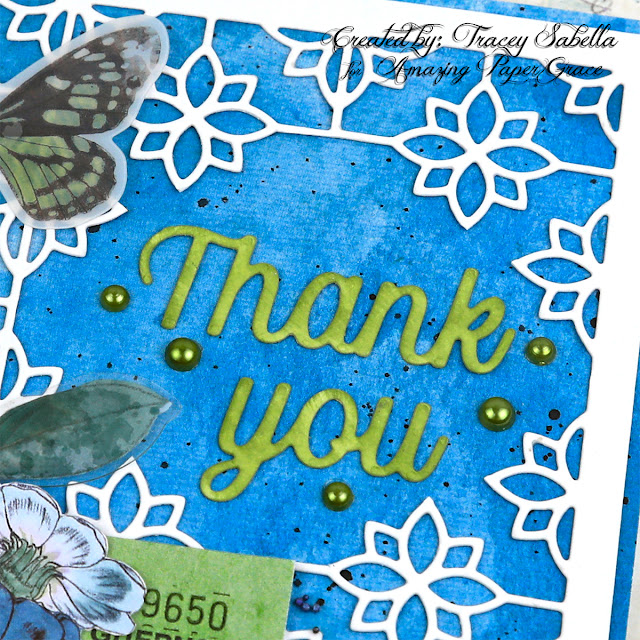
This lovely sentiment was die cut with heavy weight white cardstock, and colored with Distress Inks to coordinate with the embellishments. I used two colors of ink so that the colors would vary like the blue background paper. 

You can see here how I trimmed away some of that background die cut which is also cut in white, but not inked. I tried laying the sentiment over the floral die cut since there is a strong contrast in color, but it was just a little too busy for my taste, so cutting that section out, allows the sentiment to sing. 
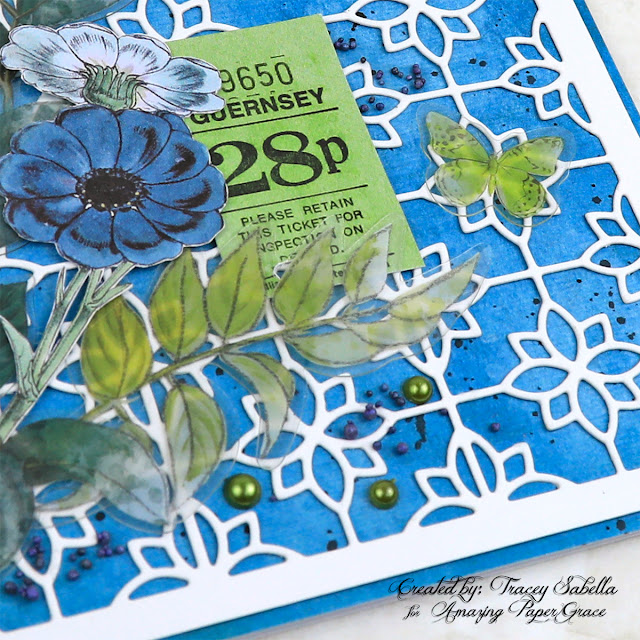
Here in the bottom section of the card you can see more of the same textures and another smaller acetate butterfly.
One final view.

Below you can find the products I used to create this project including some with compensated affiliate links to Scrapbook.com. These links are at absolutely no cost to you. When you shop through the links below, I receive a small commission from Scrapbook.com. These commissions help me cover the costs of my blog and other expenses, which allows me to continue to provide you with FREE inspiration along with Tips and Techniques provided for every project. Thank you so much for your love and support!

Amazing Paper Grace:

Paper:

Ink:

Mixed Media:
Higgins Drawing Ink ~ Black
Finnabair with Prima Marketing ~ Soft Matte Gel

Embellishments:
49 and Market - Spectrum Sherbet Collection - Acetate Leaves - Tidal Wave
US Artquest ~ Blue Jean Baby
Flat Back Pearls ~ Grass Green

Adhesives:
Beacon ~ 3-IN-1 Advanced Craft Glue
Beacon ~ Fabri-Tac

Tools:

Thanks so much for stopping by to view my card. I hope you've been inspired.

~ Blessings ~

Monday, April 19, 2021

Rusty Journey Art Journal Panel with Video Tutorial for Little Birdie Crafts


Welcome to my creative space!

When I first laid eyes on Little Birdie's The Classic Gentleman collection, I knew I had to create a birthday card for my husband with this fabulous vintage car image. My design ended up being too heavy for a card, so I created this art panel instead. 

I was inspired by this amazing rusty brake pad piece to transform Little Birdie cogs with a grungy texture paste effect I created. Be sure to view my video to see this DIY transformation along with a full project tutorial.

All the close-ups and details can be found on the Little Birdie Crafts blog HERE.
It would be great if you could stop over there to leave a comment.

If you would like to see a full supply list, please scroll down.
Little Birdie Crafts can be purchased at their online store.
Be sure to check out the current sales HERE.

Use code TRACEY05 for a 5% discount.

I receive a small commission at not cost to you.

Here are a couple close-ups showing a little more detail:


I have created a full DIY video tutorial for you with voice instructions to share all the details on how to create this rusty industrial art panel including a technique to create grungy rusty gears and details on and industrial metal finish used on the diecut cogs and rotor blade seen above.. I hope you find inspiration and learn new techniques as you view it.

Enjoy!


Little Birdie Crafts Supplies
Texture Sand

Other Supplies
Thin Kraft Chipboard
Heavy Chipboard for base (Paper Pad Back)
Corrugated Packaging
Tim Holtz with Idea-ology ~ Paper Dolls
Tim Holtz with Idea-ology ~ Metallic Sticker Book
Tim Holtz with Sizzix ~ Thinlits - Stacked Deckle
Tim Holtz with Sizzix ~ Bigz - Steampunk Parts
Tim Holtz with Ranger ~ Distress Ink - Black Soot, Ground Espresso
DecoArt ~ Crafter's Acrylic: Bright Orange; Burnt Umber; Yellow
US Artquest ~ Prills - Express-O Yourself
Bronze Mini Microbeads
Silicone Glue
Wonder Tape ~ Foam Tape
EK Success ~ Craft Tweezers
Wagner ~ HT 400 Heat Gun


Thanks for stopping by! I treasure your comments.
~ Blessings ~

Friday, April 24, 2020

Mixed Media Mother's Day Card for Little Birdie Crafts

Welcome to my creative space!

Mother's Day is just around the corner and I created this sweet card for my mom featuring the gorgeous Shabby Chic Bouquet paper and flower collections.  The card will fit into a standard 6×6″ shadowbox or frame, so I thought this sentiment about memories would work well as a display for everyday home decor and yet be lovely for a Mother’s Day card. 

I hope you'll hop on over to the Little Birdie Crafts blog for a full photo tutorial showing how I put this together and to leave a comment letting me know what you think. You can find that post HERE.

Little Birdie Crafts can be purchased at their US online store. For a limited time there is free worldwide shipping on all orders over $99.

Use code TRACEY05 for a 5% discount.
I receive a small commission at no cost to you.
Thanks for your support!

Little Birdie Crafts Supplies

Other Supplies
Cardstock - White
Ranger ~ Distress Embossing Dabber
Liquitex ~ Gesso - Clear
Stampendous ~ Embossing Enamel - Shabby White, Shabby Pink
US ArtQuest ~ Mini Prills - Tu-Tu
Stampendous ~ Fran-tage - Silver Glass Glitter
Wonder Tape ~ Foam Tape
Scrapbook Adhesive by 3L ~ Crafty Power Tape
Helmar ~ 450 Quick Dry Adhesive
Tombo ~ Mono MULTI Liquid Glue
Tim Holtz Tonic 5 Inch Haberdashery Scissors
Wagner ~ HT 400 Heat Gun


Thanks for stopping by! I treasure your comments.

~ Blessings ~

Friday, April 12, 2019

Mixed Media Birthday Card for Studio75 DT April Challenge

Mixed Media Birthday Card by Tracey Sabella for Studio75: #traceysabella #studio75 #littlebirdiecrafts #solidoak #rangerink #primamarketing #finnabair #helmar #spring #springcard #mixedmedia #mixedmediacard #mixedmediacards #shabbychic #shabbychiccard #shabbychiccards #handmadeflowers #springisintheair #handmadecard #handmadecards #diycard #diycards #handcraftedcard #hancraftedcards
Welcome to my creative space!

It's time for Studio75 April Challenge.

The theme:
Bingo

Create any project, using any technique, using 3 elements from one line,
either vertically, horizontally or diagonally.


For challenge details and to enter stop by the Studio75 Challenge blog post HERE.

For my card, I selected the middle horizontal line using Bird, Green, and Flower. The gorgeous Studio75 Forever In Love Paper Collection worked so perfectly to meet this challenge with it's beautiful floral designs and plenty of amazing flowers and leaves to fussy cut for the project. It also includes warm and lovely greens in the foliage. I tucked in a few branches of lacy moss to highlight the green. All I needed to add to meet the challenge board was a sweet bird charm swooping next to the sentiment. 

Tips and Techniques

I used a circle die to trim out the birthday sentiment from the Forever In Love Paper Collection and fussy cut flowers, leaves, and the sweet heart to add to the floral cluster. I added a small spray of stamen from the Studio75 Store to tuck in as well. 

I just adore the subtle music pattern printed on this paper. I trimmed down the focal paper from the 6x6" paper set just a little and layered it over a second sheet from the collection. The edges of both pieces were inked and distressed.


I added a few items from my stash: a leafy jewelry pendant; a green vial from Solid Oak filled with iridescent seed beads for a bit of sparkle; lace, a bling circle, and bird charm. Just the other day at the craft store, I spied a package containing several varieties of moss, that I just had to buy. Bambino Glue worked perfectly to adhere the moss. Don't you just adore the texture that this natural element adds?

Here you can see the fabulous fussy cut images from the Forever In Love collection. The gorgeous dimensional flowers from Little Birdie Crafts at A.C. Moore coordinate so perfectly!!


Other Supplies
Little Birdie Crafts at A.C. Moore ~ Sparkle Handmade Flowers - Fiona, Carnation
Little Birdie Crafts at A.C. Moore ~ Valerie - Pearl Pink
Little Birdie Crafts ~ Fiorella Flowers - Pastel Palette
Little Birdie Crafts ~ Beaded Blooms - Moon Light
Little Birdie Crafts ~ Handade Crackle Flowers - Zoe, Aqua Mist
Solid Oak ~ Steampunk Jewelry Parts - Fancy Bottles, Green
Ashland ~ Moss Kit
Darice ~ Bling Stickers
Darice ~ Craft Designer - Glass Transparent Rainbow Seed Beads, Clear AB 10/0
ScrapBerry's ~ Metal Charms - Bird
Lace ~ from my stash
Jewelry Pendant ~ from my stash
Little Birdie Crafts ~ Gesso, White
Prima ~ Finnabair - Art Basics: Gesso, Clear
Ranger ~ Distress Oxide - Vingage Photo, Walnut Stain, Antique Linen
Helmar ~ 450 Quick Dry Adhesive
Helmar ~ Fabric Glue
Imagine Crafts ~ Tear It!
Prima ~ Distress Tool

I hope you've been inspired to join the April Studio75 Challenge

and create a project inspired by the fun bingo board.

Monday, June 10, 2013

Girly Birthday Card for Really Reasonable Ribbon

June is a big month for birthday's in our family. I created this girly card for my niece featuring gorgeous Hand-dyed Silk and White Metallic String from the Really Reasonable Ribbon Store. Every girl loves glitter, butterflies and of course a pretty bow. 


Really Reasonable Ribbon Products


Tips and Techniques:

Wrapped Ribbon ~ This hand-dyed silk Bonnie carries in the RRR Store is just gorgeous and comes in a wide variety of colors. I wrapped it around the front of the card, then wrapped Iridescent Metallic White String over top, crossing as I wrapped, then finished by tying the string into a bow. This string is so sparkly and gorgeous. I've already had to order more!! 

Fussy Cutting ~ I fussy cut two flowers from the patterned paper and then cut in towards the center all around creating a fringe effect and layered the smaller flower over the larger. I also fussy cut the stem and leaves. 

Pearl Accents ~ . . . added for some girly bling. 


I also fussy cut the floral spray and this glittered butterfly. The silk ribbon and embellishments are adhered with Scor-Tape

I hope you are enjoying your summer and have time to create!!

I've entered this at:
Word Art Wednesday

Thanks for stopping by! I treasure your comments.

~ Blessings ~

Thursday, May 16, 2013

The Music Man Details for ScrapThat!

It's a busy time here in the Sabella home. Our youngest daughter is graduating on Sunday with a party here at our place afterwards, so we're all busy with preparations. It's such an exciting time! 

I created a layout featuring a photo of Maria with the ScrapThat! May Anniversary Kit. She performed in her high school musical, The Music Man, last spring. You may have seen this page during the blog hop, but today I thought I'd share some close-ups and details. 

"The Music Man"
Main Kit

Maria is the one with the big hat!

I used Amy's gorgeous May sketch:

For details on our ScrapThat! May challenges, check out the following links:


Tips and Techniques:

Embossed Vellum Flowers ~ I used the vellum included in the main kit along with Heartfelt Creations stamps and dies to created these lovely flowers. My step by step photo tutorial can be found here

Die Cut Blossoms ~ I used kit cardstock and my Donna Salazar Bitty Blossoms Spellbinder Dies to created these lovely rolled paper flowers and leaves along with distress ink to color. The larger flower is Spellbinder's Spiral Blossoms 1 die. 

Kit Goodies ~ The sweet pink rosebud and gorgeous Prima Crystal and Pearl Flourishes are included in the main kit. 

Fiber Swirls ~ I dyed the kit fiber and wrapped small portions around my finger to created these darling little swirls to tuck into the cluster. 


Fussy Cutting ~ I fussy cut and inked doilies and hexagons from the patterned paper to layer around the photo and cluster.

Embossed Vellum Lace ~ I stamped and heat embossed the vellum with a lace stamp, then fussy cut around the design. I colored the back with blue Distress Ink. 

Doily ~ I picked up this crochet doily in the dollar bin at Michaels and colored with distress ink to coordinate. 

Distressing ~ The mats and paper edges are distressed with my handy dandy Distrezz-It-All. I get soooo much use out of this tool!! 


Butterflies ~ These Petaloo butterflies started out with pure white wings. I colored with several shades of distress ink, added crystals, then kit pearls for the body and the delightful Prima flourishes for butterfly trails. So charming and easy to alter. 

Splatter ~ I splattered the background with mist, then used an eye dropper to add the larger splats 

Lace Edge ~ I pulled the paper back in a couple spots and tucked in some Prima lace from my stash and adorned with the Kaisercraft kit pearls. 

Title ~ The scroll under the hot air balloon was just the right spot to add my title using Prima letters from my stash. 

Thanks for stopping by! I treasure your comments.

~ Blessings ~

Monday, April 1, 2013

"Adventure" SEM April Main Challenge #27 ~ All God's Creatures

I hope you had a wonderful Easter! We went to church then had all the family over for some homemade lasagne and a time of sweet family fellowship.

It's the first Monday of the month and that means it's time to share the Scrapping Everyday Miracles Main Challenge. Nicole is hosting a wonderful challenge for you this month. Here are the details:
For this month's main challenge we would like you to create a project inspired by your pets.  Even if you arent animal person or don't have any pets you can still be inspired by this challenge.  You can create a project inspired by any animal in God's creation. Your projects can even be about an animal related experience like a day at the zoo or a farm. What is important is that we see that God is blessing us with everyday miracles using both the animals within our families and those outside our homes.  

SCRAP TWIST: USE AN ANIMAL RELATED QUOTE SAYING OR EVEN BIBLE VERSE ON YOUR PROJECT.   You can use it for your title, journaling or just addition to your project! Just to help you get started here's a link to a bunch of animal quotes :

Here is my project based on this challenge:

"Adventure"

My husband and I never had a dog. or even discussed the possibility of getting one. Then we moved back to Ohio in 2000 to be closer to our families. My brother taught dog obedience classes including a dog 4-H club. He also did a little breeding. He decided to keep one of the pups as an experiment. He often had clients bring in 2 or 3 year old dogs with no former obedience training, and these dogs were more of a challenge. So he decided to keep Ellie. While he didn't allow her to jump on people, she had no obedience training and had only been on a leash a couple times to go to the vet. You may have guessed it. He offered Grace the opportunity to have 15 month old Ellie so she could be in his 4-H club, and Grace became part of the experiment. Now dogs became a "big" part of our lives. Grace wanted to make Uncle Paul proud and put a lot of time and effort into training her new pal. She defied the odds and with Ellie became one of the top obedience teams in the UKC. They attained every possible obedience title and in their final year of competition placed 3rd in the country in Utility - the most advanced obedience class. 

Now, you do see three dogs in the photo. It didn't take long for our two other daughters to get dogs and join in the fun. From the left you see Tori, Ellie then Bounder. The girls have always been in charge of their dogs including training, feeding, grooming, vet appointments ~ everything. They learned so much responsibility, and the Lord has opened up many doors for us to share our faith along the way. There are people from many walks of life in the dog world, and I pray that the Lord has been able to touch some of them through us. While Elizabeth and Maria did not train for the advanced classes, they were recognized as top Junior handlers by qualifying for an invitation to the National UKC Dog Show each year they showed. 

This sweet photo was taken a year ago ~ one of the last photos before Ellie left us. Grace has just picked a new border collie puppy and is excited to have a dog in her life again. 

Tips and Techniques:
Inking ~ The larger jeweled flower started out as layers of creamy Prima flowers - the kind you used to buy in the pillars - I simply rubbed on some distress ink. The wooden leaves were also lightly inked. The background paper was somewhat teal, so more rubbing with distress ink brought it to the right color to coordinate with this photo. The white doilies were inked up as well. 

Lace Trim ~ Such an easy addition to any border strip to add a pretty touch.

Title and Trinkets ~ I was so thrilled the other day to find these fabulous vintage lightbulb word trinkets by Prima and thought the word "Adventure" would be the perfect title for this page since our daughters have had quite an adventure with their dogs!! I also enjoy adding little trinkets, buttons, wooden pieces into my clusters.


Stamping ~ I repeated this charming background stamp before adding my embellishments. To get a soft edge, I just tear a piece of paper towel and place where I want the stamped edges to be and stamp right over it.

Flourishes ~ I cut this gorgeous flourish into two pieces and used in each corner for balance.


Twine Flower ~ My tutorial for the handcrafted twine flower can be found here.

Distressing ~ So quick and easy with my Donna Salazar Distrezz-It-All by Zutter to get these nice "thick" edges. 

Canvas Tape ~ I simply folded and laid some this canvas tape at the edge of the clusters. A little talc powder on the adhesive edge that is up takes care of the stickiness. 

Fussy Cutting ~ I tucked a few fussy cut pieces in as well. 


Journaling ~ I wanted my "required element" to blend seamlessly into my layout, so hand wrote it at the bottom under the green paper strip. It says "Dogs are not our whole lives, but they make our lives whole." Roger Caras

Our Sponsor this month is:

Hello there! I'm Leena and I live in the tiny island of Singapore. I've been scrapbooking for 6 years now and the recent one year, I've turned from a traditional scrapbooker to Project Lifer. It's been an amazing year just dedicating my time and days documenting week after week worth of stories about me, my family and friends, my full time job, the places I've travelled to for work and holidays, celebrations and many more interesting journey of my life. I've also set up a very small online shop just a year ago, just to share handmade items that was originally created for my own use. Then I realized, I had a lot of request from scrapbookers all over the world asking for my handmade items to be made available for sale. That's how it got started. The response has been overwhelming and I'm so thankful to all my buyers for their support. My shop sells mainly core handmade items such as flair buttons or also known as badges which can be used for any kind of craft projects. They're a very popular scrapbook product amongst scrapbookers! Once again thank you to Scrapping Everyday Miracles for this opportunity to sponsor my shop products for their challenge this April! 

Instagram - username is "findingnana"

Leena has sponsored it us with a wonderful prize that you could win by linking up a project to our April Challenges!  Wanna see it? That is $40 worth of flair buttons!  WOW!

Guess what everyone? Leena has prepared a discount code for all of you!!!! You can save  20% off total purchase of any products in her shop, valid from now until April 30thThe code is SEM20You just need to enter this during check out. This discount does not apply on the shipping fee. She ships from Singapore to all over the world. 

**NOTE: You may submit the project you create for Scrapping Everyday Miracles to other challenge blogs but your project must be mainly created for the Scrapping Everyday Miracles challenge in order to win the sponsor prize and/or be one of Top 3**

 All entries must be linked HERE by April 30th, 11:59pm PST.

*Important: Make sure your link is to the blog post with your project & not just your blog in general...and be sure to remember the SCRAP TWIST!

Thanks for stopping by! I treasure your comments.

~ Blessings ~

Thursday, March 21, 2013

"Cherish this Moment" Details ~ ScrapThat! March Kit

There is just something special about a dad and his daughter on her wedding day. This photo of Gary dancing with Elizabeth is so sweet. I love the way he whispered and talked with her during this special dance. 

The ScrapThat! March kit with these Meg's Garden papers was so wonderful to work with! Beautiful fussy cutting opportunities and such gorgeous flowers!! 

If you happened to miss my exciting announcement about being named to the Donna Salazar 2013 Guest Design Team with a group of amazingly talented artists, check out my Tuesday post

Cherish this Moment
MK, EAO, FAO

I used Amy's gorgeous sketch:

For details on Amy's sketch challenge and prizes go here.

If you would like to play along with our March DT Challenge, check out the details here

Tips and Techniques:


Flower Cluster ~ The full brown roses and green open roses are included in the FAO kit while these fun prima gears are in the EAO. I added a few small roses cut from kit cardstock and Donna Salazar's Bitty Blossoms dies. The sweet yellow carnation used Donna's Carnation Creations dies. I added a Zva flourish from my stash that I cut apart and tucked here and there on the page. 

Fussy Cutting ~ There are so many fussy cutting opportunities with this gorgeous Meg's Garden Papers. From borders and frames to flowers and leaves.


Layering ~ I cut several strips of the striped papers for my layering. With the dark paper I distressed the edges and scratched the top with my Prima distress tool to soften the black. I then pleated it for extra dimension. The other layers were distressed and punched with kit pearls added to the punched strip. I topped the papers with the MK filmstrip which I only attached under the fussy cut flowers so it would lie loosely and ribbon-like. 

Distressing ~ I distressed all the edges and mats with my Donna Salazar Distrezz-It-All by Zutter. 


Title ~ I punched out the word Cherish with a circle punch. I punched a strip of scallops from some of the striped paper and cut each scallop apart. I adhered them around the circle, overlapping slightly to make the doily edge. I had a few extra crystals from my flourish, which I cut apart and placed around the edge. 

More Fussy Cutting ~ The sprays of little pink flowers were fussy cut and tucked into the cluster.

Handcrafted Flowers ~ The larger pink Full Open Rose was hand crafted using Donna Salazar Grand Peony and Bitty Blossoms. My tutorial can be found here


Dragonfly ~ This sweet little dragonfly by Gina's Designs is from my stash and so easy. I simply painted with rich, metallic Lumiere paints. 

Flower ~ Another of my Carnation Creations flowers close-up, and fussy cut leaves tucked into this peek-a-boo space at the edge of my paper. 

Thanks for stopping by! I treasure your comments. 

~ Blessings ~