Showing posts with label Heat Embossing. Show all posts

Monday, November 7, 2022

Amazing Paper Grace November Die of the Month: Pop Up 3D Vignette Alarm Clock

Welcome to my creative space!

As soon as I saw this fabulous Amazing Paper Grace Pop Up 3D Vignette Alarm Clock November Die of the Month, I just knew I wanted to create a patina finish to give a vintage feel to this amazing design.

These cards show patina two ways. The 3D vignette card uses mixed media products to create the patina. I explain this process below in the Tips and Techniques section. On the flat card I used patina printed paper to show you a quick and easy way to get this effect with just paper. While they look very similar in this photo, the metallic finishes truly look like old patina copper.

I'm always looking for ways to create masculine cards for the special men in my life and either of these cards could be used for a guy. The flat card even has a touch of steampunk with the black gears tucked behind the clock.

Please scroll down through the Tips and Techniques section to find close-ups and all the details on how to create these two vintage clock cards.

Many thanks to Amazing Paper Grace for providing the dies used in this project!

There are 21 cutting dies included in the Pop Up 3D Vignette Alarm Clock.

Pop Up 3D Vignette Alarm Clock

Flat Steampunk Card

Tips and Techniques
To create the patina effect, I started with a lightly patterned teal paper and rubbed Salvaged Patina Distress Oxide Ink randomly over the die cut paper, I went back and added a few touches of Uncharted Mariner Distress Oxide Ink. I then spritzed the inked paper with a fine mist of water to activate the oxide inks. Once dry to the touch, randomly rub Finnabair Copper Metallique Wax over the surface. Then go back and repeat the oxide ink process with the same colors so the oxide looks like it's coming out of the copper from years of oxidation.

Pieces that are "oxidized" include the scrolled clock frame, center decorative piece, ring with minute marks, alarm bells, hammers, sentiment strip and base.

The clock hands are cut from metallic copper cardstock and rubbed with the oxide inks. They are held in place with a mini brad which is colored with more of the copper wax. 

The number ring and backing for the center scrolled piece are cut from black metallic cardstock. The cream paper backing the entire design is a grungy masculine printed paper. This paper has touches of teal in it that works so perfectly with the patina finish.

This close-up of the bells shows the shimmering copper blended with the patina finish. It truly does look like old metal.  

The center scrolled piece backed in black is popped up with thin foam squares to give dimension and so that the clock hands will be raised up above the number ring. 

This fabulous 3D card folds flat for mailing. 
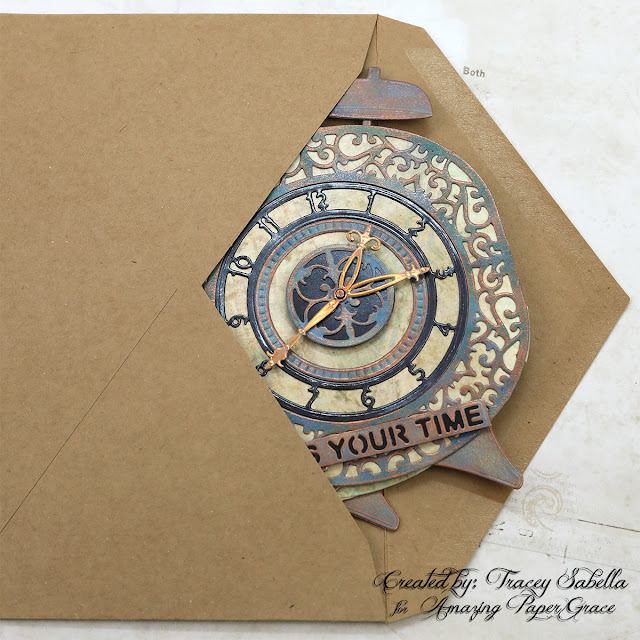
And tucks right into an envelope.

This card is cut from patina printed paper for a similar feel. If you don't have the mixed media products needed and want a quicker card, this is a great way to go. 

The background paper and gears give this card a more masculine industrial steampunk feel for that special guy in your life. The focal paper is inked with Pumice Stone Distress Ink to add to the vintage vibe. I wanted to keep this card simple, so didn't do any other inking. 

The card frame layer is cut from the same patina paper used to cut the clock design. 

The number circle and center background piece are cut from regular black cardstock and the clock hands from the same metallique copper paper used on the 3D card. I found this sentiment in the Idea-ology Small Talk pack that works so perfectly with the clock image. 

The cream clock base is the same paper used for the 3D clock card. 

These chipboard gears are heat embossed with black embossing powder for a rustic industrial feel. The clock image is popped up with foam tape so that the gears can be tucked underneath.

Below you can find the products I used to create this project including some with compensated affiliate links to Scrapbook.com and Spellbinders. These links are at absolutely no cost to you. When you shop through the links below, I receive a small commission from the companies.  These commissions help me cover the costs of my blog and other expenses, which allows me to continue to provide you with FREE inspiration along with detailed Tips and Techniques provided for every project. Thank you so much for your love and support!

Amazing Paper Grace Sets:

Paper:

Ink:

Mixed Media:

Embellishments:
  • Idea-ology - Tim Holtz - Mini Fasteners
  • Idea-ology - Tim Holtz - Small Talk
  • Stash - Chipboard Gears

Adhesives:

Tools:

The Amazing Paper Grace Die of the Month is available exclusively at Spellbinders Paper Arts during November 2022, Pop Up 3D Vignette Alarm Clock along with other membership perks.

View this month’s Amazing Paper Grace Die of the Month!

Thanks so much for stopping by to view this patina alarm clock ensemble. I hope you've been inspired.

Thursday, July 7, 2022

Romantic Shabby Heart for Little Birdie Crafts

 
Welcome to my creative space.

This dreamy and romantic home decor piece features loads of gorgeous Little Birdie Crafts supplies including the MDF Heart, gorgeous flowers handcrafted by beautiful women in India, chipboard, and mixed media products. 

As spring turns to summer, we see lots of birds in our lovely rural setting as they flit across our property and among the trees looking for food. I just adore the sweet bluebird on this Decoupage Paper and couldn't resist adding another with the sweet Garden Bird flourished chipboard. These amazing Little Birdie Flowers are such a delight to work with to create a beautiful floral cluster across the heart.

Be sure to hop on over to the Little Birdie blog where I have a full photo tutorial with all the details on how I created this lovely and romantic heart card HERE. Thanks for stopping over there to leave a comment.

Thank you Little Birdie, for providing supplies used in this project!

If you would like to see a full supply list, please scroll down.
Little Birdie Crafts can be purchased at their online store.

Be sure to check out the current sales HERE.

Use code TRACEY05 for a 5% discount.

I receive a small commission at not cost to you.

A couple close-ups for you:

Saturday, April 16, 2022

 
Welcome to my creative space!

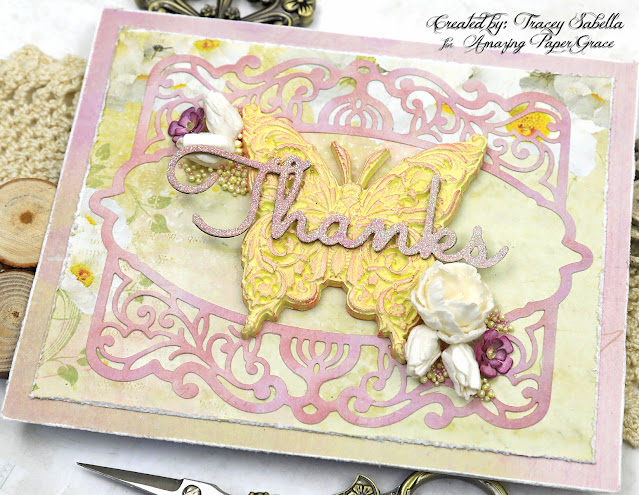
I've used a special technique to add a glittery finish to the beautiful die cut sentiment from the Amazing Paper Grace Sweet Sayings Notecard Sentiments (S4-1148) die set from the Sweet Serenade Collection. This gorgeous sentiment adds a beautiful touch to this spring thank you card.

You can find a full video tutorial explaining this technique exclusively in the Amazing Paper Grace Creative - Creative Encouragement Community Facebook Group.

This lovely group includes exclusive tutorial content. I share a mixed media tutorial there on the 13th of each month. The tutorial for this project includes a video tutorial teaching you how to create this beautiful sparkling finish that coordinates perfectly with your project. If you're not a part of this fabulous and encouraging group you can join HERE.

The lovely resin butterfly is molded with the Zuri Designs Beauty and the Beast silicone mold. I painted the butterfly with impasto paints and highlighted the texture with metallique waxes. 

Thank you Amazing Paper Grace for providing the dies used in this project.

Tips and Techniques
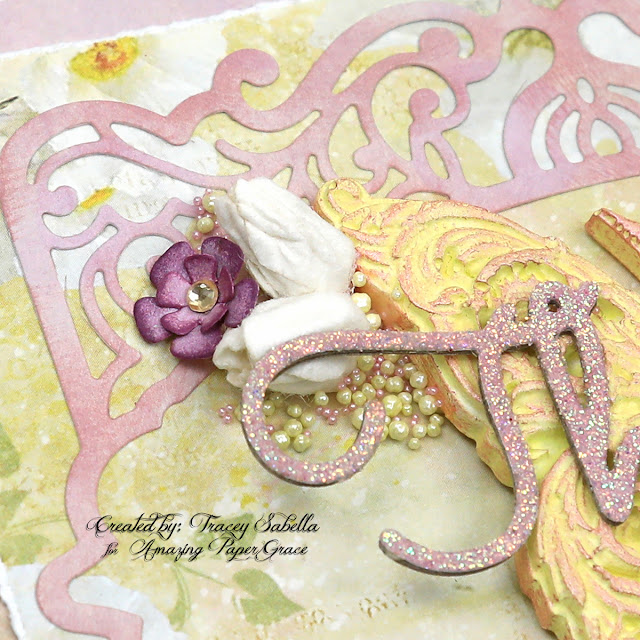
Here's a close-up of the beautiful glittery sentiment. If you would like to learn how I created this sparking finish, be sure to stop by the Amazing Paper Grace Creative - Creative Encouragement Community Facebook Group. for the video tutorial.

To coordinate this sweet butterfly with the papers, I mixed white with Lemon Peel impasto paints by Finnabair to color the butterfly and accented the texture with Sweet Rose metallique wax.

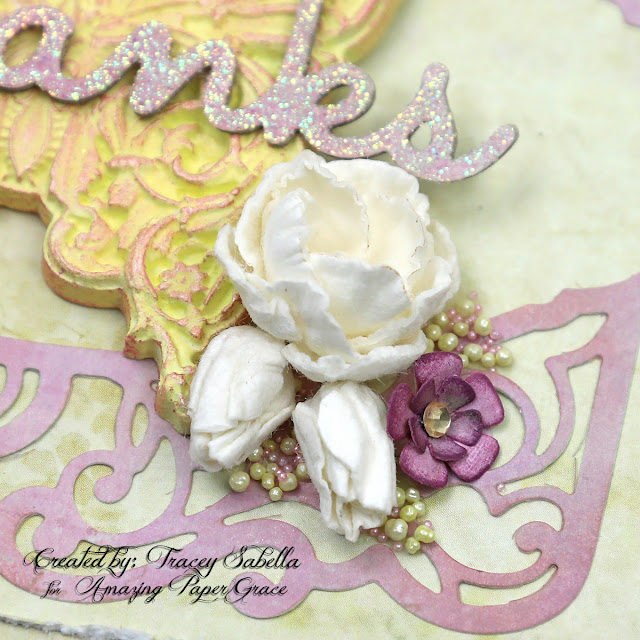
The beautiful white rose and buds are die cut from mulberry paper with the Candlewick Rosebud Dies set with the purple flower being cut with A2 Filigree Marquis set. I tucked in a few prills and microbeads to add texture.

More of the beautiful flowers. 

The background die cut is also cut with the A2 Filigree Marquis die set using the same paper found on the glittering sentiment. Don't you adore how the colors coordinate so beautifully?

Amazing Paper Grace Dies:

Paper:
  • Patterned Paper ~ Scraps from my stash
  • Cardstock ~ 120lb, White
  • Thin Chipboard

Ink:
  • Ranger ~ Distress Ink: Scattered Straw
  • Ranger ~ Distress Oxide Ink: Victorian Velvet

Mixed Media:
  • Ranger ~ Embossing Dabber
  • Ranger ~ Embossing Powder: Holographic
  • Finnabair with Prima ~ Soft Matte Gel
  • Finnabair with Prima ~ Metallique Wax: Sweet Rose
  • Finnabair with Prima ~ Impasto Paint: Snow White; Lemon Peel
  • Amazing Casting Resin ~ White
  • Zuri Designs ~ Wings of Beauty Silicone Mold (Butterfly)

Embellishments:
  • US Artquest ~ Prills: Lemon Chiffon
  • Martha Stewart Crafts ~ Microbeads - Kunzite
  • Rhinestones (Flower Centers)

Adhesives:
  • Beacon ~ 3-IN-1 Advanced Craft Glue
  • Helmar ~ 450 Quick Dry Adhesive
  • Double Sided Tape ~ 1/4" 
  • Tombo ~ Mono MULTI Liquid Glue

Tools:
  • Spellbinders ~ Platinum 6
  • Wagner ~ HT 400 Heat Gun

I am an affiliate with Zuri Designs and receive a small commission at no
cost to you if you purchase from them using a link from this post. 

You can find their online store HERE
and the Beauty and the Beast mold can be found HERE.

Thanks so much for your support!


Thanks for stopping by! I treasure your comments.

~ Blessings ~

Wednesday, October 13, 2021

"Joy to the World Card" for Amazing Paper Grace with Tutorial Link

 Welcome to my creative space!

Today I'm sharing a festive and beautiful Christmas card featuring the fabulous Amazing Paper Grace Joy Crescent Card Builder Die Set. I've heat embossed the die cuts and created stain glass poinsettias to accent the card. 

The Amazing Paper Grace - Creative Encouragement Community Facebook group includes exclusive tutorial content. I'll be creating a mixed media tutorial there on the 13th of each month. My tutorial today includes a detailed step by step photo tutorial teaching you how to create these fabulous Stained Glass Poinsettias. If you're not a part of this fabulous and encouraging group you can join HERE.

Amazing Paper Grace provided the dies used in this project.

Close-ups
The featured elements of this card are the Amazing Paper Grace Joy Crescent Card Builder die cuts. I've embellished with 49 and Market flowers from my stash, pearls, and a jewelry piece.

***Tip*** The Joy to the World sentiment is part of a larger die cut with gorgeous scrollwork around it. I just wanted the sentiment portion, so with a few snips, I cut it away from the scrollwork with scissors.

The snowflakes are die cut from silver glitter paper using the snowflake die from the Celebrate Scrollwork Card Builder set.

The glittery design on the background is unicorn effect paste spread through a snowflake stencil then sprinkled with superfine glitter. Although it doesn't show up will in the photos, the background sparkles beautifully.

One final shot. Be sure to check out the tutorial for these Stained Glass Poinsettias in the Amazing Paper Grace - Creative Encouragement Community Facebook HERE.

Amazing Paper Grace Dies:
Amazing Paper Grace: S5-466 Joy Crescent Card Builder
Amazing Paper Grace: S5-465 Celebrate Scrollwork Card Builder

Other Supplies:
Tim Holtz with Ranger ~ Distress White Heavystock
3 Birds Studio ~ Glitter Paper Pad, 8x8" - Midday Medley Collection
3 Birds Studio ~ Glitter Paper Pad, 6x6" - Graceful Season Collection
49 and Market ~ Vintage Artistry Paper - Botanical Press 
49 and Market ~ Botanical Potpourri Flowers - Buttermilk
49 and Market ~ Botanical Blends Flowers - Buttermilk
Tim Holtz with Idea-ology ~ Baubles (no hole pearls)
Liquitex ~ Clear Gesso
Liquitex ~ White Gesso
Finnabair with Prima Marketing ~ Soft Mette Gel, Transparent
Finnabair with Prima Marketing ~ Metallique Wax - Vintage Gold
Finnabair with Prima Marketing ~ Unicorn Effect Paste
Ranger ~ Emboss It Dabber
Tim Holtz with Ranger ~ Alcohol Ink - Red Pepper
Tim Holtz with Ranger ~ Alcohol Ink - Mushroom
Tim Holtz with Ranger ~ Alcohol Pearls - Deception 
Tim Holtz with Ranger ~ Alcohol Blending Solution
Tim Holtz with Ranger ~ Alcohol Ink - Air Blower
Tim Holtz with Ranger ~ Distress Ink - Walnut Stain
Emerald Creek ~ Embossing Powder - Verdigris Sparkle
US ArtQuest ~ Prills - Minnie Pearls
Glitter Ritz ~ Micro Fine Glitter, Transparent
Newton's Nook Designs ~ Purr-Fect Stencil - Snowfall
Metal Jewelry Piece 
Clear Plastic Acetate from Packaging
Rhinestones, clear
Helmar ~ 450 Quick Dry Adhesive
Tombo ~ Mono MULTI Liquid Glue
Therm O Web ~ iCraft - Purple Tape, 1 1/2"
X-Press It ~ High Tack Double Sided Tape
Tim Holtz with Tonic - Mini-Snips, 5 inches
Wagner ~ HT 400 Heat Gun


Thanks for stopping by! I treasure your comments.

~ Blessings ~

Tuesday, September 7, 2021

Shabby Fall Card for Little Birdie Crafts

Welcome to my creative space!

Fall is just around the corner. I’ve been seeing fall projects pop up on social media, so I just couldn’t resist pulling out Little Birdie’s gorgeous Woodland Stories paper and flowers with their beautiful fall colors to create a card. I've also embellished with amazing Little Birdie Primed Chipboard and mixed media products. I have a full photo tutorial with all the details on how I created this card up on the Little Birdie Crafts blog HERE. Thanks for stopping over there to leave a comment.

If you would like to see a full supply list, please scroll down.
Little Birdie Crafts can be purchased at their online store.

Be sure to check out the current sales HERE.

Use code TRACEY05 for a 5% discount.

I receive a small commission at not cost to you.

Some close-up shots:


Little Birdie Crafts Supplies

Other Supplies
US Artquest ~ Prills - Minnie Pearls
Ranger ~ Emboss It Dabber
Stampendous ~ Embossing Enamel - Aged Bronze
Emerald Creek with Seth Apter ~ Baked Velvet - Dusk (Embossing Powder)
Opaline Embossing Powder
Helmar ~ 450 Quick Dry Adhesive
Scrapbook Adhesives by 3L ~ Repositionable Tape Runner


Thanks for stopping by! I treasure your comments.

~ Blessings ~

Friday, August 20, 2021

Altered Vintage Mirror with VIDEO TUTORIAL for Little Birdie Crafts

 
Welcome to my creative space!

I found a tarnished and chipped mirror in a thrift store. It had seen better days, but I just adored the intricate design on the back and thought it would be a lovely base for a project. I used Little Birdie Gesso and Multi-Surface Paints to give it new life. It’s decorated with amazing flowers from the Celebrate Life, Shabby Chic, and Fairy Sparkle collections along with Primed Chipboard pieces and a clock cut with the Timekeeper die set.

Close-up photos and more details can be found on the Little Birdie Crafts Blog HERE.
Thanks for stopping over there if you have a chance to leave a comment.

If you would like to see a full supply list, please scroll down.
Little Birdie Crafts can be purchased at their online store.

Be sure to check out the current sales HERE.

Use code TRACEY05 for a 5% discount.

I receive a small commission at not cost to you.

I hope you’ll join me to view this video tutorial and explore how to create this gorgeous textured background, alter little birdie chipboard and die cut pieces with embossing powder, layer butterflies to build depth, arrange gorgeous little birdie flowers for this sweet floral cluster, and add sparkling texture.

Enjoy!


Little Birdie Crafts Supplies

Other Supplies
Tim Holtz with Idea-ology ~ Chitchat
Pearl Flourish ~ Pink
Beaded Stamen ~ White
Sequins and Crystal Gems in pink, clear, blue, Aqua
Aqua Beads
US Artquest ~ Prills - Minnie Pearls
Mini Microbeads ~ White Gold
Stampendous ~ Embossing Enamel, Shabby Pink
Ranger - Emboss It Dabber
Repositionable Tape Runner
Helmar ~ 450 Quick Dry Adhesive
Ranger ~ Multi Medium, Matte
Tombo ~ Mono MULTI Liquid Glue
Marvy ~ Jewel Picker
Ranger ~ Heat it Craft Tool
Wagner ~ HT 400 Heat Gun


Thanks for stopping by! I treasure your comments.

~ Blessings ~


Tuesday, April 6, 2021

Vintage Spring Mixed Media Art Tag with video tutorial for Little Birdie Crafts.


Welcome to my creative space!

Spring is in the air and I am enjoying the warming days scattered in here and there along with sweet flower blossoms wafting their gorgeous scents into the air. I've created a spring inspired vintage mixed media art tag with a step by step process video featuring gorgeous the Little Birdie Crafts Shabby Chic Bouquet collection. You can scroll down to view the video or stop by my YouTube channel HERE.

All the close-ups and details can be found on the Little Birdie Crafts blog HERE.
It would be great if you could stop over there to leave a comment.

If you would like to see a full supply list, please scroll down.
Little Birdie Crafts can be purchased at their online store.

Be sure to check out the current sales HERE.

Use code TRACEY05 for a 5% discount.

I receive a small commission at not cost to you.

Here are a couple close-ups showing a little more detail.


Other Supplies
Tim Holtz with Idea-ology ~ Clippings Stickers
Tim Holtz with Sizzix ~ Framelits Dies 658784
Tim Holtz with Ranger ~ Distressbrush
Tim Holtz with Ranger ~ Distress Ink: Frayed Burlap
Ranger ~ Emboss It Dabber
Higgins ~ Drawing Ink: White
Stampendous ~ Shabby Pink Embossing Enamel
Bee Charms (Amazon)
Martha Stewart Crafts ~ Microbeads - Florentine Gold
Home Decor Chicken Wire - White
Thin chipboard sheet
Wonder Tape ~ 1" Double Sided Foam Tape


Thanks for stopping by! I treasure your comments.
~ Blessings ~