Monday, January 31, 2022

Interactive Garden Shutters Valentine Card for Amazing Paper Grace

Welcome to my creative space!

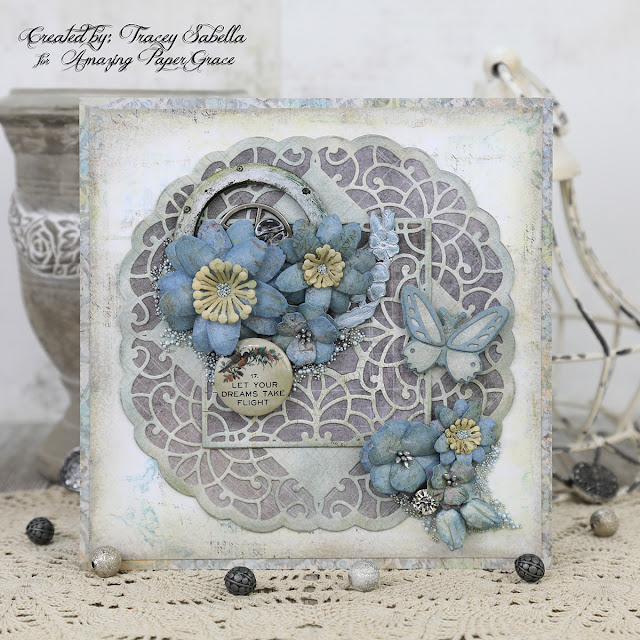
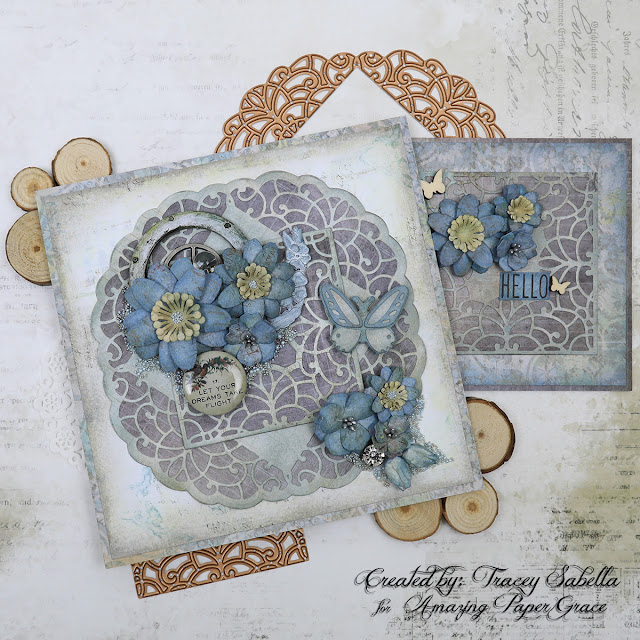
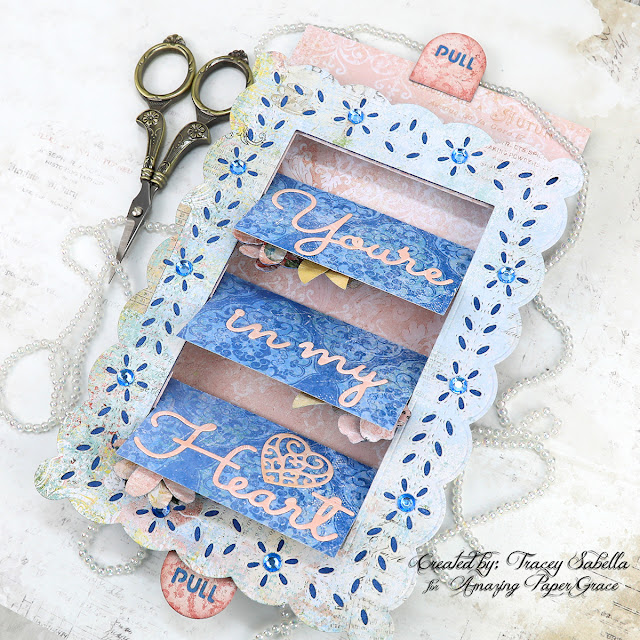
Valentine's Day is just around the corner so I paired these beautiful pinks and blues to create a lovely and romantic card. Here's a look at the sweet sentiment when it's flipped open:

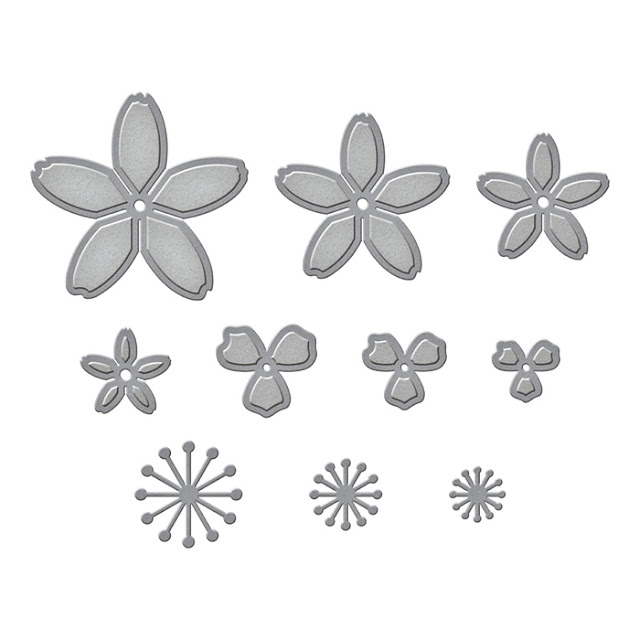
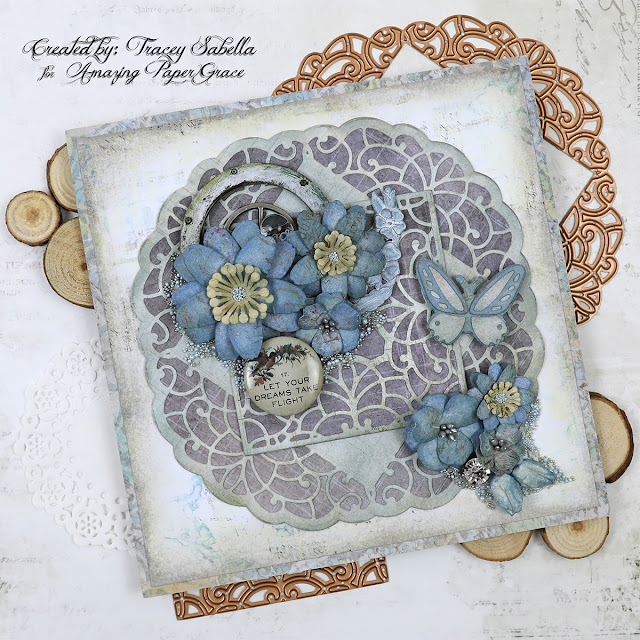
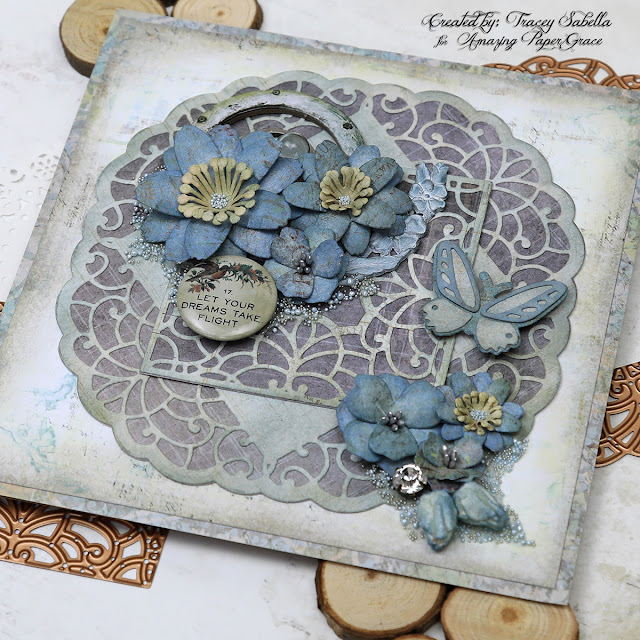
I've really enjoyed creating these interactive cards featuring the Amazing Paper Grace Garden Shutters Collection. This sweet valentine features the Eyelet Frame set (S6-184) which pairs perfectly with the Butterfly Bliss Garden Shutters 5x7 Card Base (S6-183). I've also used the heart element, pull tab and sentiment from the Primrose Heart Façade Garden Shutters set (S5-484). The flowers are cut from the Cinch and Go Blossoms die set (S4-1163) from the newly released Classically Becca Collection.

Thank you Amazing Paper Grace for providing the dies used in this project.

Tips and Techniques
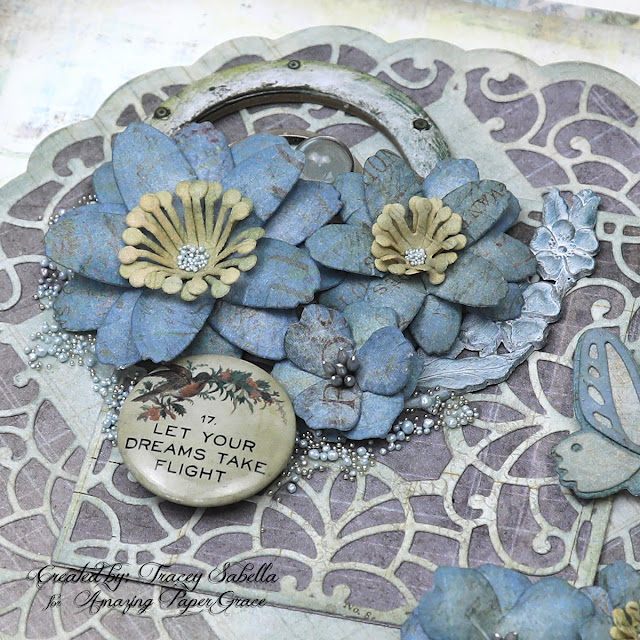
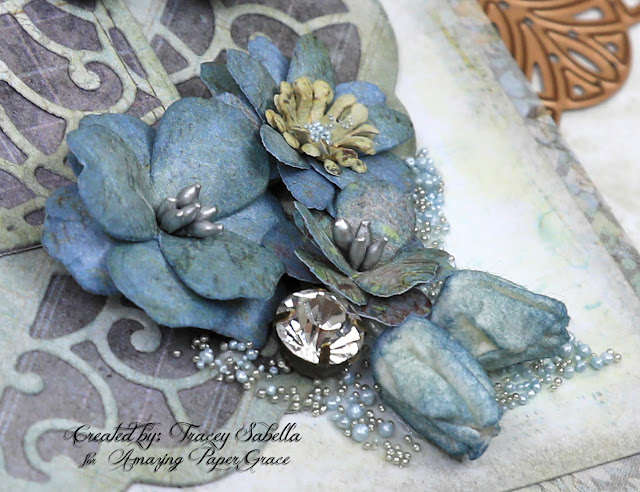
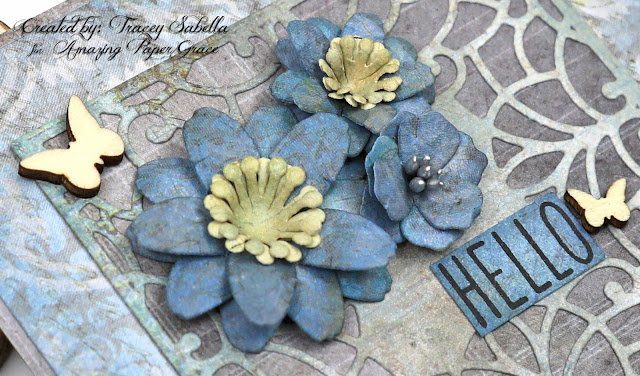
Each of the flip panels is filled with handcrafted flowers and a sweet scrolled heart atop a diecut inset piece. Prills are adhered around the flowers to add texture. The flowers and embellishments can spill over the top half of the flip panel, but be careful to keep all the embellishments within the panel on the bottom half for the interaction to work properly. 

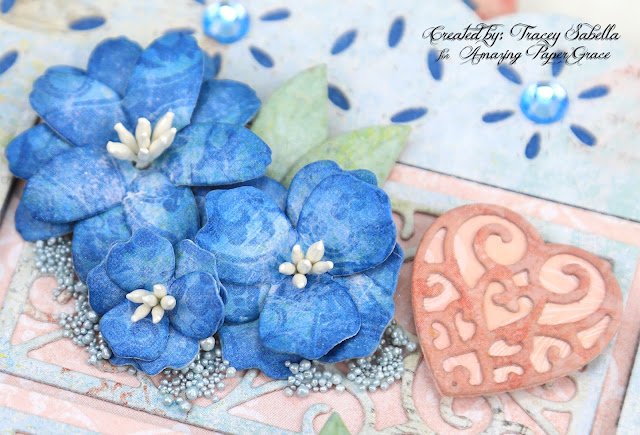
The flowers are die cut and inked in a coordinating color, then shaped before adhering the petals together. Each blossom has three of the same sized petal pieces. There is a hole in the center of each petal section to insert stamen to finish the blossoms.

The primrose Heart Façade set includes this beautiful sentiment and gorgeous heart. I didn't have quite enough of the pink patterned paper to cut the sentiment, so inked and stamped a similar color of pink cardstock for the sentiment. This is a great way to extend your patterned paper. 

.
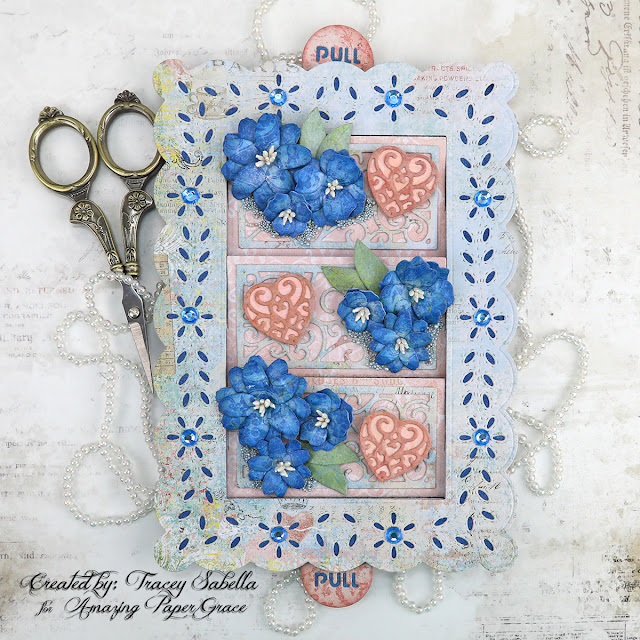
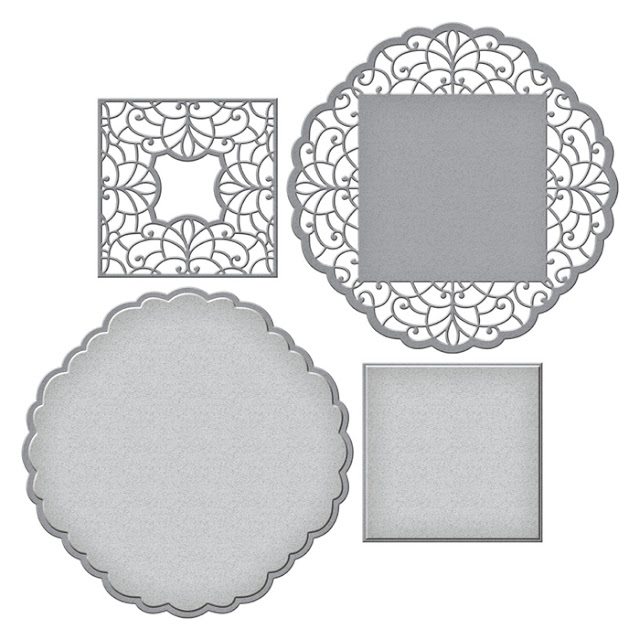
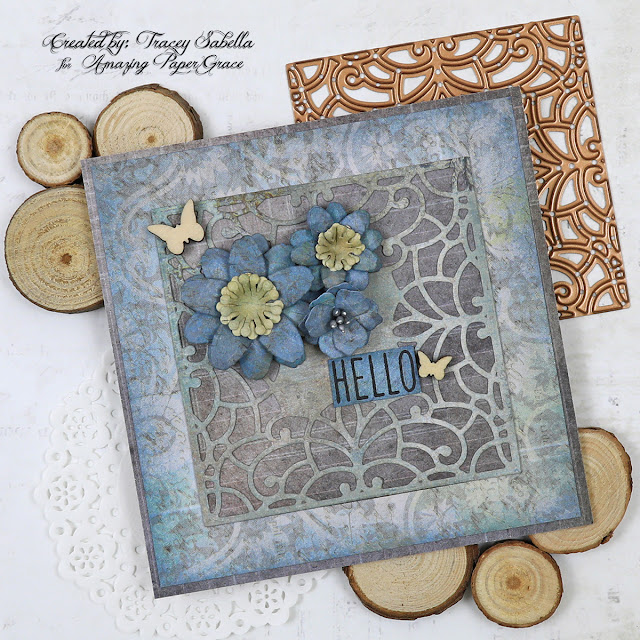
If you've been following my interactive cards, you'll remember that the top piece is a 5x7 layer with straight sides. The Eyelet Frame die stet includes this gorgeous panel with scallped edges and a beautiful eyelet lace design die cut into it along with a rectangle to die cut the center to perfectly fit the flip panels. I inked a piece of white cardstock with Faded Jeans Distress Ink to tuck behind the eyelet design to help it pop. A blue rhinestone is added to each flower eyelet for a bit of sparkle and texture.

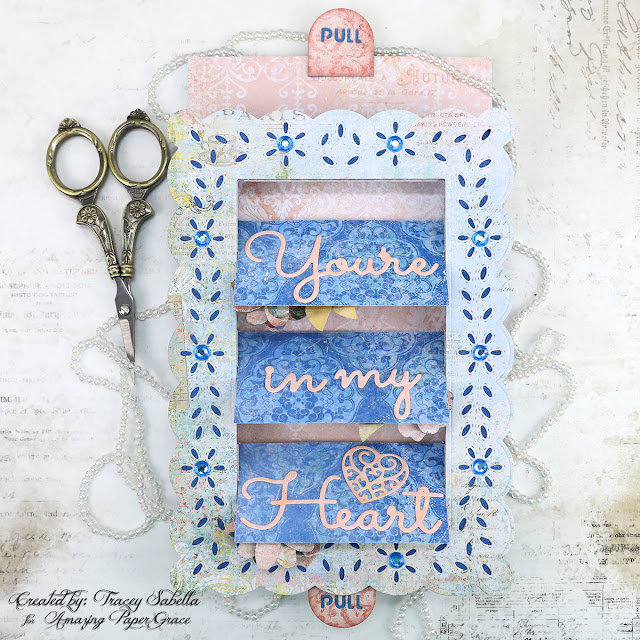
Here's one final view of the card opened up to reveal the romantic Valentine sentiment. Keep in mind when selecting patterned paper, that the back of the paper in the center layer will be revealed as the card flips open. So be sure to cut this layer from a section of paper that has a more plain back rather than a detailed printed design.

The bottom pull tab is attached to the back of the top layer while the top pull tab is attached to the front of the bottom layer.

Amazing Paper Grace Dies

Paper:
Blue Fern Studios ~ Heartland Collection
Cardstock ~ White
Darice ~ Cardstock - Pastel Pink

Ink:
Distress Ink: Victorian Velvet; Tattered Rose; Faded Jeans; Antique Linen; Bundled Sage
Clorox Mix'd Media Inx: Jasmine

Stamps:
Tim Holtz with Stampers Anonymous ~ Baroque Stamp

Embellishments:
Prills ~ Ice Queen
Stamen ~ White
Rhinestones ~ Blue

Mixed Media:
Finnabair with Prima ~ Soft Matte Gel

Adhesives:
iCraft ~ Easy Tear Tape 1/8"
Tombo ~ Mono MULTI Liquid Glue
Scrapbook Adhesives by 3L ~ 3D Foam Squares
Foam Tape ~ 1/4"
Beacon ~ 3-IN-1 Advanced Craft Glue
Beacon ~ Fabri-Tac


Thanks for stopping by! I treasure your comments.

~ Blessings ~

Monday, January 24, 2022

Interactive Birthday Flip Card for Amazing Paper Grace


Welcome to my creative space!

I'm really enjoying creating interactive cards with the fabulous Amazing Paper Grace Garden Shutters Collection. This sweet birthday card features the Daisy Delight Garden Shutters A2 Card Base (S5-479) die set. We're in the dead of winter with over a foot of snow on the ground and more on the way with temperatures below zero at night, so I just couldn't resist pulling out summery blues and yellows for this card to go with the beautiful daisies. A girl can dream, right?? 

Here's a view of the card with the shutters open:

It's such a fun and beautiful card. The sentiment and sweet daisies are included in the die set. The pull tabs are created using the Butterfly Bliss Garden Shutters 5x7 Card Base Set (S6-183).

Thank you Amazing Paper Grace for providing the dies used in this project.

Tips and Techniques
Don't you just adore the intricate lattice that fits the shutters? I cut a solid background piece and the lattice pieces from the same grungy blue paper (which is the back of the yellow patterned paper), then inked the lattice with a darker blue so it would pop against the lighter background. This entire card was cut from just one piece of 12x12" paper including the three base and shutter pieces, the lattice, and the pull tabs. I used scraps from my stash to cut the daisies.

This interactive card is three layers deep. You can cut all three pieces from the same 12x12" piece of paper like I did here or use papers that coordinate. Keep in mind that the middle piece is die cut for the shutters that flip, so the back of the paper will be part of the design as well. 

The pull tabs are cut from the back of my patterned paper and the edges are inked. A second solid tab piece is cut. I inked this piece with the same darker blue I used on the lattice, so the word pull would be more visible.

There are three different daisies in this set. Each one has three pieces - two sets of petals and a center. Each flower is a separate die with all three pieces, so it's easy to know which pieces go together. After die cutting, I inked the petals before shaping. The centers are inked and would look great with just the inking, but for added texture and a bit of glittery sparkle I adhered Gold Flower Soft to the centers.

This sweet birthday sentiment is included in the set. I used Tombow Mono MULTI liquid glue on the back and let it dry before adhering. This glue stays tacky when dry works well for intricate die cuts like this. I used a ruler to help line up and center the sentiment pieces.

Amazing Paper Grace Dies

Paper:
Blue Fern Studios ~ Happy Accident
Patterned Paper Scrap ~ Yellow (for daisies)

Ink: 
Ranger ~ Distress Ink: Scattered Straw; Faded Jeans; Broken China

Mixed Media: 
Flower Soft ~ Gold

Adhesives:
Scrapbook Adhesives by 3L ~ 3D Foam Squares
1/4" Foam Tape
Beacon ~ 3-IN-1 Advanced Craft Glue
Red Line Tape ~ 1/8"
Tombo ~ Mono MULTI Liquid Glue
Scotch ~ Quick Dry Adhesive


Thanks for stopping by! I treasure your comments.

~ Blessings ~

Saturday, January 22, 2022

Introducing Amazing Paper Grace Classically Becca Collection with Blog Hop ~ "Let Your Dreams Take Flight" Card


Welcome to my creative space!

These cards feature the gorgeous Amazing Paper Grace Circle Meets Square Die Set (S5-491) from the new Classically Becca Collection. This versatile set can be used for 5x7" or square cards. I don't know about you, but I have quite a stash of beautiful 6x6" paper pads and was so thrilled to be able to pull them out to use on these cards. I used to create a lot of 6x6" cards and have gotten away from using this card size recently. It was nice to get back to this format again.

There's just something special about filling a background with gorgeous and intricate motifs. Although these dies are perfectly elegant, I just had to go with a girly grunge feel using beautiful slate blue, slate green, and grey colors. Everything is inked to add to the shabby feel of these cards. 

They're embellished with handcrafted flowers cut from the Cinch and Go Blossoms (S4-1163) which are a part of this wonderful collection. I just adore that there are two different kinds of flowers included in this set. I've also cut a butterfly from the Butterfly Bliss Garden Shutters 5x7 Card Base Set and rose buds from the Candlewick Rosebud Dies (S4-1015) 

Today's projects were created with dies provided by Amazing Paper Grace.

My Projects for Today


What I made
I've used this fabulous Circle Meets Square die set to create a beautiful, shabby card ensemble. Keep on scrolling for more photos and details.

This 6x6" card could be used for a variety of occasions from a birthday to a graduation or even to offer congratulations on a new job. There are so many opportunities in life to "let your dreams take flight!" I just adore how the intricate circle pairs up with the square to create this amazing background for my card! The solid center of the circle gives a perfect visual contrast for the square. 

My accessory with this die set is a smaller 4x4" note card which could be used for a thank you or a sweet note of encouragement. I kept this one more simple by embellishing with the handcrafted flowers, a sentiment and a couple small wood butterflies to show you a quick and easy card that can be created with this set. The square motif is so beautiful on it's own and fit perfectly onto a 4 inch card base.

The Classically Becca Cinch and Go Blossoms set (S4-1163) creates such gorgeous flowers. The petals and stamen are die cut then inked before shaping. I added Prills to the centers of the die cut stamen. To the three petal flowers, I added grey stamen from my stash. I've tucked a selection of Tim Holtz embellishments into the floral clusters and filled in around the clusters with prills and microbeads to add texture.

Here's a close-up of the lower floral cluster. I also added in a couple rose buds cut with the Candlewick Rosebud Dies (S4-1015).

Here are the flowers from the small note card. I cut and shaped all the flowers for both cards at the same time, so this card was quite quick and easy to put together. I just inked all the edges, glued the background pieces together, then adhered the flowers, sentiment, and butterflies. Easy Peasy!

One final look.

Designer Tip: Rubbing or brushing ink onto paper edges helps give a soft shabby chic and grungy feel to your cards.

These dies and plates are available from Spellbinders right now! Click here: Classically Becca Collection.

Supplies:
Accessories:
Paper:
  • Prima ~ Nature Garden Collection, 6x6" Paper Stack
  • Prima ~ Epiphany, 6x6" Paper Pad
  • Mulberry Paper ~ Cream
  • Cardstock ~ Kraft (for the card base)

Ink:
  • Ranger ~ Distress Ink: Antique Linen, Stormy Sky; Pumice Stone; Iced Spruce
  • Versafine ~ Onyx Black Ink

Embellishments:
  • Tim Holtz with Idea-Ology: Adornments, Nature; Quote Flair' Baseboards, Window Frames; Sprockets; Antiqued Gears; Bubbles
  • Us ArtQuest ~ Mini Prills - Ice Queen
  • Microbeads ~ White Gold

Adhesives:
  • Helmar ~ 450 Quick Dry Adhesive
  • Scotch ~ Quick Dry Adhesive
  • Beacon ~ 3-IN-1 Advanced Craft Glue
  • Beacon ~ Fabri-Tac
  • Scrapbook Adhesives by 3L ~ Crafty Foam Tape, White
  • Double Sided Tape ~ 1/4" 

For more Classically Becca Collection Inspiration
Visit each Creative Team blog linked below for their take on creative paper crafting ideas using the Classically Becca Collection!


I would adore hearing from you! Please leave a comment below letting me know how you will use these gorgeous dies!


Thanks for stopping by! I treasure your comments.

~ Blessings ~

Thursday, January 13, 2022

Encouragement Card with Tutorial Link for Watercolor Die Cuts


Welcome to my creative space!

Sometimes I create a card with a specific person and event in mind, but I also like to have cards in my stash that are versatile and can be used for a variety of events. The sweet sentiment from the Amazing Paper Grace Just a Note Sentiments Tag Clear Stamp & Die Set (SDS-169) is so encouraging and could be used for a birthday, graduation, thank you, or a note of encouragement. 

I've used watercolors to create unique patterned paper for my die cut images including these amazing scrolled brackets from the Amazing Paper Grace Perfect Harmony Notecard Embellishments Set (S4-1149) and the smallest rectangle from the Fluted Classics Rectangles Dies (S5-475)You can find the full tutorial exclusively in the Amazing Paper Grace Creative - Creative Encouragement Community Facebook Group.

This lovely group includes exclusive tutorial content. I share a mixed media tutorial there on the 13th of each month. The tutorial for this project includes a detailed step by step photo tutorial teaching you how to create this one of a kind patterned paper for your projects. If you're not a part of this fabulous and encouraging group you can join HERE.

I wanted to keep the embellishments light and airy to help the watercolor diecuts to pop, so used creamy mulberry paper to cut the small cabbage roses and rose buds. The flowers are foliage are cut with the fabulous Candlewick Rosebud Dies Candlewick Sampler Collection (S4-1015) using the smallest blossom in the set. These dies create amazing roses!

Thank you Amazing Paper Grace for providing the dies used in this project.

Close-Ups
Here's a close-up of these gorgeous blossoms. I spritzed the back of the mulberry paper lightly before shaping. Three sets of petals are used to form the blossom which is shaped around a large stamen. I found these pearl colored stamen a while back in the bridal section of a local craft store. The rose buds are one set of petals shaped the same way, but glued down to the stamen to form the bud.

The floral heart charm from my stash is colored with Prima Metallic waxes to coordinate with the focal paper. I tucked in a few pearls and prills to fill out the cluster.

I wet and crinkled a length of rayon seam binding, then once dry, tied a triple loop bow for this lower cluster.

You can see in this photo how beautiful the watercolor die cut looks against the pink focal paper. 

Here you can really see the amazing visual texture on the water color paper die cut. Yes you can stamp over the watercolor. Be sure to check out my tutorial for watercolor die cuts in the Amazing Paper Grace Creative - Creative Encouragement Community Facebook Group for all the details.

One final shot.

AmazingPaper Grace Dies

Other Supplies
Prima ~ Royas Menagerie - Flutterby
Arches ~ Hot Press Watercolour Paper, 140 lb
Mulberry Paper ~ Off White
Cardstock ~ White
Tim Holtz with Idea-Ology ~ Baubles 
US ArtQuest ~ Mini Prills - Minnie Pearls
Hug Snug ~ Rayon Seam Binding, White
Charm Shop ~ Heart Charm
Large Stamen (Floral department of craft store)
M. Graham Watercolors
Colorfin ~ PanPastel: Turquoise; Phthalo Blue Shade
Versafine ~ Onyx Black Ink
Finnabair with Prima ~ Metallic Wax: Sweet Rose; Indian Pink
Finnabair with Prima ~ Matte Wax: Old White
Helmar ~ Crystal Note Matte Varnish, Permanent
Helmar ~ 450 Quick Dry Adhesive
Beacon ~ Fabri-Tac
Art Glitter ~ Designer Dries Clear
Scotch Quick-Dry Adhesive
Double Sided Tape ~ 1/4"
Watercolor Wash Brush
Painters Tape


Thanks for stopping by! I treasure your comments.

~ Blessings ~

Tuesday, January 4, 2022

Amazing Paper Grace January Die of the Month - Pop Up Vignette Coffee Tea or Me

Welcome to my creative space!

Today I'm sharing a sweet three dimensional teacup card paired with a tea bag chocolate holder featuring the fabulous Amazing Paper Grace January Die of the Month: Pop Up Vignette Coffee Tea or Me. What's better than a decadent piece of chocolate to go with a hot cup of tea? I'm a tea drinker so this die set is extra special with delicate scrollwork fit for a delicious cup of tea. The heart shaped flowers are perfect for a special Valentine, so even though this is a birthday card, I used colors that would work well for this sweet holiday. As you can see in the photos below, this card folds perfectly flat to fit into an envelope to be sent in the mail.

Thank you Amazing Paper Grace for providing the dies used in this project!


Teacup Card

Tea Bag Chocolate Holder

Tips and Techniques
There are so many ways to use this fabulous die set. Here I've decorated the front panel with patterned paper layered over burgundy cardstock with inking to add visual dimension. The tiny flowers are cut with a die included in the set, inked, then shaped before adhering prills in the center of each blossom. I stamped a small birthday greeting with a stamp from my stash. The back panel is also front facing with more of the darling stir stick flowers peeking through.

Every cup of tea needs a stir of sweet honey and these beautiful flowers are perfect for the job. I just couldn't resist posing these lovely daisies in a downward position and the hearts are just so darling with die cut foliage. The "stems" are designed to be stir sticks. You could easily layer these die cuts as is, but I have inked each layer for added visual dimension.

Designer Tip: Die cut the stir stick pieces from thin chipboard and adhere your die cut cardstock pieces to the chipboard for added strength.

Three of the flowers are grouped on the right side of the front teacup with two more arranged on the left side of the back cup to give wonderful depth to this card.

There is so much amazing dimension created with all the layers in this fabulous card.

The clever die cut design slides over for the card to lay flat to slip into an envelope.

Solid burgundy cardstock is cut for the interior teacup panels.

This darling tea bag is just the right size to slip a piece of gourmet chocolate into for a sweet treat. It's designed to coordinate with the card by using the same patterned paper and burgundy cardstock. It's embellished with a daisy layered with one of the smaller flowers and a small cluster of flowers in the top corner. 

The dies for the words "Tea Lover" are designed to fit into the tea bag die so it is all cut at once. A piece of burgundy cardstock is adhered behind the die cut opening. The attached tag has a die cut hole for attaching the string, but I wanted to glue the string between two tags, so covered the hole with a die cut blossom and leaves.

Below you can find the products I used to create this project including some with compensated affiliate links to Scrapbook.com. These links are at absolutely no cost to you. When you shop through the links below, I receive a small commission from Scrapbook.com. These commissions help me cover the costs of my blog and other expenses, which allows me to continue to provide you with FREE inspiration along with Tips and Techniques provided for every project. Thank you so much for your love and support!

Supplies:

Accessories:
Paper:
  • Blue Fern Studios ~ Blush, Heartland Collections
  • Cardstock ~ Burgundy
  • Recollections ~ Thin Chipboard
Stamps:
  • Fiskars ~ Essential Sayings
Ink:

Embellishments:
  • Hemptique ~ Bamboo Cord - 20lb
  • Mini Prills ~ Lemon Chiffon
Adhesive:

Tools:

You can find more Pop Up 3D Vignette Coffee, Tea or Me Inspiration by visiting each Creative Team blog linked below for more creative paper crafting ideas using Pop Up 3D Vignette Coffee, Tea or Me, the Amazing Paper Grace January 2022 Die of the Month!

Visit Tracey Sabella <<You Are Here>>
Visit Robin Clendenning
Visit Joanna Wisniewska
Visit Patricia Manhire
Visit Agnieszka Posluszny
Visit Elena Olinevich
Visit Anita Kejriwal
Visit Katarzyna Bobrowska
Visit Becca Feeken at Amazing Paper Grace

The Amazing Paper Grace Die of the Month is available exclusively at Spellbinders Paper Arts during the month of January 2022, Pop Up 3D Vignette Coffee, Tea or Me along with other membership perks.

I hope you'll view this video with details on using this month’s Amazing Paper Grace Die of the Month! 


I would adore hearing from you! Please leave a comment below letting me know how you will use these gorgeous dies!


Thanks for stopping by! I treasure your comments.

~ Blessings ~