Showing posts with label Butterflies. Show all posts

Monday, September 19, 2022

'Celebrate New Beginnings' Spring Card for Amazing Paper Grace

Welcome to my creative space!

Spring is a time for new beginnings with the scent of sweet blossoms, leaves budding and popping, and new life as animal babies come along while butterflies emerge from their cocoons, so these sweet spring images from the gorgeous Amazing Paper Grace Spring Labels Motifs die set (S4-1238) are just so perfect to celebrate a new beginning in the life of someone special. This could be used for a graduation, new job or any new endeavor one may be entering. The sweet sentiment is from the coordinating Seasonal Motif Sentiments Stamp Set (STP-150). I also die cut the lovely background medallion using the Circle Meets Square Set (S5-491).

To learn more about the techniques used to create this shabby mixed media card including the gorgeous flowers and lovely butterfly, be sure to scroll down to view my 'Tips and Techniques' section below.

Thank you Amazing Paper Grace for providing the dies used in this project.

Tips and Techniques
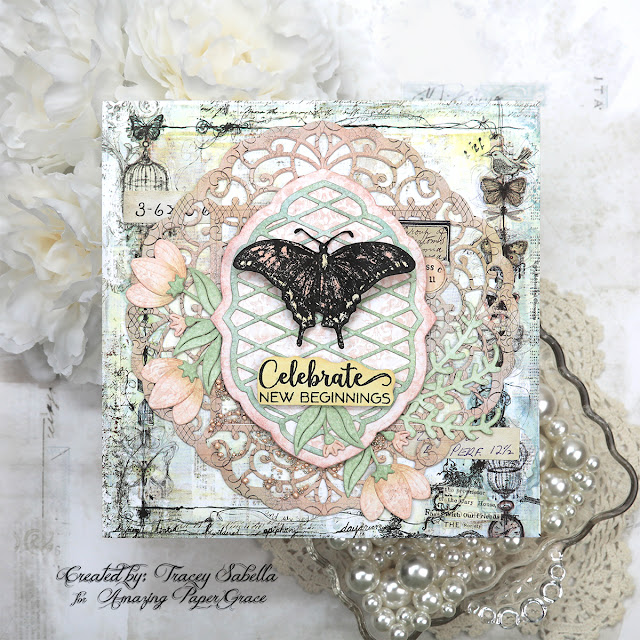
This 6x6" card is created using older papers from my stash from a 6x6" paper pad, so the colors coordinate beautifully. I often add a frame around the edges of my card, but the focal base paper has a beautifully drawn frame around the edges, so I didn't feel that a border was needed here. 
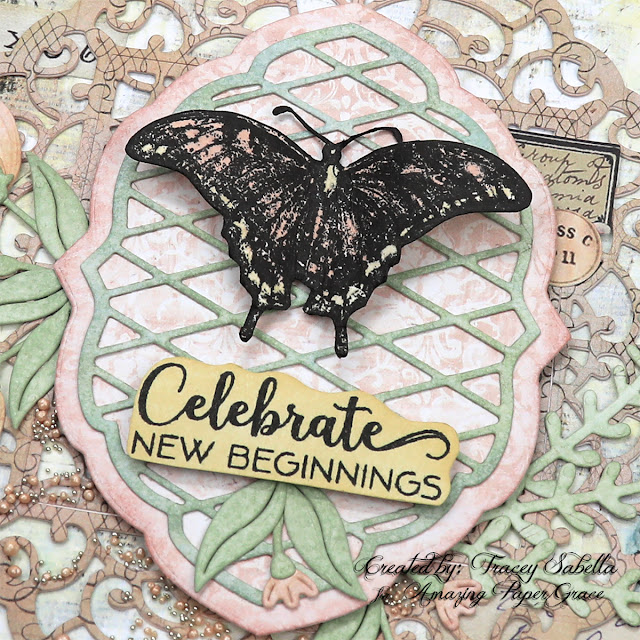
What a sweet sentiment from the Seasonal Motif Sentiments (STP-150) stamp set. It is stamped onto smooth white cardstock with permanent ink. Once the ink was dry, I colored it with Scattered Straw Distress Ink using an ink blending brush. To anchor the sentiment, a tiny die cut blossom and leaves are added below to fill in this space beautifully. 

While this die set is focused on spring, the label and lattice pieces could be a focal point for any occasion or season. I like an organic feel to my die cuts, so randomly added Bundled Sage; Iced Spruce, and Speckled Egg to the lattice and Victorian Velvet just to the edges of the pink layer. This label layer is popped up by adhering with foam squares in the center leaving the edges free to tuck flowers under.

This die set works well for adding a focal element like this butterfly. You could use a pre-made embellishment of your choice. Here I stamped a butterfly from the Tim Holtz Botanic Collage set onto the smooth side of Distress Watercolor Paper with permanent black ink then colored it using coordinating distress inks. I smooshed an ink pad onto my craft mat and picked up the ink with a fine tip paint brush to apply the ink. Once colored, I fussy cut the image. 

***Tip*** The antenna are too thin to cut out, so leave a bit of a margin around them, then go back with a black marker and color them in. I also use the marker around the edges so the white core of the paper didn't show. I use the marker from the back side for this edging, so I don't slip and color onto the stamped image.
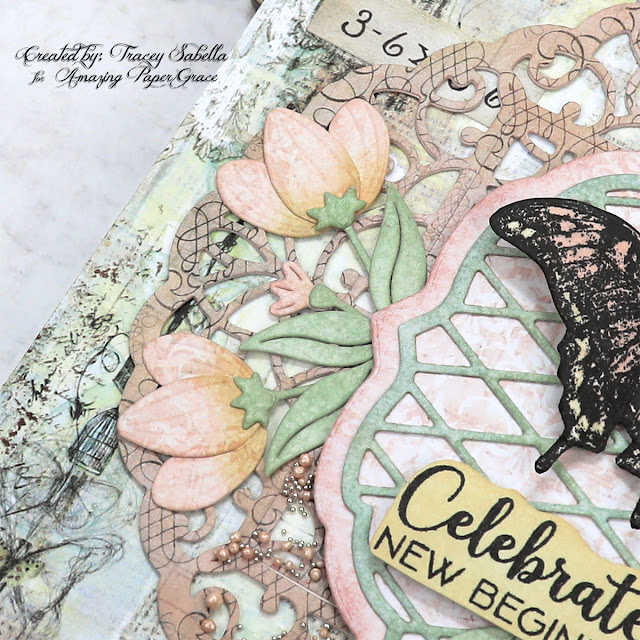
The flowers included in this die set are just so sweet. After die cutting, I brushed the base of each petal with Scattered Straw Ink and a little Victorian Velvet ink around the edges. The foliage is inked around the edges with Bundled Sage. This gives definition to make them more visible against the busy background.

***Tip*** I find that tweezers help me place these intricate blossoms.
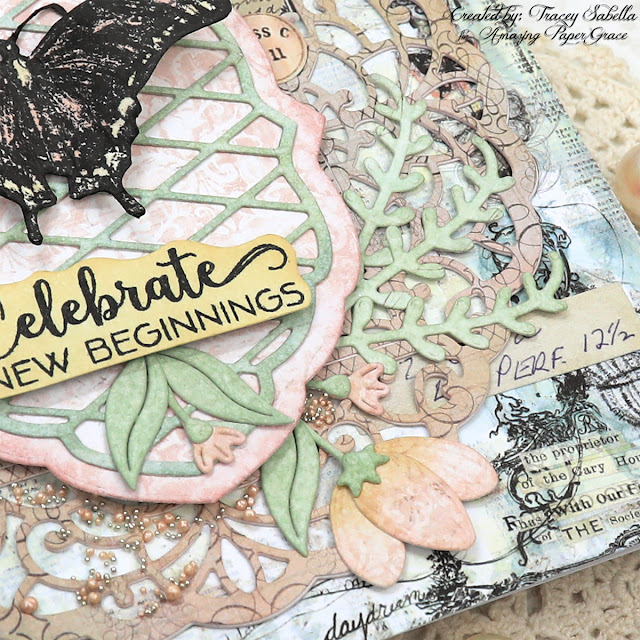
 
Another blossom is added to the other side as well as a few sprigs of foliage.

Texture is added around the bottom nestled around the blossoms and over the medalion. Matte Soft Gel Medium is used to add the peachy prills and white gold microbeads to add some bling.

I've tucked in number and label snippets from Tim Holtz Idea-ology. You can see a couple of them in this shot.
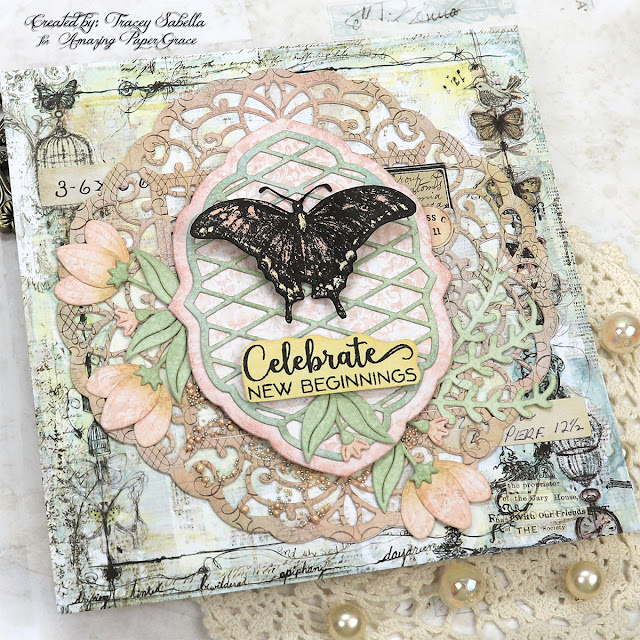
The larger medallion piece is die cut using the gorgeous Circle Meets Square die set (S5-491). I darkened it up a little with Victorian Velvet Distress ink to make it more visible. 

***Tip*** If you have die cut a piece like this medallion, and it ends up blending into the background more than you expected, just brush on some coordinating ink in a darker shade of color to help it pop. 

Below you can find the products I used to create this project including some with compensated affiliate links to Scrapbook.com and Spellbinders. These links are at absolutely no cost to you. When you shop through the links below, I receive a small commission from the companies.  These commissions help me cover the costs of my blog and other expenses, which allows me to continue to provide you with FREE inspiration along with detailed Tips and Techniques provided for every project. Thank you so much for your love and support!

Supplies:

Amazing Paper Grace:

Paper:

Ink:

Stamps:

Mixed Media:

Embellishments:

Adhesives:

Tools:

Monday, June 27, 2022

'Don’t Forget To Fly' 3D Art Panel for Amazing Paper Grace

Welcome to my creative space.

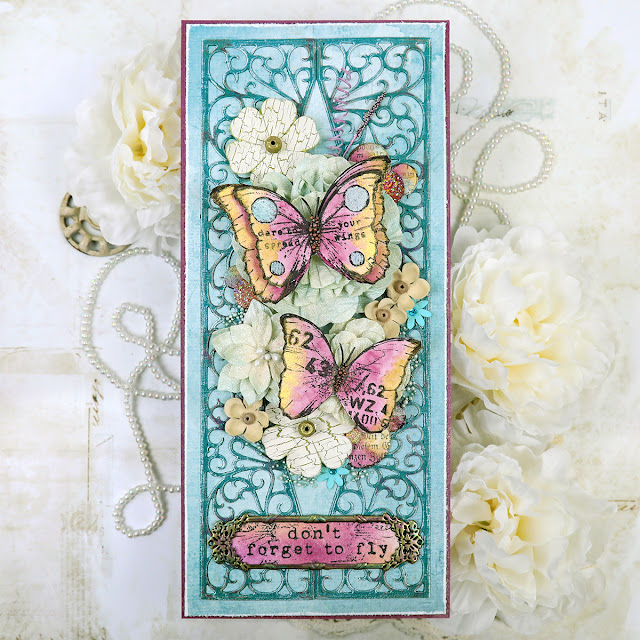
Summer has arrived here in Ohio bringing soaring temperatures and gorgeous fluttering butterflies. The scrolled design in this fabulous Amazing Paper Grace Half Slimline Diamond set (S4-1197) looks like iron scrollwork to me and I just couldn't resist this using amazing design as a backdrop to these watercolor butterflies layered over beautiful flowers. 

This stunning die cut is cut twice with one piece flipped and placed down in mirror image to create this amazing flourish with a diamond cut out in the center which is perfect for adding a simple sentiment or embellishing with a floral cluster as you see here. Originally I had planned this to be a delightful slimline card. However, by the time I put the finishing touches on this lovely creation, I decided to back it with chipboard to use as a home decor piece instead. 

Do you ever discover long forgotten items when organizing your creative space? While cleaning out a paper holder on my work table I rediscovered a sheet of images I had stamped out onto watercolor paper a while back including these beautiful butterflies and script filled circles. I decided it was time to use them on a project. 

Be sure to scroll down through the "Tips and Techniques" section below for close-ups and all the details on how to create this beautiful butterfly art panel with this gorgeous scrollwork background.

Thank you Amazing Paper Grace for providing the dies used in this project.

Tips and Techniques
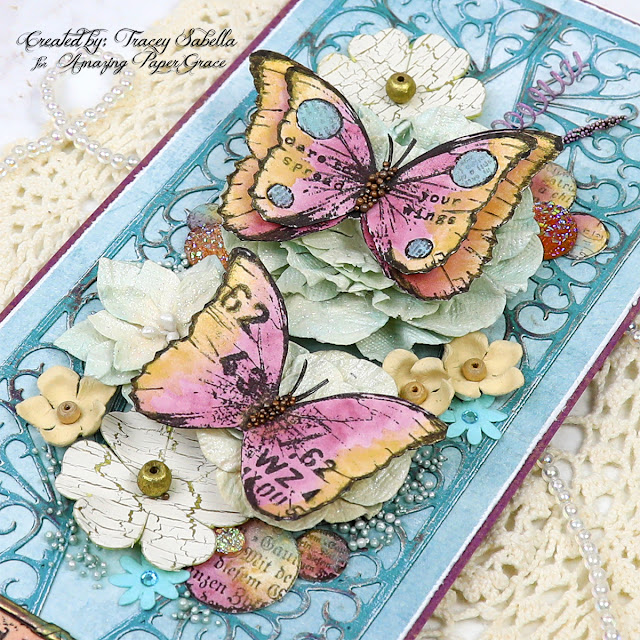
The butterflies and script circles are stamped onto smooth watercolor paper. I started by mixing some purple watercolors to get this lovely hue which I washed across the centers of the butterflies and about half of each circle. Once completely dry, the edges of the wings and about a fourth of the circles are brushed with metallic gold watercolor to add beautiful shimmer, which unfortunately doesn't photograph well. I also added some metallic teal to finish coloring each of the circles. The metallic gold watercolor paint lightened the black ink, so I colored over the gold areas with a black marker where needed. 

I placed a piece of washi tape across the top and bottom of the scrollwork pieces to hold them together and make it easier to keep them lined up properly as I adhered them onto the patterned teal background paper. 

Little Birdie Crafts flowers are arranged down the center of the design with the butterflies layered atop the blossoms. The watercolor circles are tucked in around the cluster.

A fan brush was used  to dry brush gesso across the entire background for a shabby feel. Purple wax is randomly rubbed across the raised die cut as well to add a bit of shading. The teal paper is lightly distressed along the edges and backed with coordinating purple cardstock. A little metallic yellow PanPastel is rubbed around this purple border for a bit of shimmer. 

I just adore texture so added Mint To Be Prills around the cluster.

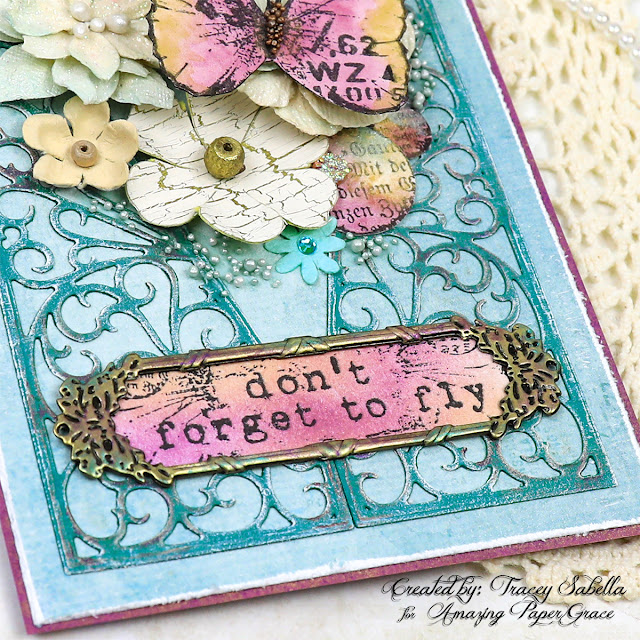
I've had this small metal frame in my stash for eons, and finally found the perfect use for it. The sentiment is part of a larger image with a beautiful woman that is part of the stamp set used for the butterflies. When I placed the frame over the sentiment, I found that it was a perfect paring. The grungy print around the sentiment is part of that stamp, and works well here. Teal and purple waxes are rubbed across the metal frame before adhering it to the sentiment.

For added shimmer, I've tucked in a few Finnabair Sugar Art Pebbles. 

Foam squares are used to pop up the butterflies and where I layered the two butterflies together. The watercolor butterflies and circles were fussy cut after coloring them. 

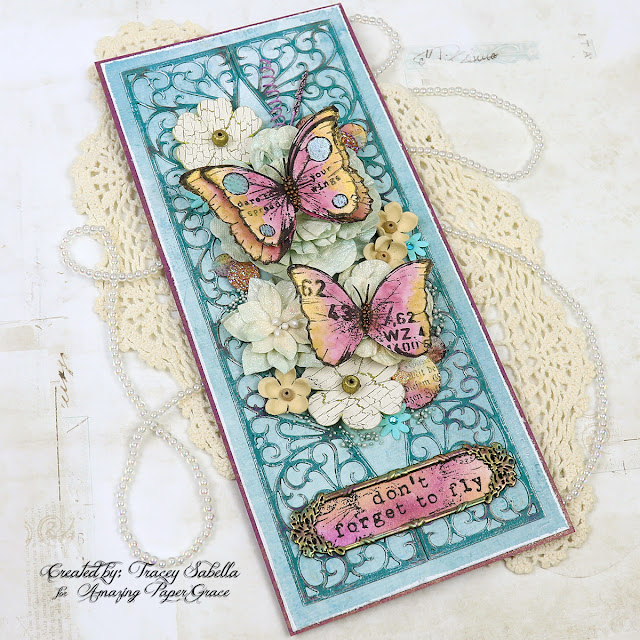
One final look.

Amazing Paper Grace Dies:

Paper:
  • 49 and Market ~ Spectrum Sherbet: Solids, Cotton Candy
  • Cardstock ~ Teal
  • Arches ~ Watercolor Paper - Hot Press 140 lb

Ink:
  • Versafine ~ Onyx Black 
  • Ranger ~ Distress Ink: Seedless Preserves; Scattered Straw

Stamps:
  • Finnabair with Prima Marketing ~ Cling Stamps: Don't Forget to Fly; Rust and Dust

Mixed Media:
  • Finnabair with Prima Marketing ~ Antique Brilliance Wax: Amethyst Magic
  • Finnabair with Prima Marketing ~ Metallique Wax: Peacock
  • M. Graham ~ Artists' Watercolors
  • Prima Marketing ~ Metallic Accents Semi-Watercolor Cake Set
  • Colorfin ~ PanPastel: Light Gold

Embellishments:

Adhesives:
Scrapbook.com ~ Clear Double Sided Adhesive Roll, 1/4"
Tombow ~ Mono MULTI Liquid Glue
Helmar ~ 450 Quick Dry Adhesive
Beacon ~ 3-IN-1 Advanced Craft Glue
Beacon ~ Fabri-Tac 
Scrapbook Adhesives by 3L ~ 3D Foam Squares - Small, White

Tools:
Spellbinders ~ Platinum 6
Tim Holtz with Tonic Studios ~ Haberdashery Scissor - 5 Inches
Ranger ~ Heat It Craft Tool

Thank you Little Birdie Crafts for providing flowers used in this project!

Little Birdie Crafts can be purchased at their online store.

Use code TRACEY05 for a 5% discount.

I receive a small commission at not cost to you.


Thanks for stopping by! I treasure your comments.

~ Blessings ~

Monday, June 13, 2022

Shabby Mixed Media Tag For Amazing Paper Grace with Tutorial Link for Distress Oxide Ink Blending on Die Cuts

Welcome to my creative space!

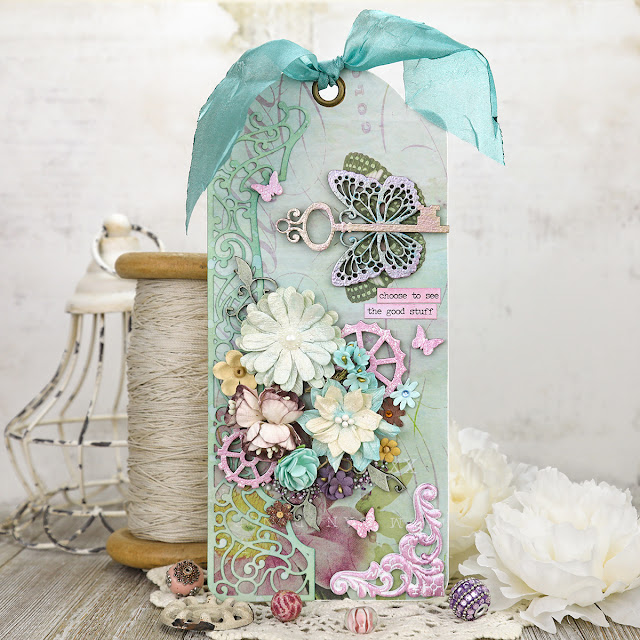
A tag is a perfect way to share a small piece of art. With this encouraging sentiment and gorgeous embellishments, this tag is meant to be on display, rather than being a simple gift tag. This tag features the fabulous Amazing Paper Grace Half Slimline Bracket die set (S4-1199) from the Layered Fleur Bouquet Slimlines collection. I've framed half of this tag with this gorgeous die cut. I've created a video tutorial showing how to use Distress Oxide Ink blending on die cuts to create flowing organic color that coordinates perfectly with your patterned background paper.

You can find a full video tutorial explaining this technique exclusively in the Amazing Paper Grace Creative - Creative Encouragement Community Facebook Group.

This lovely group includes exclusive tutorial content. I share a mixed media tutorial there on the 13th of each month. If you're not a part of this fabulous and encouraging group you can join HERE.

Thank you Amazing Paper Grace for providing the dies used in this project.

Tips and Techniques
This gorgeous die cut on the left is cut using the Amazing Paper Grace Half Slimline Bracket die set (S4-1199) and is colored with Distress Oxide ink blending. A full video tutorial is available in the Amazing Paper Grace Creative - Creative Encouragement Community Facebook Group.

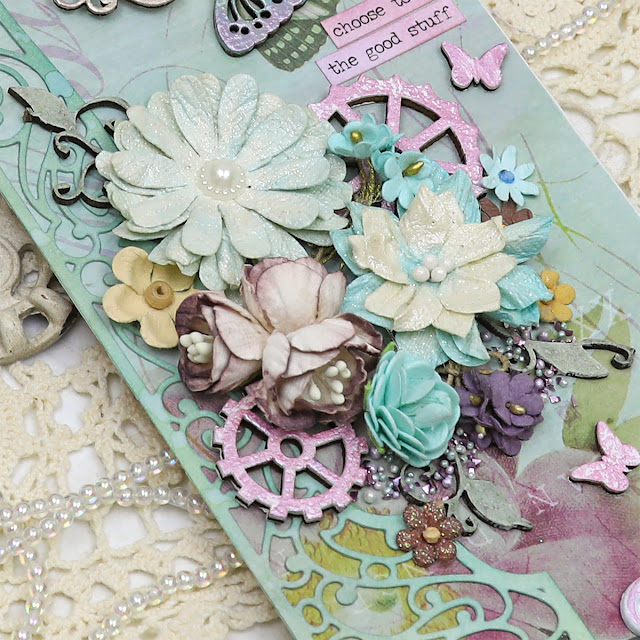
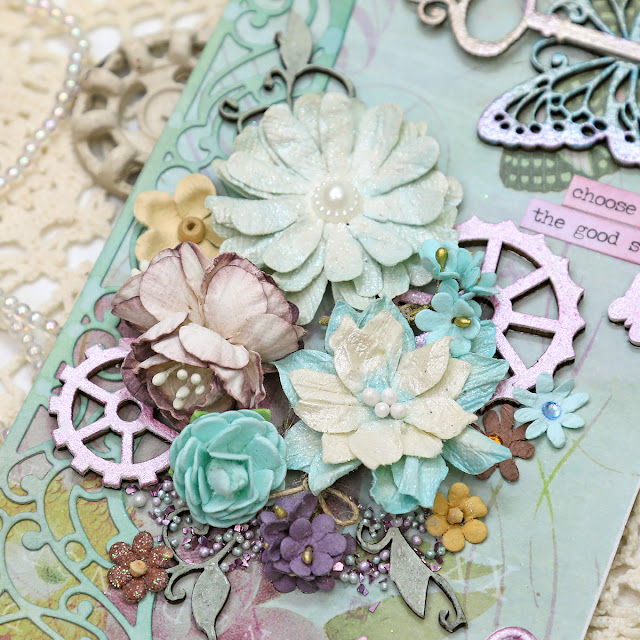
This lovely floral cluster is created with Little Birdie Crafts flowers, wood veneer gears and leafy chipboard vines. I've used metallic paints to color the gears.

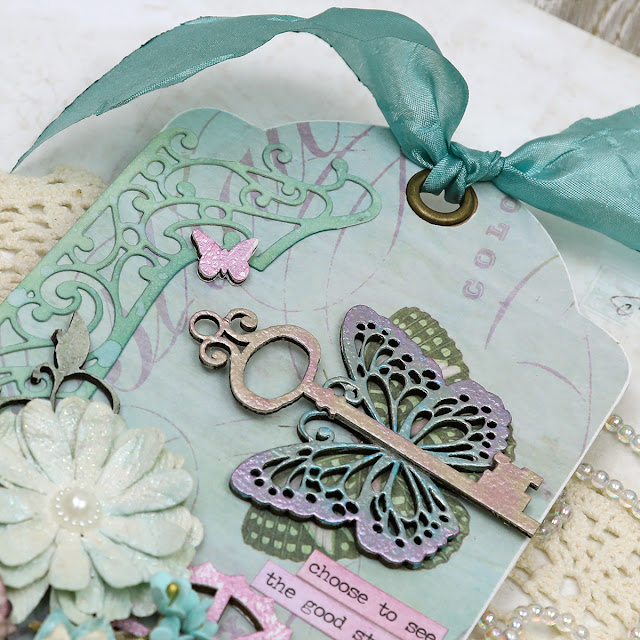
The top edge of this beautiful die cut is fussy cut to fit the tag and becomes such a beautiful design element!

I wanted to accent the sweet butterfly on the background paper, so layered this chipboard butterfly and key over the printed one. They're colored with a blend of metallic paints. The sweet and encouraging sentiment is inked to coordinate with the colors on the tag.

A piece of beautiful May Arts Silky Crush ribbon is tied on the top.

The bottom edge of the die cut is trimmed to curve with the edge of the tag. 

I've added texture around the bottom of the cluster using prills and glass glitter. The ornate corner on the right side is a metal piece from my stash. It's painted with white gesso then dry brushed with metallic paints to add a bit of color. 

One final look. Doesn't this gorgeous die cut add such amazing texture to this tag?

Amazing Paper Grace Dies:

Paper:
  • Scrap of patterned paper 
  • Scalloped Kraft Tag
  • Tim Holtz with Idea-ology ~ Small Talk

Ink:
  • Ranger ~ Distress Oxide Ink: Iced Spruce; Pine Needles; Forest Moss
  • Ranger ~ Distress Ink: Victorian Velvet; Seedless Preserves; Dusty Concord

Mixed Media:

Embellishments:

Adhesives:
  • Scrapbook.com ~ Clear Double Sided Adhesive Roll - Permanent
  • Helmar ~ 450 Quick Dry Adhesive
  • Beacon ~ 3-IN-1 Advanced Craft Glue
  • Beacon ~ Fabri-Tac 
  • Tombow ~ Mono MULTI Liquid Glue

Tools:
  • Spellbinders ~ Platinum 6


Thanks for stopping by! I treasure your comments.

~ Blessings ~

Friday, March 4, 2022

Amazing Paper Grace March Die of the Month - Bella Ovalette with Blog Hop

 Welcome to my creative space!

Spring is just around the corner as the temperatures here in Ohio are starting to warm and melt the winter snows. We actually saw green grass this week before waking to yet another glistening, snow covered day yesterday morning. I don't know about you, but I'm ready for the soft delicate flowers of spring along with fluttering butterflies.

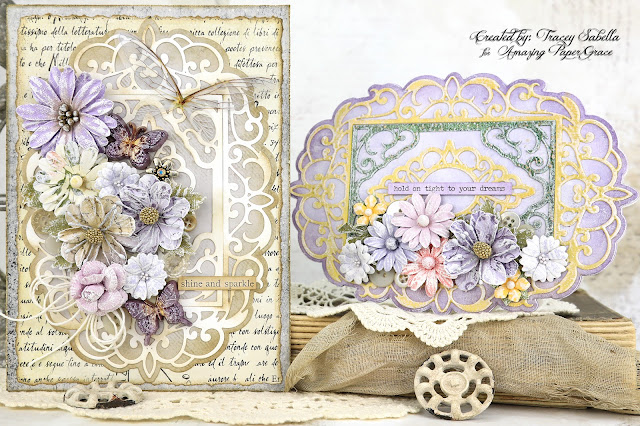
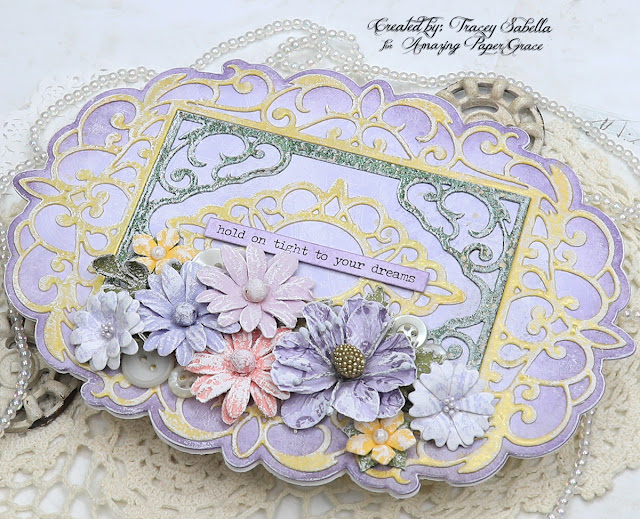
I've used the fabulous Amazing Paper Grace March Die of the Month: Bella Ovalette to create these two spring inspired cards. 

Do you ever start a project and it doesn't turn out how you envisioned and is destined to be discarded? That happened to me with the shaped card on the right. The yellow was too bright, and the green turned out too dark. The contrasts were just too much for my taste, so I put it to the side and started over with the card on the left by die cutting muted neutrals and whites for the background.  


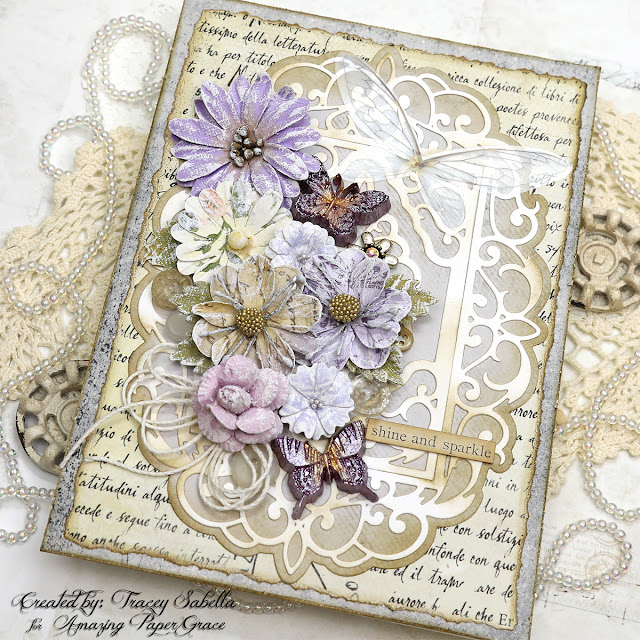
The scroll work pieces cut from white are inked with Frayed Burlap distress ink to give them the vintage, shabby look I was going for. Subtle spring purples, pinks, and yellows are added with flowers and resin butterflies. I adore combining flowers in a variety of sizes and shapes, so used a few Little Birdie Crafts flowers for the larger blossoms, and handcrafted the two smaller pale purple ones using the flower dies included in the Bella Ovalette set.


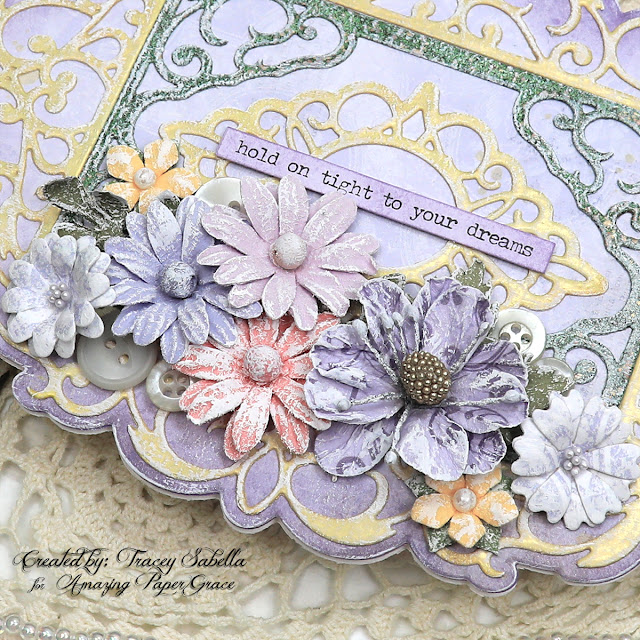
Now it was time to create an accessory, and I got to thinking about the first card I had started. I have a thing for salvaging hopeless projects, and wasn't quite ready to give up on it yet. I had cut green patterned paper to place behind the die cuts, and again it was too bright, so I decided to discard it and create a shaped card. I die cut the base from white cardstock and kept the remaining pieces which I had already assembled and glued down. The yellow and green pieces are heat embossed with enamel powder, so inking them wasn't really an option, so I dry brushed the entire piece with white gesso and breathed a sigh of relief as this softened and blended the colors perfectly. Then to finish it off, I just added the cluster of flowers and a sentiment. I used more Little Birdie Crafts flowers along with two more of my handcrafted flowers cut with the Bella Ovalette dies.

Many thanks to Amazing Paper Grace for providing the dies used in this project!

There are 12 dies included in this Bella Ovalette die set.

Tips and Techniques
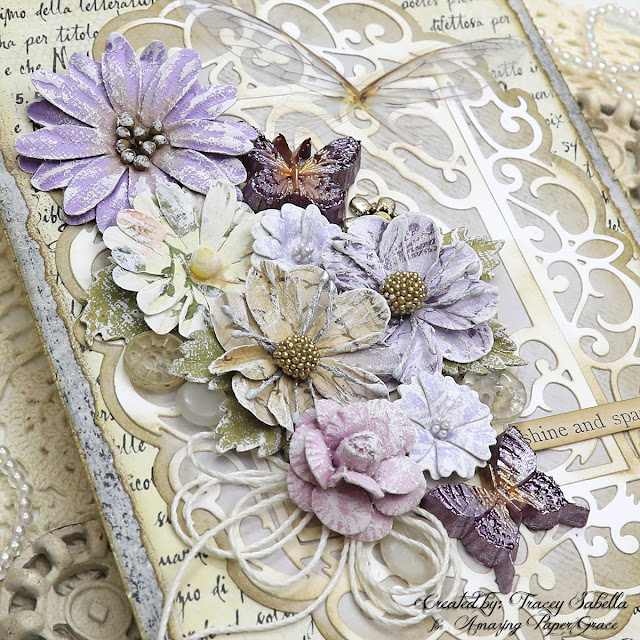
I just adore the gorgeous design of these beautiful die cuts!! The solid outer layer is cut in a light grey patterned paper that's edged with brown inking. The intricate layers are cut from white cardstock and randomly inked with brown for a grungy shabby chic feel. The flowers are lightly dry brushed with white gesso and arranged to cascade down the left side of the card along with resin butterflies painted with metallic acrylic paints. I make the resin pieces to keep on hand so all I need to do is add a bit of paint or waxes for a quick and easy embellishment. I've also tucked in a few vintage buttons around the edges and tied a 4-loop bow from bamboo cord to add a soft touch.

The two smaller flowers near the butterflies are cut with the flower dies included in the Bella Ovalette die set. They are die cut and shaped. Each blossom has two layers which are adhered together with offset petals. Each petal section has a hole in the center, making it easy to add a few stamen to each flower.

I cut a 5 1/2 by 7 1/2 inch piece of script paper and tore off the edges before adding a touch of ink to them. The back layer is cut from grey patterned paper. The black dots were more visible on the left side so I used a natural bristle paint brush to pick up some black soot ink and stippled around the edges to pick up this design around the other sides. I used a printed sentiment and added brown ink around the edges.

To add a little balance to the design, I added a transparent butterfly to the top right corner. This gives more weight to that corner, but still allows you to see the gorgeous die cut design beneath it.

I've used some of the same flowers here and added a couple tiny yellow blossoms along with the two handcrafted die cut flowers. A few vintage buttons are tucked in around the edges. I'm so blessed to have had friends and family members bless me with their family button boxes and adore using these treasures on my creations. You could also use bought buttons or any little trinkets you might have on hand.

You can see here how dry brushing the background layers with white gesso adds a soft touch and tones down the vibrant colors to these lovely pale spring colors. It also adds some beautiful visual texture.

The base layer is cut from a lightly patterned purple paper and then edged with Dusty Concord Distress Ink. The printed sentiment is also colored with this ink.

Supplies:

Accessories:

Paper:
  • Vintage style scraps from my stash
  • Cardstock: Kraft; White

Ink:
  • Ranger ~ Distress Ink: Frayed Burlap; Black Soot; Dusty Concord

Mixed Media:
  • Finnabair with Prima Marketing ~ Sparks Acrylic Paint: Iris Potion; Ginger Magic
  • Finnabair with Prima Marketing ~ Gesso, Clear
  • Prima Marketing ~ Silicone Mould: Regal Findings
  • Amazing Casting Resin ~ White
  • Liquitex ~ Gesso, White
  • Stampendous ~ Embossing Enamel: Aged Green
  • Ranger ~ Embossing Pearl: Pale Gold
  • Ranger ~ Micro Glaze

Embellishments:

Adhesives:
  • Double Sided Tape ~ 1/4" 
  • Beacon ~ 3-IN-1 Advanced Craft Glue
  • Beacon ~ Fabri-Tac
  • Tombo ~ Mono MULTI Liquid Glue
  • Helmar ~ 450 Quick Dry Adhesive

Tools:
  • Spellbinders ~ Platinum 6
  • Wagner ~ HT 400 Heat Gun
Thank you Little Birdie Crafts for supplying products used to create this card.

Little Birdie Crafts can be purchased at their online store.

Use code TRACEY05 for a 5% discount.

I receive a small commission at not cost to you.

For more Bella Ovalette Inspiration from the Creative Team:

Visit each blog linked below for their take on creative paper crafting ideas with Bella Ovalette, the Amazing Paper Grace March 2022 Die of the Month!

View this month’s Amazing Paper Grace Die of the Month!

I would adore hearing from you!
Please leave a comment below letting me know how you will use these gorgeous dies!


Thanks for stopping by! I treasure your comments.

~ Blessings ~

Friday, May 7, 2021

"You Are Beautiful" Layered Shabby Mixed Media Card with VIDEO TUTORIAL for Little Birdie Crafts

Welcome to my creative space!

Mother's Day is this Sunday and I've created this beautiful layered card for my mom featuring gorgeous Little Birdie Crafts Papers, flowers, and mixed media supplies. The video shows all the details and techniques used to create this beautiful card.

My sister and I took our mom out for lunch to celebrate this week. How do you observe Mother's Day with your mom or another special woman in your life?

All of the close-ups and details can be found on the Little Birdie Crafts blog HERE.
It would be great if you could stop over there to leave a comment.

If you would like to see a full supply list, please scroll down.
Little Birdie Crafts can be purchased at their online store.

Be sure to check out the current sales HERE.

Use code TRACEY05 for a 5% discount.

I receive a small commission at not cost to you.

I've created a full project video with voice instructions including how to:
  • Alter gorgeous flowers with paint and texture
  • Highlight texture on this fabulous butterfly with paint and wax
  • Transform seam binding into a grungy bow using paint & gesso
  • Create gorgeous gems with pearl drops
  • Add tattered edges to beautiful layered papers

Enjoy!


Amazing Casting Resin ~ White
Tim Holtz with Stampers Anonymous ~ Ledger Script
Tim Holtz with Stampers Anonymous ~ Flower Shop
Tim Holtz with Ranger ~ Distress Ink - Old Paper
Tim Holtz with Ranger ~ Distress Archival Ink: Ground Espresso; Peeled Paint
Tim Holtz with Ranger ~ Distress Paint - Kitsch Flamingo
Ranger ~ Emboss It Dabber
Stampendous ~ Embossing Enamel - Shabby Pink
Stampendous ~ Glass Glitter: Bronze; Champagne
Mini Microbeads ~ White Gold
Hug Snug Seam Binding - White
Helmar ~ 450 Quick Dry Adhesive
Repositionable Tape
Tim Holtz with Tonic Studios ~ Paper Distresser
Ranger ~ Heat it Craft Tool
Ranger ~ Mini Ink Blending Tool


Thanks for stopping by! I treasure your comments.

~ Blessings ~

Monday, March 22, 2021

3-D Layered Butterfly Wall Hanging with VIDEO TUTORIAL for Little Birdie Crafts

 Welcome to my creative space!

I have created a spring-themed home decor piece to celebrate the warming days of this new season we're entering with this 3-D layered butterfly wall hanging featuring Little Birdie Flowers from the gorgeous Song of the Sea collection along with their beautiful decoupage paper, primed chipboard pieces, and fabulous mixed media products.

Here's a close-up shot so you can see just how much dimension there is on this beauty.


I have created a full DIY video tutorial for you with voice instructions to share all the details on how to create this beautiful spring piece including the sweet 3-D layered butterfly and faux metal gears. I hope you find inspiration and learn new techniques as you view it.

In this 3-D Layered Butterfly Wall Hanging tutorial learn how to:
~ Create a 3-D layered butterfly
~ Create gorgeous faux metal/patina gears from chipboard using gilding flakes and waxes
~ Enhance mixed media projects with natural elements
~ Alter flowers for a patina effect
~ Use layers to develop dimension

Enjoy!


Please hop on over to the Little Birdie Crafts blog to view more close-up photos HERE.

Little Birdie Crafts can be purchased at their online store.
Be sure to check out the current sales HERE.

Use code TRACEY05 for a 5% discount.

I receive a small commission at not cost to you.

Little Birdie Crafts Supplies
Craft Pellets - Mini

Other Supplies
Wood Bracket Shaped Base purchased at a local craft store - 6 1/2 by 6 1/2 inches
Tim Holtz with Sizzix ~ Scribbly Butterflies
Tim Holtz with Idea-ology ~ Small Talk
Momenta ~ Metal Stickers: Flourish; Mini Corners
Speedball ~ Mona Lisa - Gold Leaf
Nuvo ~ Gilding Flakes - Sunkissed Copper
Martha Stewart ~ Microbeads - Fire Opal
Nature: Feathers; Twigs; White Birch Bark
Wonder Tape ~ 1" Double Sided Foam Tape
Sizzix ~ Stylus (Sizzix Paper Sculpting Kit)


Thanks for stopping by! I treasure your comments.

~ Blessings ~