Showing posts with label Vintage. Show all posts

Monday, April 24, 2023

Cat Birthday Card Featuring Amazing Paper Grace Dies

 
Welcome to my creative space!

I have missed sharing inspiration with you. I'm finally feeling better after a tough winter. Nothing serious, but I've been catching one thing after another since October. That comes spending time with our preschool grandchildren and our granddaughter who just entered kindergarten this year. Lots of germs to spread to grandma. I'm praying for a nice healthy spring and remaining 2023.

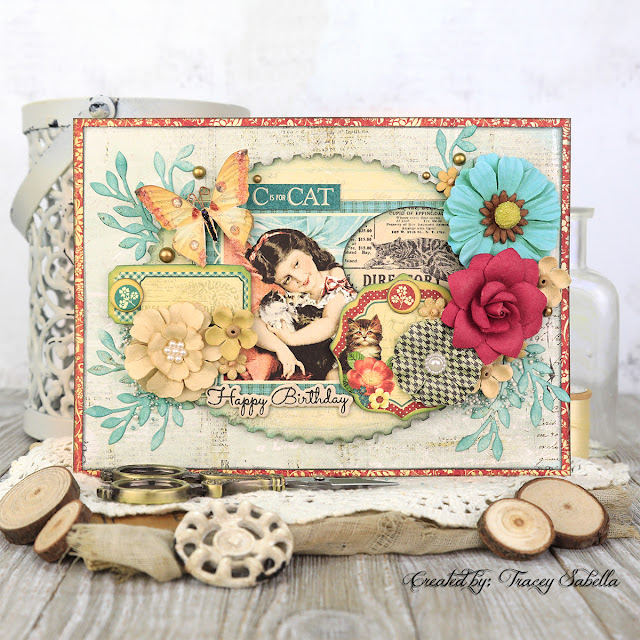
Today I'm sharing a sweet card created to celebrate our granddaughter, Avery's sixth birthday. While this may seem to be an unusual card for a six year old, she is a sweet old soul. Last year I made an adorable, age appropriate card for her. She glanced at it and set it aside. She adores the shabby chic creations I make and always asks if she can have one of them when it's time for her birthday. She has a cat she named Elpha and adores felines, so I combined her love of cats with my shabby chic style to create this card for her featuring the Amazing Paper Grace Postage Edge Ovals die set (S5-548). And yes, this card got more than a single glance from her.

This older Raining Cats & Dogs paper from Graphic 45 included dog images, so I needed to be creative in placing some of the elements to hide those pups. I used an oval die from the Postage Edge set to die cut the striped cat that covers a dog by the girl's shoulder. A creative way to showcase the dies and create layers on the card that look natural while bringing together the cat theme.

I used a mix of Prima Marketing and Little Birdie flowers paired with die cut foliage from the Petite Floral Potpourri die set (S3-420). A little inking on the leafy foliage helps it pop.

The birthday sentiment is stamped and die cut using the Lyrical Layered Florals Clear Stamp & Die Set (SDS-170). I just adore how this elegant birthday sentiment looks on this card.

For more close-ups and all the details on how to create this card, be sure to scroll down through the Tips and Techniques section below. 

Thank you Amazing Paper Grace for providing the dies used in this project.

Tips and Techniques
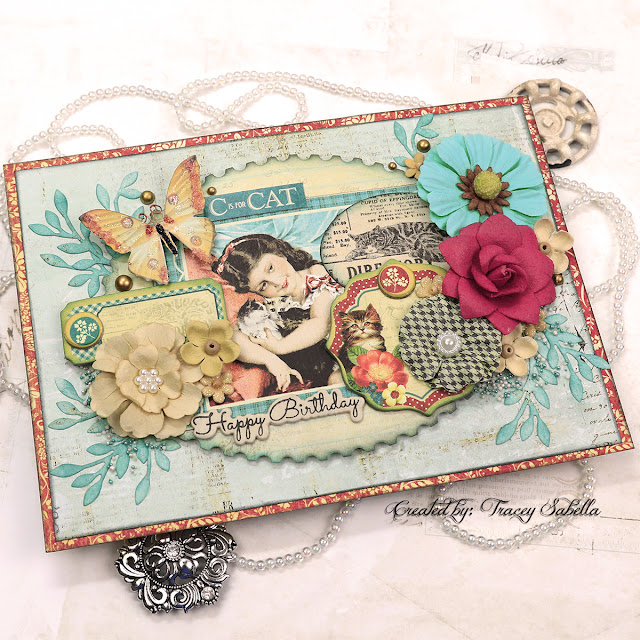
I just adore creating layers and the Postage Edge Ovals set (S5-548) is perfect for this. The larger oval is popped up with foam tape. The edges are inked with coordinating distress ink colors.
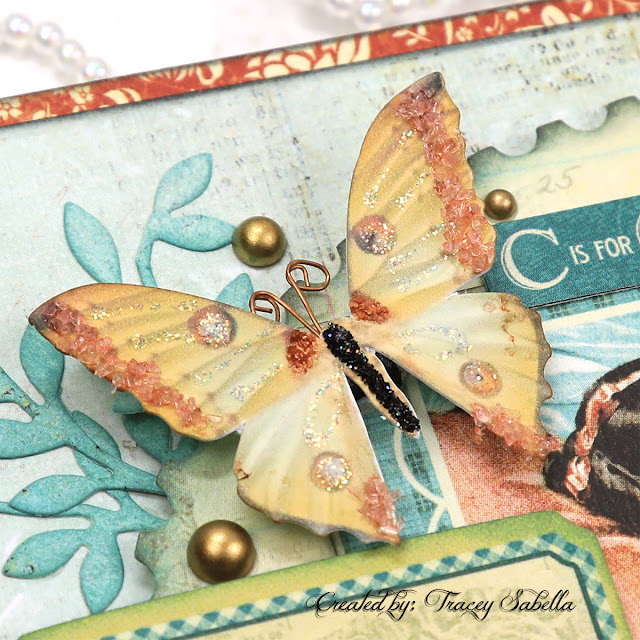

This gorgeous butterfly is an older Renea Bouquets creation. If you are not familiar with her unique and gorgeous embellishments, be sure to stop by her shop HERE. I'm a big fan of her creations and adore supporting fellow artists.
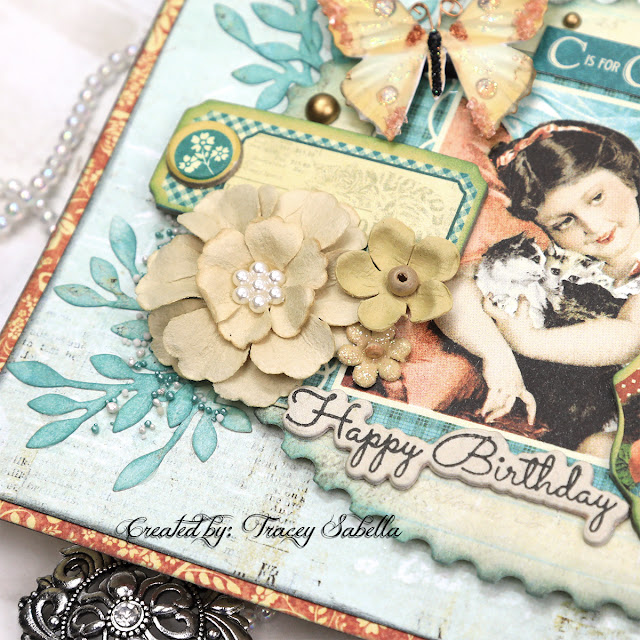
Here you can see the gorgeous birthday sentiment. The Lyrical Layered Florals Clear Stamp & Die Set (SDS-170) includes the stamp and die to create this beauty along with other lovely designs. You can see how the layers come together so beautifully.
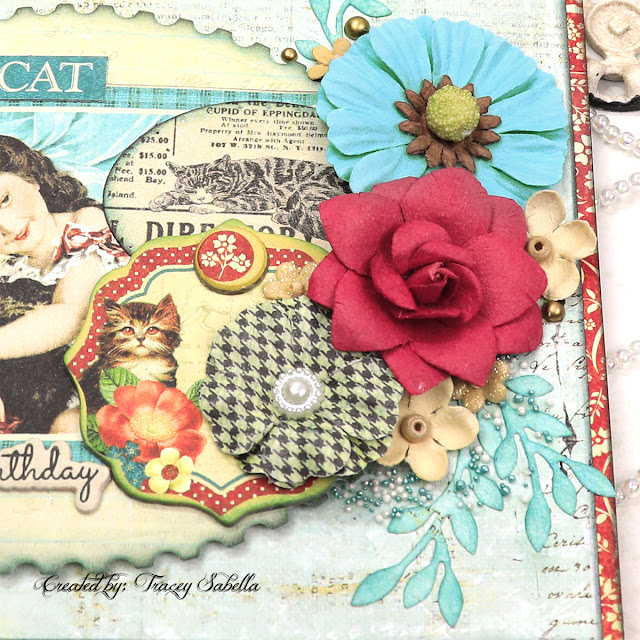

I've layered die cuts, chipboard elements, flowers and foliage cut from the Petite Floral Potpourri die set (S3-420) to create dimension. 
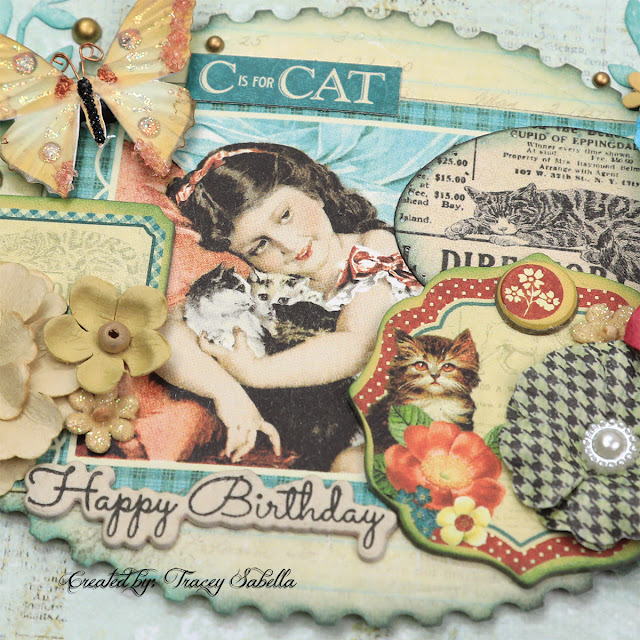
Cats, cats everywhere! The C is for Cat adds a bit of whimsey to the card to make it a bit more youthful for a six year old.  

You can see how I've inked the edges of many of the layers to help them pop.
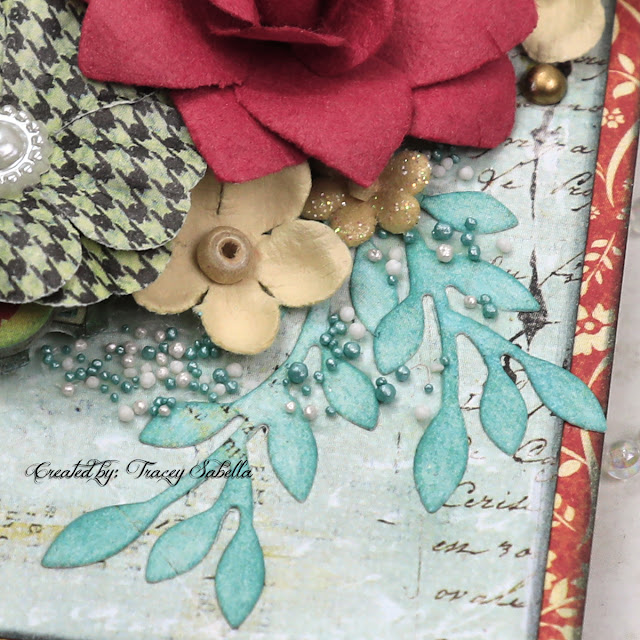
Texture is created by adding a mix of white and teal Prills using matte gel medium along with a few Matte Gold flat backed Pinkfresh Studio Pearls.

Below you can find the products I used to create this project including some with compensated affiliate links to Scrapbook.com and Spellbinders. These links are at absolutely no cost to you. When you shop through the links below, I receive a small commission from the companies.  These commissions help me cover the costs of my blog and other expenses, which allows me to continue to provide you with FREE inspiration along with detailed Tips and Techniques provided for every project. Thank you so much for your love and support!

Amazing Paper Grace Sets


Paper:
Graphic 45 - Raining Cats & Dogs (Retired)
Prima Marketing - Cigar Box Secrets (Retired)

Ink:

Mixed Media:
Prima - Finnabair - Soft Matte Gel

Embellishments:
Little Birdie Crafts - Beaded Blooms - Butter
Little Birdie Crafts - Micro Petals - Tan
Prima Marketing - Cigar Box Secrets #578626
Graphic 45 - Chipboard - Raining Cats & Dogs
Renea Bouquets - Butterfly
US ArtQuest - Mini Prills - Mini Pearls; Sage Advice

Adhesives:
Beacon - 3-IN-1: Fabri-Tac

Tools:

Thanks so much for stopping by to check out this sweet shabby cat card I created for our granddaughter. I hope you've been inspired!

Monday, November 14, 2022

Introducing the Amazing Paper Grace Postage Edge Shapes Collection with Vintage Shabby Chic Card and ATC

Welcome to my creative space!

There is just something special about having gorgeous die cut edges to fill in with your favorite things. This new Postage Shape Edges Collection by Amazing Paper Grace does just that! Today I'm sharing an ensemble created with the Postage Edge Rectangles Set (S5-540)

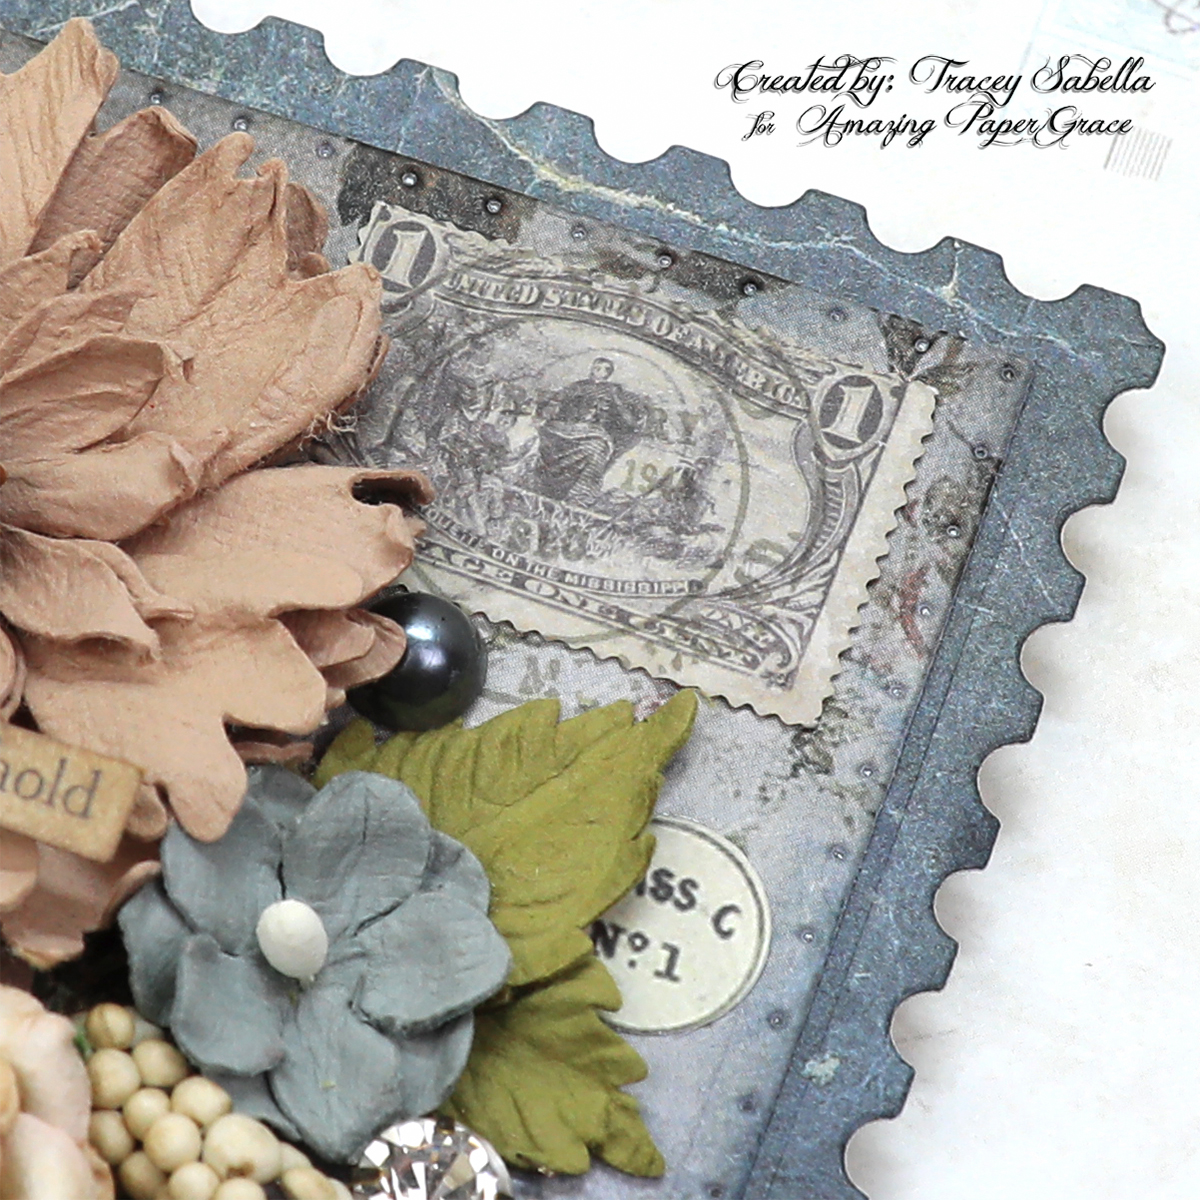
In keeping with the postal shapes, you'll see postage themed stamping and images in the background of both pieces. The card layers both shapes included in this amazing die set. The scalloped edge layer is cut from a darker slate blue patterned paper to frame the card and the focal paper is cut with the pierced edges from a floral paper. The card is embellished in fall colors with flowers and precut pieces that came in the paper pack including the postage stamp up in the corner. 

The ATC pairs the same papers cut with the smallest postal scalloped rectangle with the center cut with a die from the Fluted Classics Rectangle set (S5-475). This new Postage Shape Edges Collection is designed to coordinate with the dies in the Fluted Classics Collection and they look so great together! 

For all the details on how to create this ensemble with lots of close-ups, please scroll down through the Tips and Techniques section below.

Today's projects were created with dies provided by Amazing Paper Grace.

Vintage Postal Edged Card

Shabby Chic Postal Edged ATC


Tips and Techniques
I decided to go with fall colors and a vintage postal design for this sweet shabby card. The floral background paper is cut with the largest pierced die in the Postage Edge Rectangles set (S5-540) from the 49 and Market Remnants Mini Collection paper while the scalloped postage edges frame layer is cut using a page from the Tim Holtz, Backdrops - Volume Two paper pack. To add visual dimension and accent the pierced design, both pieces are edged with Stormy Sky Distress Ink with Pumice Stone also added to the scalloped edge frame. 

This shabby card is embellished with 49 and Market flowers in fall colors and precut pieces from the Remnants Mini Collection pack including the stamp image in the top corner. 

The cluster is embellished with textural elements including pearls and antique gems. The smaller texture includes Prills and chunky glass glitter. A little bling is always welcome on a shabby chic card!

Here's a side view showing ephemera tucked in and around the cluster from the Tim Holtz Curator Ephemera Pack. The scrolled cream piece is popped up with foam tape for dimension and to give room to tuck in the ephemera and textural bits.

The sentiment is inked with Ground Espresso Distress Oxide ink and spritzed with water for the vintage oxidized effect.

I wanted to embrace a postal theme so used Archival Hickory Smoke Ink to stamp postal images on the background including "special delivery' across the side and the cancelation mark over the stamp image.

One final view of the entire card.

An ATC is a great way to share a small piece of our art and the smallest dies in these sets are perfect to create a base for this small format art. Yes, it's slightly larger than a traditional ATC, but I just adore how the scallop postal edge pairs with the Fluted Classics Rectangle, so perfect for a vintage fall feel.

More of the flowers and cut-outs are used to embellish the ATC. Instead of the larger pearls and gems, smaller iridescent drops are paired with the Prills and glitter to keep with the scale of an ATC.

The edges here are also inked with Stormy Sky Distress Ink to give definition and highlight the diecut texture. The outer scalloped edge is also inked with Pumice Stone.

The small butterfly is popped up with foam tape and this simple sentiment is framed and adhered atop the fluttering insect.

In keeping with the vintage postal theme, this fun stamp image is stamped with Ground Espresso archival ink, fussy cut, then the cancel mark is added using Hickory Smoke Archival Ink.

One last view of the full ATC. You can really see how beautifully the two die sets work together here. 

The Postage Edge Shapes Availability:
These dies and plates are available from Spellbinders right now! Click here: The Postage Edge Shapes Collection.

Below you can find the products I used to create this project including some with compensated affiliate links to Scrapbook.com and Spellbinders. These links are at absolutely no cost to you. When you shop through the links below, I receive a small commission from the companies.  These commissions help me cover the costs of my blog and other expenses, which allows me to continue to provide you with FREE inspiration along with detailed Tips and Techniques provided for every project. Thank you so much for your love and support!

Amazing Paper Grace Sets:

Paper:

Ink:

Stamps:

Mixed Media:
Prima Marketing - Finnabair - Art Basics - Soft Matte Gel

Embellishments:
Idea-ology - Tim Holtz - Ephemera Pack - Curator
49 and Market - Botanical Blends - Hazelnut
49 and Market - Mulberry Paper Flowers - Beige Roses
49 and Market - Botanical Potpourri - Shadow
US Artiest - Mini Prills - Express-O-Yourself
Stampendous - Chunky Glass Glitter - Champagne

Adhesives:
Beacon - 3-IN-1: Fabri-Tac

Tools:

For more Postage Edge Shapes Collection Inspiration
Visit each Creative Team blog linked below for their take on creative paper crafting ideas using  The Postage Edge Shapes Collection.


I would adore hearing from you! Please leave a comment below letting me know how you will use these gorgeous dies!


Thanks for stopping by! I treasure your comments.

~ Blessings ~

Monday, September 26, 2022

Merry Christmas Wintry Holiday Scene Card for Amazing Paper Grace

Welcome to my creative space!

I like to get a jump start on creating my Christmas cards. This sweet card features the fabulous Amazing Paper Grace Winter Label Motifs die set (S4-1240) that includes so many lovely images to create this wonderful wintry scene. 

I cut out the label frame and embossed it with the Holly Flourish Embossing Folder (SES-046) which is part of the new Christmas flourish collection. It's popped up with foam tape to layer the wintry scene below the opening. I thought this sweet scene would be perfect for Christmas, so added this sentiment from the Silent Night Make a Scene die set (S5-462). The snow drifts and smaller building in the scene are also from this set.

Be sure to scroll down through the tips and techniques section below for close-ups and all the details on how to create this card including how I created the sparking snow drifts and shimmering holly berries.

Thank you Amazing Paper Grace for providing the dies used in this project.

Tips and Techniques
Here's a close-up of the wintry scene. The Winter Label Motifs (S4-1240) set includes the large house, trees, fence, snowflakes, label frame, and holly leaves, and berries. 

The snowflakes are cut from shimmer paper for just a hint of sparkle. Three snowdrifts are cut from white glitter paper that really sparkles and shines in the light. I've also used this paper for the snow cover building roofs. The smaller building is from the Silent Night Make a Scene set. I enlarged the window openings with a couple snips from my scissors so that the window frames from the Winter Label Motifs set would fit to add cohesiveness. There is no roof die for this smaller home, so I hand cut the snow. It's a right angle, so I just cut a corner off the paper and trimmed the inside edges to fit.

The trees are cut from two different green patterned papers and offset to layer them to look like a forest of pines surrounding the homes. The fence is also cut from a wood grain patterned paper. I thought this blue patterned paper looked like a wintry sky, so used it for the background.

The holly leaves and branches are included in the Winter Label Motifs set and are cut from the same darker green paper used for the trees. They are inked with Forest Moss Distress ink, then with a little Ground Espresso for a vintage feel and to give definition. 

The berries, label frame and chimneys are all cut from the same red patterned paper. The berries are edged with Ground espresso then to add sparkle, they're brushed with a clear Wink of Stella brush.

The frame is die cut from a cream patterned paper with the outside edges measuring 4" by 5 1/4". I cut the paper to size first, then die cut the center using the smallest of the label frame dies, then I ran it through the Holly Flourish Embossing Folder to add texture. Frayed Burlap Distress Ink is applied around the edges, then with a foam applicator, I rubbed lightly over the raised embossing to highlight the texture and add to the vintage feel I was looking for. The label frame is cut from red patterned paper and adhered around the opening. 

An outer frame is added by cutting a piece of the red patterned paper to 4 1/4" by 5 1/2 inches. The blue sky paper is cut to about 3 1/2" by 4 3/4" and adhered to the center of the red paper. The dimensions for the sky paper aren't that important. It just needs to be larger than the label opening and smaller than the embossed piece. 

The embossed frame piece is adhered using 1/4" foam tape around the outside edges. 

***Tip*** I adhered the foam tape directly to the the back of the embossed frame, then applied clear glue (Beacon Fabri-Tac) to top the foam tape, so when I set the embossed frame onto the red base, I can adjust it so that it's perfectly centered and the wet glue will set in a few minutes to continue working. Just make sure to adhere the blue sky piece before adding the embossed frame.

The Christmas sentiment is cut from the same green used for the foliage.

The scene was created after the embossed label frame was in place. I just used tweezers to help place everything. Because the frame is adhered on the outside edges, it gave me room to tuck the pieces in place since the inside edges were not adhered.

After creating the scene, I added the holly and sentiment around the outside. 

Below you can find the products I used to create this project including some with compensated affiliate links to Scrapbook.com and Spellbinders. These links are at absolutely no cost to you. When you shop through the links below, I receive a small commission from the companies.  These commissions help me cover the costs of my blog and other expenses, which allows me to continue to provide you with FREE inspiration along with detailed Tips and Techniques provided for every project. Thank you so much for your love and support!

Amazing Paper Grace:

Paper:

Ink:

Mixed Media

Adhesives:

Tools:
Thanks so much for stopping by to view my card. I hope you've been inspired.

Tuesday, March 1, 2022

Vintage Junk Journal Easel Board for Little Birdie Crafts

 
Welcome to my creative space!

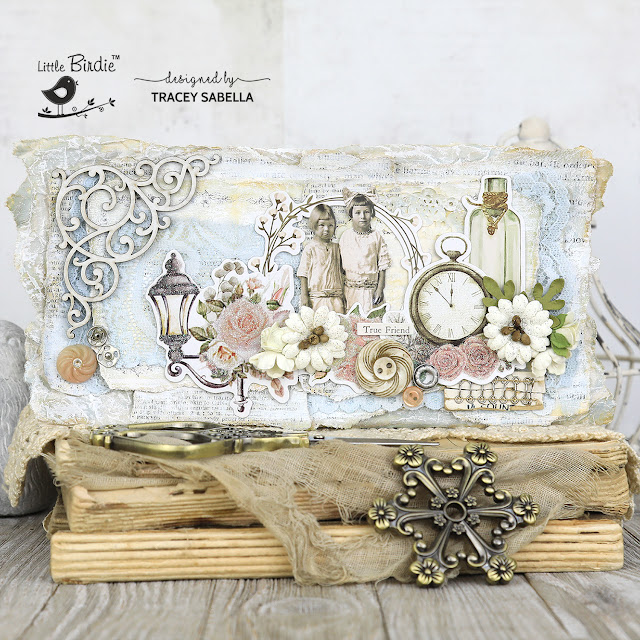
I just adore the shabby vintage look of junk journals, but have never committed the time to creating one. So, I got to thinking . . . "What about creating a junk journal style home decor piece?" This is what I came up with. A while back I found this 4x8" easel board with bold Valentine graphics in the clearance section for a deep discount and thought it would be perfect to repurpose for one of my projects. Several coats of white gesso gave me a clean base to work with.

This beautiful vintage creation features Little Birdie Crafts ephemera, flowers, chipboard, and mixed media supplies along with vintage tea stained book pages along with lace, vintage buttons, and notions like snaps and hooks.  I have a full photo tutorial with all the details on how I created this card up on the Little Birdie Crafts blog HERE. Thanks for stopping over there to leave a comment.

Thank you Little Birdie, for providing supplies used in this project!

If you would like to see a full supply list, please scroll down.
Little Birdie Crafts can be purchased at their online store.

Be sure to check out the current sales HERE.

Use code TRACEY05 for a 5% discount.

I receive a small commission at not cost to you.

A couple close-ups:


Little Birdie Crafts Supplies

Other Supplies
MDF Easel Board - 4x8"
Tea Stained Vintage Book Pages and Packing Paper
Tim Holtz with Idea-ology ~ Paper Dolls
Tim Holtz with Idea-ology ~ Clippings Stickers
Ranger ~ Distress Ink: Brushed Corduroy
Lace Pieces
Vintage: Buttons; Hooks; Snaps
Silicone Glue


Thanks for stopping by! I treasure your comments.

~ Blessings ~

Monday, April 19, 2021

Rusty Journey Art Journal Panel with Video Tutorial for Little Birdie Crafts


Welcome to my creative space!

When I first laid eyes on Little Birdie's The Classic Gentleman collection, I knew I had to create a birthday card for my husband with this fabulous vintage car image. My design ended up being too heavy for a card, so I created this art panel instead. 

I was inspired by this amazing rusty brake pad piece to transform Little Birdie cogs with a grungy texture paste effect I created. Be sure to view my video to see this DIY transformation along with a full project tutorial.

All the close-ups and details can be found on the Little Birdie Crafts blog HERE.
It would be great if you could stop over there to leave a comment.

If you would like to see a full supply list, please scroll down.
Little Birdie Crafts can be purchased at their online store.
Be sure to check out the current sales HERE.

Use code TRACEY05 for a 5% discount.

I receive a small commission at not cost to you.

Here are a couple close-ups showing a little more detail:


I have created a full DIY video tutorial for you with voice instructions to share all the details on how to create this rusty industrial art panel including a technique to create grungy rusty gears and details on and industrial metal finish used on the diecut cogs and rotor blade seen above.. I hope you find inspiration and learn new techniques as you view it.

Enjoy!


Little Birdie Crafts Supplies
Texture Sand

Other Supplies
Thin Kraft Chipboard
Heavy Chipboard for base (Paper Pad Back)
Corrugated Packaging
Tim Holtz with Idea-ology ~ Paper Dolls
Tim Holtz with Idea-ology ~ Metallic Sticker Book
Tim Holtz with Sizzix ~ Thinlits - Stacked Deckle
Tim Holtz with Sizzix ~ Bigz - Steampunk Parts
Tim Holtz with Ranger ~ Distress Ink - Black Soot, Ground Espresso
DecoArt ~ Crafter's Acrylic: Bright Orange; Burnt Umber; Yellow
US Artquest ~ Prills - Express-O Yourself
Bronze Mini Microbeads
Silicone Glue
Wonder Tape ~ Foam Tape
EK Success ~ Craft Tweezers
Wagner ~ HT 400 Heat Gun


Thanks for stopping by! I treasure your comments.
~ Blessings ~

Sunday, September 6, 2015

Vintage Rose Jay Pendant with VIDEO TUTORIAL ~ Scraps of Elegance August Kit

It's reveal day for my second video tutorial with the August Scraps of Elegance Kit.

I thought I would change things up a bit this time. The August SOE Creativity Add On is filled with brass Vintaj pieces and Ranger Vintaj Patina along with the Reliefing Block. Before I started scrapbooking, I dabbled in jewelry making - mostly beaded pieces. As soon as I saw these fabulous items, I knew they would make up into a gorgeous necklace.

Now if you're thinking, jewelry making is not for me. (Gasp!) Not a problem - you can use the same process and products to create beautiful, one of a kind metal pieces for your papercrafted projects. These pieces are so beautiful, you may just take up jewelry making so that you can display them on a regular basis!

Vintage Rose Jay Pendant Tutorial


If you enjoyed this video, please subscribe to my channel HERE.
Thanks so much for subscribing!

Here's the gorgeous August Scraps of Elegance Kit:

Creativity Add On

Scraps of Elegance Links:

Close-ups:


Product List

Scraps Of Elegance - August Kit - Mallika's Whimsy

SOE Creativity Add On
Ranger ~ Vintaj - Patina, Quartz
Ranger ~ Vintaj - Matte Glaze - .5oz
Vintaj ~ Natural Brass - 20x14mm Embossed Keyhole
Vintaj ~ Natural Brass - 47mm Rose Jay
Vintaj - Metal Reliefing Block

SOD August Creativity Add On
Ranger ~ Vintaj - Patina Kit, Weathered Copper - Moss/Verdigris/Jade

Other Products
Vintaj - Filigree 15x21mm
Darice ~ Tri-Chip Shell Beads
Darice ~ Signed, Sealed, Remembered Altered Art Jewelry - Head Pins, Jump Rings
Solid Oak ~ Steampunk Chain, Antique Gold
Chain-Nosed Pliers
Round Nose Pliers


Thanks for stopping by! I treasure your comments.

~ Blessings ~