Showing posts with label Video Tutorial. Show all posts

Saturday, April 16, 2022

 
Welcome to my creative space!

I've used a special technique to add a glittery finish to the beautiful die cut sentiment from the Amazing Paper Grace Sweet Sayings Notecard Sentiments (S4-1148) die set from the Sweet Serenade Collection. This gorgeous sentiment adds a beautiful touch to this spring thank you card.

You can find a full video tutorial explaining this technique exclusively in the Amazing Paper Grace Creative - Creative Encouragement Community Facebook Group.

This lovely group includes exclusive tutorial content. I share a mixed media tutorial there on the 13th of each month. The tutorial for this project includes a video tutorial teaching you how to create this beautiful sparkling finish that coordinates perfectly with your project. If you're not a part of this fabulous and encouraging group you can join HERE.

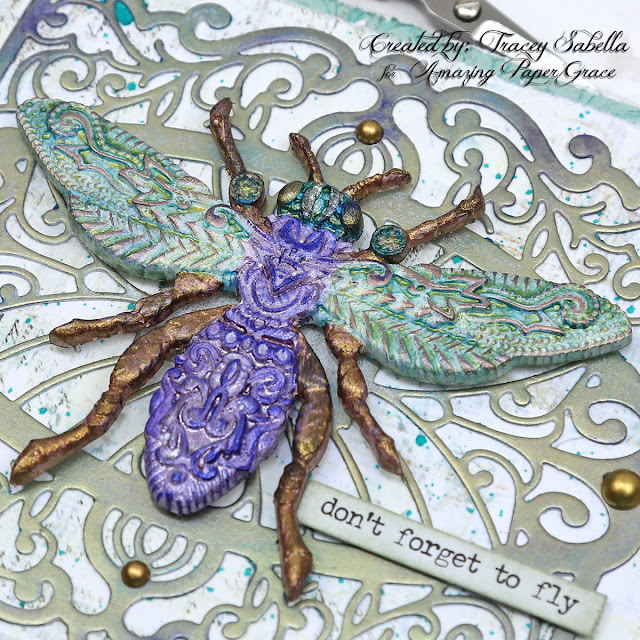
The lovely resin butterfly is molded with the Zuri Designs Beauty and the Beast silicone mold. I painted the butterfly with impasto paints and highlighted the texture with metallique waxes. 

Thank you Amazing Paper Grace for providing the dies used in this project.

Tips and Techniques
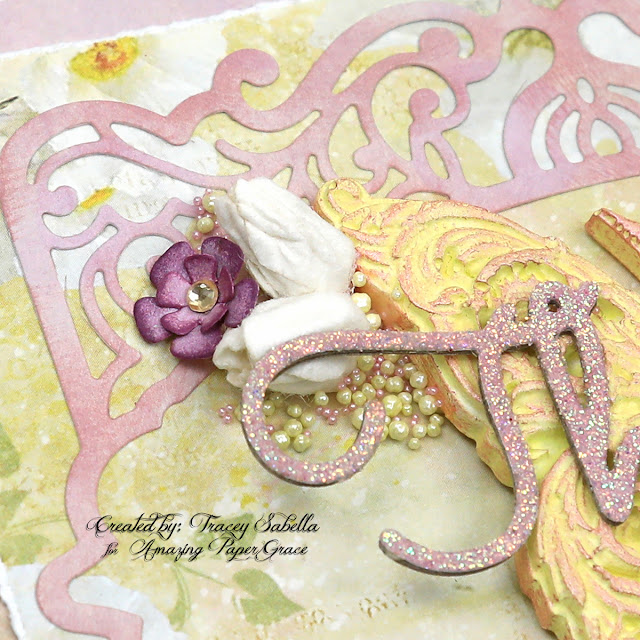
Here's a close-up of the beautiful glittery sentiment. If you would like to learn how I created this sparking finish, be sure to stop by the Amazing Paper Grace Creative - Creative Encouragement Community Facebook Group. for the video tutorial.

To coordinate this sweet butterfly with the papers, I mixed white with Lemon Peel impasto paints by Finnabair to color the butterfly and accented the texture with Sweet Rose metallique wax.

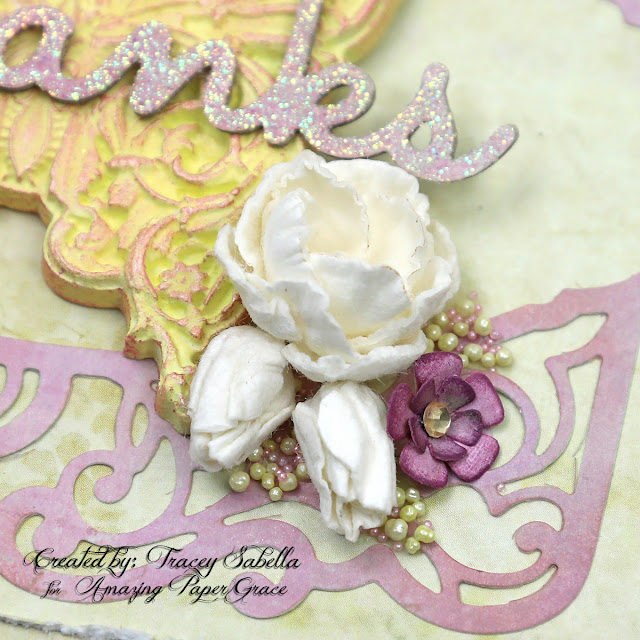
The beautiful white rose and buds are die cut from mulberry paper with the Candlewick Rosebud Dies set with the purple flower being cut with A2 Filigree Marquis set. I tucked in a few prills and microbeads to add texture.

More of the beautiful flowers. 

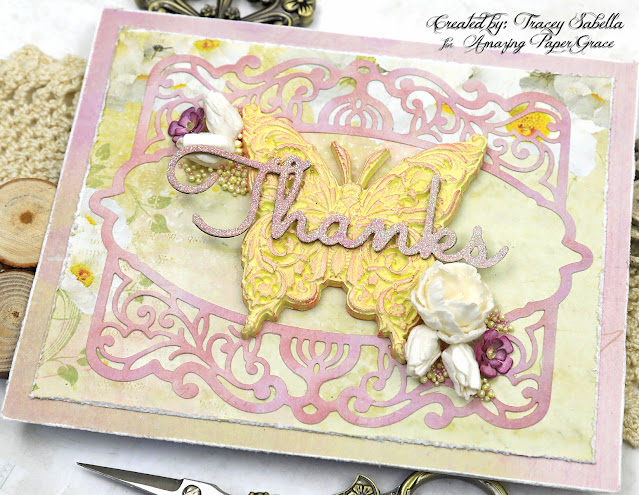
The background die cut is also cut with the A2 Filigree Marquis die set using the same paper found on the glittering sentiment. Don't you adore how the colors coordinate so beautifully?

Amazing Paper Grace Dies:

Paper:
  • Patterned Paper ~ Scraps from my stash
  • Cardstock ~ 120lb, White
  • Thin Chipboard

Ink:
  • Ranger ~ Distress Ink: Scattered Straw
  • Ranger ~ Distress Oxide Ink: Victorian Velvet

Mixed Media:
  • Ranger ~ Embossing Dabber
  • Ranger ~ Embossing Powder: Holographic
  • Finnabair with Prima ~ Soft Matte Gel
  • Finnabair with Prima ~ Metallique Wax: Sweet Rose
  • Finnabair with Prima ~ Impasto Paint: Snow White; Lemon Peel
  • Amazing Casting Resin ~ White
  • Zuri Designs ~ Wings of Beauty Silicone Mold (Butterfly)

Embellishments:
  • US Artquest ~ Prills: Lemon Chiffon
  • Martha Stewart Crafts ~ Microbeads - Kunzite
  • Rhinestones (Flower Centers)

Adhesives:
  • Beacon ~ 3-IN-1 Advanced Craft Glue
  • Helmar ~ 450 Quick Dry Adhesive
  • Double Sided Tape ~ 1/4" 
  • Tombo ~ Mono MULTI Liquid Glue

Tools:
  • Spellbinders ~ Platinum 6
  • Wagner ~ HT 400 Heat Gun

I am an affiliate with Zuri Designs and receive a small commission at no
cost to you if you purchase from them using a link from this post. 

You can find their online store HERE
and the Beauty and the Beast mold can be found HERE.

Thanks so much for your support!


Thanks for stopping by! I treasure your comments.

~ Blessings ~

Wednesday, March 16, 2022

"Don't Forget to Fly" Card with Tutorial Link for Altering Die Cuts with Metallic Waxes

Welcome to my creative space!

I just adore using mixed media products to create unique backgrounds and embellishments. This beautiful design behind the bee is die cut using a gorgeous Amazing Paper Grace die from the S4-1167 A2 Radiant Navette Dies from the Classically Becca Collection. I cut this shape using white card stock. For the flowing, organic metallic finished I've used metallic art waxes.

You can find a full video tutorial explaining this technique exclusively in the Amazing Paper Grace Creative - Creative Encouragement Community Facebook Group.

This lovely group includes exclusive tutorial content. I share a mixed media tutorial there on the 13th of each month (or the 16th this month). The tutorial for this project includes a detailed step by step photo tutorial teaching you how to create this one of a kind patterned paper for your projects. If you're not a part of this fabulous and encouraging group you can join HERE.

This lovely resin bee is molded with the Zuri Designs Beauty and the Beast silicone mold. I took artistic liberties with the bee using non-tradional purples for the abdomen and gave the wings a translucent effect with teals and golds. 

Thank you Amazing Paper Grace for providing the dies used in this project.

Tips and Techniques
Here you can see how this beautiful Amazing Paper Grace die cut shimmers with color from the waxes. Be sure to hop on over to the Amazing Paper Grace Creative - Creative Encouragement Community Facebook Group to watch the video tutorial. I've added a few matte gold pearls to accent.

This fabulous Zuri Designs bee was colored with a combination of Finnabair Sparks and Metallique paints, then accented with her waxes to highlight the gorgeous textures. You can find the colors I used in the product list below.

The background papers coordinate with the lovely teals from the bee wings and are spattered with green ink. The edges are lightly distressed as well.

Amazing Paper Grace Dies:

Paper:
  • Prima Marketing ~ Epiphany 6x6" Paper Pad
  • BoBunny ~ Gabrielle 6x6" Paper Pad
  • Cardstock ~ 120 lb, White

Mixed Media:
  • Zuri Designs ~ Beauty and the Beast Silicone Mold (Bee)
  • Finnabair with Prima Marketing ~ Metallique Wax: White Gold; Peacock; Electric Violet;Heather Hills
  • Finnabair with Prima Marketing ~ Metallique Acrylic Paint: Gold Rush; Emerald Green
  • Finnabair with Prima Marketing ~ Sparks Acrylic Paint: Chest of Gold; Raven Black; Iris Potion
  • Amazing Casting Resin ~ White
  • Liquitex ~ Gesso, White
  • Higgins Drawing Ink: Green

Embellishments:
  • Pink Fresh Studio ~ Metallic Pearls: Matte Gold

Adhesives:
  • Beacon ~ 3-IN-1 Advanced Craft Glue
  • Beacon ~ Fabri-Tac
  • Double Sided Tape ~ 1/4" 
  • Tombo ~ Mono MULTI Liquid Glue
Tools:
  • Spellbinders ~ Platinum 6
I am an affiliate with Zuri Designs and receive a small commission at no
cost to you if you purchase from them using a link from this post. 

You can find their online store HERE
and the Beauty and the Beast mold can be found HERE.

Thanks so much for your support!


Thanks for stopping by! I treasure your comments.

~ Blessings ~

Saturday, July 10, 2021

Masculine Airplane Card with Faux Metal Gears with VIDEO TUTORIAL for Little Birdie Crafts

 Welcome to my creative space!

My dad served in the Air Force, so when I saw this fabulous vintage airplane in Little Birdie Crafts Classic Gentleman collection, I knew I would be creating a card for him featuring this amazing paper. I combined this gorgeous airplane image with industrial embellishments. Some are metal and some are diecut from chipboard with the Cogs and Wheels die set that have been transformed with metallic paints into grungy metallic beauties with a patina finish.

The metal embellishments are from Tim Holtz and the Dad sentiment is embossed with Tim's Typewriter 3-D Texture Fade which are so perfect for the industrial vibe I wanted to achieve. Distress Ink is used to enhance add patina to the background paper.

Close-up photos and more details can be found on the Little Birdie Crafts Blog HERE.
Thanks for stopping over there if you have a chance to leave a comment.

Little Birdie Crafts is having a huge sale at their online store with their best prices
of the year along with FREE worldwide shipping on orders over $99.
Check out the sale HERE.

Use code TRACEY05 for a 5% discount.

I receive a small commission at not cost to you.

I hope you'll join me to view this video tutorial and explore how to add thin borders to image blocks and backgrounds, create a grungy typeset title, use metallic paints to transform diecut chipboard gears into faux metal beauties and to create a patina finish then add grungy texture to take this masculine card to the next level.

Enjoy!


Little Birdie Crafts Supplies

Other Supplies
Thin Kraft Chipboard
Tim Holtz with Idea-ology ~ Metallic Kraft Stock: Champagne
Tim Holtz with Idea-ology ~ Sprocket Gears
Tim Holtz with Idea-ology ~  Mini Gears; Adornments - Stars
Tim Holtz with Idea-ology ~  Compass Coins
Tim Holtz with Ranger ~ Distress Ink: Salvaged Patina
Tim Holtz with Ranger ~  Peacock Feathers
Tim Holtz with Ranger ~  Pumice Stone
Tim Holtz with Sizzix ~ 3-D Texture Fades - Typewriter
US Artquest ~ Prills - Gilt Trip
Microbeads ~ Bronze
Helmar 450 Quick Dry Adhesive
Tombo ~ Mono MULTI Liquid Glue
X-Press It ~ High Tack Double Sided Tape
Wonder Tape - Foam Tape


Thanks for stopping by! I treasure your comments.

~ Blessings ~

Monday, March 22, 2021

3-D Layered Butterfly Wall Hanging with VIDEO TUTORIAL for Little Birdie Crafts

 Welcome to my creative space!

I have created a spring-themed home decor piece to celebrate the warming days of this new season we're entering with this 3-D layered butterfly wall hanging featuring Little Birdie Flowers from the gorgeous Song of the Sea collection along with their beautiful decoupage paper, primed chipboard pieces, and fabulous mixed media products.

Here's a close-up shot so you can see just how much dimension there is on this beauty.


I have created a full DIY video tutorial for you with voice instructions to share all the details on how to create this beautiful spring piece including the sweet 3-D layered butterfly and faux metal gears. I hope you find inspiration and learn new techniques as you view it.

In this 3-D Layered Butterfly Wall Hanging tutorial learn how to:
~ Create a 3-D layered butterfly
~ Create gorgeous faux metal/patina gears from chipboard using gilding flakes and waxes
~ Enhance mixed media projects with natural elements
~ Alter flowers for a patina effect
~ Use layers to develop dimension

Enjoy!


Please hop on over to the Little Birdie Crafts blog to view more close-up photos HERE.

Little Birdie Crafts can be purchased at their online store.
Be sure to check out the current sales HERE.

Use code TRACEY05 for a 5% discount.

I receive a small commission at not cost to you.

Little Birdie Crafts Supplies
Craft Pellets - Mini

Other Supplies
Wood Bracket Shaped Base purchased at a local craft store - 6 1/2 by 6 1/2 inches
Tim Holtz with Sizzix ~ Scribbly Butterflies
Tim Holtz with Idea-ology ~ Small Talk
Momenta ~ Metal Stickers: Flourish; Mini Corners
Speedball ~ Mona Lisa - Gold Leaf
Nuvo ~ Gilding Flakes - Sunkissed Copper
Martha Stewart ~ Microbeads - Fire Opal
Nature: Feathers; Twigs; White Birch Bark
Wonder Tape ~ 1" Double Sided Foam Tape
Sizzix ~ Stylus (Sizzix Paper Sculpting Kit)


Thanks for stopping by! I treasure your comments.

~ Blessings ~

Wednesday, March 3, 2021

Under the Sea Clean and Simple Birthday Card including DIY Video Tutorial for Little Birdie Crafts

Welcome to my creative space!

It's our grandson's birthday this month. He has an ocean themed room with a giant whale on his wall which he simply adores, so I couldn't resist using this whale image from the Little Birdie Crafts Songs of the Sea collection to create a fun and adorable card for him. I hope you'll watch my video to see how I transformed this mixed media paper collection into this cute clean and simple card.

Please hop on over to the Little Birdie Crafts blog HERE
for more close-up photos and leave a comment there to let me know what you think! 

Little Birdie Crafts can be purchased at their online store.

Be sure to check out the great sales they are currently running HERE.

Use code TRACEY05 for a 5% discount.

I receive a small commission at not cost to you.

In this DIY Under the Sea clean & simple card tutorial learn how to:
~ Color fun chipboard sea creatures with watercolor paint
~ Create hand drawn and painted balloons to embellish
~ Use circle dies and Distress Ink and to create a background ring
~ Arrange elements for a clean & simple card
~ Alter cardstock colors to coordinate with your focal paper
~ Add sparkling rhinestones

Enjoy!


Little Birdie Crafts Supplies
Premium Card Stock A4 - Bright White

Other Supplies
Iridescent Rhinestones
M. Graham Watercolors
Tim Holtz with Ranger ~ Distress Ink: Peacock Feathers; Old Paper; Hickory Smoke; Chipped Sapphire; Dusty Concord
Tim Holtz with Ranger ~ Distress Oxide Ink: Mermaid Lagoon; Dusty Concord
Tsukineko ~ Versafine Ink Pad - Onyx Black
Black Permanent Marker
Tim Holtz with Ranger ~ Micro Glaze
Tim Holtz with Sizzix ~ Thinlits: Alphanumeric Label
Quick Kutz ~ Ktfestyle Crafts - Nesting Circles Dies
Stampendous ~ Clear Stamps: Birthday Wish
Helmar ~ 450 Quick Dry Adhesive
Ranger Ink ~ Matter Multi Medium
Scrapbook Adhesives by 3L ~ EZ Dots Repositionable
iCraft ~ Removable Purple Tape: 1.5"
Lined Double Sided Tape


Thanks for stopping by! I treasure your comments.

~ Blessings ~

Saturday, February 13, 2021

Romantic Shabby Chic Valentine's Day Card with DIY Video Tutorial for Little Birdie Crafts


Welcome to my creative space!

Valentine's Day is just a couple days away. I've created this romantic Shabby Chic Valentine's Day card to celebrate featuring the gorgeous Little Birdie Crafts True Love paper collection, Love and Roses flowers, and amazing Chipboard. I've created a DIY process video tutorial with voice to share all the details. You can view the video below or on my YouTube channel HERE.

Please hop on over to the Little Birdie Crafts blog to view more close-up photos HERE.

Little Birdie Crafts can be purchased at their online store.
Be sure to check out the Dollar Deals sale they are currently running HERE.

Use code TRACEY05 for a 5% discount.

I receive a small commission at not cost to you.

In this DIY Romantic Valentine's Day card tutorial learn how to:
~ Use clear gesso to protect your focal paper
~ Use second generation stamping
~ Stencil a design with texture paste
~ Add spatter to the background with Color Splash
~ Heat emboss chipboard with embossing powder
~ Alter metal embellishments with metallic wax
~ Learn my creative process for arranging embellishments
~ Add texture with mica flakes and metal microbeads
~ Add glitter to flowers

Enjoy!


Other Supplies
Momenta - Metal Stickers: Insects
KaiserCraft - Sparklets: Hearts
Red rhinestones in different sizes
Donna Salazar with Clearsnap - Twinkle Dust Glitter: Sugar Shimmer
Vintage lace snippets
Tsukineko - Versafine Ink Pad - Onyx Black
Ranger - Emboss It Dabber
Stampendous - Embossing Enamel: Shabby White
49 and Market - 1787 Stamp Set
Quick Kutz - Nesting Circles Dies
Tombo ~ Mono MULTI Liquid Glue
Helmar ~ 450 Quick Dry Adhesive
Scrapbook Adhesive by 3L - Crafty Power Tape
Tim Holtz with Tonic ~ 5" Mini Snips Scissors
Wagner ~ HT 400 Heat Gun


Thanks for stopping by!
I treasure your comments.

Friday, February 12, 2021

"Let it Snow" Mixed Media Winter Star with DIY Video Tutorial for Little Birdie Crafts

Welcome to my creative space!

We're in the midst of a frigid and beautifully snow covered winter vortex here in Ohio. Today I'm sharing a wintry mixed media star that fits the season perfectly with it's sparkling snowflakes. This shimmering star features gorgeous Little Birdie Crafts flowers and mixed media products. 

Here's a full DIY video tutorial with voice instructions to share all the details on how to create one of these gems. I hope you find inspiration and learn new techniques as you view it.

In this DIY Wintry Mixed Media Star tutorial learn how to:
~ Prepare a wood base with gesso
~ Dry brush with metallic paints
~ Stencil a design with crackle texture paste
~ Accentuate crakle with Color Splash
~ Add spatter texture with ink
~ Heat emboss chipboard and wooden snowflakes with glittered embossing powder
~ Hand stamp your sentiment
~ Learn my creative process for arranging embellishments
~ Add texture with mini craft pellets and metal microbeads
~ Add sparkling mica flakes

Enjoy!


Please hop on over to the Little Birdie Crafts blog to view more close-up photos HERE.

Little Birdie Crafts can be purchased at their online store.
Be sure to check out the current sales HERE.

Use code TRACEY05 for a 5% discount.

I receive a small commission at not cost to you.

Little Birdie Crafts Supplies
Premium Card Stock A4 - Bright White
Crackle Paste
Craft Pellets - Mini
Sissal Fiber - Natural

Other Supplies
Wooden Star Base
Tim Holtz with Idea-ology ~ Adornments - Snowflakes
Clear Rhinestones
Beaded White Stamen
Blue Fern Studios ~ Shabby Flakes Chipboard
KaiserCraft ~ Wooden Snowflakes
Hobby Lobby ~ Wooden Snowflakes
Stampendous ~ Spoonfuls of Snow Embossing Powder
Wow! Opaque Bright White Embossing Powder
Ranger ~ Holographic Embossing Powder
Ranger ~ Emboss It Dabber
Tsukineko ~ Versafine Ink Pad - Onyx Black
Higgins ~ White Drawing Ink
Tim Holtz with Sizzix ~ Mini Paper Snowflakes Die Set
Alphabet Stamps - Upper and Lower Case Sets
Helmar 450 Quick Dry Adhesive
Helmar ~ Premium Craft Glue
Tombow ~ MONO Multi Liquid Glue
Bristle Fan Brushes #1, #3, 20/0
Liquitex ~ Free-style Small Knife #5
EK Success ~ Tweezers
Liquitex ~ Free-Style Small Knife #5
Watercolor Rigger Brush #2


Thanks for stopping by!
I treasure your comments.

Monday, May 18, 2020

Steampunk Altered/Upcycled Book and VIDEO TUTORIAL with VOICE for Little Birdie Crafts

Welcome to my creative space!

Hi everyone! I'm back to share an upcycled project with you today. I altered an old book with steampunk and poppies – a perfect pairing. The gorgeous flowers and clock are fussy cut from the Poppies & Roses collection. 

Here's a close-up of the fabulous beetle molded from the Zuri Designs Loveable Bugs set and colored with amazing Little Birdie Metallic Waxes.

I adore living atop a hill in the beautiful countryside of Ohio, but it does have it's limitations when it comes to internet speed which dwindled to nearly nothing when the stay at home orders came down for COVID-19. As a result, I was unable to upload videos for a while. Our service is improving, so I can once again create videos for you! This is my second video with voice. I hope you like it.

In this video I also share techniques using more amazing Little Birdie supplies: Crackle Paste; Tinted Metallic Paints; Primed Chipboard; and Metallic Waxes.

Enjoy!


More close-up photos can be viewed on the Little Birdie Crafts Blog HERE.

Little Birdie Crafts can be purchased at the online store.

Use code TRACEY05 for a 5% discount.
I receive a small commission at not cost to you.

Little Birdie Crafts Supplies
Poppies & Roses Paper Pack 12x12"
Song of the Sea ~ Micro Roses
Song of the Sea ~ Charlie
Song of the Sea ~ Bonita
Primed Chipboard ~ Especially Cogs
Primed Chipboard ~ Cogs
Tinted Metallic Paint ~ Tawny Glint
Tinted Metallic Paint ~ Silver Charm
Tinted Metallic Paint ~ Caribbean Teal
Tinted Metallic Paint ~ Golden Glaze
Tinted Metallic Paint ~ Golden Plum
Tinted Metallic Paint ~ Blue Waltz
Metallic Wax ~ Glimmer Moss
Metallic Wax ~ Aqua Sheen
Metallic Wax ~ Copper Blaze
Metallic Wax ~ Rich Gold
Acrylic Gesso ~ Black
Acrylic Soft Gel Medium Matte
Crackle Paste
Mini Craft Pellets
Silicon Glue

Other Supplies
Zuri Designs ~ Silicone Mold - Lovable Bugs
Vintage Book to Upcycle
Tim Holtz with Idea-ology ~ Metallic 2 Kraft Stock Paper Stash, 8x8"
Tim Holtz with Idea-ology ~ Quote Chips
Tim Holtz with Sizzix ~ 3-D Texture Fades - Mechanics
Tim Holtz with Ranger - Pumice Stone
Amazing Casting Resin - White


Thanks for stopping by! I treasure your comments.

~ Blessings ~

Wednesday, March 25, 2020

Romantic Mixed Media Canvas and VIDEO TUTORIAL with VOICE for Little Birdie Crafts


Welcome to my creative space!

The Birds and Berries collection from Little Birdie Crafts is simply gorgeous and perfect for this spring time shabby mixed media canvas. 

I have created a video tutorial sharing the techniques used to bring this canvas together. I decided to go out of my comfort zone and added voice instructions to my video. I would be so grateful if you would leave a comment either on YouTube or here to let me know what you think! As always, your feedback is so appreciated!

In this DIY Mixed Media Canvas Tutorial Learn how to:
~ Adhere base paper to the canvas
~ Sand to distress edges
~ Add texture by stenciling with Grainy Texture Paste
~ Add color and texture to chipboard
~ Paint resin pieces
~ Use art wax to highlight texture
~ Dry brush with white gesso to highlight texture and soften colors
~ Add texture with Craft Pellets and Metal Microbeads
~ Add depth with Color Splash

Enjoy!


More close-up photos can be viewed on the Little Birdie Crafts Blog HERE.

Little Birdie Crafts can be purchased at the online store.

Use code TRACEY05 for a 5% discount.
I receive a small commission at not cost to you.
Thanks for your support!

Little Birdie Crafts Supplies: 
Zoey Fairy Sparkle 18 pc
Wendy Fairy Sparkle 9pc
Primed Chipboard - Fancy Panel
Primed Chipboard - Chipboard Bird & Birdcage
Primed Chipboard - Cogs
Primed Chipboard - Ornate Wings
Craft Pellets - Mini
Acrylic Soft Gel Medium 100ml
Crackle Paste
Color Splash - Grape Crush, 50ml
Color Splash - Mocha, 50ml
Color Splash - Lemon Zing, 50ml
Tinted Metallic Paint - Shimmery Sherbet
Tinted Metallic Paint - Glazed Berries
Tinted Metallic Paint - Golden Plum
Metallic Wax - Rich Gold
Fleur-de-lis Trellis Stencil - 4x7"

Other Supplies
4x12" Canvas
Tim Holtz with Idea-ology ~ Small Talk
Lavender Rhinestones ~ From my stash
Lace ~ From my stash
Hand Crocheted Flowers ~ Made by Me
Liquitex ~ Clear Gesso
Tim Holtz with Ranger ~ Distress Oxide Ink: Dusty Concord; Shaded Lilac; Victorian Velvet
Amazing Casting Resin - White
Zuri Designs ~ Dragonfly Mold


Thanks for stopping by! I treasure your comments.

~ Blessings~

Wednesday, February 26, 2020

Boho Dreams Birthday Wishes Mixed Media Card with VIDEO TUTORIAL for Little Birdie Crafts


Welcome to my creative space!

Today I'm sharing a card created with the gorgeous and vibrant Boho Dreams collection. Please check out my video where I share the techniques and process of creating this sweet card.

Enjoy!


More close-up photos can be viewed on the Little Birdie Crafts Blog HERE.

Little Birdie Crafts can be purchased at the online store.

Use code TRACEY05 for a 5% discount.
I receive a small commission at not cost to you.
Thanks for your support!

Little Birdie Crafts Supplies
Paper Pack Boho Dreams- 12in x 12in, 12 Sheet, 12 Designs, 250gsm
Paper Pack Boho Dreams- 6in x 6in, 24 sheet, 12 Designs, 250gsm
Wishes Words Embellishments 14Pc
Card Stock A4- Bright White
Marika Boho Vibes 2pc
Wendy Boho Vibes 9pc
Julita Boho Vibes 8pc
Elira Boho Vibes 40pc
Primed Chipboard- Especially Cogs, 1pc
Floral Flourish Primed Chipboard
Butterfly Inspire Stencil 4x7"
Metal Microbeads 30gm - Gala Pink
Metal Microbeads 30gm - Summer Gold
Acrylic Gesso- White, 100ml
Grainy Texture Paste -200gm
Acrylic Soft Gel Medium Matte 100ml
Tinted Metallic Paint- Tawny Glint, 50ml
Tinted Metallic Paint- Golden Glaze, 50ml
Metallic Wax- Antique Gold, 20ml
Metallic Wax- Copper Blaze, 20ml
Silicon Glue 100ml

Other Products
6x6" White Card Base from my stash
Beadcraft ~ Jewellry Essentials - Pearls
Explorer Traditions ~ Jewelry Pack - Steampunk Metal Ring
Yellow Rhinestones from my stash
Bead Landing ~ Cording
Filigree piece from my stash
Tim Holtz with Ranger ~ Distress Oxide Ink - Wild Honey; Candied Apple
Tim Holtz with Ranger ~ Alcohol Pearl: Splendor; Enchanted
Ranger ~ Perfect Medium Bullet Pen
Liquitex ~ Clear Gesso
Stampendous ~ Embossing Enamel - Aged Scarlet; Aged Hunter
Tim Holtz with Sizzix ~ Crochet Thinlets
Double-Sided Tacky Tape - 10mm


Thanks for stopping by! I treasure your comments.

~ Blessings ~