Showing posts with label Valentine. Show all posts

Monday, December 5, 2022

Amazing Paper Grace December Die of the Month: Sweetheart Envelope & Notecard Set - Steampunk Valentine's Day Card and Gift Card Holder

 
Welcome to my creative space.

I try to keep to a more masculine style when creating Valentine's cards for my husband so decided to go steampunk with this fabulous Amazing Paper Grace December Die of the Month Set: Sweetheart Envelope & Notecard Set. This set also included some amazing flowers which I did not use, but would be fabulous on a more elegant and feminine creation.

The intricate details in this gorgeous die set have a definite steampunk vibe with the fabulous scrollwork design, so I enhanced this genre by adding rusty gears, star, and metal key, along with masculine twine. The papers I selected have subtle patterns, so I added some stamping to add more visual texture. Inking is added to help the heart designs and edges pop.

Please scroll down through the Tips and Techniques section to find close-ups and all the details on how to create this steampunk Valentine card and gift card holder.

Many thanks to Amazing Paper Grace for providing the dies used in this project!


Steampunk Valentine Card

Steampunk Valentine Gift Card Holder

Tips and Techniques
I selected patterned papers in neutral colors with a touch of peach to give a Valentine feel without being too feminine, since this card is for my husband. 

***Designer Tip*** When selecting patterned papers for this die set, keep in mind that both sides will be showing and need to make sense for the design. The peach color is the back of the more neutral cream paper used to die cut the envelope feature.

To enhance the masculine steampunk feel of this card, stamping is added with a grungy script and dotted squares. 

The heart is cut from the same paper that is behind it, so it is rubbed with Distress Inks in Tea Dye and Vintage Photo to give it some contrast. 

The envelope feature is popped up with foam tape for added dimension and to leave room to tuck gears underneath as well as the twine wrap.

This sentiment is stamped with Vintage Photo Archival Ink on the same paper as the envelope piece and edged with Vintage photo Distress Ink.

Rusty steampunk gears are tucked under the envelope flap. 

As you can see in the top right corner, the inside background layer is distressed and both background layers are rubbed at the edges with Vingtage Photo Distress Ink.

Here's a side view of the heart so you can see how dimension is built. The heart is adhered to the envelope, then the envelope is wrapped with twine over the heart. The rusty star is added and a small copper gear is centered onto the star. These wonderful layers give beautiful dimension to the card.

One final photo. You can see there's even a rusty faucet handle added to the card insert. This insert is a great place to add a special private note!

Now let's take a look at the gift card holder. It's created with the larger envelope die that's left open on the card. I just folded the flap over to create this envelope gift card holder. 

This particular paper was a little thicker and cracked just a little on the fold lines. I went with that and lightly distressed the folded edges, then inked with Vintage Photo Distress Ink. Just make sure you don't distress the edges too much or you might go all the way through the paper. 
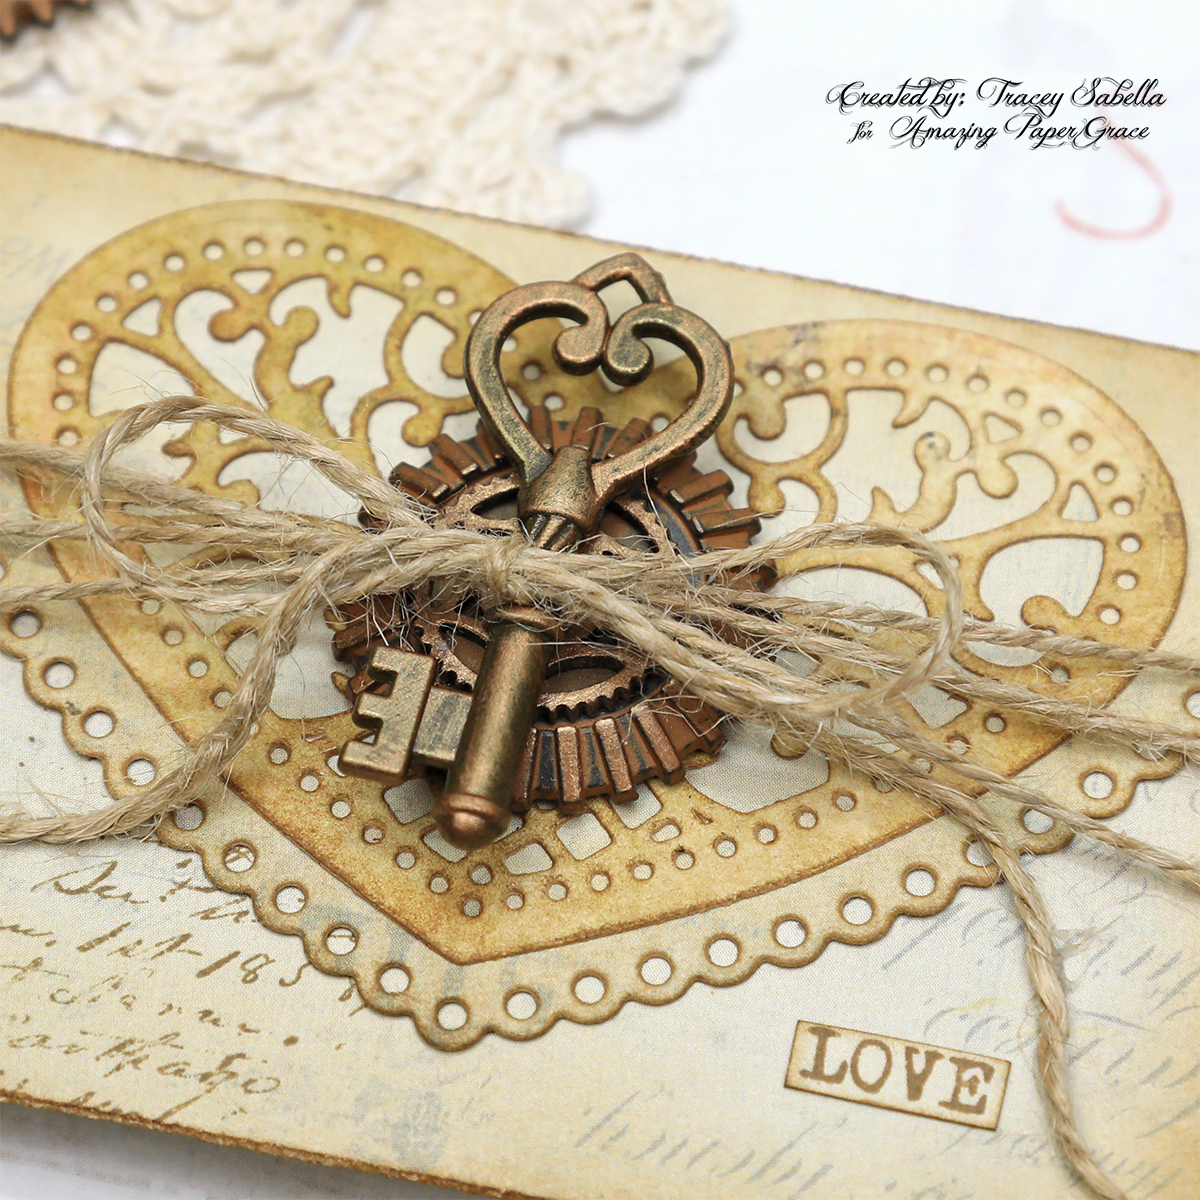
This beautiful heart is rubbed with more of the Vintage photo ink to highlight the gorgeous intricate design. The card is wrapped and tied with twine for a closure. 

Here's a side view to see the dimension. The heart die cut is centered onto the envelope flap, then a rusty gear is added. This gear has a large flat center, so I found a chipboard gear that fit perfectly. The chipboard is painted with a mix of Brass Hardware and Hazelnut Metallique paints to coordinate. A brass key is added to the top of the gears. It is dry brushed with the same paint mixture used for the chipboard gear to add highlights. Then the entire card is wrapped with twine to act as a closure. 

One final view. The sentiment is also stamped and edged in Vintage Photo Ink. 

Below you can find the products I used to create this project including some with compensated affiliate links to Scrapbook.com and Spellbinders. These links are at absolutely no cost to you. When you shop through the links below, I receive a small commission from the companies.  These commissions help me cover the costs of my blog and other expenses, which allows me to continue to provide you with FREE inspiration along with detailed Tips and Techniques provided for every project. Thank you so much for your love and support!

Amazing Paper Grace Sets:

Paper:

Ink: 

Mixed Media:

Stamps:

Embellishments:
  • Prima - Finnabair Collection - Mechanicals - Steampunk Gears
  • Prima - Finnabair Collection - Mechanicals - Rustic Knobs
  • Prima - Finnabair Collection - Mechanicals - Barn Stars
  • Prima - Tiny Junkyard Findings - Vintage Trinkets
  • Creative Embellishments - Gears - Steampunk - Industrial
  • Hobby Lobby - Sunny Side Up - Bakery Twine (thin)
  • Michaels - Metal Embellishments - A Place in Time - Keys

Adhesives:

Tools:

The Amazing Paper Grace Die of the Month is available exclusively at Spellbinders Paper Arts during December 2022, Sweetheart Envelope and Notecard Set along with other membership perks.

View this month’s Amazing Paper Grace Die of the Month: 

Thanks so much for stopping by to view this steampunk Valentine ensemble.
I hope you've been inspired!

Friday, February 4, 2022

Amazing Paper Grace February Die of the Month - Marvelous Medallion

Welcome to my creative space!

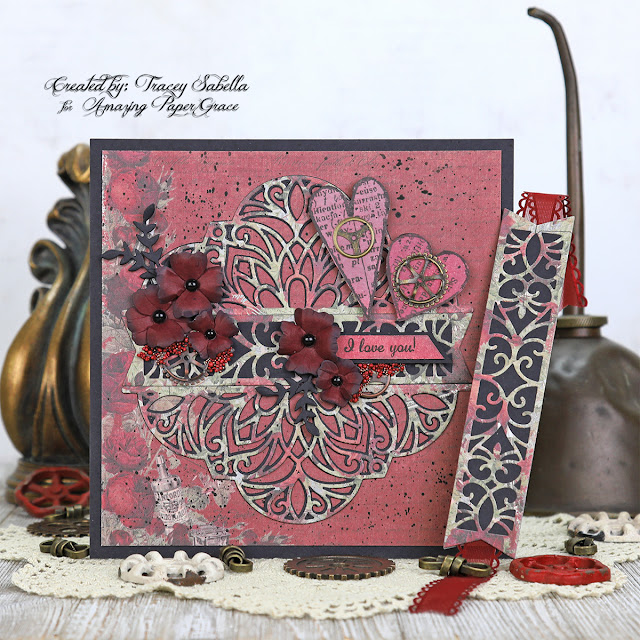
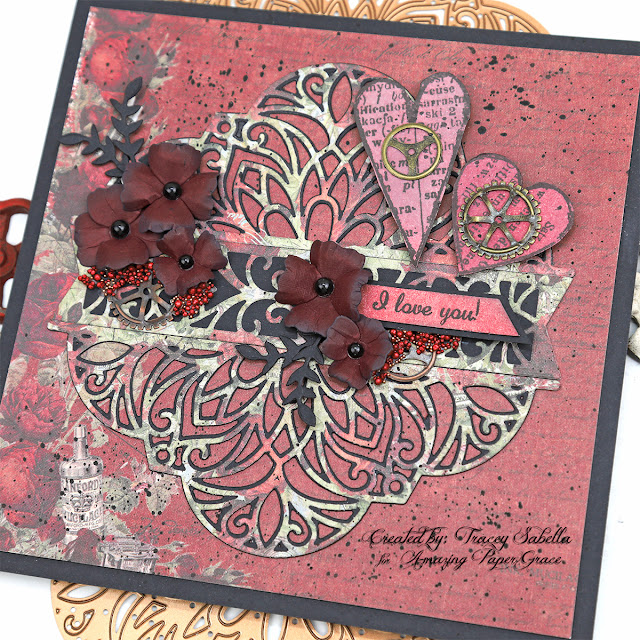
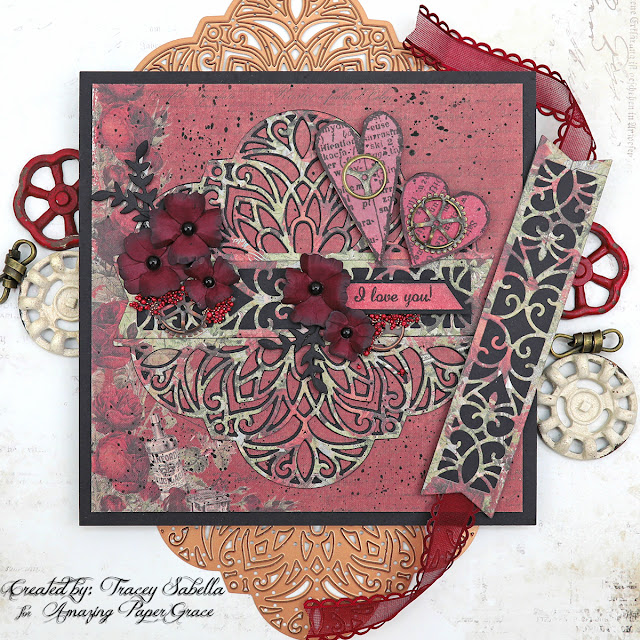
Love is in the air with this dramatic Valentine featuring the fabulous Amazing Paper Grace February Die of the Month: Marvelous Medallion. Valentine's Day is just around the corner so I couldn't resist pulling out beautiful reds and florals to create a Valentine with touches of steampunk by adding grungy hearts and gears with splashes of black to give this delicate die set a bit of a masculine feel. I've paired it with a sweet bookmark. I realize many people now read ebooks; however, bound books are precious in our home, and I don't want to chance any ink transferring to the pages, so there's no ink or texture on this double-sided bookmark.

Many thanks to Amazing Paper Grace for providing the dies used in this project!


Steampunk Valentine Card

Bookmark

Tips and Techniques
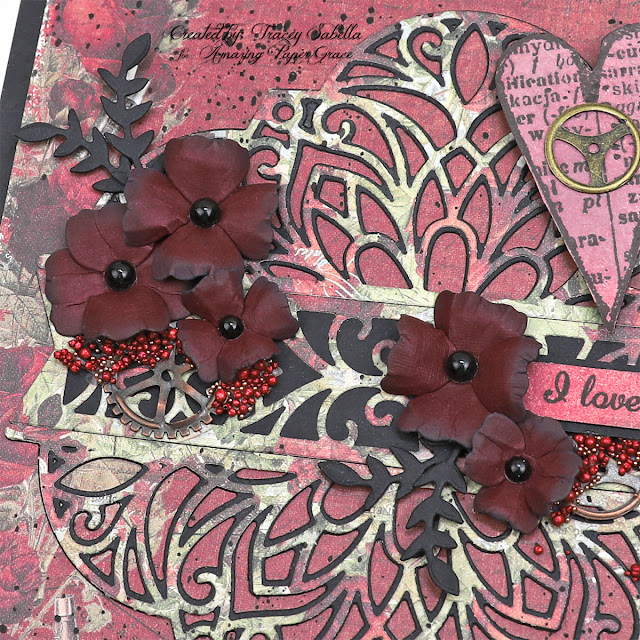
I just adore the sweet flower and foliage dies that Becca includes in her Amazing Paper Grace Die of the Month sets. I kept these simple since I was going for a more grungy effect. The blossoms are die cut from coordinating red cardstock, inked, then shaped. There are two sets of petals for each blossom that are adhered together with a black pearl in the center. The foliage is cut from black cardstock.

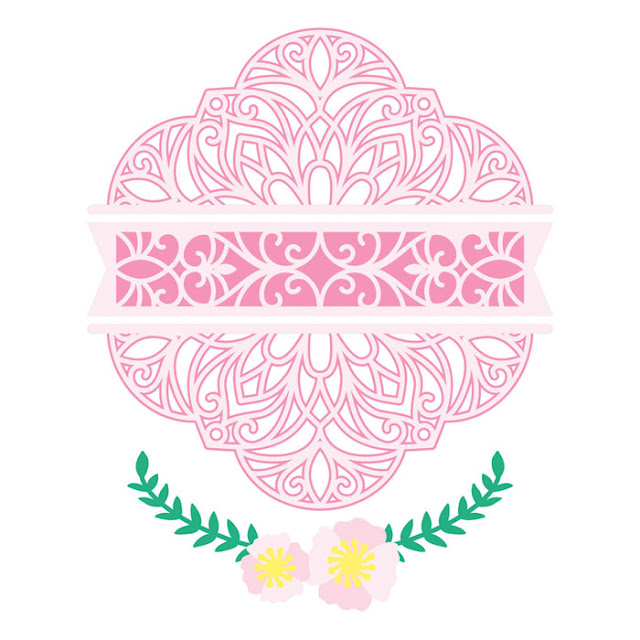
There are three dies to cut this gorgeous background so it is easy to layer with the shadow piece. The center piece is cut with two dies. I chose to include a black background layer to this center to provide contrast. There are so many creative ways to combine these beautiful die cuts. I abutted the three pieces together to create one continuous background piece.

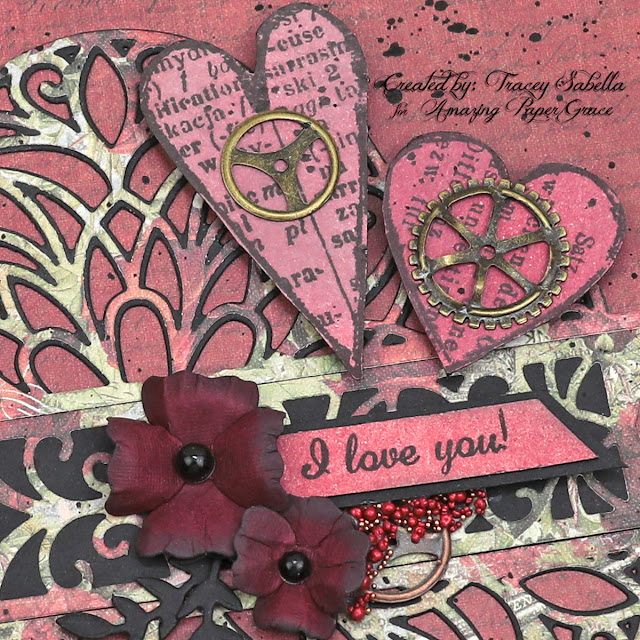
I stamped two grungy text-filled hearts and fussy cut them to embellish my Valentine. If you don't have this type of stamp, you could draw a grungy heart outline and fill it with a text stamp, then fussy cut to get a similar embellishment. I layered gears onto the hearts as well as tucking in a few around the flowers. Around the clusters. Prills and microbeads are also addedfor grungy texture. I brushed soft gel medium around the flowers then sprinkled on the wine color Prills followed by a few copper microbeads.

I wasn't sure the stamped images would show up against the red focal paper since it already had black script across it, so I inked some white cardstock to coordinate, then stamped the hearts and sentiment on the inked paper.

I spattered on some black ink to enhance the grungy feel. I covered the sentiment with a small piece of scrap cardstock, then let the spatter fall over the rest of the card, especially in the red area outside of the die cut. I dip a long bristle liner brush into the ink, then tap it over the card to get the spatters.

I used patterned paper from a 6x6" pad, so cut 3/8" off of the top and right the side (with less patterning) and layered onto a 6x6" piece of black cardstock to frame the card.

To create the bookmark, I die cut two solid black pieces and two of the patterned intricate pieces. I applied glue to the backs of the solid pieces, then laid the ribbon down the center before sandwiching the two pieces together. Once set, I adhered a scrolled die cut to each side. 

Supplies:
Accessories:

Paper:
  • Prima Marketing ~ Stationer's Desk - 6x6" Paper Pad
  • Cardstock; Black, Dark Red; White

Stamps:
  • Finabair with Prima Marketing ~ Cling Stamps; Trust the Magic; Now Is the Right Time
  • Close to My Heart ~ Just to Say... 

Ink:
  • Versafine ~ Onyx Black Ink
  • Ranger ~ Distress Ink: Aged Mahogany; Fired Brick; Hickory Smoke
  • Ranger ~ Distress Oxide Ink: Black Soot

Embellishments:
  • The Paper Studio ~ Spare Parts - Gears
  • Queen & Co. ~ Pearls - Nightfall
  • Ribbon, Red

Mixed Media:
  • US ArtQuest ~ Mini Prills - Stop Wining
  • Finnabair with Prima Marketing ~ Microbeads - Copper
  • Finnabair with Prima Marketing ~ Soft Matte Gel
  • Higgins ~ Drawing Ink - Black

Adhesives:
  • Scrapbook Adhesives by 3L ~ Crafty Foam Tape, White
  • Double Sided Tape ~ 1/4" 
  • Scotch ~ Quick Dry Adhesive
  • Beacon ~ 3-IN-1 Advanced Craft Glue
  • Beacon ~ Fabri-Tac

Tools:
  • Spellbinders ~ Platinum 6
For more Marvelous Medallion Inspiration from the Creative Team:

Visit each blog linked below for their take on creative paper crafting ideas with Marvelous Medallion, the Amazing Paper Grace February 2022 Die of the Month!

Visit Kate Skonieczna
Visit Joanna Wisniewska
Visit Patricia Manhire
Visit Agnieszka Posluszny
Visit Elena Olinevich
Visit Anita Kejriwal
Visit Katarzyna Bobrowska
Visit Tracey Sabella <<That's me>>
Visit Robin Clendenning
Visit Rajni Chawla

The Amazing Paper Grace Die of the Month is available exclusively at Spellbinders Paper Arts during February 2022, Marvelous Medallion along with other membership perks.

For more information be sure to view this month’s
Amazing Paper Grace Die of the Month video:

I would adore hearing from you! Please leave a comment below letting me know how you will use these gorgeous dies!


Thanks for stopping by! I treasure your comments.

~ Blessings ~

Monday, January 31, 2022

Interactive Garden Shutters Valentine Card for Amazing Paper Grace

Welcome to my creative space!

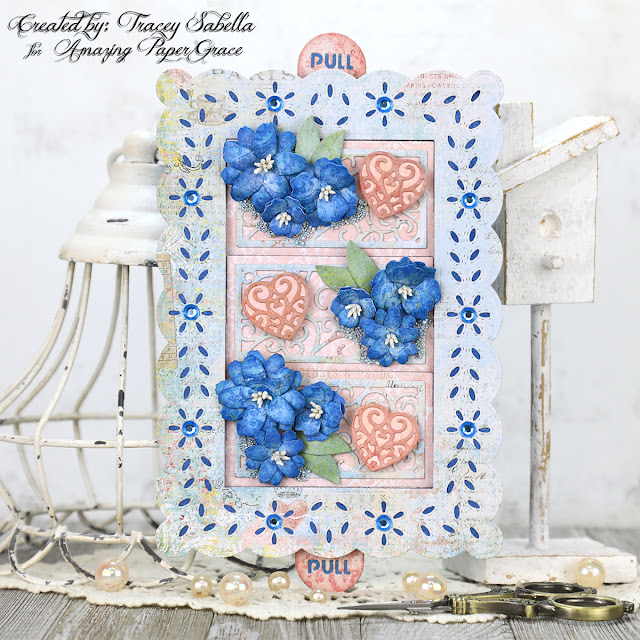
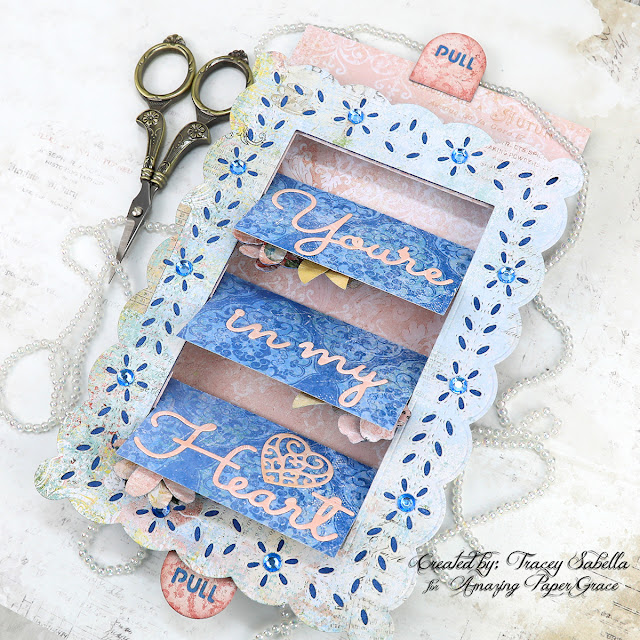
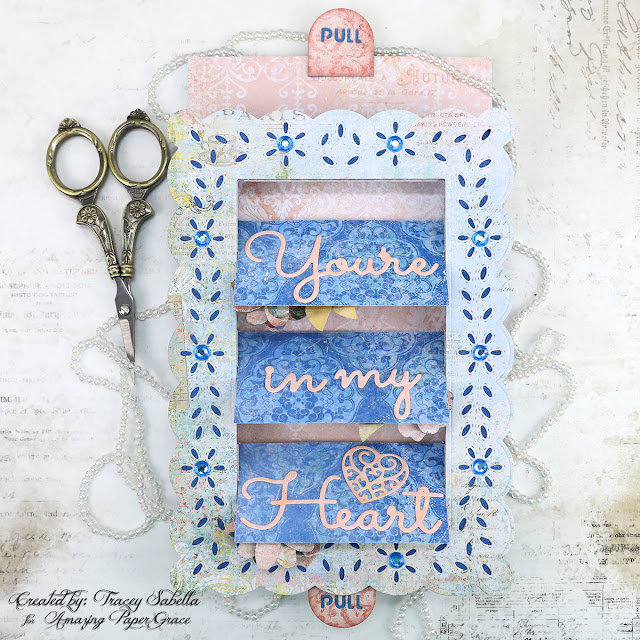
Valentine's Day is just around the corner so I paired these beautiful pinks and blues to create a lovely and romantic card. Here's a look at the sweet sentiment when it's flipped open:

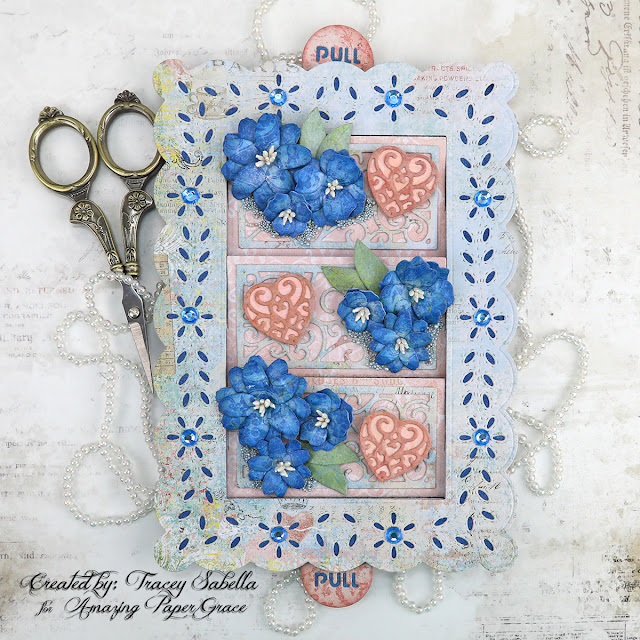
I've really enjoyed creating these interactive cards featuring the Amazing Paper Grace Garden Shutters Collection. This sweet valentine features the Eyelet Frame set (S6-184) which pairs perfectly with the Butterfly Bliss Garden Shutters 5x7 Card Base (S6-183). I've also used the heart element, pull tab and sentiment from the Primrose Heart Façade Garden Shutters set (S5-484). The flowers are cut from the Cinch and Go Blossoms die set (S4-1163) from the newly released Classically Becca Collection.

Thank you Amazing Paper Grace for providing the dies used in this project.

Tips and Techniques
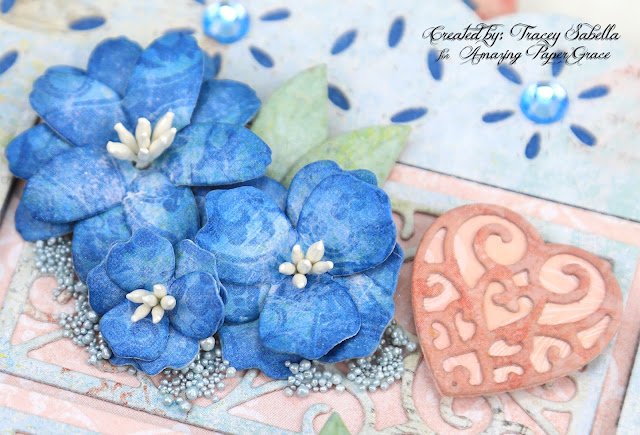
Each of the flip panels is filled with handcrafted flowers and a sweet scrolled heart atop a diecut inset piece. Prills are adhered around the flowers to add texture. The flowers and embellishments can spill over the top half of the flip panel, but be careful to keep all the embellishments within the panel on the bottom half for the interaction to work properly. 

The flowers are die cut and inked in a coordinating color, then shaped before adhering the petals together. Each blossom has three of the same sized petal pieces. There is a hole in the center of each petal section to insert stamen to finish the blossoms.

The primrose Heart Façade set includes this beautiful sentiment and gorgeous heart. I didn't have quite enough of the pink patterned paper to cut the sentiment, so inked and stamped a similar color of pink cardstock for the sentiment. This is a great way to extend your patterned paper. 

.
If you've been following my interactive cards, you'll remember that the top piece is a 5x7 layer with straight sides. The Eyelet Frame die stet includes this gorgeous panel with scallped edges and a beautiful eyelet lace design die cut into it along with a rectangle to die cut the center to perfectly fit the flip panels. I inked a piece of white cardstock with Faded Jeans Distress Ink to tuck behind the eyelet design to help it pop. A blue rhinestone is added to each flower eyelet for a bit of sparkle and texture.

Here's one final view of the card opened up to reveal the romantic Valentine sentiment. Keep in mind when selecting patterned paper, that the back of the paper in the center layer will be revealed as the card flips open. So be sure to cut this layer from a section of paper that has a more plain back rather than a detailed printed design.

The bottom pull tab is attached to the back of the top layer while the top pull tab is attached to the front of the bottom layer.

Amazing Paper Grace Dies

Paper:
Blue Fern Studios ~ Heartland Collection
Cardstock ~ White
Darice ~ Cardstock - Pastel Pink

Ink:
Distress Ink: Victorian Velvet; Tattered Rose; Faded Jeans; Antique Linen; Bundled Sage
Clorox Mix'd Media Inx: Jasmine

Stamps:
Tim Holtz with Stampers Anonymous ~ Baroque Stamp

Embellishments:
Prills ~ Ice Queen
Stamen ~ White
Rhinestones ~ Blue

Mixed Media:
Finnabair with Prima ~ Soft Matte Gel

Adhesives:
iCraft ~ Easy Tear Tape 1/8"
Tombo ~ Mono MULTI Liquid Glue
Scrapbook Adhesives by 3L ~ 3D Foam Squares
Foam Tape ~ 1/4"
Beacon ~ 3-IN-1 Advanced Craft Glue
Beacon ~ Fabri-Tac


Thanks for stopping by! I treasure your comments.

~ Blessings ~

Saturday, February 13, 2021

Romantic Shabby Chic Valentine's Day Card with DIY Video Tutorial for Little Birdie Crafts


Welcome to my creative space!

Valentine's Day is just a couple days away. I've created this romantic Shabby Chic Valentine's Day card to celebrate featuring the gorgeous Little Birdie Crafts True Love paper collection, Love and Roses flowers, and amazing Chipboard. I've created a DIY process video tutorial with voice to share all the details. You can view the video below or on my YouTube channel HERE.

Please hop on over to the Little Birdie Crafts blog to view more close-up photos HERE.

Little Birdie Crafts can be purchased at their online store.
Be sure to check out the Dollar Deals sale they are currently running HERE.

Use code TRACEY05 for a 5% discount.

I receive a small commission at not cost to you.

In this DIY Romantic Valentine's Day card tutorial learn how to:
~ Use clear gesso to protect your focal paper
~ Use second generation stamping
~ Stencil a design with texture paste
~ Add spatter to the background with Color Splash
~ Heat emboss chipboard with embossing powder
~ Alter metal embellishments with metallic wax
~ Learn my creative process for arranging embellishments
~ Add texture with mica flakes and metal microbeads
~ Add glitter to flowers

Enjoy!


Other Supplies
Momenta - Metal Stickers: Insects
KaiserCraft - Sparklets: Hearts
Red rhinestones in different sizes
Donna Salazar with Clearsnap - Twinkle Dust Glitter: Sugar Shimmer
Vintage lace snippets
Tsukineko - Versafine Ink Pad - Onyx Black
Ranger - Emboss It Dabber
Stampendous - Embossing Enamel: Shabby White
49 and Market - 1787 Stamp Set
Quick Kutz - Nesting Circles Dies
Tombo ~ Mono MULTI Liquid Glue
Helmar ~ 450 Quick Dry Adhesive
Scrapbook Adhesive by 3L - Crafty Power Tape
Tim Holtz with Tonic ~ 5" Mini Snips Scissors
Wagner ~ HT 400 Heat Gun


Thanks for stopping by!
I treasure your comments.

Friday, February 14, 2020

Masculine Grungy "Love" Valentine Card

Welcome to my creative space.

Happy Valentine's Day my dear friends!!

Today I'm sharing this grungy, masculine card I created for my dear husband.
Scroll down to see how I put it all together.

Tips and Techniques
I cut this Geo Heart Frame from metallic cardstock using the new Tim Holtz Geo Frames die set. The love sentiment is cut from black cardstock using his Script die set. I lightly brushed the sentiment with finnabair waxes to give a rusty effect. 

Tim's Sprocket Gears, Story Stick and Hardware Head. All of the metal pieces are rubbed with Finnabair waxes to give a rusty effect.

Here's a cluster of Tim's Mini Gears.

I diecut one of Tim's Geo Insect's and lightly brushed them with Finnabair's waxes. I trimmed them apart and tucked them in to give the heart a set of wings.


Don't you just adore the Abandoned paper pack? I'm so happy it is now a part of Tim's regular line with Idea-ology! This piece had just the perfect colors to create a rusty, grungy Valentine. I stamped the background with this clock from Tim's Inventor 1 rubber stamp set. My husband is an engineer and was immediately drawn to this image when he saw the card. After stamping the card, I added the black border and then stitched around the edges on my sewing machine with black thread. Then the other elements were adhered.


Supplies
Tim Holtz with Idea-ology ~ Abandoned 8x8 Paper Stash
Tim Holtz with Idea-ology ~ Metallic Jewels Kraft Stock 8x8 Paper Stash
Tim Holtz with Idea-ology ~ Classic Kraft Stock 8x8 Paper Stash
Tim Holtz with Idea-ology ~ Hardware Heads
Tim Holtz with Idea-ology ~ Sprocket Gears
Tim Holtz with Idea-ology ~ Mini Gears
Tim Holtz with Idea-ology ~ Story Sticks
Tim Holtz with Sizzix ~ Geo Frames Thinlets Die Set 
Tim Holtz with Sizzix ~ Geo Insects Thinlets Die Set 
Tim Holtz with Sizzix ~ Celebration Words - Script Thinlets Die Set 
Tim Holtz with Stampers Anonymous ~ Cling Rubber Stamps - Inventor 1
Ranger ~ Archival Ink Pad - Jet Black
Prima ~ Finnabair: Art Alchemy: Metallique Wax - Charcoal Black
Prima ~ Finnabair: Art Alchemy: Matte Brilliance Wax - Red Amber; Fire Ruby
Helmar ~ 450 Quick Dry Adhesive
Scrapbook Adhesives by 3L ~ Crafty Power Tape
Scrapbook Adhesives by 3L ~ Crafty Foam Tape
Tombo ~ Mono MULTI Liquid Glue
Tim Holtz with Tonic ~ Travel Stamp Platform
Sizzix ~ Big Shot
Sizzix ~ Chrome Precision Base Plate
Sewing Machine
Black Thread
Black Cardstock

Thanks for stopping by! I treasure your comments.

~ Blessings ~

Saturday, January 27, 2018

"You + Me" Grungy Mixed Media Valentine for ScrapBerry's

Welcome to my creative space!

I have a new ScrapBerry's project to share with you. Valentine's Day is just around the corner. I don't know about you, but my husband isn't into girly pink hearts, so I really enjoy coming up with ideas on how to show my love with a more grungy look. Here's my Valentine card for him featuring ScrapBerry's fabulously masculine Adventure Awaits and Words Live Forever Collections. I've also used ScrapBerry's gorgeous Silver Wings and a polymer heart from the Vintage Circus Collection.

Close-Ups
The background is a sheet from the 6x6" Adventure Awaits collection. The Memos page from the Words Live Forever collections has wonderful vintage paper pieces along with the  clock that I cut out and layered in the center of the card. The edges are inked to give a grungy vintage feel. The Vintage Circus Polymer Heart was brushed with black gesso, then texture added with Prima Mini Art Stones in soft matte gel.

The ScrapBerry's Metal Wings are a focal point centered with a corrugated heart in theme with Valentine's Day. I have quite a collection of gears and masculine embellishments. I have a pulled an assortment of gears, and assorted pieces to arrange around the heart and sentiment. Before adhering, I painted everything with black gesso. Once the elements were in place, I brushed with Prima Rust and Patina Effect Paste, then rubbed with several colors of Prima art wax to bring out the amazing textures. Around the edges I've added texture with Prima Art Stones, mica flakes, and Prima microbeads.

I simply adore the woodgrain and gear images on the background paper.

It makes my day when I find an old rusty washer laying on the ground. My dear friend Valerie mentioned my obsession with rusty washers to her husband, and he now collects them for me as well. This washer is one of those sweet finds.

ScrapBerry’s Supply List
Adventure Awaits ~ Paper Set 6x6” (SCB220610509x)
Words Live Forever Collection ~ Memos (SCB220609307)
Vintage Circus ~ Performance Polymer Items (SCB26002010)
Metal Embellishments ~ Set of Wings, Silver (SCB341101)

Other Products
Corrugated Cardboard from cardboard box
Prima ~ Junkyard Findings - Vintage Trinkets: Clock Parts
Prima ~ Finnabair Mechanicals - Stars
Bead Landing ~ Gears
Prima ~ Art ExtraVagance - Art Stones - regular and mini
Miscellaneous Chipboard Pieces
Leaky Shed Studio ~ Chipboard - Watch Parts
Spare Parts ~ Mini Light Bulbs
Other Miscellaneous Rusty Washer, Gears and Trinkets ~ Stash
Prima ~ Finnabair - Art Basics: Gesso Clear; Heavy Gesso Black
Prima ~ Finnabair - Art Basics: Soft Matte Gel
Ranger ~ Tim Holtz - Distress Ink: Ground Espresso; Vintage Photo; Gathered Twigs
Ranger ~ Perfect Medium
Prima ~ Art ExtraVagance - Rust Effect Paste; Patina Effect Paste
Prima ~ Art ExtraVagance -  Microbeads - Copper
Stampendous ~ Fran-tage - Bronzed Mica
Prima ~ Art Alchemy Wax - Metallique: Brushed Iron; Aged Brass; Vintage Gold
Prima ~ Art Alchemy Wax - Antique Brilliance: Mystic Turquoise
Sizzix ~ Heart Dies
Helmar ~ Premioum Craft Glue
ScrapBook Adhesives by 3L ~ 3D Foam Squares - Small, Black

~ Blessings ~
Tracey

Friday, February 14, 2014

Valentine's projects for Leaky Shed Studio and Helmar

Happy Valentine's Day!!

I have special Valentine's projects up today on two of my Design Team Blogs. 

First, I've created a love themed wedding layout for Leaky Shed Studio including a tutorial for a "Stained Glass Window" that goes so perfectly with my photo.

Here's a little sneak peek:

I hope you'll drop by the Leaky Shed Studio blog to check out my layout and tutorial. Thanks so much for leaving some love over there if you do!! 

~~~~~~~~~~~~~~~~~~~~

Next up, I used a lot of Helmar products on the Family Love Mini Album I created for Gary for Valentine's Day. It is being featured on the Helmar blog today. Lot's of grungy guy details in this one. 

Here's a peek of the cover:

I hope you'll have the chance to hop on over to the Helmar Blog to check out how I've used Helmar's fabulous products in creating my mini album. 

Have you ever layered mist onto other mediums only to find out it stays tacky and smears even after plenty of drying time? I've found a solution in one of Helmar's fab products. 

Thanks for stopping by today!
I hope you find inspiration in my Valentine projects. 

~ Blessings ~