Showing posts with label APG Tutorial Link. Show all posts

Wednesday, July 13, 2022

Masculine Industrial Card for Amazing Paper Grace with Tutorial Link for Using Crackle Paste on Die Cuts

 
Welcome to my creative space!

I just adore creating industrial masculine cards with grungy textures and feature the Amazing Paper Grace Happy Occasions Die set (S4-1206) from The Right Words collection to cut this fabulous tag showcasing a cracked leather effect using crackle paste and Distress Stain Sprays. I've added a bit of patina to the birthday sentiment also cut with this fabulous die set using Finnabair waxes as well as the metal embellishments. The black medallions cut with the A2 Radient Navette (S4-1167) die set add a a bit of a steampunk flair as well.

You can find a full video tutorial explaining this crackle technique exclusively in the Amazing Paper Grace Creative - Creative Encouragement Community Facebook Group.

This lovely group includes exclusive tutorial content. I share a mixed media tutorial there on the 13th of each month. If you're not a part of this fabulous and encouraging group you can join HERE.


Thank you Amazing Paper Grace for providing the dies used in this project.

Tips and Techniques
The gorgeous crackle effect on this tag cut with the Happy Occasions die set (S4-1206) looks like old cracked leather. A video tutorial for this easy technique can be found in the Amazing Paper Grace Creative - Creative Encouragement Community Facebook Group. The birthday sentiment is cut from metallic Kraft-Stock. I wanted to accent with patina blue and colored the words with Finnabair waxes.

I've added a few Tim Holtz embellishments to add to the industrial feel I wanted for this card including this Gauge Dial and lock which is also colored with waxes for a rusty patina effect. Gold half pearls are scattered across the bottom of the card to add texture. A tiny gear and pearl are added to the center of this paper gauge to add dimension.

This fabulous brass steam gauge is from Mitform castings and is given a patina finish with more of the waxes. I've added bits of Design Tape to add the numbers across the tag and text across the top of the card.

I just adore these black medallions behind the tag which are cut with the A2 Radient Navette (S4-1167) die set that add a steampunk feel to the card. The hinge clip on the end of the tag is from Tim Holtz and the scrolled corner is an older piece from my stash, and they are colored with the art waxes for a rusty patina finish.

One final view.

Below you can find the products I used to create this project including some with compensated affiliate links to Scrapbook.com and Spellbinders. These links are at absolutely no cost to you. When you shop through the links below, I receive a small commission from the companies.  These commissions help me cover the costs of my blog and other expenses, which allows me to continue to provide you with FREE inspiration along with detailed Tips and Techniques provided for every project. Thank you so much for your love and support!

Amazing Paper Grace Dies:

Paper:

Mixed Media:

Embellishments:

Adhesives:

Tools:

Monday, June 13, 2022

Shabby Mixed Media Tag For Amazing Paper Grace with Tutorial Link for Distress Oxide Ink Blending on Die Cuts

Welcome to my creative space!

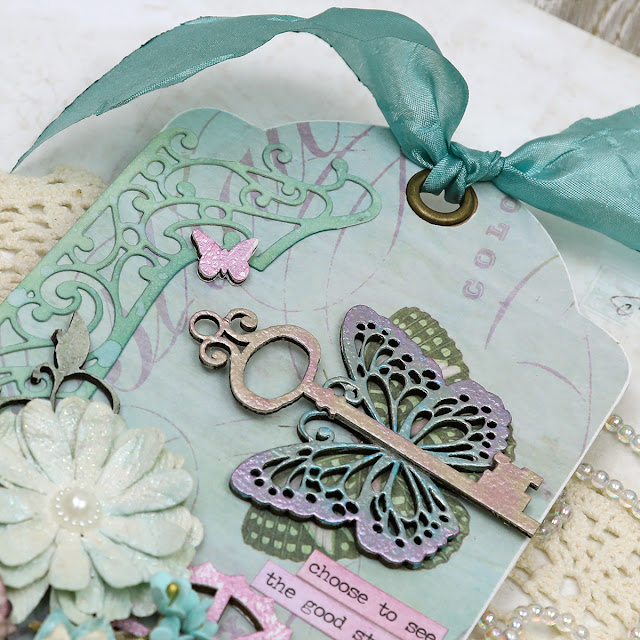
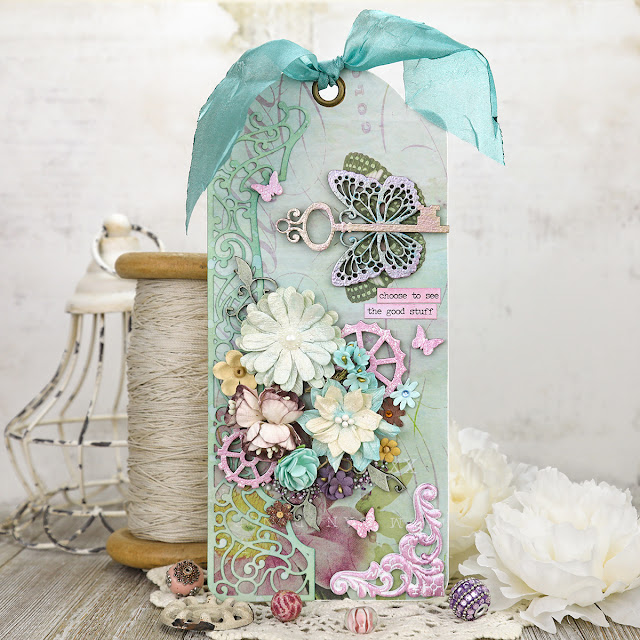
A tag is a perfect way to share a small piece of art. With this encouraging sentiment and gorgeous embellishments, this tag is meant to be on display, rather than being a simple gift tag. This tag features the fabulous Amazing Paper Grace Half Slimline Bracket die set (S4-1199) from the Layered Fleur Bouquet Slimlines collection. I've framed half of this tag with this gorgeous die cut. I've created a video tutorial showing how to use Distress Oxide Ink blending on die cuts to create flowing organic color that coordinates perfectly with your patterned background paper.

You can find a full video tutorial explaining this technique exclusively in the Amazing Paper Grace Creative - Creative Encouragement Community Facebook Group.

This lovely group includes exclusive tutorial content. I share a mixed media tutorial there on the 13th of each month. If you're not a part of this fabulous and encouraging group you can join HERE.

Thank you Amazing Paper Grace for providing the dies used in this project.

Tips and Techniques
This gorgeous die cut on the left is cut using the Amazing Paper Grace Half Slimline Bracket die set (S4-1199) and is colored with Distress Oxide ink blending. A full video tutorial is available in the Amazing Paper Grace Creative - Creative Encouragement Community Facebook Group.

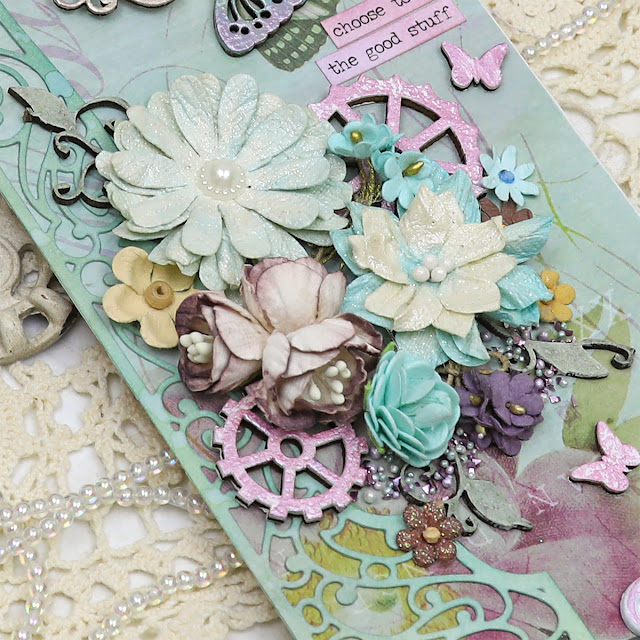
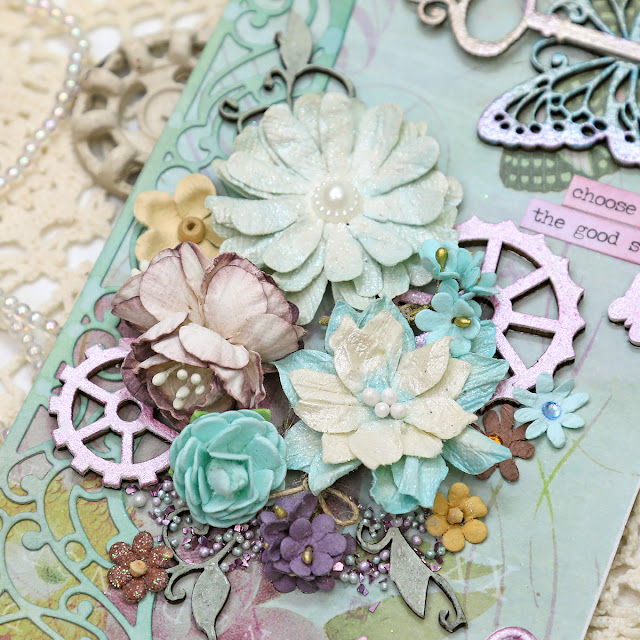
This lovely floral cluster is created with Little Birdie Crafts flowers, wood veneer gears and leafy chipboard vines. I've used metallic paints to color the gears.

The top edge of this beautiful die cut is fussy cut to fit the tag and becomes such a beautiful design element!

I wanted to accent the sweet butterfly on the background paper, so layered this chipboard butterfly and key over the printed one. They're colored with a blend of metallic paints. The sweet and encouraging sentiment is inked to coordinate with the colors on the tag.

A piece of beautiful May Arts Silky Crush ribbon is tied on the top.

The bottom edge of the die cut is trimmed to curve with the edge of the tag. 

I've added texture around the bottom of the cluster using prills and glass glitter. The ornate corner on the right side is a metal piece from my stash. It's painted with white gesso then dry brushed with metallic paints to add a bit of color. 

One final look. Doesn't this gorgeous die cut add such amazing texture to this tag?

Amazing Paper Grace Dies:

Paper:
  • Scrap of patterned paper 
  • Scalloped Kraft Tag
  • Tim Holtz with Idea-ology ~ Small Talk

Ink:
  • Ranger ~ Distress Oxide Ink: Iced Spruce; Pine Needles; Forest Moss
  • Ranger ~ Distress Ink: Victorian Velvet; Seedless Preserves; Dusty Concord

Mixed Media:

Embellishments:

Adhesives:
  • Scrapbook.com ~ Clear Double Sided Adhesive Roll - Permanent
  • Helmar ~ 450 Quick Dry Adhesive
  • Beacon ~ 3-IN-1 Advanced Craft Glue
  • Beacon ~ Fabri-Tac 
  • Tombow ~ Mono MULTI Liquid Glue

Tools:
  • Spellbinders ~ Platinum 6


Thanks for stopping by! I treasure your comments.

~ Blessings ~

Saturday, May 14, 2022

Hello Card for Amazing Paper Grace with Tutorial Link for Water Blended Backgrounds with Distress Oxide Inks

 
Welcome to my creative space!

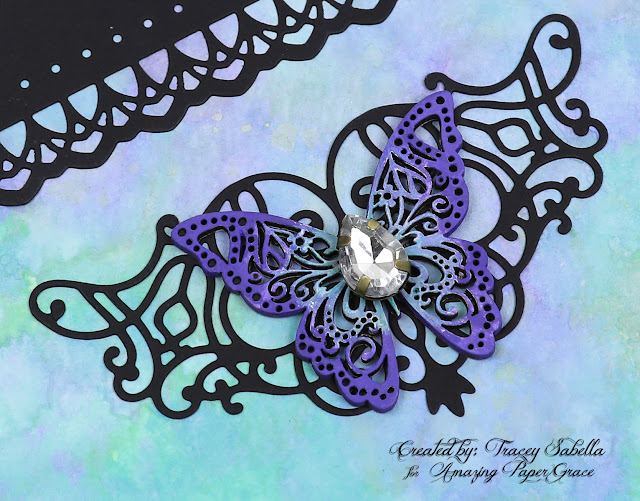
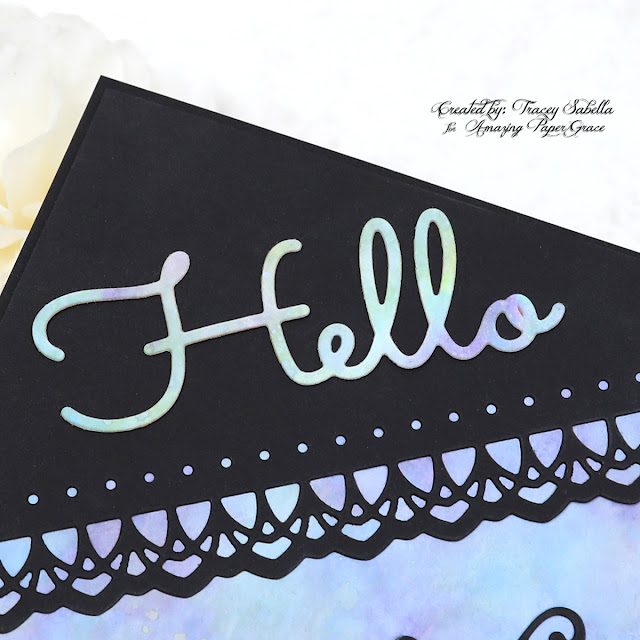
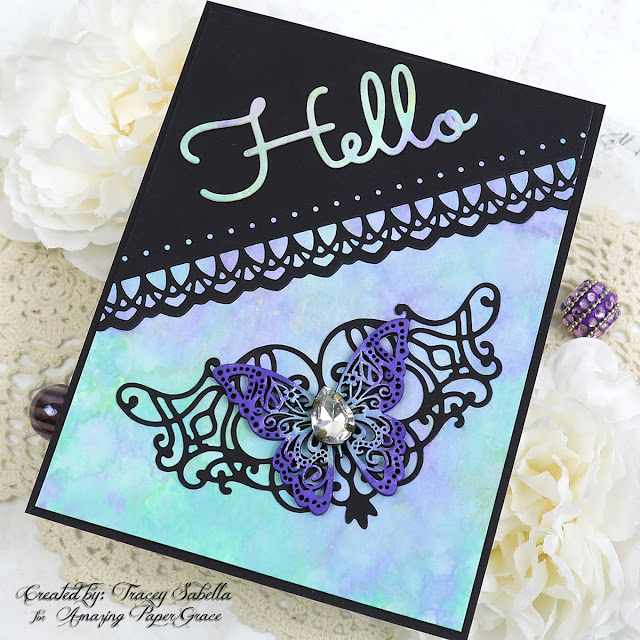
It's nice to have cards on hand to send a cheery note, so I created this sweet "Hello" card featuring Amazing Paper Grace dies with this gorgeous Distress Oxide Ink background. I thought that black would be a perfect accent to this lovely inky paper, and the lacy border is cut with the Romantic Slimline Borders die set (S4-1165) from the Classically Becca collection. I've also used Sweet Sayings Notecard Sentiments (S4-1148) to cut "Hello" and Perfect Harmony Notecard Embellishments (S4-1149) to cut the medallion below the sweet butterfly. Isn't it the perfect shape to layer with the butterfly?

You can find a full video tutorial explaining this technique exclusively in the Amazing Paper Grace Creative - Creative Encouragement Community Facebook Group.

This lovely group includes exclusive tutorial content. I share a mixed media tutorial there on the 13th of each month. The tutorial for this project includes a video tutorial teaching you how to create this beautiful paper to die cut or use as a background for your die cut projects. If you're not a part of this fabulous and encouraging group you can join HERE.

Thank you Amazing Paper Grace for providing the dies used in this project.

Tips and Techniques
This beautiful background paper is created using a water blended Distress Oxide Ink. A video tutorial for this technique can be found in the Amazing Paper Grace Creative - Creative Encouragement Community Facebook Group.

I really wanted this paper to shine so kept the embellishments simple. This sweet butterfly is painted using Distress Paints in coordinating colors. It's layered over a gorgeous medallion die cut from the Perfect Harmony Notecard Embellishments set. A teardrop shaped gem is placed in the center to add sparkle to the butterfly body.

This beautiful lacy border is cut with the Romantic Slimline Borders die set pairing the intricate scalloped die with the dots. The sentiment is cut from the Distress Oxide blended paper, using the sample piece I had created to make sure the colors I had selected played well together. You could also die cut the sentiment into the black paper to allow the focal paper to show through underneath.

One final look.

Amazing Paper Grace Dies:

Paper:
  • Tim Holtz with Ranger ~ Distress Watercolor Cardstock 
  • Cardstock: Black; White

Ink:
  • Tim Holtz with Ranger ~ Distress Oxide Ink: Salvaged Patina; Bundled Sage; Speckled Egg; Villainous Potion

Mixed Media:
  • Tim Holtz with Ranger ~ Distress Paint: Villainous Potion; Salvaged Patina; Speckled Egg
  • Liquitex ~ Gesso, White

Embellishments:
  • Recollections ~ Mixed Media Chipboard - Butterflies
  • Prima Marketing ~ Vintage Trinkets - Gems

Adhesives:
  • Helmar ~ 450 Quick Dry Adhesive 
  • Tombow ~ Mono MULTI Liquid Glue
  • Beacon ~ 3-IN-1 Advanced Craft Glue
  • Double Sided Tape ~ 1/4" 

Tools:
  • Spellbinders ~ Platinum 6
  • Wagner ~ HT 400 Heat Gun


Thanks for stopping by! I treasure your comments.

~ Blessings ~
Saturday, April 16, 2022

 
Welcome to my creative space!

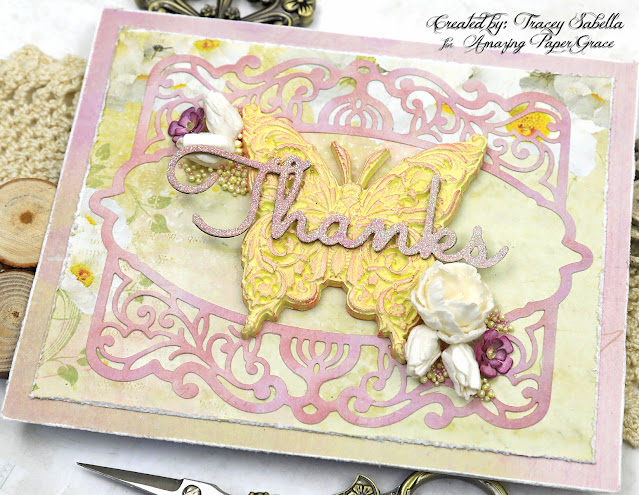
I've used a special technique to add a glittery finish to the beautiful die cut sentiment from the Amazing Paper Grace Sweet Sayings Notecard Sentiments (S4-1148) die set from the Sweet Serenade Collection. This gorgeous sentiment adds a beautiful touch to this spring thank you card.

You can find a full video tutorial explaining this technique exclusively in the Amazing Paper Grace Creative - Creative Encouragement Community Facebook Group.

This lovely group includes exclusive tutorial content. I share a mixed media tutorial there on the 13th of each month. The tutorial for this project includes a video tutorial teaching you how to create this beautiful sparkling finish that coordinates perfectly with your project. If you're not a part of this fabulous and encouraging group you can join HERE.

The lovely resin butterfly is molded with the Zuri Designs Beauty and the Beast silicone mold. I painted the butterfly with impasto paints and highlighted the texture with metallique waxes. 

Thank you Amazing Paper Grace for providing the dies used in this project.

Tips and Techniques
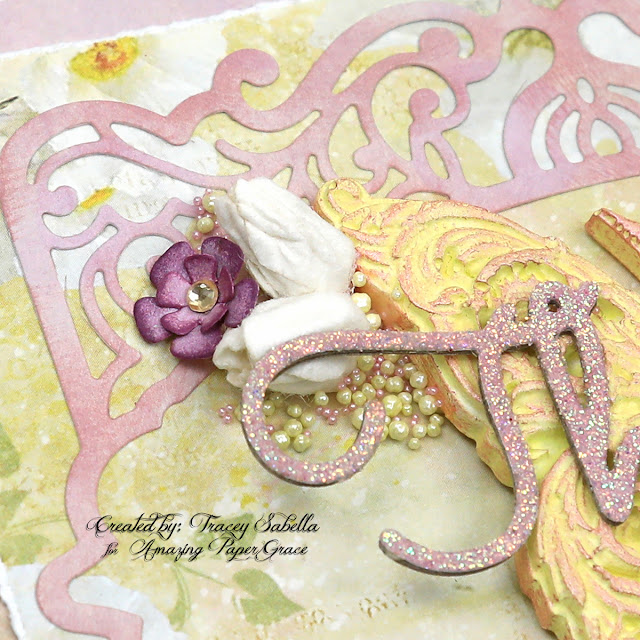
Here's a close-up of the beautiful glittery sentiment. If you would like to learn how I created this sparking finish, be sure to stop by the Amazing Paper Grace Creative - Creative Encouragement Community Facebook Group. for the video tutorial.

To coordinate this sweet butterfly with the papers, I mixed white with Lemon Peel impasto paints by Finnabair to color the butterfly and accented the texture with Sweet Rose metallique wax.

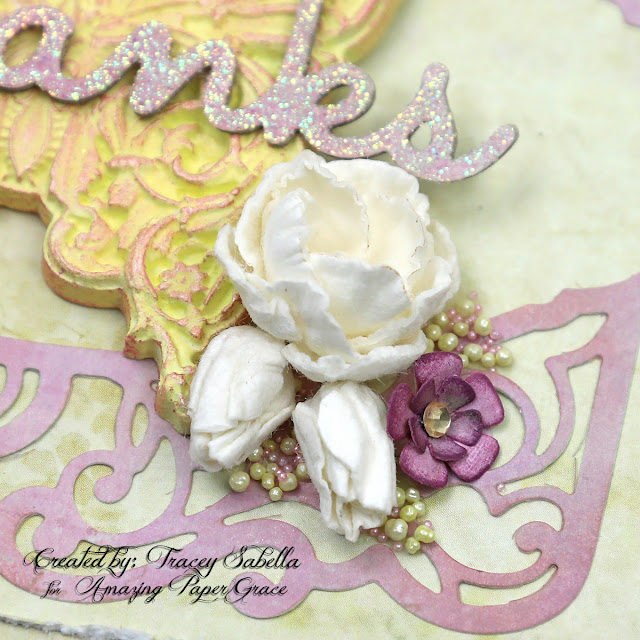
The beautiful white rose and buds are die cut from mulberry paper with the Candlewick Rosebud Dies set with the purple flower being cut with A2 Filigree Marquis set. I tucked in a few prills and microbeads to add texture.

More of the beautiful flowers. 

The background die cut is also cut with the A2 Filigree Marquis die set using the same paper found on the glittering sentiment. Don't you adore how the colors coordinate so beautifully?

Amazing Paper Grace Dies:

Paper:
  • Patterned Paper ~ Scraps from my stash
  • Cardstock ~ 120lb, White
  • Thin Chipboard

Ink:
  • Ranger ~ Distress Ink: Scattered Straw
  • Ranger ~ Distress Oxide Ink: Victorian Velvet

Mixed Media:
  • Ranger ~ Embossing Dabber
  • Ranger ~ Embossing Powder: Holographic
  • Finnabair with Prima ~ Soft Matte Gel
  • Finnabair with Prima ~ Metallique Wax: Sweet Rose
  • Finnabair with Prima ~ Impasto Paint: Snow White; Lemon Peel
  • Amazing Casting Resin ~ White
  • Zuri Designs ~ Wings of Beauty Silicone Mold (Butterfly)

Embellishments:
  • US Artquest ~ Prills: Lemon Chiffon
  • Martha Stewart Crafts ~ Microbeads - Kunzite
  • Rhinestones (Flower Centers)

Adhesives:
  • Beacon ~ 3-IN-1 Advanced Craft Glue
  • Helmar ~ 450 Quick Dry Adhesive
  • Double Sided Tape ~ 1/4" 
  • Tombo ~ Mono MULTI Liquid Glue

Tools:
  • Spellbinders ~ Platinum 6
  • Wagner ~ HT 400 Heat Gun

I am an affiliate with Zuri Designs and receive a small commission at no
cost to you if you purchase from them using a link from this post. 

You can find their online store HERE
and the Beauty and the Beast mold can be found HERE.

Thanks so much for your support!


Thanks for stopping by! I treasure your comments.

~ Blessings ~
Wednesday, March 16, 2022

"Don't Forget to Fly" Card with Tutorial Link for Altering Die Cuts with Metallic Waxes

Welcome to my creative space!

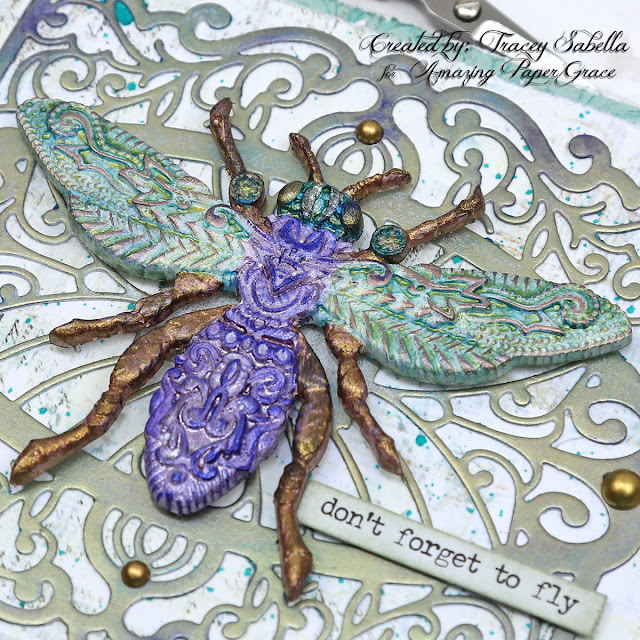
I just adore using mixed media products to create unique backgrounds and embellishments. This beautiful design behind the bee is die cut using a gorgeous Amazing Paper Grace die from the S4-1167 A2 Radiant Navette Dies from the Classically Becca Collection. I cut this shape using white card stock. For the flowing, organic metallic finished I've used metallic art waxes.

You can find a full video tutorial explaining this technique exclusively in the Amazing Paper Grace Creative - Creative Encouragement Community Facebook Group.

This lovely group includes exclusive tutorial content. I share a mixed media tutorial there on the 13th of each month (or the 16th this month). The tutorial for this project includes a detailed step by step photo tutorial teaching you how to create this one of a kind patterned paper for your projects. If you're not a part of this fabulous and encouraging group you can join HERE.

This lovely resin bee is molded with the Zuri Designs Beauty and the Beast silicone mold. I took artistic liberties with the bee using non-tradional purples for the abdomen and gave the wings a translucent effect with teals and golds. 

Thank you Amazing Paper Grace for providing the dies used in this project.

Tips and Techniques
Here you can see how this beautiful Amazing Paper Grace die cut shimmers with color from the waxes. Be sure to hop on over to the Amazing Paper Grace Creative - Creative Encouragement Community Facebook Group to watch the video tutorial. I've added a few matte gold pearls to accent.

This fabulous Zuri Designs bee was colored with a combination of Finnabair Sparks and Metallique paints, then accented with her waxes to highlight the gorgeous textures. You can find the colors I used in the product list below.

The background papers coordinate with the lovely teals from the bee wings and are spattered with green ink. The edges are lightly distressed as well.

Amazing Paper Grace Dies:

Paper:
  • Prima Marketing ~ Epiphany 6x6" Paper Pad
  • BoBunny ~ Gabrielle 6x6" Paper Pad
  • Cardstock ~ 120 lb, White

Mixed Media:
  • Zuri Designs ~ Beauty and the Beast Silicone Mold (Bee)
  • Finnabair with Prima Marketing ~ Metallique Wax: White Gold; Peacock; Electric Violet;Heather Hills
  • Finnabair with Prima Marketing ~ Metallique Acrylic Paint: Gold Rush; Emerald Green
  • Finnabair with Prima Marketing ~ Sparks Acrylic Paint: Chest of Gold; Raven Black; Iris Potion
  • Amazing Casting Resin ~ White
  • Liquitex ~ Gesso, White
  • Higgins Drawing Ink: Green

Embellishments:
  • Pink Fresh Studio ~ Metallic Pearls: Matte Gold

Adhesives:
  • Beacon ~ 3-IN-1 Advanced Craft Glue
  • Beacon ~ Fabri-Tac
  • Double Sided Tape ~ 1/4" 
  • Tombo ~ Mono MULTI Liquid Glue
Tools:
  • Spellbinders ~ Platinum 6
I am an affiliate with Zuri Designs and receive a small commission at no
cost to you if you purchase from them using a link from this post. 

You can find their online store HERE
and the Beauty and the Beast mold can be found HERE.

Thanks so much for your support!


Thanks for stopping by! I treasure your comments.

~ Blessings ~
Monday, February 14, 2022

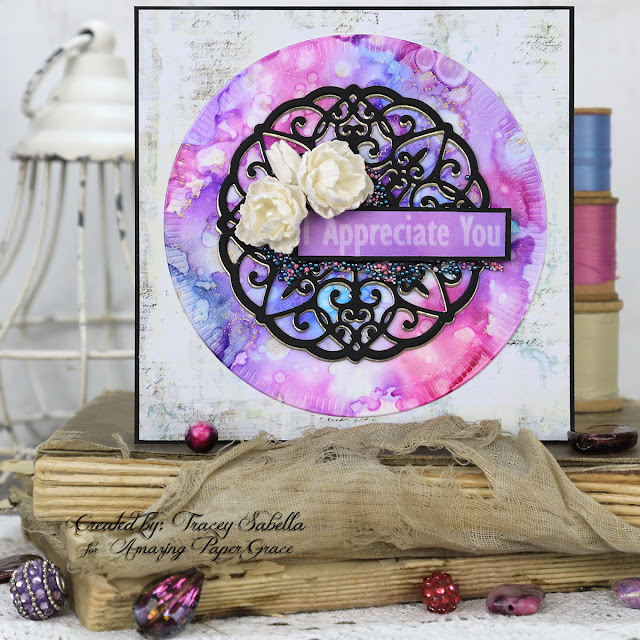
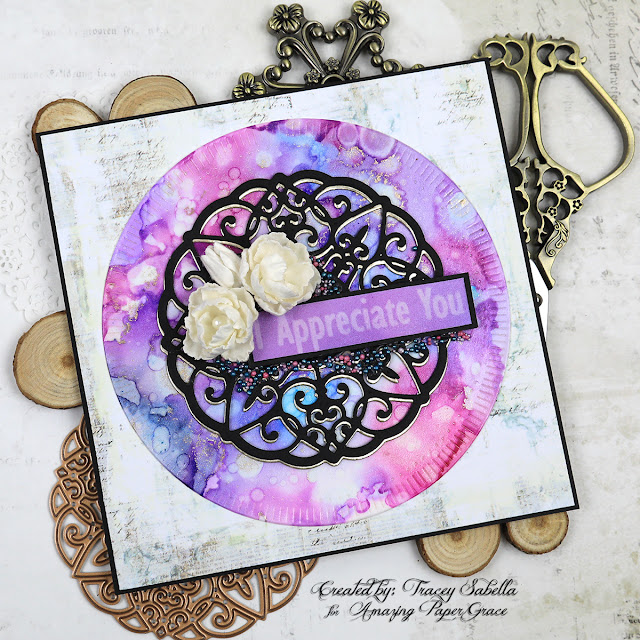
Appreciation Card with Tutorial Link for Alcohol Pearls with Lift-Ink on Vellum


Welcome to my creative space!

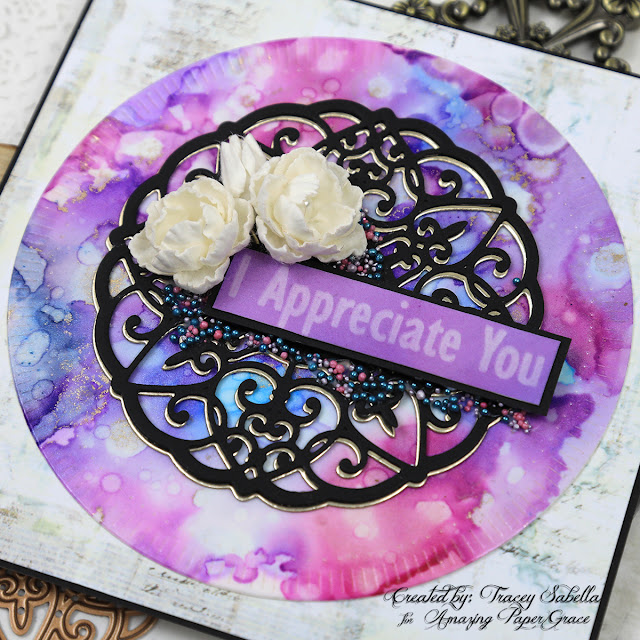
I have adored working with alcohol inks for many years, but don't get them out as often as I used to. Alcohol pearls and inks are trending right now, so I thought I'd pull them out and try a new technique by using Alcohol Pearls with Vellum. I just adore the way this combination turned out to use as a gorgeous background to die cut with Amazing Paper Fluted Classics Circles (S4-1150).  I took things a step further by using this same technique with Alcohol Lift-Ink to stamp a lovely sentiment with the Just a Note Sentiments Tag Clear Stamp & Die Set (SDS-169) from the Sweet Serenade Collection.

You can find the full tutorial for using alcohol pearls and Lift-Ink using vellum exclusively in the Amazing Paper Grace Creative - Creative Encouragement Community Facebook Group.

This lovely group includes exclusive tutorial content. I share a mixed media tutorial there on the 13th of each month. The tutorial for this project includes a detailed step by step photo tutorial teaching you how to create this one of a kind patterned paper for your projects. If you're not a part of this fabulous and encouraging group you can join HERE.

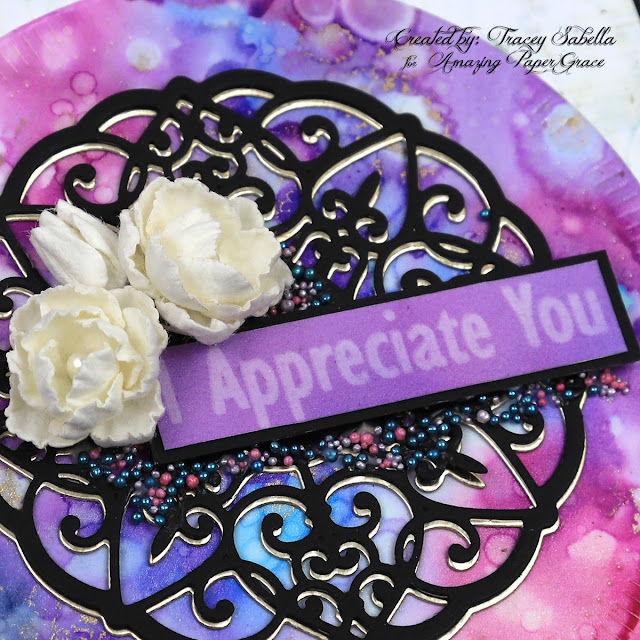
To accent this beautiful alcohol pearl background, I wanted a strong contrast, so die cut the  beautiful medallion from black using the Scalloped Symphony Notecard set (S6-177) and created a shadow with gold. The gorgeous flowers are die cut from soft, textured mulberry paper using the Candlewick Rosebud Dies (S4-1015).

Thank you Amazing Paper Grace for providing the dies used in this project.

Close-Ups
Here you can see the how the vellum alcohol pearl background die cut beautifully with the fluted edges.

The Alcohol Lift-Ink created a beautiful sentiment. These flowers using the Candlewick Rosebud dies are so beautiful cut from mulberry paper. I like having a few handcrafted flowers on hand to use on projects, so I die cut a bunch of these blossoms in the smallest size, then sat down and formed a pile of roses and buds while watching some television. That made it quick and easy to finish off this lovely card with beautiful blossoms.

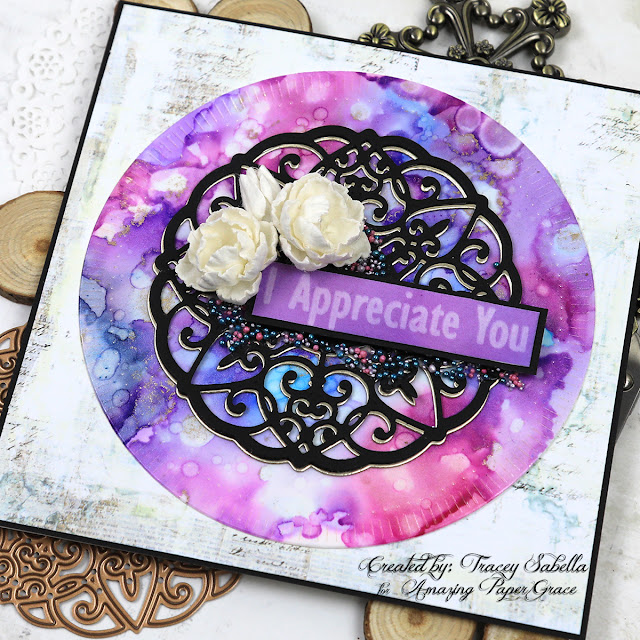
The black provides a beautiful contrast to the bold alcohol pearls. It doesn't photograph well, but there is so much pearlescent shimmer in the alcohol pearled background.

One final shot of this sweet card.

Amazing Paper Grace Dies and Stamps

Other Supplies:

Paper:
  • Vellum
  • Prima Marketing ~ Epiphany 6x6" Paper Pad
  • Tim Holtz with Idea-ology ~ Kraft-Stock Metallic 3, Champagne
  • Mulberry Paper ~ Cream

Ink:
  • Tim Holtz with Ranger ~ Alcohol Pearls: Intrigue; Tranquil; Celestial; Villainous
  • Tim Holtz with Ranger ~ Alcohol Lift-Ink
  • Tim Holtz with Ranger ~ Alcohol Blending Solution
  • Jacquard ~ Alcohol Ink - Piñata: Brass

Embellishments:
  • Large Stamen (for flower centers)

Mixed Media:

Adhesives:
  • Scrapbook Adhesives by 3L ~ Crafty Foam Tape - Black
  • Beacon ~ 3-IN-1 Advanced Craft Glue
  • Beacon ~ Fabri-Tac
  • Scotch ~ Quick Dry Adhesive
  • Tombo ~ Mono MULTI Liquid Glue
  • Double Sided Tape ~ 1/4" 

Tools:
  • Tim Holtz with Ranger ~ Alcohol Ink Air Blower
  • Spellbinders ~ Platinum 6
When purchasing from Little Birdie Crafts HERE
Use code TRACEY05 for a 5% discount.
I receive a small commission at no cost to you.

Thank you Little Birdie for providing some of the supplies used for this project.


Thanks for stopping by! I treasure your comments.

~ Blessings ~