Showing posts with label Idea-ology. Show all posts

Monday, June 19, 2023

Masculine Patriotic Card for Father's Day featuring Amazing Paper Grace Dies paired with Tim Holtz Idea-ology

 
Welcome to my creative space!

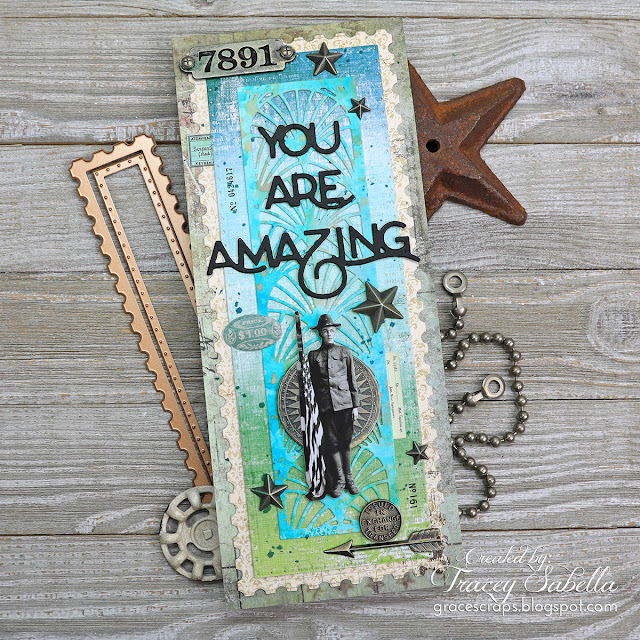
Father's Day is a special time to honor our fathers and other special men in our lives. I hope you had the opportunity to celebrate with a loved one this year. My dad served in the Air Force in the photomapping division and has proud memories of his service to our country. To honor that legacy, I created this Father's Day card for him featuring the Amazing Paper Grace Postage Edge Slimlines (S5-541) and You're Amazing (S4-1203) die sets, pairing the slimline die cuts with Tim Holtz Idea-ology ephemera and metal pieces. When looking through my paper dolls this military figure with the flag caught my eye.

I just adore how the Slimline Postage edge dies work perfectly with the intricate background die cut from the You're Amazing set to form a wonderful masculine background for this special card. 

For more close-ups and all the details on how to create this card, be sure to scroll down through the Tips and Techniques section below. 

Thank you Amazing Paper Grace for providing the dies used in this project.

You can add visual interest by repeating elements. I've accented this card with numbers that can be found on the metal tag and used remnant rubs to add number strips to the background. I've also placed 3D metal stars across the card. These repeated elements help move your eyes across the image. 

I'm entering this week's Simon Says Stamp Monday Challenge: Pick a Number. You can find this number challenge HERE. They have wonderful challenges each week, and if you aren't familiar, be sure to go check them out!

Tips and Techniques
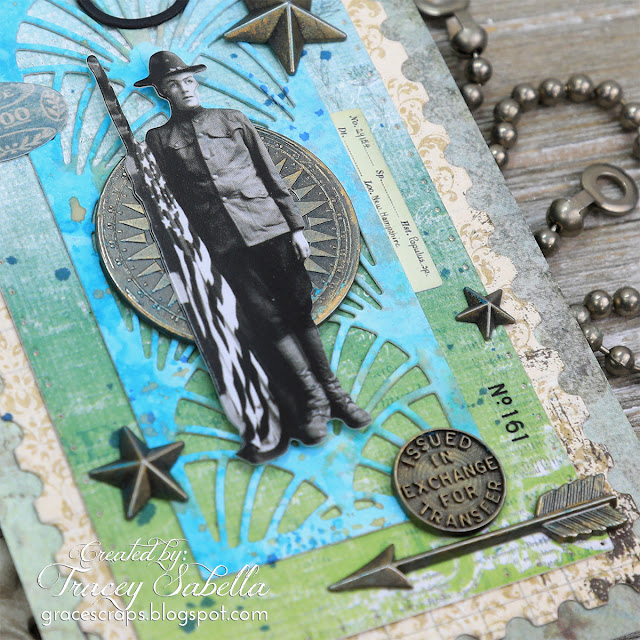
This soldier carrying a flag from the Tim Holtz Idea-Ology Paper Dolls Minis pack is the perfect image to honor my dad with this card. 

I want to share how the background for this card came together. The top die cut uses a scrap of paper that I had created using Distress Spray Stains and Distress Oxide Sprays on Distress Heavystock Paper. Because this was in my stash I don't remember the exact colors that I used to create it, but they were in the teal range with splashes of orange. This intricate die cut using the hand-colored paper adds so much interest and visual dimension. It's layered over a blended tri-color paper from the 49 and Market - Spectrum Sherbet Collection - 6 x 8 Collection Pack. I positioned the soldier so that it looks like he's standing in a grassy meadow with a blue sky overhead. This piece was cut and embossed using the largest inner die from the Postage Edge Slimlines set. You can see the pierced design around the edges.

From there I went to some older papers from my stash to cut the outer postage edge layer from a cream and brown design, then for the card base layer I went back to earthy greens cut to 3 1/2 by 8 1/2". I wanted each layer to be different enough in color and tone so that while coordinating into one beautiful background, the design of each layer would be clearly visible. You don't need to use these exact papers and colors to create a wonderful masculine card, but consider how the colors and designs will pull together cohesively while allowing the die cut designs to shine.
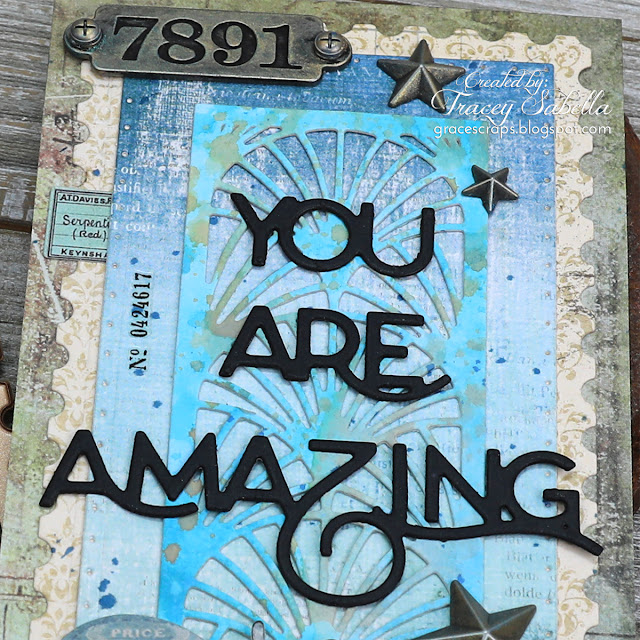

This fabulous sentiment is cut from the You're Amazing die set that also includes the beautiful die that cut the top intricate layer of the background. The words are cut from a heavyweight black cardstock so that they would show up against the busy background. This masculine card with this encouraging sentiment would be suitable for so many types of events including Father's Day, a birthday, graduation, promotion, or any milestone event.

To add interest, random numbers are applied to the background using Remnant Rubs from the Tim Holtz Special Delivery set as well as a couple pieces of ephemera tucked in from the Curator Snippets set. 
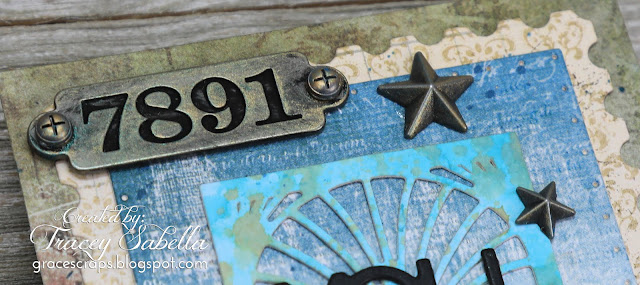
This number plate from the Factory Tags set is adorned with screws from the Hardware Heads set. The numbers were not very visible, so I rubbed Black Soot Distress Ink into the numbers to help them stand out. Of course the entire piece was covered in black paint, so I used a soft paper towel to remove most of the paint from the surface, but left a little for a grungy aged feel. 

The Idea-ology Stars that are scattered across the card reference this patriotic image from the flag. For a tarnished brass effect all of the silver metal pieces were rubbed with Finnabair Metallic Wax in Aged Brass and Peacock.
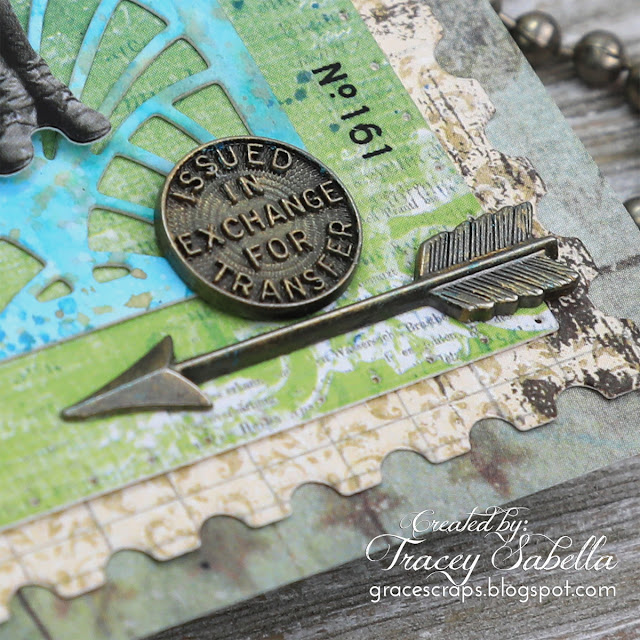
I find it a challenge sometimes to fill out a slimline card, so I've added this arrow and word coin to the bottom left of the card to balance the number plate on the top left corner. You can also see another of the number rub-ons in this photo. 

Once all the background layers were adhered together and before the embellishments were adhered, I splattered Uncharted Mariner Distress Spray Stain over the background to add more visual dimension.

Don't you just adore the effect of these postage edges? They're so perfect for this masculine Father's Day card!

Below you can find the products I used to create this project including some with compensated affiliate links to Scrapbook.com and Spellbinders. These links are at absolutely no cost to you. When you shop through the links below, I receive a small commission from the companies.  These commissions help me cover the costs of my blog and other expenses, which allows me to continue to provide you with FREE inspiration along with detailed Tips and Techniques provided for every project. Thank you so much for your love and support!

Amazing Paper Grace Sets:

Paper:
Thick black cardstock
Retired pattern papers from my stash

Mixed Media:
Ranger Ink - Tim Holtz Distress Sprays and Distress Oxide Sprays in teals and orange.
Ranger Ink - Tim Holtz - Distress Paint - Black Soot
Prima - Finnabair Collection - Art Alchemy - Metallique Wax - Aged Brass

Embellishments:
Idea-ology - Tim Holtz - Adornments - Stars
Idea-ology - Tim Holtz - Remnant Rubs - Special Delivery
Idea-ology - Tim Holtz - Compass Coins
Idea-ology - Tim Holtz - Arrows

Adhesives:
Beacon - 3-IN-1: Fabri-Tac
Helmar - 450 Quick Dry Adhesive

Tools:

Thanks so much for stopping by to learn more about creating this masculine card.
I hope you've been inspired!

Monday, November 14, 2022

Introducing the Amazing Paper Grace Postage Edge Shapes Collection with Vintage Shabby Chic Card and ATC

Welcome to my creative space!

There is just something special about having gorgeous die cut edges to fill in with your favorite things. This new Postage Shape Edges Collection by Amazing Paper Grace does just that! Today I'm sharing an ensemble created with the Postage Edge Rectangles Set (S5-540)

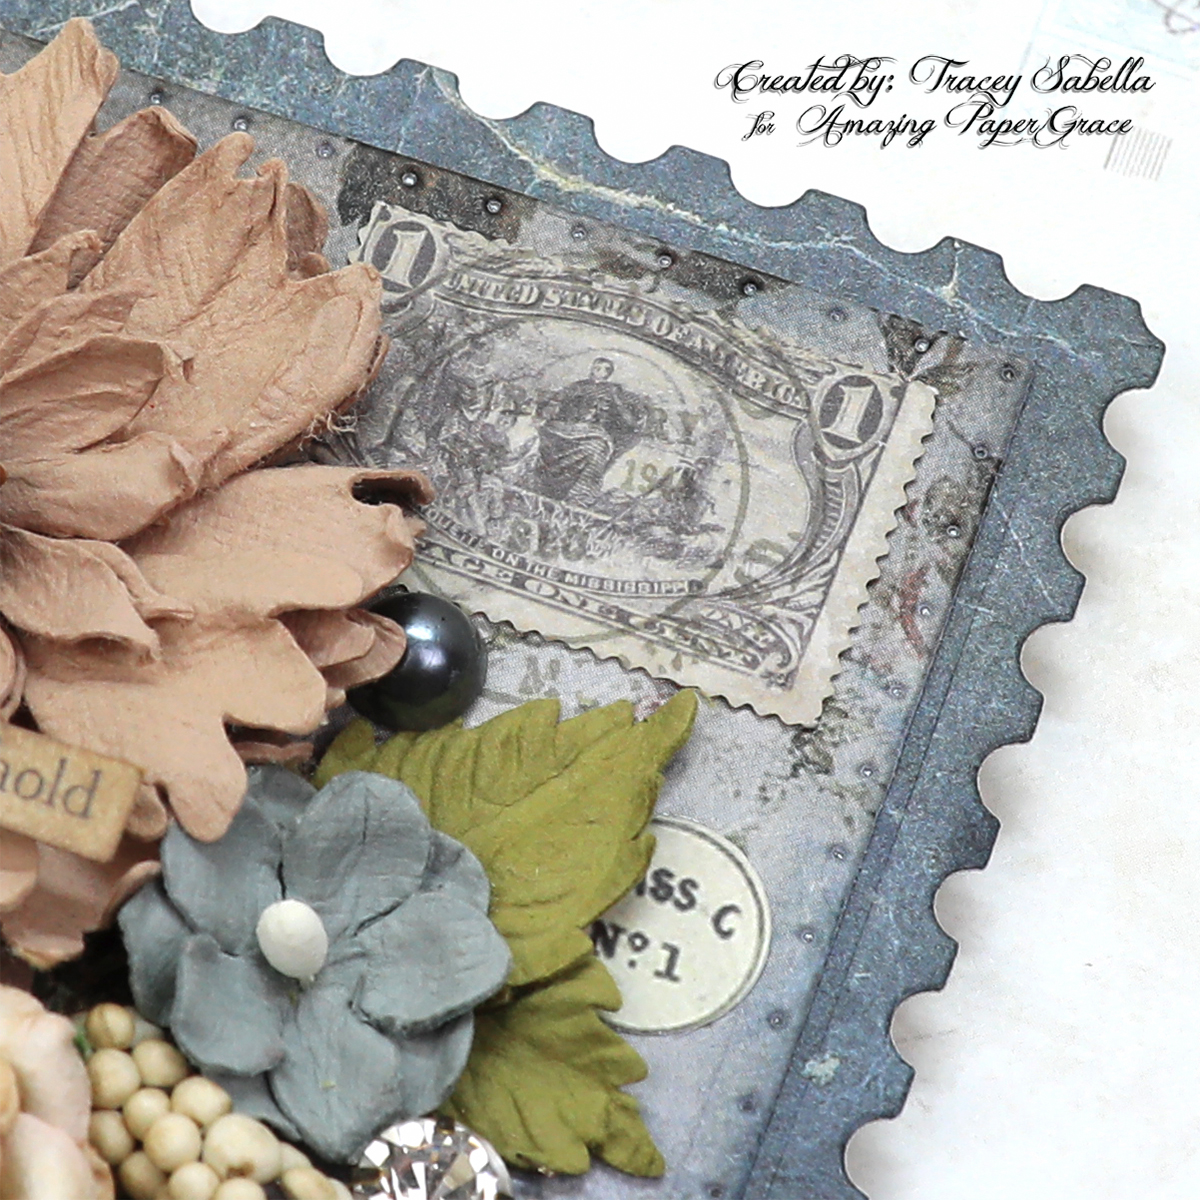
In keeping with the postal shapes, you'll see postage themed stamping and images in the background of both pieces. The card layers both shapes included in this amazing die set. The scalloped edge layer is cut from a darker slate blue patterned paper to frame the card and the focal paper is cut with the pierced edges from a floral paper. The card is embellished in fall colors with flowers and precut pieces that came in the paper pack including the postage stamp up in the corner. 

The ATC pairs the same papers cut with the smallest postal scalloped rectangle with the center cut with a die from the Fluted Classics Rectangle set (S5-475). This new Postage Shape Edges Collection is designed to coordinate with the dies in the Fluted Classics Collection and they look so great together! 

For all the details on how to create this ensemble with lots of close-ups, please scroll down through the Tips and Techniques section below.

Today's projects were created with dies provided by Amazing Paper Grace.

Vintage Postal Edged Card

Shabby Chic Postal Edged ATC


Tips and Techniques
I decided to go with fall colors and a vintage postal design for this sweet shabby card. The floral background paper is cut with the largest pierced die in the Postage Edge Rectangles set (S5-540) from the 49 and Market Remnants Mini Collection paper while the scalloped postage edges frame layer is cut using a page from the Tim Holtz, Backdrops - Volume Two paper pack. To add visual dimension and accent the pierced design, both pieces are edged with Stormy Sky Distress Ink with Pumice Stone also added to the scalloped edge frame. 

This shabby card is embellished with 49 and Market flowers in fall colors and precut pieces from the Remnants Mini Collection pack including the stamp image in the top corner. 

The cluster is embellished with textural elements including pearls and antique gems. The smaller texture includes Prills and chunky glass glitter. A little bling is always welcome on a shabby chic card!

Here's a side view showing ephemera tucked in and around the cluster from the Tim Holtz Curator Ephemera Pack. The scrolled cream piece is popped up with foam tape for dimension and to give room to tuck in the ephemera and textural bits.

The sentiment is inked with Ground Espresso Distress Oxide ink and spritzed with water for the vintage oxidized effect.

I wanted to embrace a postal theme so used Archival Hickory Smoke Ink to stamp postal images on the background including "special delivery' across the side and the cancelation mark over the stamp image.

One final view of the entire card.

An ATC is a great way to share a small piece of our art and the smallest dies in these sets are perfect to create a base for this small format art. Yes, it's slightly larger than a traditional ATC, but I just adore how the scallop postal edge pairs with the Fluted Classics Rectangle, so perfect for a vintage fall feel.

More of the flowers and cut-outs are used to embellish the ATC. Instead of the larger pearls and gems, smaller iridescent drops are paired with the Prills and glitter to keep with the scale of an ATC.

The edges here are also inked with Stormy Sky Distress Ink to give definition and highlight the diecut texture. The outer scalloped edge is also inked with Pumice Stone.

The small butterfly is popped up with foam tape and this simple sentiment is framed and adhered atop the fluttering insect.

In keeping with the vintage postal theme, this fun stamp image is stamped with Ground Espresso archival ink, fussy cut, then the cancel mark is added using Hickory Smoke Archival Ink.

One last view of the full ATC. You can really see how beautifully the two die sets work together here. 

The Postage Edge Shapes Availability:
These dies and plates are available from Spellbinders right now! Click here: The Postage Edge Shapes Collection.

Below you can find the products I used to create this project including some with compensated affiliate links to Scrapbook.com and Spellbinders. These links are at absolutely no cost to you. When you shop through the links below, I receive a small commission from the companies.  These commissions help me cover the costs of my blog and other expenses, which allows me to continue to provide you with FREE inspiration along with detailed Tips and Techniques provided for every project. Thank you so much for your love and support!

Amazing Paper Grace Sets:

Paper:

Ink:

Stamps:

Mixed Media:
Prima Marketing - Finnabair - Art Basics - Soft Matte Gel

Embellishments:
Idea-ology - Tim Holtz - Ephemera Pack - Curator
49 and Market - Botanical Blends - Hazelnut
49 and Market - Mulberry Paper Flowers - Beige Roses
49 and Market - Botanical Potpourri - Shadow
US Artiest - Mini Prills - Express-O-Yourself
Stampendous - Chunky Glass Glitter - Champagne

Adhesives:
Beacon - 3-IN-1: Fabri-Tac

Tools:

For more Postage Edge Shapes Collection Inspiration
Visit each Creative Team blog linked below for their take on creative paper crafting ideas using  The Postage Edge Shapes Collection.


I would adore hearing from you! Please leave a comment below letting me know how you will use these gorgeous dies!


Thanks for stopping by! I treasure your comments.

~ Blessings ~

Monday, September 5, 2022

Amazing Paper Grace September 2022 Die of the Month: Pop Up 3D Vignette Bubble Gum Machine

Welcome to my creative space.

The Amazing Paper Grace September Die of the Month: Pop Up 3D Vignette Bubble Gum Machine is such a sweet die set. For my main project card I selected a teal metallic paper and used gold paper for the accents to give it a fun retro feel. What a fun card for a child or someone who adores nostalgic retro machines.

My second card is a nod to my passion for industrial rust and patina. I had been stumped on what to do for my accessory project until I walked through my studio and spied a recent vintage purchase, a rusty steam gauge piece. A light went off in my head and I wondered . . . "what if I transform the bubble gum machine into an industrial steam gauge machine?" I had just the right pieces to fit perfectly to make the transformation. I hope you adore it as much as I do.

Be sure to check out my Tips and Techniques section below for more close-ups and all the details on how I created these wonderful cards including the cracked vintage glass over the industrial steam gauge. 

Many thanks to Amazing Paper Grace for providing the dies used in this project!

There are 26 cutting dies included in the Pop Up 3D Vignette Bubble Gum Machine.

Pop Up 3D Bubble Gum Machine Card

Vintage Steam Gauge Machine Card

Tips and Techniques
I kept this card pretty straight forward by keeping with the beautiful die cut design. The fun and whimsical retro design comes from the teal metallic and gold papers that are die cut and embossed. This just looks so much like the gumball machines I grew up with. I pulled out my metallic paper scraps to cut the gumballs, so they also have the shiny gumball appeal. 

I adhered one gumball to each of the spots on the die cut, then filled in and added more to make it full. On the inner layers, I just adhered gumballs across the top of each layer, since the lower portion of these layers isn't seen.

The trim pieces are cut and embossed in metallic gold cardstock. The layers of the mechanism are popped up with thin foam squares for added dimension and a more realistic feel. I even added a few gumballs falling out of the opening. 

The penny is cut from copper cardstock, but was too shiny and bright for my taste, so I brushed a little Worn Penny metallic paint to add the patina found on a well used penny.

I just adore how these 3D Vignette cards fold over so that they can be tucked into an envelope to hand deliver or as suggested a padded envelope for mailing. The card pops right back into place after being folded and stands on its own to be displayed.

Of course a vintage bubble gum machine needs a little bling, so a rhinestone is added to the top and onto the money mechanism. There are three fun sentiments included in this die set. 

It's hard to tell in the photos, but there is a piece of clear acetate cut to fit the window of the front piece so it looks like the gumballs are behind glass.

I just can't express how happy I was to find that this gauge frame and dial from Tim Holtz fit the opening so perfectly. To create the bubbled and cracked glass front, I used a mica tile. Mica is slightly yellowed with beautiful natural imperfections and easy to cut, so was a great choice for the glass front here. I bent the mica in a couple places just enough to get a cracked look.

The machine is cut three times using the insert so that the gumballs are not diecut into the piece. Once with a lighter rusty patina paper for the top layer. Once from a darker rusty paper for the bottom piece that shows behind the gauge. And one more time from light weight chipboard. The top piece is adhered to the chipboard piece for more stability. The bottom layer is adhered directly to the card. I brushed black paint on the edges of the chipboard layer for a more finished look.

I popped up the top layer with a couple layers of thicker cardboard placed under this lower section. I also adhered two stacks of thin black chipboard cut into narrow strips that are the same height as this cardboard shim. Each one is abut 3/4 inch long. These were adhered under the top corners of the upper frame to keep the machine the same height and to add stability. The shims are high enough that the mica window sits slightly above the gauge so they are not touching.

The trim pieces are cut from black metallic cardstock and rubbed with silver wax to give a vintage feel. Most of the metal embellishments were already a tarnished silver color, but a couple were copper, so I rubbed those pieces with more of the silver wax for a cohesive look.

Decorative tape is placed on both sides of the machine. It's easiest to add this tape before adhering the bottom machine layer to the card. To keep things more simple, I used patterned paper printed with a rusty patina design to die cut the machine layers. I rubbed the edges of the top layer with a little black soon Distress Ink to age it a little more.

I cut a panel from brown cardstock just a little larger than the printed paper base to frame the card. The edges of the printed paper are inked with pumice stone Distress Ink. 

I hope you agree that this bubble gum machine is the perfect base for a vintage industrial steam gauge! 

Below you can find the products I used to create this project including some with compensated affiliate links to Scrapbook.com. These links are at absolutely no cost to you. When you shop through the links below, I receive a small commission from Scrapbook.com. These commissions help me cover the costs of my blog and other expenses, which allows me to continue to provide you with FREE inspiration along with Tips and Techniques provided for every project. Thank you so much for your love and support!

Supplies:

Amazing Paper Grace:

Paper:

Ink:

Mixed Media:

Embellishments:

Adhesives:

Tools:

The Amazing Paper Grace Die of the Month is available exclusively at Spellbinders Paper Arts during September 2022, Pop Up 3D Vignette Bubble Gum Machine along with other membership perks.

View this month’s Amazing Paper Grace Die of the Month!


Thanks for stopping by! I treasure your comments.

~ Blessings ~

Friday, November 5, 2021

"Shine" Layered Shabby Card for Little Birdie Crafts


Welcome to my creative space!

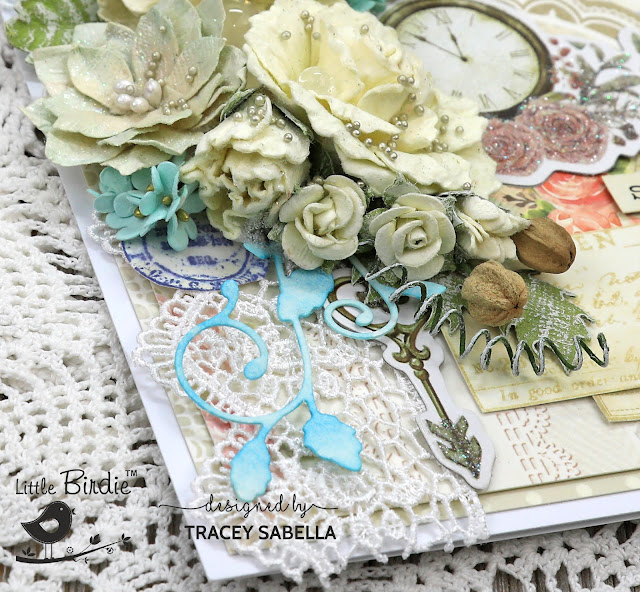
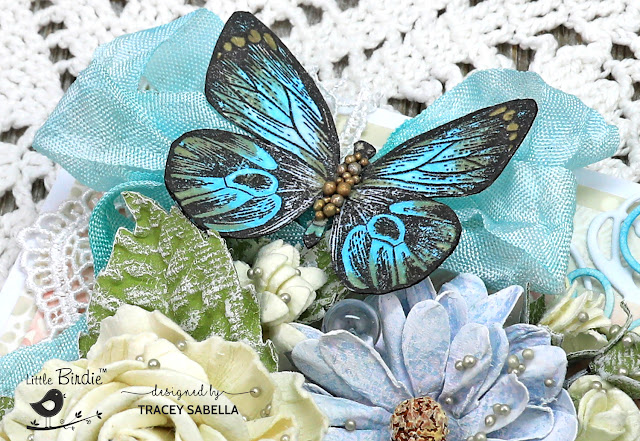
I've created this beautiful layered card featuring gorgeous Little Birdie Crafts Flowers and Ephemera. I've added in some stamped images and lace from my stash as well. I have a full photo tutorial with all the details on how I created this card up on the Little Birdie Crafts blog HERE. Thanks for stopping over there to leave a comment.

Be sure to check out the current sales HERE.

Use code TRACEY05 for a 5% discount.

I receive a small commission at not cost to you.

Some close-up shots:


Little Birdie Crafts Supplies

Other Supplies
Tim Holtz with Idea-ology ~ Big Chat ***
Tim Holtz with Idea-ology ~ Bubbles ***
Tim Holtz with Stampers Anonymous ~ Flutter Stamp Set ***
Tim Holtz with Stampers Anonymous ~ Field Notes Stamp Set ***
Tim Holtz with Ranger ~ Distress Ink - Antique Linen ***
Tim Holtz with Ranger ~ Distress Oxide Ink - Chipped Sapphire ***
Memory Box ~ Quinn Flourish Die
Memory Box ~ Norwich Corner Die
Versafine Pigment Ink ~ Vintage Sepia
Prills ~ Gilt Trip
White Lace
White Rayon Seam Binding
Zig ~ Clean Color Real Brush Markers - Light Blue; Haze Blue; Brick Beige
Lindy's Gang ~ Starburst - Tibetian Poppy Teal
Heidi Swapp ~ Color Shine - Ocean; Tropicana Teal
1/4" Double Sided Tape
Helmar ~ 450 Quick Dry Adhesive


Thanks for stopping by! I treasure your comments.

~ Blessings ~

Friday, January 29, 2021

Industrial Steampunk Card and DIY Video Tutorial with Voice for Little Birdie Crafts


Welcome to my creative space!

I had so much fun working with Little Birdie's The Classic Gentleman collection to create this industrial steampunk card for our son-in-law who recently celebrated a birthday. I normally enjoy applying mixed media to the background in the form of stamping and stenciling, but the design was simply too fabulous to cover up. I've used the Little Birdie thincut Cogs and Wheels die set to create gears for my clusters. 

I created a DIY video tutorial with voice sharing the techniques used to create this card. I hope you will find inspiration and learn some new techniques.

In this DIY steampunk card tutorial learn how to:
~ Create a patina effect on metal objects with paints and waxes
~ Accentuate background colors
~ Diecut and shade gears from patterned paper
~ Learn my creative process for arranging embellishments
~ Add texture with metal microbeads and prills

Enjoy!


Please hop on over to the Little Birdie Crafts blog to view more close-up photos HERE.

Little Birdie Crafts can be purchased at their online store.
Be sure to check out the Dollar Deals sale they are currently running HERE.

Use code TRACEY05 for a 5% discount.

I receive a small commission at not cost to you.

Little Birdie Crafts Supplies
Premium Card Stock A4 - Bright White
Premium Card Stock A4 - Ebony Black 

Other Supplies
Tim Holtz with Idea-ology: Optical Lens; Foundry; Date Dials; Hardware Heads; Mini Gears; Philosophy Tags
Bead Landing ~ Found Objects
Spare Parts ~ Clocks & Time
Miscellaneous: gears; clock;, cotter pin; and other found items
USArtqust ~ Mini Prills - Express-O-Yourself
Martha Stewart Crafts ~ Microbeads - Copper
Tim Holtz with Ranger ~ Distress Ink: Black Soot; Hickory Smoke; Peacock Feathers
Tombo ~ Mono MULTI Liquid Glue
Helmar ~ 450 Quick Dry Adhesive
Imagine Crafts ~ Tear It Double Sided Tape
Bone Folder
EK Success ~ Tweezers


Thanks for stopping by!
I treasure your comments.