Showing posts with label Layering. Show all posts

Monday, April 24, 2023

Cat Birthday Card Featuring Amazing Paper Grace Dies

 
Welcome to my creative space!

I have missed sharing inspiration with you. I'm finally feeling better after a tough winter. Nothing serious, but I've been catching one thing after another since October. That comes spending time with our preschool grandchildren and our granddaughter who just entered kindergarten this year. Lots of germs to spread to grandma. I'm praying for a nice healthy spring and remaining 2023.

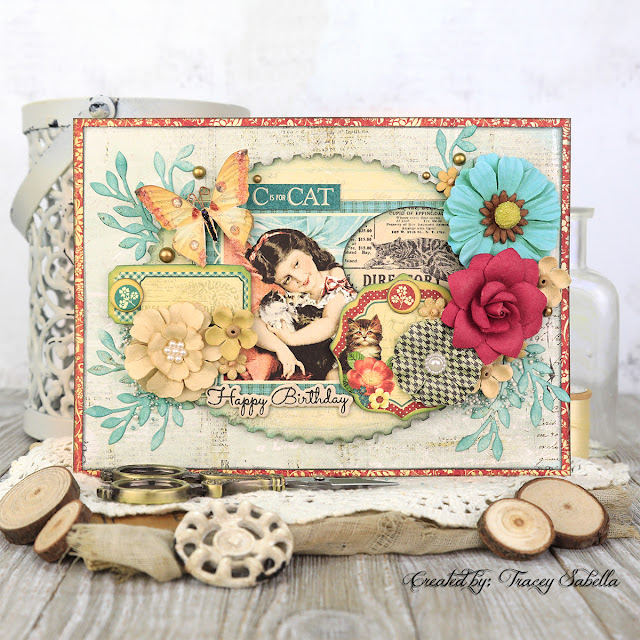
Today I'm sharing a sweet card created to celebrate our granddaughter, Avery's sixth birthday. While this may seem to be an unusual card for a six year old, she is a sweet old soul. Last year I made an adorable, age appropriate card for her. She glanced at it and set it aside. She adores the shabby chic creations I make and always asks if she can have one of them when it's time for her birthday. She has a cat she named Elpha and adores felines, so I combined her love of cats with my shabby chic style to create this card for her featuring the Amazing Paper Grace Postage Edge Ovals die set (S5-548). And yes, this card got more than a single glance from her.

This older Raining Cats & Dogs paper from Graphic 45 included dog images, so I needed to be creative in placing some of the elements to hide those pups. I used an oval die from the Postage Edge set to die cut the striped cat that covers a dog by the girl's shoulder. A creative way to showcase the dies and create layers on the card that look natural while bringing together the cat theme.

I used a mix of Prima Marketing and Little Birdie flowers paired with die cut foliage from the Petite Floral Potpourri die set (S3-420). A little inking on the leafy foliage helps it pop.

The birthday sentiment is stamped and die cut using the Lyrical Layered Florals Clear Stamp & Die Set (SDS-170). I just adore how this elegant birthday sentiment looks on this card.

For more close-ups and all the details on how to create this card, be sure to scroll down through the Tips and Techniques section below. 

Thank you Amazing Paper Grace for providing the dies used in this project.

Tips and Techniques
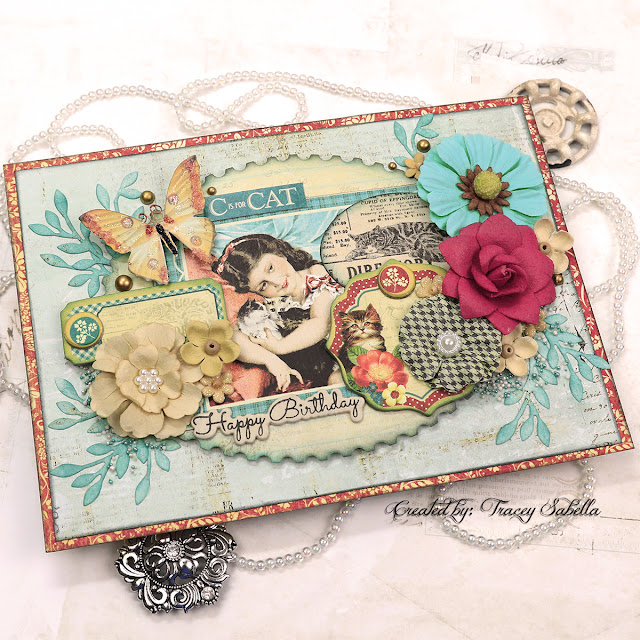
I just adore creating layers and the Postage Edge Ovals set (S5-548) is perfect for this. The larger oval is popped up with foam tape. The edges are inked with coordinating distress ink colors.
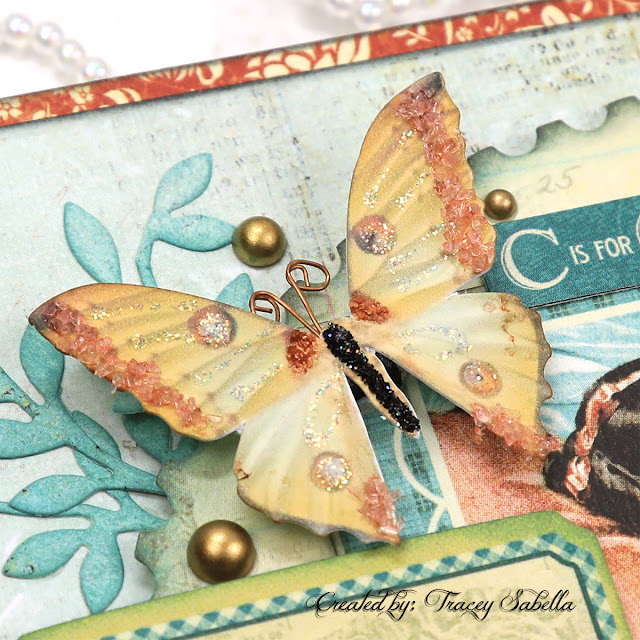

This gorgeous butterfly is an older Renea Bouquets creation. If you are not familiar with her unique and gorgeous embellishments, be sure to stop by her shop HERE. I'm a big fan of her creations and adore supporting fellow artists.
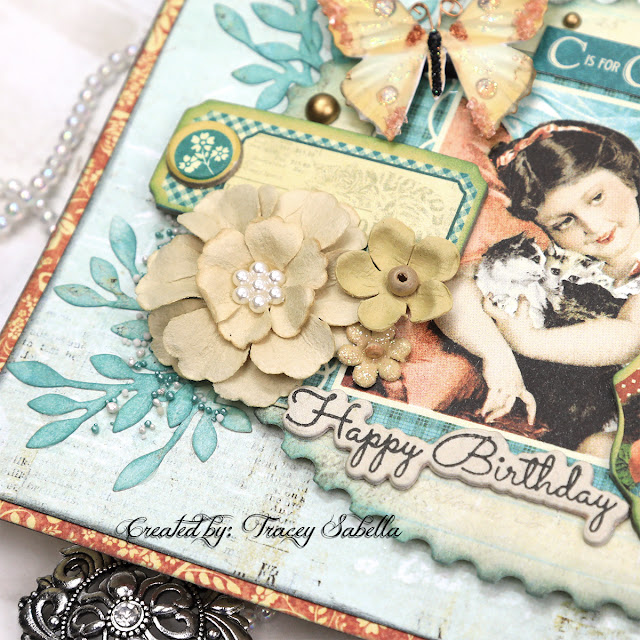
Here you can see the gorgeous birthday sentiment. The Lyrical Layered Florals Clear Stamp & Die Set (SDS-170) includes the stamp and die to create this beauty along with other lovely designs. You can see how the layers come together so beautifully.
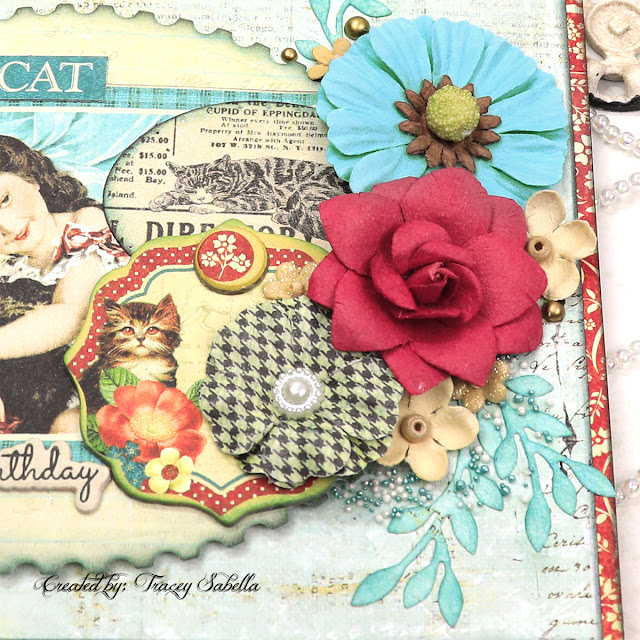

I've layered die cuts, chipboard elements, flowers and foliage cut from the Petite Floral Potpourri die set (S3-420) to create dimension. 
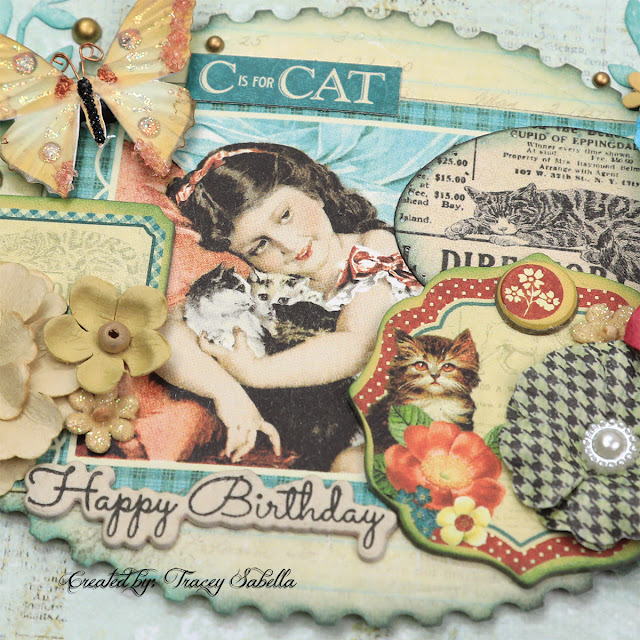
Cats, cats everywhere! The C is for Cat adds a bit of whimsey to the card to make it a bit more youthful for a six year old.  

You can see how I've inked the edges of many of the layers to help them pop.
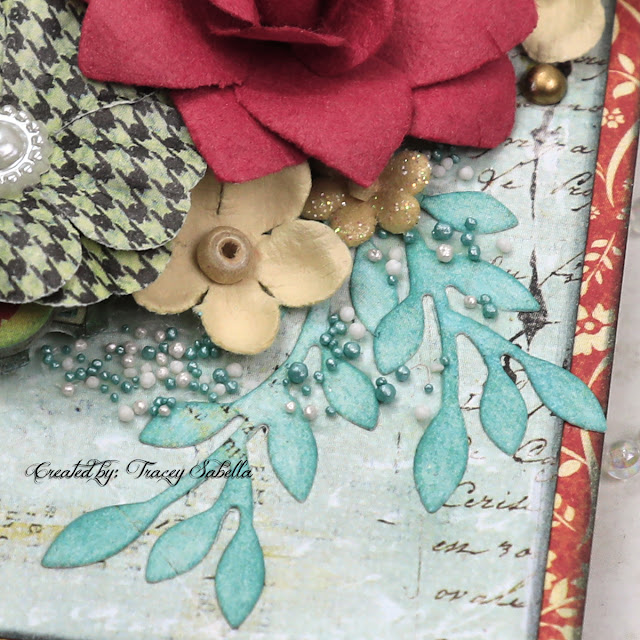
Texture is created by adding a mix of white and teal Prills using matte gel medium along with a few Matte Gold flat backed Pinkfresh Studio Pearls.

Below you can find the products I used to create this project including some with compensated affiliate links to Scrapbook.com and Spellbinders. These links are at absolutely no cost to you. When you shop through the links below, I receive a small commission from the companies.  These commissions help me cover the costs of my blog and other expenses, which allows me to continue to provide you with FREE inspiration along with detailed Tips and Techniques provided for every project. Thank you so much for your love and support!

Amazing Paper Grace Sets


Paper:
Graphic 45 - Raining Cats & Dogs (Retired)
Prima Marketing - Cigar Box Secrets (Retired)

Ink:

Mixed Media:
Prima - Finnabair - Soft Matte Gel

Embellishments:
Little Birdie Crafts - Beaded Blooms - Butter
Little Birdie Crafts - Micro Petals - Tan
Prima Marketing - Cigar Box Secrets #578626
Graphic 45 - Chipboard - Raining Cats & Dogs
Renea Bouquets - Butterfly
US ArtQuest - Mini Prills - Mini Pearls; Sage Advice

Adhesives:
Beacon - 3-IN-1: Fabri-Tac

Tools:

Thanks so much for stopping by to check out this sweet shabby cat card I created for our granddaughter. I hope you've been inspired!

Sunday, April 17, 2022

Layered Shabby Chic Card for Little Birdie Crafts

 
Welcome to my creative space!

Spring has finally arrived after a cold, snowy winter here in northeast Ohio. I’ve created this shabby layered card loaded with spring flowers and embellishments featuring the gorgeous Little Birdie Crafts Shabby Chic Bouquet collection including papers, ephemera, and of course fabulous handcrafted flowers created by beautiful women in India!

I have a full photo tutorial with all the details on how I created this card up on the Little Birdie Crafts blog HERE. Thanks for stopping over there to leave a comment.

Thank you Little Birdie, for providing supplies used in this project!

If you would like to see a full supply list, please scroll down.
Little Birdie Crafts can be purchased at their online store.

Be sure to check out the current sales HERE.

Use code TRACEY05 for a 5% discount.

I receive a small commission at not cost to you.

A couple close-ups for you:


Little Birdie Crafts Supplies

Other Supplies
Thin Chipboard
Tim Holtz with Ranger ~ Distress Ink - Old Paper; Brushed Corduroy
Tim Holtz with Ranger ~ Distress Archival Ink: Ground Espresso; Peeled Paint
Tim Holtz with Stampers Anonymous ~ Ledger Script
Tim Holtz with Stampers Anonymous ~ Flower Shop
Beaded Lace
Bee Charm (from Amazon)
Repositionable Tape
Silicone Glue


Thanks for stopping by! I treasure your comments.

~ Blessings ~

Tuesday, March 1, 2022

Vintage Junk Journal Easel Board for Little Birdie Crafts

 
Welcome to my creative space!

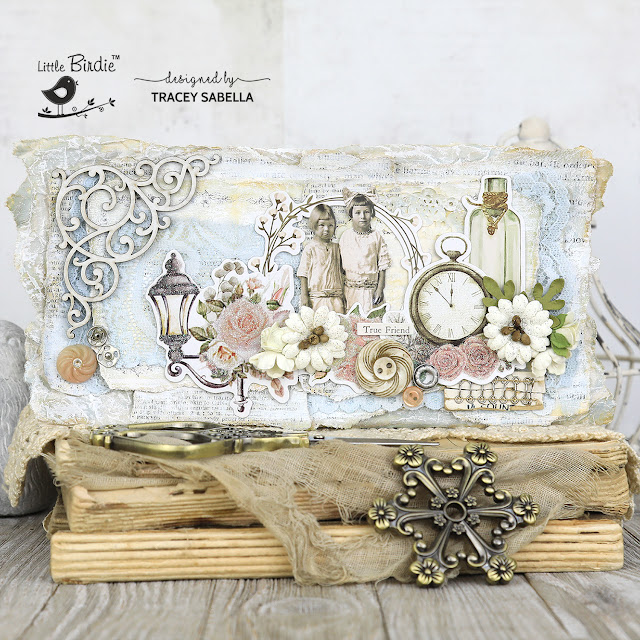
I just adore the shabby vintage look of junk journals, but have never committed the time to creating one. So, I got to thinking . . . "What about creating a junk journal style home decor piece?" This is what I came up with. A while back I found this 4x8" easel board with bold Valentine graphics in the clearance section for a deep discount and thought it would be perfect to repurpose for one of my projects. Several coats of white gesso gave me a clean base to work with.

This beautiful vintage creation features Little Birdie Crafts ephemera, flowers, chipboard, and mixed media supplies along with vintage tea stained book pages along with lace, vintage buttons, and notions like snaps and hooks.  I have a full photo tutorial with all the details on how I created this card up on the Little Birdie Crafts blog HERE. Thanks for stopping over there to leave a comment.

Thank you Little Birdie, for providing supplies used in this project!

If you would like to see a full supply list, please scroll down.
Little Birdie Crafts can be purchased at their online store.

Be sure to check out the current sales HERE.

Use code TRACEY05 for a 5% discount.

I receive a small commission at not cost to you.

A couple close-ups:


Little Birdie Crafts Supplies

Other Supplies
MDF Easel Board - 4x8"
Tea Stained Vintage Book Pages and Packing Paper
Tim Holtz with Idea-ology ~ Paper Dolls
Tim Holtz with Idea-ology ~ Clippings Stickers
Ranger ~ Distress Ink: Brushed Corduroy
Lace Pieces
Vintage: Buttons; Hooks; Snaps
Silicone Glue


Thanks for stopping by! I treasure your comments.

~ Blessings ~

Monday, February 28, 2022

Grungy Layered Butterfly Card for Amazing Paper Grace

Welcome to my creative space!

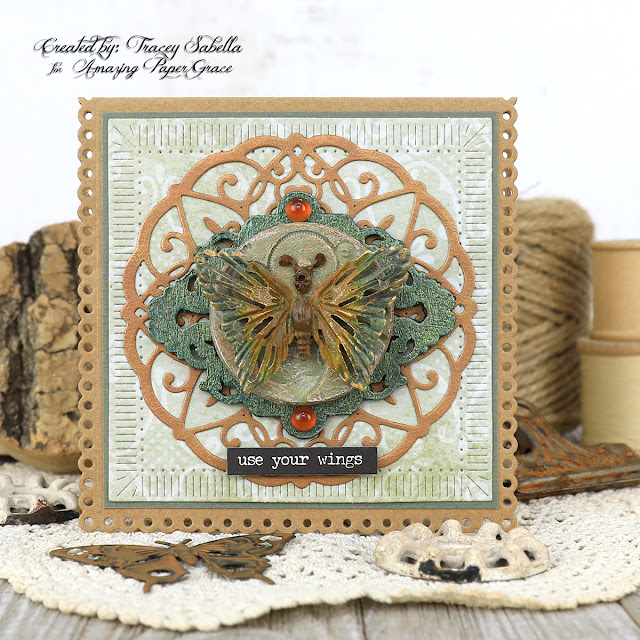
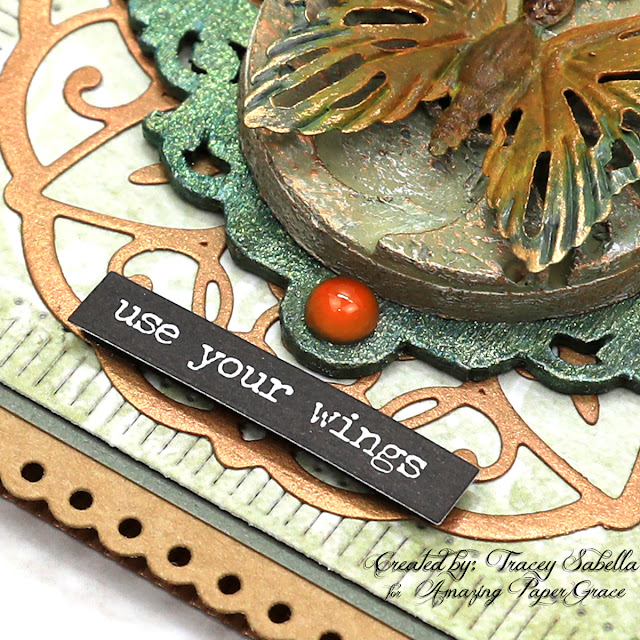
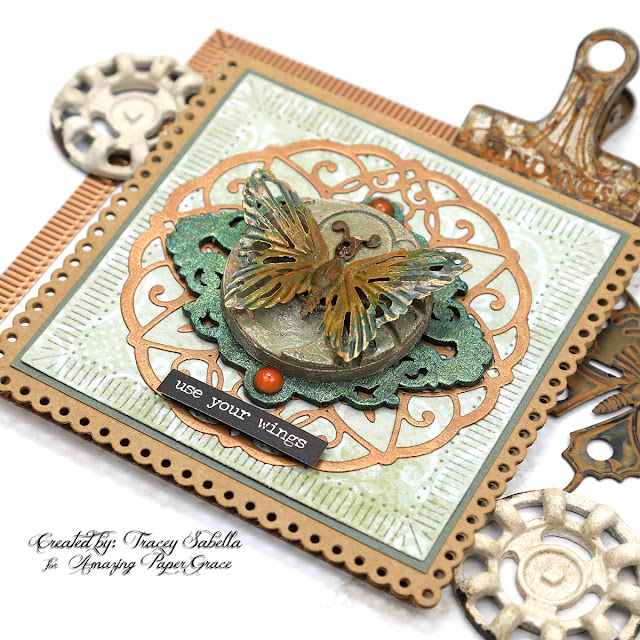
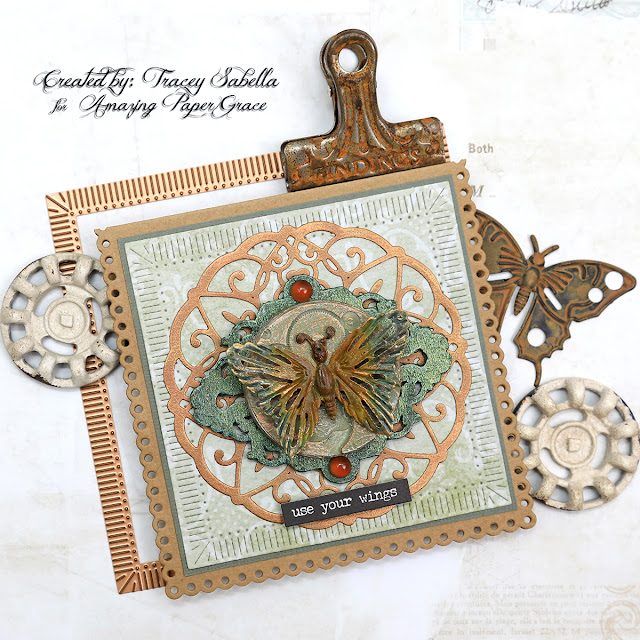
Spring is just around the corner. I'm looking forward to beautiful butterflies fluttering across our property, so I was inspired to created a grungy layered butterfly card to share with you featuring the fabulous Amazing Paper Grace Fluted Classics Squares die set (S4-1151). These fluted edges look so fabulous with grungy creations that I just couldn't help creating another one with this collection! The medium die in this set pairs perfectly with this base and medallion from the Scalloped Symphony Notecard set (S6-177). The layers include a painted metal butterfly, resin machine cog, and chipboard ironwork piece atop the die cut medallion and fluted background. Be sure to scroll down for close-ups and more details.

Tips and Techniques
When I think of Becca's Amazing Paper Grace designs, I think elegant and sweet, but you can see how perfectly these die sets can also work with my grungy mixed media style as well. The medallion and base are cut from kraft cardstock and the scrolled medallion is brushed with aged brass and copper art wax to give it a metallic shimmer.

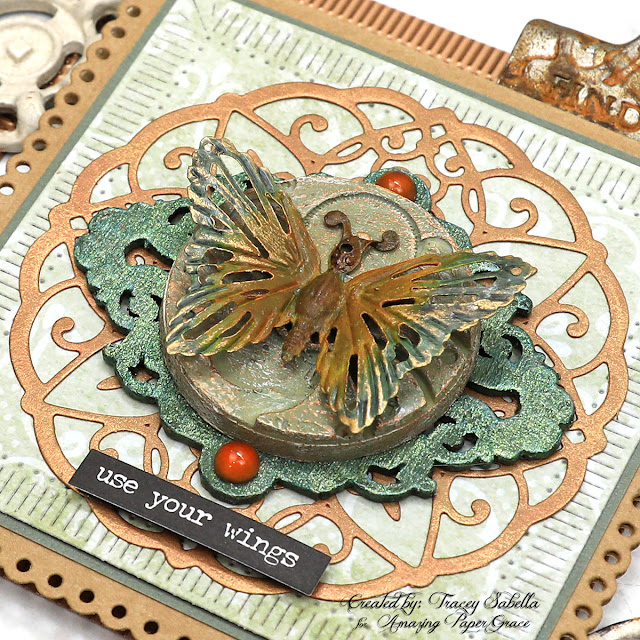
Just look at the amazing detail in these scalloped and fluted edges, and this medallion is perfect to alter for a metallic layer. A couple baubles are added to accent the coppery color.  I thought this sentiment from the Tim Holtz Small Talk set popped up on foam tape was perfect for this card.

Here you can see the beautiful interplay of the layers. Over the die cut medallion is an ironwork chipboard shape that I painted with shimmery mica filled paint, then atop that is a resin machine cog that's painted with impasto paints, then rubbed with brass and copper art wax to highlight the textures and details. Then the feature piece is this gorgeous metal butterfly that I painted with liquid acrylics. I realized after putting everything together that the butterfly got a little lost above the green ironwork piece which was similar in color. That was an easy fix by highlighting the wing edges with a bit more of the metallic art wax to give a nice contrast. Those details really can make a difference.

Here's one final view. Don't you just adore this mix of beautiful die cut layers and grungy painted pieces? 

Amazing Paper Grace Die Sets:

Paper: 
  • Tim Holtz with Idea-ology: Wallflower
  • Cardstock ~ Kraft

Mixed Media:
  • Finnabair with Prima Marketing ~ Impasto Paint: Burlap; Victorian Green; Lemon Peel
  • Finnabair with Prima Marketing ~ Liquid Acrylic: Avocado Green; Burnt Sienna; Tiger Orange; Emerald
  • Finnabair with Prima Marketing ~ Metallique Wax: Rich Copper; Aged Brass
  • Finnabair with Prima Marketing ~ Sparks Acrylic Paint: Green Goblin
  • Finnabair with Prima Marketing ~ Mould - Cogs and Wings
  • Amazing Casting Resin ~ White
  • Liquitex ~ Gesso, White

Embellishments:
  • Finnabair with Prima Marketing ~ Mechanicals - Grungy Butterflies
  • Finnabair with Prima Marketing ~ Melange Art Pebbles - Vintage
  • Blue Fern Studios ~ Chipboard: Ironwork Accents

Adhesives:
  • Double Sided Tape ~ 1/4" 
  • Beacon ~ 3-IN-1 Advanced Craft Glue
  • Beacon ~ Fabri-Tac
  • Tombo ~ Mono MULTI Liquid Glue
  • Scrapbook Adhesives by 3L ~ Crafty Foam Tape - Black
Tools:
  • Spellbinders ~ Platinum 6


Thanks for stopping by! I treasure your comments.

~ Blessings ~

Monday, June 14, 2021

Summery Slimline Floral Card with VIDEO TUTORIAL for Little Birdie Crafts


Welcome to my creative space!

Summer is just around the corner and those warm (hot) temperatures have arrived along with beautiful vibrant flowers coming into full bloom which inspired me to pull out the gorgeous Boho Dreams collection filled with amazing yellows, corals, and pinks!! 

Slimline cards are trending these days, so I thought I'd use this popular format to create this summery card filled with gorgeous Little Birdie flowers, chipboard, and mixed media products.

Close-up photos and more details can be found on the Little Birdie Crafts Blog HERE.
Thanks for stopping over there if you have a chance to leave a comment.

Little Birdie Crafts is having a huge sale at their online store with their best prices of the year along with FREE worldwide shipping on orders over $99.
Check out the sale HERE.

Use code TRACEY05 for a 5% discount.

I receive a small commission at not cost to you.


I hope you'll join me to view this video tutorial and explore how to use paints and waxes to beautifully color resin, add a lovely finish to chipboard with embossing enamel, arrange gorgeous flowers and embellishments to fill a slimline card while creating dimension, and add sparking texture to flowers. 


Other Supplies
Zuri Designs ~ Dragonfly Wings (Affiliate Link)
Amazing Casting Resin - White
Lace ~ Gold
Ice Resin ~ German Glass Glitter Shards - Primrose
USArtquest ~ Mini Prills - Go ManGo
Stampendous ~ Fran-tage - Embossing Enamel: Shabby White
Ranger - Emboss It Dabber
Helmar ~ 450 Quick Dry Adhesive
Scrapbook Adhesives by 3L ~ EZ Dots Repositionable
Wonder Tape - Foam Tape

 
Thanks for stopping by! I treasure your comments.

~ Blessings ~

Friday, May 7, 2021

"You Are Beautiful" Layered Shabby Mixed Media Card with VIDEO TUTORIAL for Little Birdie Crafts

Welcome to my creative space!

Mother's Day is this Sunday and I've created this beautiful layered card for my mom featuring gorgeous Little Birdie Crafts Papers, flowers, and mixed media supplies. The video shows all the details and techniques used to create this beautiful card.

My sister and I took our mom out for lunch to celebrate this week. How do you observe Mother's Day with your mom or another special woman in your life?

All of the close-ups and details can be found on the Little Birdie Crafts blog HERE.
It would be great if you could stop over there to leave a comment.

If you would like to see a full supply list, please scroll down.
Little Birdie Crafts can be purchased at their online store.

Be sure to check out the current sales HERE.

Use code TRACEY05 for a 5% discount.

I receive a small commission at not cost to you.

I've created a full project video with voice instructions including how to:
  • Alter gorgeous flowers with paint and texture
  • Highlight texture on this fabulous butterfly with paint and wax
  • Transform seam binding into a grungy bow using paint & gesso
  • Create gorgeous gems with pearl drops
  • Add tattered edges to beautiful layered papers

Enjoy!


Amazing Casting Resin ~ White
Tim Holtz with Stampers Anonymous ~ Ledger Script
Tim Holtz with Stampers Anonymous ~ Flower Shop
Tim Holtz with Ranger ~ Distress Ink - Old Paper
Tim Holtz with Ranger ~ Distress Archival Ink: Ground Espresso; Peeled Paint
Tim Holtz with Ranger ~ Distress Paint - Kitsch Flamingo
Ranger ~ Emboss It Dabber
Stampendous ~ Embossing Enamel - Shabby Pink
Stampendous ~ Glass Glitter: Bronze; Champagne
Mini Microbeads ~ White Gold
Hug Snug Seam Binding - White
Helmar ~ 450 Quick Dry Adhesive
Repositionable Tape
Tim Holtz with Tonic Studios ~ Paper Distresser
Ranger ~ Heat it Craft Tool
Ranger ~ Mini Ink Blending Tool


Thanks for stopping by! I treasure your comments.

~ Blessings ~

Wednesday, March 13, 2013

"Faith is the Strength" for SOUS Card Sketch

Our dear and sweet owner of ScrapThat! has had sadness touch her life this week with the passing of her beloved brother. I have sent Kaitlyn this card I created as a word of encouragement. Because I mailed it, I tried to created some layers and visual dimension without the thickness of my normal flowers.

"Faith is the Strength"

Inside View

I used this lovely sketch over at SOUS.
As you can see, I rotated and flipped the sketch.

Tips and Techniques: 


Lolipop Flower ~ This technique has been around for as long as I've been scrapping and still creates some lovely flowers. Cut circles in 1/2 inch increments, crinkle the paper, and glue the centers together. The sweet center is a vintage button from a tin of buttons given to me by my DH's cousin, Debbie Clapper - Thanks Debbie!! 


Color Work ~ I wanted these sweet flowers on the background paper to pop, so I used my Picket Fence Distress Marker to color the flowers. Since it is opaque, it really highlighted these sweet gems in such a lovely way


Layers ~ One of the Spring in Bloom Donna Salazar papers was die cut with gorgeous paper ribbons. I cut a strip of the pink to layer over the teal music paper and atop them all is the beautiful lace. 

Sentiment ~ I stamped this sentiment with Donna Salazar Mix'd Media Ink, then while still wet, sprinkled on clear embossing powder and heat set. I then hand cut this little banner around the sentiment and distressed the edges adding a couple pearls to accent. 

Inside ~ The December 26, 2012 Word Art Wednesday quotation by Helen Keller gives such an encouraging message. I printed it in the center of a sheet of copy paper. I then cut out a 6 x 6 inch printed square of Donna Salazar Antiquities Artistic Paper and applied repositionable tape to the back. Using a light box, I positioned the paper over the sentiment and adhered it in place. I ran both through my printer to get the sentiment on the card exactly how I wanted it. I then trimmed the piece to fit the card and distressed the edges with my Distrezz-It-All. 

Products Used:
DSD Spring in Bloom ~ Flight
DSD Spring in Bloom ~ White Roses
DSD Spring in Bloom ~ Springtime Ribbons
DSD Spring in Bloom ~ Spring Journal Cards
DSD Spring in Bloom ~ Artistic Papers, Antiquities
Zing Embossing Powder - Clear
DSD Mix'd Media Inx - Indigo
Distress Marker - Picket Fence
Inky Antics Clear Stamps - Mighty Tower
Want2Scrap Say It With Baby Bling - Pearls
Vintage Button - Stash
Cotton Lace - Stash
Word Art  ~ December 26, 2012 WAW Word Art
DSD Distrezz-It-All
Scotch ATG
Helmar 450 Adhesive
Glossy Accents
Fiskars Circle Cutter
Martha Stewart Mini Scoring Board

I pray that this card will express my heartfelt sympathies.

I have entered this at:
Stuck on U Sketches March 6 Card Sketch
Word Art Wednesday Challenge #71 Anything Goes

Thanks for stopping by! I treasure your comments.

~ Blessings ~

Friday, February 8, 2013

"A Perfect Day" Details ~ ScrapThat! Feb. Kit

I'm back today to share the details of "A Perfect Day" Created with the February ScrapThat! Kit. As you may remember, Elizabeth brought Andrew into our family back in October. We were delighted to receive the wedding photos last month just in time for me to use one to create the final LO with my gorgeous February Kit. Aren't they a sweet couple?

Before I share the details, I have some exciting news to share. My Misted Rock Salt Chipboard Tutorial has been published by Scrapbooking.com. They have taken my photos and created a wonderful video tutorial. I hope you will stop over there to check it out. Here are the links:


"A Perfect Day"
MK, EAO

Tips and Techniques:


Ribbons ~ I used the cream cardstock in the kit to cut ribbons. I then used a foam applicator to apply Distress inks to pull out the colors found on the focal background paper. Finally I distressed the edges with my Prima distressing tool and edged with a darker distress ink. To make them look more like actual ribbon, I gently bent and crumpled them until they had a soft fabric like appearance. I then snipped some pieces from two of the kit ribbons to layer over top of the paper ribbon strips. Our former DT, Marilyn Rivera, is a master of transforming paper to look and drape like fabric and I got this idea from her. You will be inspired by a visit her blog, Treasuring Memories.

A side view:

Netting ~ The kit came with gorgeous netting that works so well to add extra dimension. Here I tucked some behind my flower cluster.

Wood Heart Flourish ~ I painted the KaiserCraft Heart with gold metalic paint and when dry stamped across the piece with a script stamp using black Stazon.


Chipboard Frame ~ I added this Dusty Attic Chipboard piece from my stash. I love this photo, but Andrew's had around Elizabeth's shoulder a bit pronounced when placed on a scrapbook page. Using the chipboard piece to frame and layer over the photo took care of that little "problem." The technique here is so easy peasy. I simply painted with metallic paint and when dry took some Distress ink in a darker shade to add dimension on the edges. 

Puffy Hearts ~ These Green Tara hearts are included in the EAO kit. They were just a little bright for this page, so I spritzed them with some cork Glimmer Mist to get more of a burgundy color. 

Distressed Layers ~ I framed the photo with two of the kit cardstock papers and used my Donna Salazar/Zutter Distrezz-It-All on the edges. Behind the top right corner, I placed a corner from the gorgeous square doily found in the main kit. 


Medallion ~ The kit includes these kraft journal spots which made the perfect base for my medallion. The pearl ribbon slide is also in the kit and the paper ribbons are described earlier. The metal heart is from my stash. 

Hand Stitching ~ I drew a swirled line around the border of my layout in pencil, then went back and pierced stitching holes, erased the pencil mark and stitched with coordinating embroidery floss. I used to cross stitch, so I have an entire box of DMC floss to choose from. 


Mixed Media Butterfly ~ What is a page without some mixed media? I used some Martha Stewart White Texture Effect over one of her butterfly stencils, then sprinkled on some gold microbeads. 


Title ~ This really was a perfect day, so this title worked perfectly for my page. Originally, I cut it out in the beautiful bracket frame from the page. I brushed on some Ranger Rock Candy Distress Paint. I didn't set it aside far enough to allow it to dry, because I accidentally laid some scrap paper on top, ruining the edge. It was one of those happy mistakes, since I like the words cut out better than I did in the frame. I'm here to tell you, always look for the lemonade when those scrappy lemons happen. 

The February Kits are now in the ScrapThat! Store, so be sure to drop by and get yours before they are sold out. 

I hope you will have a chance to stop by and see my Misted Rock Salt Video over at Scrapbooking.com. 

Thanks for stopping by! I treasure your comments.
~ Blessings ~