Showing posts with label Square Card. Show all posts

Saturday, December 31, 2022

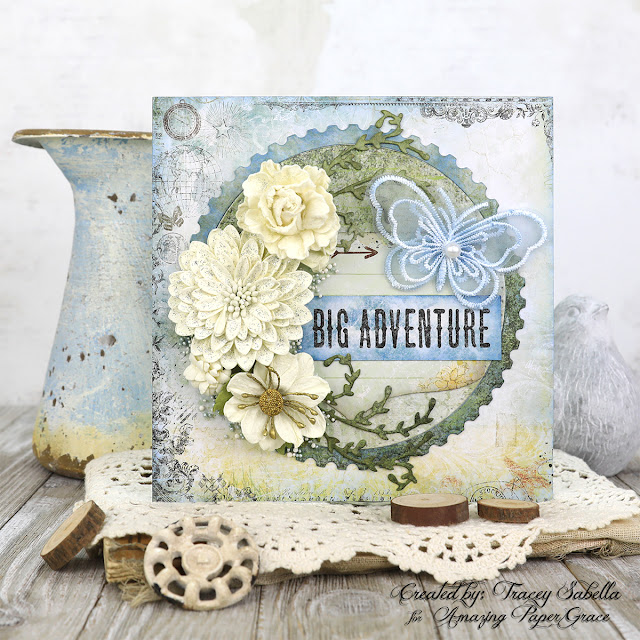
Big Adventure Postage Edge Circle Card for Amazing Paper Grace

 
Welcome to my creative space!

I thought it would be nice to bring a hint of summer warmth after the recent wintry weather we have experienced recently. This beautiful card features the Amazing Paper Grace Postage Edge Circles die set (S5-539). I just adore the versatility of this fabulous postage edge collection.

The postage edge and pierced inner circle were cut in one pass with the same section of patterned paper.  The outer postage ring is inked and turned to highlight and give definition. Premade flowers from Little Birdie Crafts are paired with gorgeous foliage die cut with fabulous leaf dies from the My Sweet Friend set (S5-512)

I enjoy creating versatile cards that can be used for a variety of occasions. This card could be a send off for someone taking an adventurous trip, a new job, graduation, or milestone birthday. 

For more close-ups and all the details on how to create this card, be sure to scroll down through the Tips and Techniques section below. 

Thank you Amazing Paper Grace for providing the dies used in this project.


Tips and Techniques
As mentioned earlier, I die cut the postage edge ring and inner pierced circle from the same patterned paper in one pass. I wanted the ring to have definition while coordinating with the inner circle so rubbed it randomly with Faded Jeans Distress Ink. The edges of the inner circle are inked with Pumice Stone Distress Ink to make the pierced design more visible and to add to the contrast between the two pieces. 

The white lace butterfly is also rubbed with the Faded Jeans ink to give it a soft blue hue.
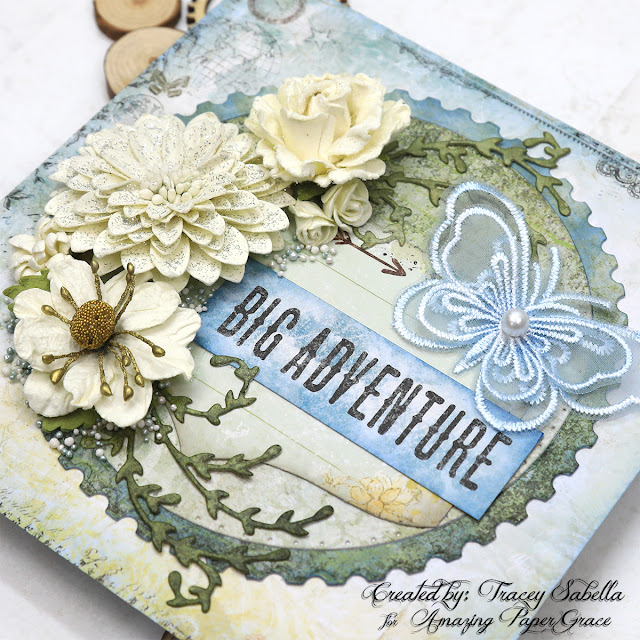
This circle design is perfect for arranging a flowing floral cluster along one side as I did here. I arranged pre-made Little Birdie flowers from the Shabby Chic collection, then to extend the design around the circle I die cut foliage with a soft curve from the My Sweet Friend die set (S5-512) from a darker green section of the same patterned paper. The leafy section is cut into two pieces to use on each end of the cluster and inked with Forest Moss Distress Ink to add contrast.

This close-up also shows how gorgeous this postage edge design is. You may notice that I also rotated the outer ring so that the darker part of the ring is against the lighter part of the circle. This adds more contrast to the design. By rotating and inking the postal edged ring, it looks like two different patterned paper were used. 
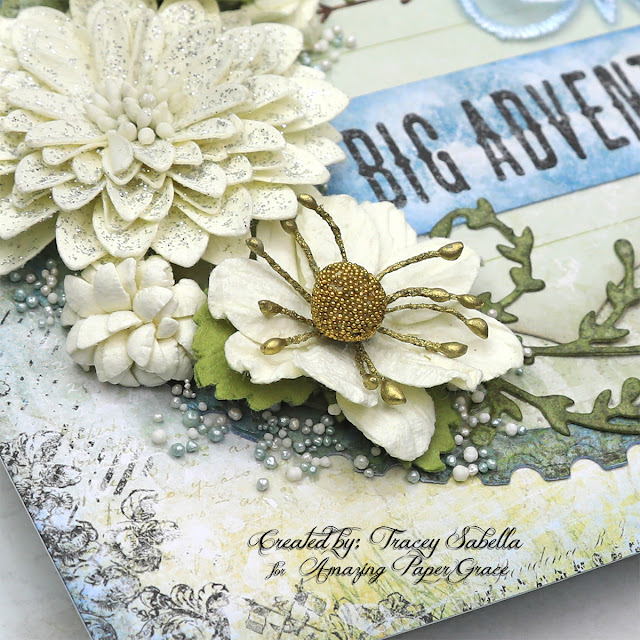
To add texture and fill in areas around the cluster I brushed matte gel medium around the edges and sprinkled with two colors of Prills. This is an easy way to add a bit of sparkling texture to your project.
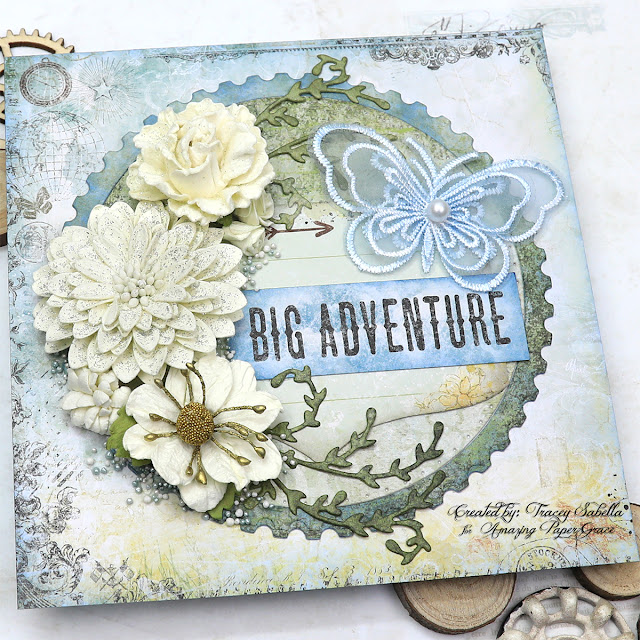
The Wanderlust paper collection included a page with 6x6" designs that could be cut for card bases. The background paper is one of those pieces and coordinates perfectly with the round postage designs. The edges look stamped, but this is part of the patterned paper. I did add a bit of light inking with Faded Jeans around the edges of the background and sentiment.

Below you can find the products I used to create this project including some with compensated affiliate links to Scrapbook.com and Spellbinders. These links are at absolutely no cost to you. When you shop through the links below, I receive a small commission from the companies.  These commissions help me cover the costs of my blog and other expenses, which allows me to continue to provide you with FREE inspiration along with detailed Tips and Techniques provided for every project. Thank you so much for your love and support!

Amazing Paper Grace Sets:

Paper:

Ink:

Mixed Media:
  • Prima - Finnabair - Soft Matte Gel

Embellishments:
  • Little Birdie Crafts - Shabby Chic Flowers: Wendy; Nancy; Bonita; Julita: Micro Roses
  • Prima - My Sweet Butterfly Lace
  • US ArtQuest - Mini Prills: Mint To Be; Minnie Pearls

Adhesives:

Tools:

Thank so much for stopping by to view this warm summery card.
I hope you've been inspired.

Wednesday, December 14, 2022

Introducing the Amazing Paper Grace Home Sweet Quilt Collection with Quilted Card Two Ways

 
Welcome to my creative space!

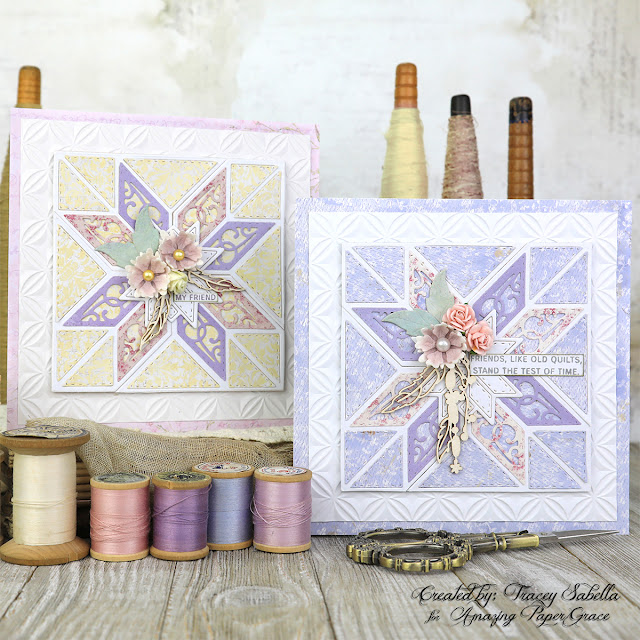
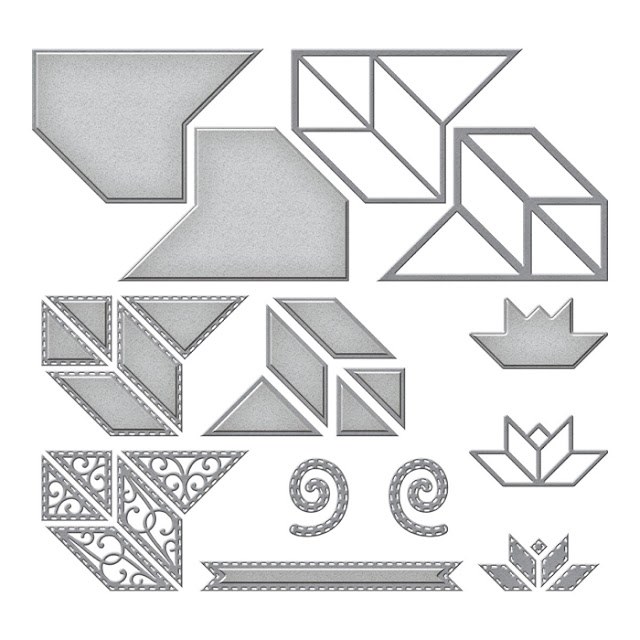
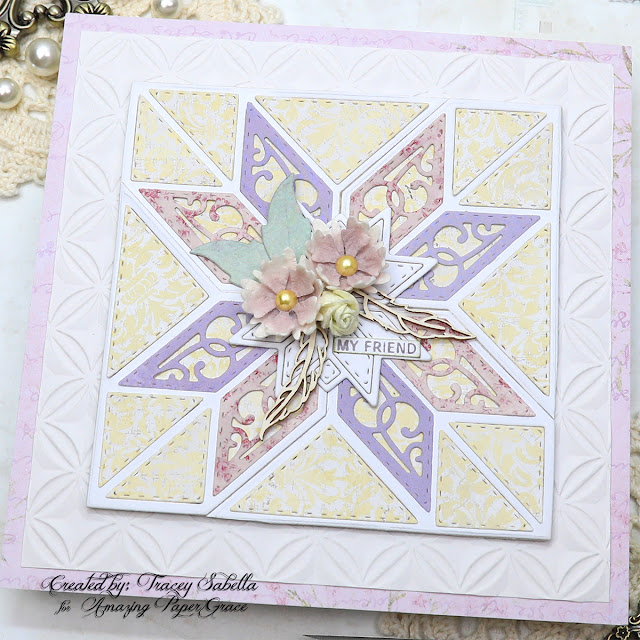
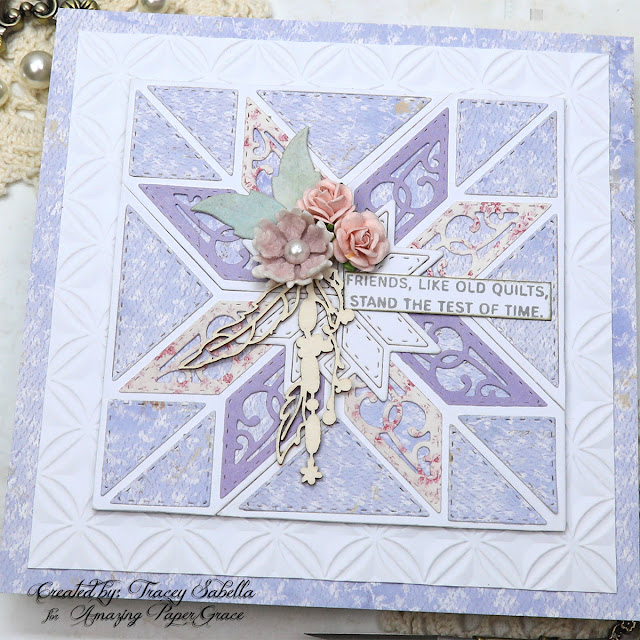
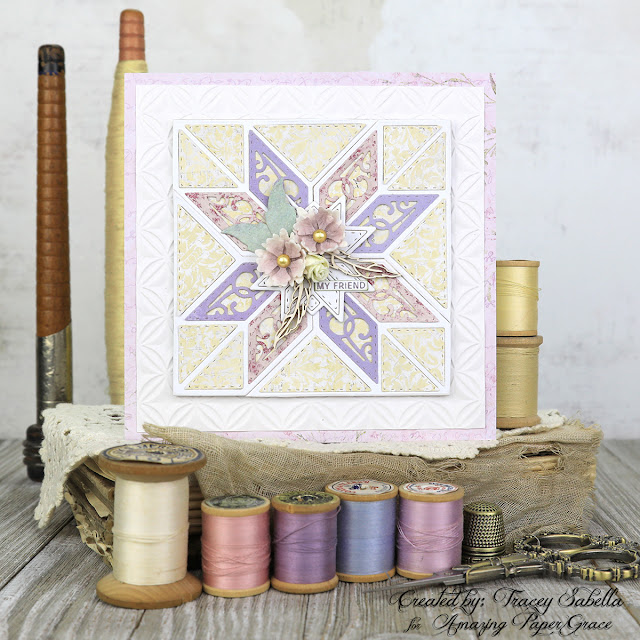
My grandmother created gorgeous quits from lovely scraps of fabric. I remember visiting my grandparents as a child and seeing the quilt rack pulled up to the ceiling amazed at the beautiful designs peeking through. My grandfather crafted a special quilt rack for her that hung from chains where she spent many creative hours hand quilting her beautiful designs. This has made it a special joy to create beautiful shabby chic quilted cards with the fabulous Amazing Paper Grace Filigree Eight Point Star set (S4-1251) from the newly released Home Sweet Quilt Collection! 

As I child my grandmother's creative spirit inspired me. I often thought I would become a quilter, but that creative inspiration turned into mixed media paper crafting instead. I'm so thankful for her beautiful inspiration and how much it means in my life.

I started out by die cutting the filigree points and wanted to alternate colors as you so often see on fabric quilts. The points are directional, so I needed to cut out eight points in each color, but could only use four of each for this card. I set aside the extras to get a head start on a second card. 

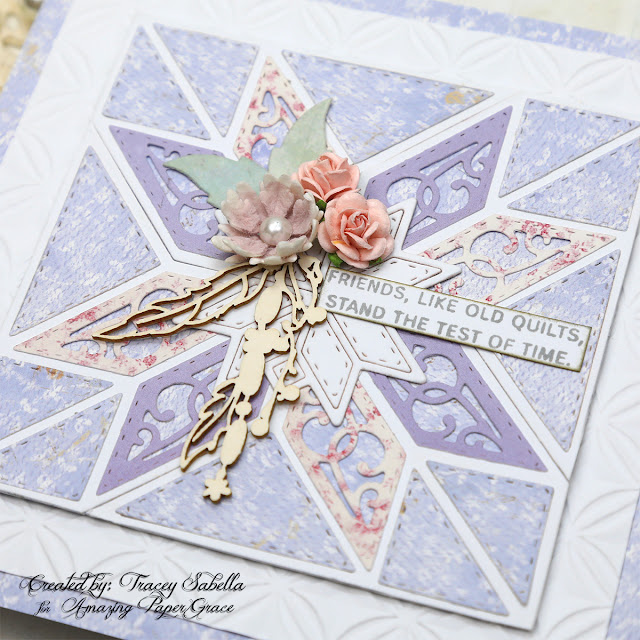
Yellow is a complementary color to purple and this pairing of colors is just gorgeous. With the filigree points already die cut for the second card, I wanted to show a different direction with the colors and used blue with just a hint of lavender to keep it in the same cool color family. 

The embossed design that frames both quilt squares uses the Orange Peel Quilt 3D Embossing Folder (E3D-046), and the sentiments are from the Quilty Hugs Sentiments Clear Stamp Set (STP-156). These sweet sets are from the new Home Sweet Quilt Collection.

Because I went with a masculine design last week, I didn't end up using the floral and foliage dies from the Sweetheart Envelope & Notecard Die of the Month Set (DOMAPG-DEC22) so used them here to create the mulberry purple centered flowers and green leaves used on both cards. The scale of these gorgeous flowers is just perfect with this quilted design.

For lots of close-ups and all the details on how to create these beautiful quilted cards, be sure to scroll down through my Tips and Techniques section below.

Today's projects were created with dies provided by Amazing Paper Grace.

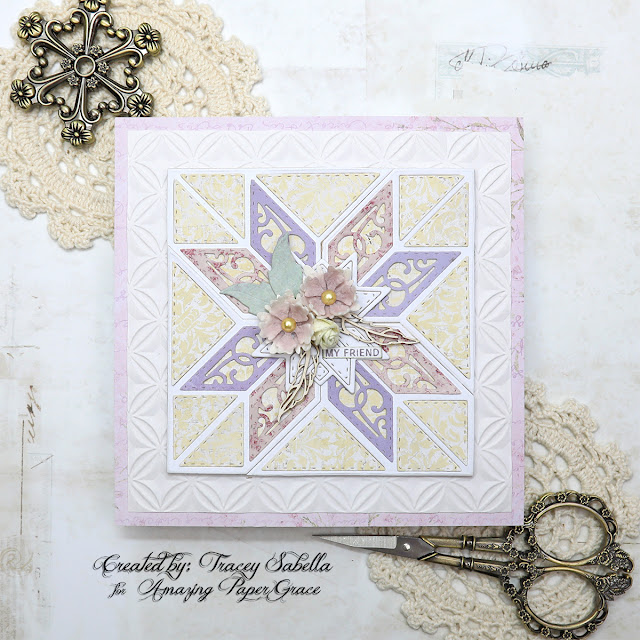
Purple and Yellow Quilted Card

Purple and Blue Quilted Card

Tips and Techniques
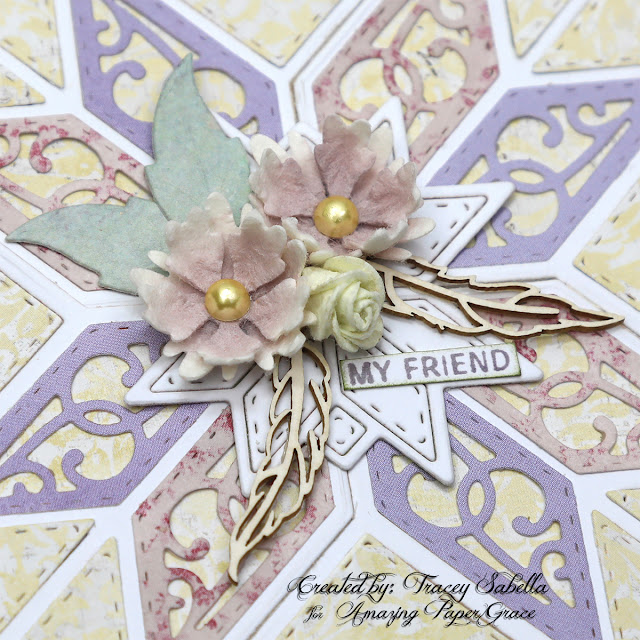
What a gorgeous die set to work with. The details are just so gorgeous from the filigree points to the stitched triangles and inlay frames that bring this design together so effortlessly. 

This card pairs the beautiful golden yellow with the purples.

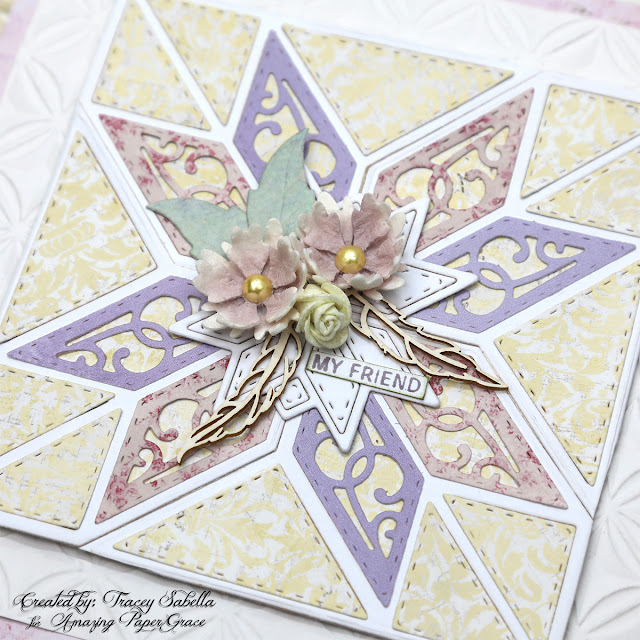
The floral filigree points were a little on the light side so I didn't get a good contrast with the yellow background. It was an easy fix. I inked them lightly with Milled Lavender Distress Ink to darken them just a little to get the nice contrast I was looking for. 

***Designer Tip*** If you love a patterned paper die cut, but the color isn't quite working just right, it can be altered with inks.

These sweet flowers are die cut from ivory mulberry paper using the December Sweetheart Envelope & Notecard Set (DOMAPG-DEC22) and the leaves are cut from soft green patterned paper. I added a small ivory rosebud and chipboard leaves from my stash.

The white quilted points in the center make a gorgeous base for this simple cluster. I die cut two sets of white points then added washi tape to the back to hold all the pieces in place.

The sentiment is stamped with Hickory Smoke Distress Archival ink onto white cardstock with the coordinating Quilty Hugs Sentiments Clear Stamp Set (STP-156). I wanted to keep it small so more of the quilted design would be visible, so cut it out closely with scissors and inked the edges lightly with Hickory Smoke Distress Ink.

In this close-up you can see how lovely the stitched details are in these die cut pieces.

The embossed design is just so gorgeous to frame this beautiful quilt square. By using white cardstock with the Orange Peel Quilt 3D Embossing Folder (E3D-046), it adds lovely texture, but keeps the focus on the beautiful quilted pattern. The entire card is framed with a piece of coordinating purple patterned paper.
    
Now let's take a look at how these same filigree points paired with blue patterned paper. The quilts my grandmother created had lovely designs in the fabric, so when looking through my stash of papers I looked for patterns with a small scale that would look like fabrics quilted together. 

Since the filigree points were already cut, and I had put this card together once, this second one came together more quickly, yet each has a distinctive look with the different color palettes. 

I used another sweet sentiment from the Quilty Hugs Sentiments Clear Stamp Set (STP-156) using the same Hickory Smoke color that is used on the yellow card.

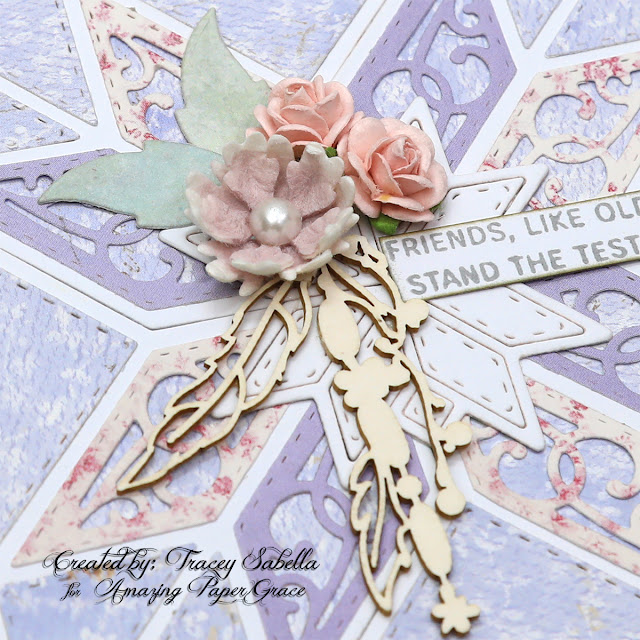
This time the floral filigree points contrasted nicely with the blue paper beneath, so no need to ink them.

Here is the third mulberry paper flower I created using the December Sweetheart Envelope & Notecard Set (DOMAPG-DEC22) along with another pair of lovely green leaves. 

It's paired with two pink rosebuds and more delicate chipboard.

I framed this card with more of the embossed design and framed it using the same lavender blue paper used for the quilt square. I normally use 1/4 inch double sided adhesive on the edges to adhere layers, but for this embossed layer, I knew there would be less contact with the adhesive because of the raised design, so used 1/2 inch double sided adhesive to be on the safe side.

These dies and plates are available from Spellbinders right now! Click here: The Home Sweet Quilt Collection.

Below you can find the products I used to create this project including some with compensated affiliate links to Scrapbook.com and Spellbinders. These links are at absolutely no cost to you. When you shop through the links below, I receive a small commission from the companies.  These commissions help me cover the costs of my blog and other expenses, which allows me to continue to provide you with FREE inspiration along with detailed Tips and Techniques provided for every project. Thank you so much for your love and support!

Amazing Paper Grace Sets:

Paper:
Stash - Maja Designs; Scrapberry's Patterned Paper (Retired)
Mulberry Paper - Thick, Ivory

Ink:
Ranger Ink - Tim Holtz - Distress Archival Ink - 4 Pack (Hickory Smoke)

Embellishments:
Scrapiniec - Boho Love Chipboard - Small Garlands 02 - 5144
Stash - Half Pearls - Gold

Adhesive:
Clear Double Sided Adhesive Roll - 1/4 Inch - Permanent
Scotch - Quick Dry Adhesive
Beacon - 3-IN-1: Fabri-Tac

Tools:

Visit each Creative Team blog linked below for their take on creative paper crafting ideas using  The Home Sweet Quilt Collection.


I would adore hearing from you! Please leave a comment below letting me know how you will use these gorgeous dies!


Thanks for stopping by! I treasure your comments.

~ Blessings ~

Monday, October 24, 2022

Joy to the World Christmas Card for Amazing Paper Grace

Welcome to my creative space!

"Joy to the World" is a favorite Christmas hymn, so I was just delighted to design with this fabulous and elegant Amazing Paper Grace Joy Flourish Doily die set (S5-532).

I started creating this card at a creative weekend with a dear friend. I had selected papers and die cut the doily frame, sentiment, and curls. I knew I wanted to add poinsettias, but thought I'd wait until I got home to finish the blossoms. I like to die cut my petals, and then form the blossoms while watching a bit of television in the evening. 

As it turns out I ended up going a little overboard creating blossoms for my poinsettia envelope project earlier this month using the gorgeous APG October Die of the Month: 3D Poinsettia Surprise Envelope. (This set is available only through the APG DOM subscription through October 28 HERE.) I had five extra poinsettias in purple. I wasn't sure they would go with the teal and reds I had selected for this card until I put them together and wow!! The colors look great together, don't you think?

Holly leaves from the Joy Flourish Doily set were die cut in teal patterned paper to add to the floral clusters and snowflakes are die cut in white glitter paper from the Let it Snowman set (S5-533).

You can view all the details on how I created this card with close-ups by scrolling down through the Tips and Techniques section below.

Thank you Amazing Paper Grace for providing the dies used in this project.


Tips and Techniques
The vintage background paper is cut to 5x5" and the edges are inked lightly with Gathered Twigs Distress Ink to give a shabby vintage feel. The outer frame in a dark teal patterned paper is cut to 5 1/4x5 1/4" giving a 1/8" frame around the card. This layer is inked lightly just at the very edge in Uncharted Mariner. 

The doily frame is cut in the same teal paper and inked with more of the Uncharted Mariner. This frame is backed in a neutral patterned paper which is inked around the edges with Gathered Twigs.  

Here are the poinsettias created with the 3D Poinsettia Surprise Envelope October Die of the Month. I used purple paper for the petals and teal for the center with green leaves. The berries are Pine by Me Prills. The petals, leaves, and centers are cut and inked before shaping, then glued together.

More of these gorgeous poinsettias. The holly leaves are from the Joy Flourish Doily set cut in the same teal, and inked with Uncharted Mariner.

The scrolled curls are cut from Gold metallic paper.

These sweet snowflakes are cut from white glitter paper with the Let it Snowman die set

Texture is added by adhering teal mica flakes, then going back in and adhering teal microbeads over the flakes that are underneath the floral clusters and sentiment die cut. Don't you just adore a bit of sparkle and shine on a Christmas card?!

Joy is cut from a dark red patterned paper and again from gold metallic paper. The pieces are offset when glued together to show a sliver of the gold underneath.

The banner for "To the World" is cut using a die from the Sweet Leaf Mini Slimlines set (S5-508). Once cut, the word sentiment is centered into the banner and die cut again.

I hope you've been inspired to pull out non-traditional colors to create a shabby vintage Christmas card for someone special in your life.

Below you can find the products I used to create this project including some with compensated affiliate links to Scrapbook.com and Spellbinders. These links are at absolutely no cost to you. When you shop through the links below, I receive a small commission from the companies.  These commissions help me cover the costs of my blog and other expenses, which allows me to continue to provide you with FREE inspiration along with detailed Tips and Techniques provided for every project. Thank you so much for your love and support!

Amazing Paper Grace Sets:

Paper:

Ink:

Mixed Media:

Embellishments:
  • US Artiest - Mini Prills - Pine by Me
  • Martha Stewart - Metallic Microbeads - Apetite
  • Mica Flakes - Teal

Adhesives:

Tools:
Thanks so much for stopping by to view my card. I hope you've been inspired.
Monday, March 21, 2022

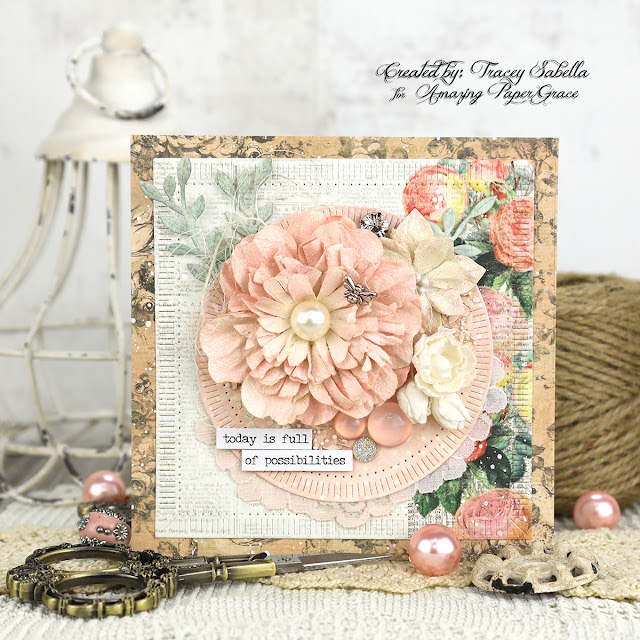
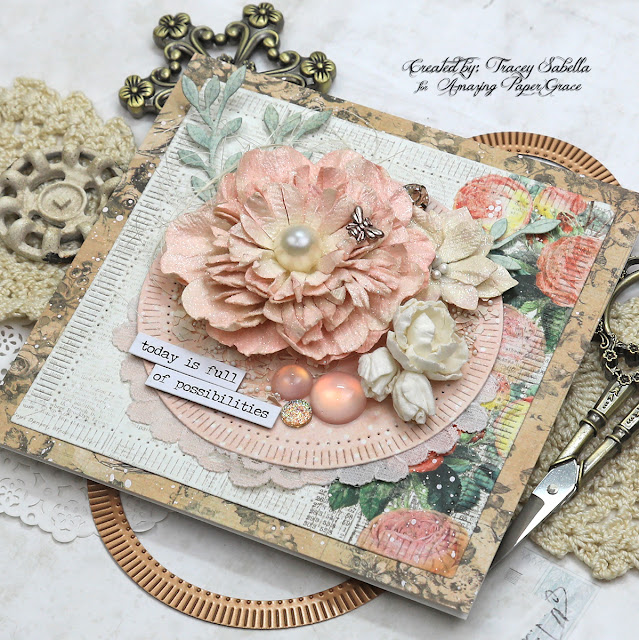
"Today is Full of Possibilities" Shabby Chic Card for Amazing Paper Grace

Welcome to my creative space!

Spring is officially here and has brought with it warming temperatures and the first blossoms of the year. This floral spring card features the fabulous Amazing Paper Grace Fluted Classics Circles die set (S4-1150). I've also used the companion Fluted Classics Squares set (S4-1151). These edges are just so beautiful and can be used in a wide range of styles.

I've also used the Candlewick Rosebud Dies Candlewick Sampler Collection (S4-1015) to create tiny roses and rose buds to pair with larger Little Birdie Crafts Flowers. The leafy bits are cut with Petite Floral Potpourri (S3-420) As you scroll down through the Tips and Techniques section, you will discover the details on how I put this card together. 

Thank you Amazing Paper Grace for providing the dies used on this card!

Tips and Techniques
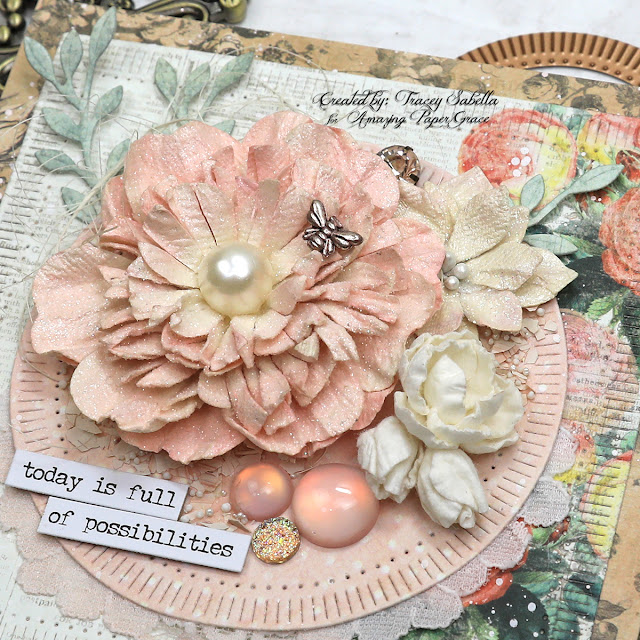
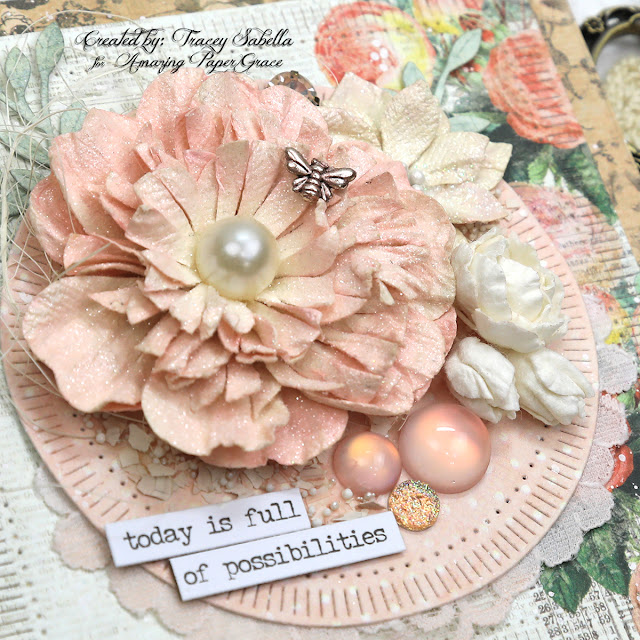
These gorgeous fluted edges create such beautiful layers to build this shabby chic card on. I've combined a couple larger flowers from Little Birdie Crafts with this delicate handcrafted rose and rose buds cut with the Candlewick Rosebud die set using creamy mulberry paper. They are set atop of a bed of natural sisal and leaf sprigs cut with Petite Floral Potpourri dies. I cut a motif from a lace strip to peek out from the bottom of the fluted circle. It's inked with Tattered Rose Distress Ink to coordinate with the flowers and circle.

The cluster is embellished with Finnabair Art Pebbles. I also added texture with rose colored fragments and white Prills. The sentiment is from the Tim Holtz Small Talk set. I showed the "finished" card to our granddaughter who promptly said that it needed a bug, so she helped me select this tiny bee charm and colored it with Rose Gold Metallique Wax. At the top I tucked in a sparkling gem.

This is the final shot, but the first thing I did to build this card is to adhere the two square background layers together, then spattered them with white ink to give visual texture and add to the shabby feel of this card.

I hope you've enjoyed learning the process for creating this card and will be inspired to try these dies out on a shabby chic creation.

Amazing Paper Grace Die Sets:
Paper:
  • Prima Marketing ~ Something Blue - 6x6" Paper Pad
  • Mulberry Paper ~ Cream

Ink:
  • Ranger ~ Distress Ink: Tattered Rose; Iced Spruce

Mixed Media:
  • Finnabair with Prima Marketing ~ Matter Gel Medium
  • Finnabair with Prima Marketing ~ Metallique Wax: Rose Gold
  • Higgins Drawing Ink ~ White

Embellishments:

Adhesives:
  • Beacon ~ 3-IN-1 Advanced Craft Glue
  • Beacon ~ Fabri-Tac
  • Double Sided Tape ~ 1/4" 
  • Tombo ~ Mono MULTI Liquid Glue
  • Scotch Quick-Dry Adhesive

Tools:
  • Spellbinders ~ Platinum 6
Thank you Little Birdie Crafts for supplying products used to create this card.

Little Birdie Crafts can be purchased at their online store.

Use code TRACEY05 for a 5% discount.

I receive a small commission at not cost to you.


Thanks for stopping by! I treasure your comments.

~ Blessings ~