Monday, April 13, 2020

Designer Spotlight Guest Designer for the April Simon Says Stamp Monday Challenges Week 2: "E" is for?


Welcome to my creative space!


I'm back with my second project as the Spotlight Designer for Simon Says Stamp Monday Challenges during the Month of April. I am so delighted and honored to be guest designing for them this month!


This week's theme is:

'E' is for?  

Be sure to hop on over to the Simon Says Stamp blog HERE for all the details and to be inspired by the gorgeous design team projects.

For this "E" challenge I used the theme of Easter. We just celebrated this special holiday yesterday, so I created an Easter card. I decided to grab my alcohol inks to create a vibrant and sparkling background to go behind this gorgeous Tim Holtz die cut using his Sizzix Bouquet Die. The flowers are cut with his Wildflower Stems #1 and #2 dies which are colored with Distress Oxide Inks. Be sure to scroll down through my Tips and Techniques section for all the details.

Tips and Techniques

I just adore alcohol inks!! I used to use them a lot, but have gotten away from creating with them. I recently purchased the new 2020 colors and Alloys so thought this would be the perfect opportunity to use them. I purchased this pack of Silver Sparkle Alcohol Ink Cardstock last year, but never got around to trying it out. So I thought I would experiment with it. Honestly I thought I had created quite the mess until . . . 


I placed the black Bouquet die cut over top. 

So . . . I started out by dropping alcohol ink onto the paper then added 70% rubbing alcohol over top and tried to move the alcohol ink color. Well, that didn't go so well. I ended up wiping it off with more alcohol, but it had stained the paper. Yes, you can still see the stain marks. 

Then . . . I used a pipette to pull a line of alcohol across the paper. Then I added drops of alcohol ink into the wet alcohol. A felt applicator was then used to swipe the color across the sparkly cardstock. That worked MUCH better. Well, except the stains were still there. 

So . . . to add more color and maybe help hide the stains, I added puddles of alcohol and dropped alcohol ink and Gilded Alloy into the puddles and moved them with the "cool air" setting on a hair dryer. It created a nice effect, but still didn't cover up the stains. 

To be perfectly honest, I thought it looked, well, um, ugly . . . unattractive . . . you get the idea. I was ready to admit defeat and toss it in the trash. I figured I had learned a lot and knew how to move forward with a new sheet of sparkle paper. That would be alcohol first, then alcohol ink. 

But . . . on a whim, I decided to place the the black bouquet die cut over the alcohol ink background, mostly to have an idea of what colors looked nice to know how to move forward with the next background and then to my disbelief, it looked absolutely gorgeous. Who knew??? Can you believe this transformation?? 

Here's a close-up of the Wildflower Stems flowers. I die cut them from white cardstock, then colored them with distress ink. I mashed the ink pads onto my Glass Media Mat, spritzed a little water next to the color and used a paint brush to mix the colors and paint the die cuts.

Here's a close-up of the alcohol ink background behind the die cut. You can see how glittery the background is on the Silver Sparkle Cardstock when the light hits it.

And another section showing the blues, purples, and Gilded Alloy.

I dyed a length of rayon seam binding with Boysenberry and Vinyard Alcohol Inks along with Intrigue Alcohol Pearls. I dropped some rubbing alcohol onto the Glass Media Mat to soak the ribbon, then dropped the alcohol ink onto the soaked ribbon and scrunched it until it was completely colored. While it was still wet, I added a few more drops of color and just lightly scrunched it some more so the color would vary with some darker and lighter sections. I held the ribbon in a scrunched up ball with my tweezers while drying it with my Heat It Craft Tool, so it would be nice and crinkled when dry.

The ribbon is tied into a triple loop bow. I also colored a Tim Holtz pearl Bauble and Heirloom Rose with alcohol ink to adorn the bow.

This metal piece from the Tim Holtz Nature Adornments set is colored with alcohol inks. I used a Tim Holtz Alcohol Ink brush to paint the ink onto the metal.

I colored white cardstock with Distress Oxide ink in similar colors and then stamped this sweet Easter sentiment. The edges are brushed with more of the purple Distress Oxide Ink.


As you may know, the  Simon Says Stamp Store is accepting new orders, but have longer shipping times for the moment due to the coronavirus. With this in mind we have made the difficult decision to suspend the $50 voucher for this challenge.

We know that many people are staying safe at home and we would love it if you would continue to enter the challenges and have fun! We are all in this together! You have until Monday 8am Ohio time. 1pm UK time, 2 pm CET to join in. The challenge can be found HERE.


Supply List
Alcohol Ink Mountain Rose
Tim Holtz Idea-ology Heirloom Roses Embellishments
Tim Holtz Idea-ology Nature Adornments 
Tim Holtz Idea-ology Baubles 
Tim Holtz with Tonic ~ Travel Stamp Platform
Cardstock ~ White
Cardstock ~ Black
Hug Snug ~ Seam Binding
Scrapbook Adhesives by 3L ~ Crafty Power Tape
Home & Hobby ~ Extreme Double-Sided Tape - 1/2"
Tim Holtz with Tonic ~ Travel Stamp Platform

You can follow me on:
Facebook

Thanks for stopping by! I treasure your comments.

~ Blessings ~

Thursday, April 9, 2020

Mixed Media Carnival Horse Birthday Card for Little Birdie Crafts


Welcome to my creative space!

Our little granddaughter turned three recently and I created this sweet card for her featuring the gorgeous Little Birdie Crafts Fairy Sparkle Collection with the Primed Chipboard Carnival Horse. Avery adores butterflies, so of course I added the fluttering butterflies that I fussy cut from the Fairy Sparkle paper. 

I hope you'll hop on over to the Little Birdie Crafts blog for a full photo tutorial showing how I put this together and to leave a comment letting me know what you think. You can find that post HERE.


Little Birdie Crafts can be purchased at their US online store. For a limited time there is free worldwide shipping on all orders over $99.

Use code TRACEY05 for a 5% discount.
I receive a small commission at no cost to you.
Thanks for your support!

Little Birdie Crafts Supplies 
Premium Card Stock ~ A4 - Bright White
Woodland Stories - Calypso
Primed Chipboard ~ Carnival Horse Ride
Stencil ~ Fleur-de-lis Trellis - 4x7"
Grainy Texture Paste
Tinted Metallic Paint ~ Shimmery Sherbet
Tinted Metallic Paint ~ Golden Plum
Tinted Metallic Paint ~ Glazed Berries
Crystal Drops

Other Supplies
Webster's Pages ~ Pink Velvet and Organza Trim 
Clear Rhinestones ~ 3mm
Buttons Galore & More ~ Fancy Hearts
Ranger Perfect Pearls ~ Pink Gumball; Berry Twist


Thanks for stopping by! I treasure your comments.

~ Blessings ~

Monday, April 6, 2020

Designer Spotlight Guest Designer for the April Simon Says Stamp Monday Challenges Week 1: Add Some Texture: Stamperia


Welcome to my creative space!


I have been invited to be the Spotlight Designer for Simon Says Stamp Monday Challenges during the Month of April. I am so delighted and honored to be guest designing for them this month!


This week's theme is:

Add Some Texture!

As it’s the first Monday of the month we are showcasing a brand/company. This week we are all using some fabulous products from Stamperia! You don’t have to use them to join in with the challenge but if you have them we would love to see them used.


Be sure to hop on over to the Simon Says Stamp blog HERE for all the details and to be inspired by the gorgeous design team projects.

I really enjoyed this challenge. I adore texture and this was the perfect excuse to try out Stamperia products for the first time. I have been eager to create something with their amazing Sea World designs and this collection was fantastic to work with. You can see several different ways texture is used on the canvas in my Tips and Techniques section below.

So many of us across the world are on stay at home orders to stay safe from COVID-19. It's an opportunity to embrace family and carve out time to find peace and comfort in being creative. I thought this sentiment was perfect for the situation we are in with the virus as well as pairing so wonderfully with the ocean themed canvas. "When a wave comes, go deep." We are all making sacrifices to help save lives particularly for those who are most vulnerable.

Tips and Techniques

The first thing I did was to trace my oval canvas shape onto the fabulous Stamperia Sea World paper, cut it out and adhered it to the canvas using matte soft gel medium. I also brushed over the paper with a coat of the soft gel medium to seal the paper to help protect it from the wet mediums I am using on the project. After the gel medium was dry, I sanded around the edges to get the paper even with the canvas. The edge of the canvas is painted with copper metalic paint and rubbed with charcoal black art wax. I also rubbed some of the charcoal wax around the edges of the paper to add depth.


I used resin in the Stamperia Sea World Soft Mold to create this amazing steampunk seahorse. I brushed it with white gesso then painted with metallic paints. After the paint had a chance to dry, Iit  rubbed with art waxes to highlight the fabulous textures. The gear on the back of the seahorse is painted with Prima Finnabair Rust Effect Paste. I added a couple Prima Finnabair gears - one over the eye, and another on the gear. For a little steampunk whimsy, I added a wing behind the gear. 

I layered the seahorse over a piece of fish netting from my stash. The net was black, and I highlighted the texture by rubbing with Prima art waxes. I stamped the seaweed and sea flowers from the Stamperia Seahorse Cling Stamp set onto Tim Holtz Distress Watercolor Cardstock and colored with Distress Oxide Inks, then fussy cut them to add a pops of color around the seahorse, starfish, and gears.


This sentiment is from the Prima Finnabair Art Daily Sentiments Stickers pack and embellished with a piece from the Prima Finnabair Rusty Knobs Mechanicals set. I colored the sentiment with Distress Ink. Texture is added to the background with black lava embossing paste using the Stamperia Mixed Media Layout Stencil. 


These three base gears are created with resin using the Sea World Soft Mold and topped with a couple Finnabair Mechanicals Metal Gears The resin gears are painted with metallic paint then rubbed with art wax. I added aqua prills and metallic microbeads with matte soft gel medium for added texture. 


More of the molded and metal gears.

The starfish is another resin piece from the Sea World Soft Mold. I applied Rust and Patina Effect Pastes then rubbed with copper art wax. For more texture I added a small seashell from my stash tucked onto a bit of moss. I painted the moss to coordinate.


Another starfish from the Sea World Soft Mold. This one is painted with metallic paint and rubbed with art wax to highlight the textures.


A close-up of some of the seaweed stamped with the Sea World Seahorse Cling Stamps set and colored with distress oxide inks.


As you may know, the  Simon Says Stamp Store is accepting new orders, but have longer shipping times for the moment due to the coronavirus. With this in mind we have made the difficult decision to suspend the $50 voucher for this challenge.

We know that many people are staying safe at home and we would love it if you would continue to enter the challenges and have fun! We are all in this together! You have until Monday 8am Ohio time. 1pm UK time, 2 pm CET to join in. The challenge can be found HERE.


Supply List
Stamperia Mixed Media Layout Stencil
Prima Marketing Steampunk Blades Mechanicals
Prima Marketing Winged Mechanicals
Prima Marketing: Finnabair Art Daily Sentiments Stickers
Prima Marketing: Finnabair Art Basics Heavy Body Gel
Prima Marketing Old White Finnabair Wax
Prima Marketing Charcoal Black Finnabair Wax Paste
Prima Marketing Rusty Brown Finnabair Wax Paste
Prima Marketing Rusty Red Finnabair Wax Paste
Prima Marketing White Gold Art Alchemy Metallique Wax
Prima Marketing Rich Copper Art Alchemy Metallique Wax
Prima Marketing White Gold Art Alchemy Metallique Wax
Prima Marketing Brushed Iron Art Alchemy Metallique Wax
Prima Marketing Rust Effect Paste Art Extravagance - Brown Rust, Gold Rust, Red Rust
Prima Marketing Patina Effect Paste Art Extravagance - Brass
Prima Marketing Metallique Steampunk Copper Art Alchemy Acrylic Paint
Prima Marketing Micro Beads Bronze
Prima Marketing Micro Beads Black
Ranger Mini Round Ink Blending Tools
Little Birdie Crafts Tinted Metallic Paint - Silver Charm
Amazing Casting Resin - White
Art Anthology Stone Effects Lava
USArtquest Mini Prills Aqua Net
Decorative Fish Netting
Helmar 450 Quick Dry Adhesive

You can follow me on:
Instagram
YouTube
Facebook

Thanks for stopping by! I treasure your comments.

~ Blessings ~

Wednesday, March 25, 2020

Romantic Mixed Media Canvas and VIDEO TUTORIAL with VOICE for Little Birdie Crafts


Welcome to my creative space!

The Birds and Berries collection from Little Birdie Crafts is simply gorgeous and perfect for this spring time shabby mixed media canvas. 

I have created a video tutorial sharing the techniques used to bring this canvas together. I decided to go out of my comfort zone and added voice instructions to my video. I would be so grateful if you would leave a comment either on YouTube or here to let me know what you think! As always, your feedback is so appreciated!

In this DIY Mixed Media Canvas Tutorial Learn how to:
~ Adhere base paper to the canvas
~ Sand to distress edges
~ Add texture by stenciling with Grainy Texture Paste
~ Add color and texture to chipboard
~ Paint resin pieces
~ Use art wax to highlight texture
~ Dry brush with white gesso to highlight texture and soften colors
~ Add texture with Craft Pellets and Metal Microbeads
~ Add depth with Color Splash

Enjoy!


More close-up photos can be viewed on the Little Birdie Crafts Blog HERE.

Little Birdie Crafts can be purchased at the online store.

Use code TRACEY05 for a 5% discount.
I receive a small commission at not cost to you.
Thanks for your support!

Little Birdie Crafts Supplies: 
Zoey Fairy Sparkle 18 pc
Wendy Fairy Sparkle 9pc
Primed Chipboard - Fancy Panel
Primed Chipboard - Chipboard Bird & Birdcage
Primed Chipboard - Cogs
Primed Chipboard - Ornate Wings
Craft Pellets - Mini
Acrylic Soft Gel Medium 100ml
Crackle Paste
Color Splash - Grape Crush, 50ml
Color Splash - Mocha, 50ml
Color Splash - Lemon Zing, 50ml
Tinted Metallic Paint - Shimmery Sherbet
Tinted Metallic Paint - Glazed Berries
Tinted Metallic Paint - Golden Plum
Metallic Wax - Rich Gold
Fleur-de-lis Trellis Stencil - 4x7"

Other Supplies
4x12" Canvas
Tim Holtz with Idea-ology ~ Small Talk
Lavender Rhinestones ~ From my stash
Lace ~ From my stash
Hand Crocheted Flowers ~ Made by Me
Liquitex ~ Clear Gesso
Tim Holtz with Ranger ~ Distress Oxide Ink: Dusty Concord; Shaded Lilac; Victorian Velvet
Amazing Casting Resin - White
Zuri Designs ~ Dragonfly Mold


Thanks for stopping by! I treasure your comments.

~ Blessings~

Tuesday, March 10, 2020

"Brave Wings" Mixed Media/Watercolor Card for Little Birdie Crafts

Welcome to my creative space!

Today I have something just a little different for you. I created this card for our daughter who is an artist, so I wanted to give it an artsy feel. The background is created with watercolors on Little Birdie Crafts 100% Cotton Watercolour Paper. I did a wet on wet application to achieve this night sky/ocean look. And of course it is embellished with gorgeous Little Birdie Crafts flowers, chipboard, bling, and mixed media products. 

I hope you'll hop on over to the Little Birdie Crafts blog for a full photo tutorial showing how I put this together and to leave a comment letting me know what you think. You can find that post HERE.

Little Birdie Crafts can be purchased at their US online store. For a limited time there is free worldwide shipping on all orders over $99.

Use code TRACEY05 for a 5% discount.
I receive a small commission at not cost to you.
Thanks for your support!

Little Birdie Crafts Supplies
Premium Card Stock ~ A4 - Bright White
Silicone Glue

Other Supplies
Tim Holtz with Idea-ology ~ Small Talk
Rhinestones ~ From my Stash
Jewelry Pieces ~ From my Stash
Tim Holtz with Ranger ~ Distress Oxide Ink: Mermaid Lagoon; Dusty Concord; Wilded Violet; Faded Jeans; Black Soot
M Graham ~ Watercolor Paints
WOW! ~ Embossing Pad - Clear Ultra Slow Drying
Ranger ~ Embossing Pearl - Pale Gold
Stabilo All Pencil ~ 8046 Black - Aquarellable
Scrapbook Adhesives by 3L ~ Crafty Power Tape
Wagner ~ HT 400 Heat Gun


Thanks for stopping by! I treasure your comments.

~ Blessings ~

Wednesday, February 26, 2020

Boho Dreams Birthday Wishes Mixed Media Card with VIDEO TUTORIAL for Little Birdie Crafts


Welcome to my creative space!

Today I'm sharing a card created with the gorgeous and vibrant Boho Dreams collection. Please check out my video where I share the techniques and process of creating this sweet card.

Enjoy!


More close-up photos can be viewed on the Little Birdie Crafts Blog HERE.

Little Birdie Crafts can be purchased at the online store.

Use code TRACEY05 for a 5% discount.
I receive a small commission at not cost to you.
Thanks for your support!

Little Birdie Crafts Supplies
Paper Pack Boho Dreams- 12in x 12in, 12 Sheet, 12 Designs, 250gsm
Paper Pack Boho Dreams- 6in x 6in, 24 sheet, 12 Designs, 250gsm
Wishes Words Embellishments 14Pc
Card Stock A4- Bright White
Marika Boho Vibes 2pc
Wendy Boho Vibes 9pc
Julita Boho Vibes 8pc
Elira Boho Vibes 40pc
Primed Chipboard- Especially Cogs, 1pc
Floral Flourish Primed Chipboard
Butterfly Inspire Stencil 4x7"
Metal Microbeads 30gm - Gala Pink
Metal Microbeads 30gm - Summer Gold
Acrylic Gesso- White, 100ml
Grainy Texture Paste -200gm
Acrylic Soft Gel Medium Matte 100ml
Tinted Metallic Paint- Tawny Glint, 50ml
Tinted Metallic Paint- Golden Glaze, 50ml
Metallic Wax- Antique Gold, 20ml
Metallic Wax- Copper Blaze, 20ml
Silicon Glue 100ml

Other Products
6x6" White Card Base from my stash
Beadcraft ~ Jewellry Essentials - Pearls
Explorer Traditions ~ Jewelry Pack - Steampunk Metal Ring
Yellow Rhinestones from my stash
Bead Landing ~ Cording
Filigree piece from my stash
Tim Holtz with Ranger ~ Distress Oxide Ink - Wild Honey; Candied Apple
Tim Holtz with Ranger ~ Alcohol Pearl: Splendor; Enchanted
Ranger ~ Perfect Medium Bullet Pen
Liquitex ~ Clear Gesso
Stampendous ~ Embossing Enamel - Aged Scarlet; Aged Hunter
Tim Holtz with Sizzix ~ Crochet Thinlets
Double-Sided Tacky Tape - 10mm


Thanks for stopping by! I treasure your comments.

~ Blessings ~

Monday, February 24, 2020

Unboxing Video ~ Amazing DT Box for Little Birdie Crafts

Welcome to my creative space!

Today I have a video sharing the fabulous papers, flowers, and mixed media products I received in my design team box for Little Birdie Crafts.

Enjoy!


You can purchase Little Birdie Crafts products HERE.

They currently have some amazing grand opening sales going on and free shipping internationally for orders over $99.

Use the code TRACEY05 at checkout to receive a 5% discount.

I do receive a small commission for your purchases.
Thanks so much for your support!

Thanks for stopping by! I treasure your comments.
~ Blessings ~

Friday, February 14, 2020

Masculine Grungy "Love" Valentine Card

Welcome to my creative space.

Happy Valentine's Day my dear friends!!

Today I'm sharing this grungy, masculine card I created for my dear husband.
Scroll down to see how I put it all together.

Tips and Techniques
I cut this Geo Heart Frame from metallic cardstock using the new Tim Holtz Geo Frames die set. The love sentiment is cut from black cardstock using his Script die set. I lightly brushed the sentiment with finnabair waxes to give a rusty effect. 

Tim's Sprocket Gears, Story Stick and Hardware Head. All of the metal pieces are rubbed with Finnabair waxes to give a rusty effect.

Here's a cluster of Tim's Mini Gears.

I diecut one of Tim's Geo Insect's and lightly brushed them with Finnabair's waxes. I trimmed them apart and tucked them in to give the heart a set of wings.


Don't you just adore the Abandoned paper pack? I'm so happy it is now a part of Tim's regular line with Idea-ology! This piece had just the perfect colors to create a rusty, grungy Valentine. I stamped the background with this clock from Tim's Inventor 1 rubber stamp set. My husband is an engineer and was immediately drawn to this image when he saw the card. After stamping the card, I added the black border and then stitched around the edges on my sewing machine with black thread. Then the other elements were adhered.


Supplies
Tim Holtz with Idea-ology ~ Abandoned 8x8 Paper Stash
Tim Holtz with Idea-ology ~ Metallic Jewels Kraft Stock 8x8 Paper Stash
Tim Holtz with Idea-ology ~ Classic Kraft Stock 8x8 Paper Stash
Tim Holtz with Idea-ology ~ Hardware Heads
Tim Holtz with Idea-ology ~ Sprocket Gears
Tim Holtz with Idea-ology ~ Mini Gears
Tim Holtz with Idea-ology ~ Story Sticks
Tim Holtz with Sizzix ~ Geo Frames Thinlets Die Set 
Tim Holtz with Sizzix ~ Geo Insects Thinlets Die Set 
Tim Holtz with Sizzix ~ Celebration Words - Script Thinlets Die Set 
Tim Holtz with Stampers Anonymous ~ Cling Rubber Stamps - Inventor 1
Ranger ~ Archival Ink Pad - Jet Black
Prima ~ Finnabair: Art Alchemy: Metallique Wax - Charcoal Black
Prima ~ Finnabair: Art Alchemy: Matte Brilliance Wax - Red Amber; Fire Ruby
Helmar ~ 450 Quick Dry Adhesive
Scrapbook Adhesives by 3L ~ Crafty Power Tape
Scrapbook Adhesives by 3L ~ Crafty Foam Tape
Tombo ~ Mono MULTI Liquid Glue
Tim Holtz with Tonic ~ Travel Stamp Platform
Sizzix ~ Big Shot
Sizzix ~ Chrome Precision Base Plate
Sewing Machine
Black Thread
Black Cardstock

Thanks for stopping by! I treasure your comments.

~ Blessings ~

Saturday, January 18, 2020

"Possibility Begins" Steampunk Industrial Card for the Simon Says Stamp Monday Challenge


Welcome to my creative space!

I was under the weather for a while and then got busy preparing to host our family gathering for Christmas, so haven't been spending much time in my studio. I'm delighted to be back with this steampunk/industrial card I created for our son-in-law, Andrew's, birthday.

The Simon Says Stamp Monday Challenge this week is all about rust.

You can find the challenge HERE.

I die cut the gears and other elements from chipboard using Tim Holtz's Sizzix Steampunk and Industreal Bigz dies, then used Finnabair rust pastes, metallic paints and waxes to achieve the rusty patina effect that looks just like metal. I just adore the grit in the rust paste that not only gives the color of rust, but the gritty texture as well. I also added rusty patina to the Word Band, Philosophy Tag, Clock, and hardware pieces using Finnabairs metallic waxes.

Here's a list of supplies used to create this card:

Tim Holtz with Idea-ology ~ 8x8 Paper Stash - Abandoned
Chipboard ~ Upcycled
Cardstock ~ Black - From my Stash
Tim Holtz with Idea-ology ~ Paper Dolls
Tim Holtz with Idea-ology ~ Hardware Heads
Tim Holtz with Idea-ology ~ Word Bands
Tim Holtz with Idea-ology ~ Timepieces
Tim Holtz with Idea-ology ~ Philosophy Tags
Prima ~ Finnabair: Mechanicals - Hardware Accents
Prima ~ Tiny Junkyard Findings - Special Screws
Prima ~ Finnabair: Art ExtraVagance - Microbeads: Bronze; Black
US Artquest ~ Mini Prills - Gilt Trip
Stampendous ~ Bronzed Mica Fragments
Prima ~ Finnabair: Art Basics: Gesso, Clear
Prima ~ Finnabair: Art Basics: Soft Matte Gel
Prima ~ Finnabair: Art Alchemy: Metallique Wax - Rich Copper; Peacock
Prima ~ Finnabair: Art ExtraVagance - Rust Effect Paste: Northern Lights - Turquoise
Prima ~ Finnabair: Art ExtraVagance - Rust Effect Paste: Brown Rust
Prima ~ Finnabair: Art ExtraVagance - Rust Effect Paste: Red Rust
Prima ~ Finnabair: Art ExtraVagance - Rust Effect Paste: Gold Rust
Prima ~ Finnabair: Art ExtraVagance - Patina Effect Paste: Brass
Prima ~ Finnabair: Art ExtraVagance - Patina Effect Paste: Blue
Prima ~ Finnabair: Art Alchemy ~ Metallique Acrylic Paint: Emerald Green
Higgins ~ Drawing Ink - Black
Tim Holtz with Sizzix ~ Steampunk Parts Bigz Die
Tim Holtz with Sizzix ~ Industrial Bigz Die
Helmar ~ 450 Quick Dry Adhesive
Sizzix ~ Bigshot

Thanks for stopping by! I treasure your comments.

~ Blessings ~

Thursday, November 14, 2019

"Birthday Wishes" Shabby Mixed Media Card for Studio75

Welcome to my creative space!

Hello dear friends! Today I'm sharing a sweet mixed media birthday card I created featuring the gorgeous Studio75 Hello Spring paper collection along with fabulous chipboard from the store. The Up in the Air stencil by SnipArt adds amazing texture to the background as well. 

I had so much fun painting the chipboard and adding background texture. Be sure to check out the details below.

Tips and Techniques
What gorgeous papers to work with! I adore the birdhouse image, so used this Anemone Birdhouse Frame from the Studio75 store along with the little bird from the Scrapiniec Spring Prodigy Bird Ave Set. These gorgeous flowers from Little Birdie Crafts coordinate perfectly with the background paper. The fabulous watercolor leaves are fussy cut from the Hello Spring 07 page.

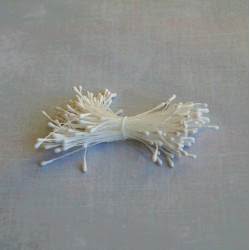
A close-up of the flowers. At the edges of the cluster you can see some of the flowers I fussy cut from the Hello Sping 06 sheet and stamens which I bunched together to add a bit more texture. The gear is molded from Finnabair's Cogs and Wings Mould then brushed with her White Gold Metallic Wax to coordinate.

I painted this sweet birdhouse portion of the frame with a wood grain to coordinate with the sweet birdhouse on the paper. I left the little bird untreated. The Scrapiniec chipboard hearts are painted in coordinating colors as well with this one strategically placed over the opening to the birdhouse.

The delicate flowers and leaves around the frame are painted and shaded. I adhered small rhinestones to the center of each flower using Bambino Glue. The background is stenciled with Finnabair's White Gold Icing Paste using the fabulous SnipArt Damask Stencil.

I added a little cluster to the bottom corner that includes a snippet of Organza Rose Trim along with this sweet Little Birdie rose.

More of the painted Scrapiniec Confetti Hearts Using Finnabair's Impasto Paints.

This sentiment from the Hello Spring 08 page is colored with Distress Ink and the heart is fussy cut from the 6x6" Hello Spring paper set

The card front is adhered to a 6x6" Blank Card from the store. I just adore these sturdy card bases that hold the weight of my mixed media creations so well.

Studio75 Supplies
https://studio75.pl/en/5379-hello-spring-paper-set-12-pcs-5902414100862.html https://studio75.pl/en/5380-hello-spring-6x6-paper-set-590241410094.html 

  https://studio75.pl/en/5386-hello-spring-06-5902414100923.html 

https://studio75.pl/en/5388-hello-spring-08-5902414100954.html 

  https://studio75.pl/en/2063-confetti-serduszka.html

https://studio75.pl/en/5877-budka-w-majowym-ogrodzie.html  https://studio75.pl/en/3442-up-in-the-air-damask-stencil-15x15.html 

https://studio75.pl/en/2322-rozetka-2-do-napisow-5902557820085.html  https://studio75.pl/en/592-roses-trim-ecru.html 

https://studio75.pl/en/2250-stamens-1mm-white.html  https://studio75.pl/en/2737-heavy-weight-cards-15x15cm-.html


https://studio75.pl/en/2651-klej-magiczny-w-tubie-45g-bambino-stmajewski.html?search_query=bambino+glue&results=36

Other Supplies
Little Birdie Crafts ~ Handmade Burlap - Renea, Natural & Cream
Little Birdie Crafts ~ Sparkle Flowers - Fiona, Carnation
Little Birdie Flowers from A.C. Moore ~ #106011789
The Paper Studio ~ Self Adhesive Gemstones - AB Round, 2mm
Prima ~ Finnabair - Art Basics: Gesso, Clear
Prima ~ Finnabair: Art ExtraVagance - Icing Paste: White Gold
Prima ~ Finnabair - Art Alchemy - Impasto Paint: Victorian Green; Manor Blue; Burlap; Snow White; Lemon Peel; Boudour Pink
Prima ~ Finnabair - Art Alchemy: Metallique Wax - White Gold
Tim Holtz with Ranger ~ Distress Ink - Frayed Burlap, Antique Linen
Tsukineko ~ Versafine Ink - Vintage Sepia
Amazing Casting Resin - White
DecoArt ~ Crafter's Acrylic - Cafe Mocha
Prima ~ Finnabair: Moulds - Cogs and Wings
Helmar ~ 450 Quick Dry Adhesive
Scrapbook Adhesives by 3L ~ Crafty Power Tape
Scrapbook Adhesives by 3L ~ EZ Dots Repositionable
Scrapbook Adhesives by 3L ~ Crafty Foam Tape - White
Tombo ~ Mono MULTI Liquid Glue

https://gracescraps.blogspot.com/

Thanks so much for stopping by! I treasure your comments

~ Blessings ~