Showing posts with label Easter. Show all posts

Monday, July 18, 2022

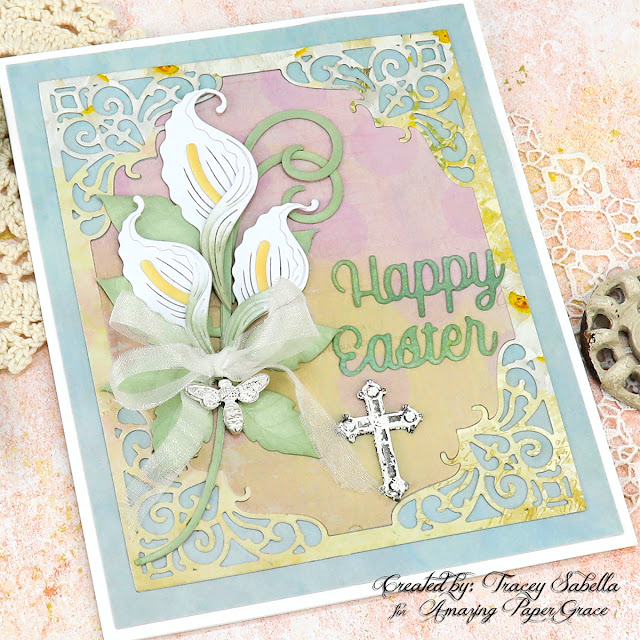
Easter Card with Lilies for Amazing Paper Grace

Welcome to my creative space!

As soon as I saw these gorgeous Amazing Paper Grace Layered Lilies dies (S4-1192), I thought of Easter and just had to create a card to celebrate this blessed holiday in lovely spring colors. So instead of Christmas in July, today we have Easter in July!

I've also use the gorgeous Filigree Marquis (S4-1164) die set for the scrolled background and this lovely Easter sentiment is from the Merry Everything Words set (S4-1205).

Be sure to scroll down through the "Tips and Techniques" section below for close-ups and all the details on how to create this beautiful butterfly Easter Card.

Thank you Amazing Paper Grace for providing the dies used in this project.

Tips and Techniques
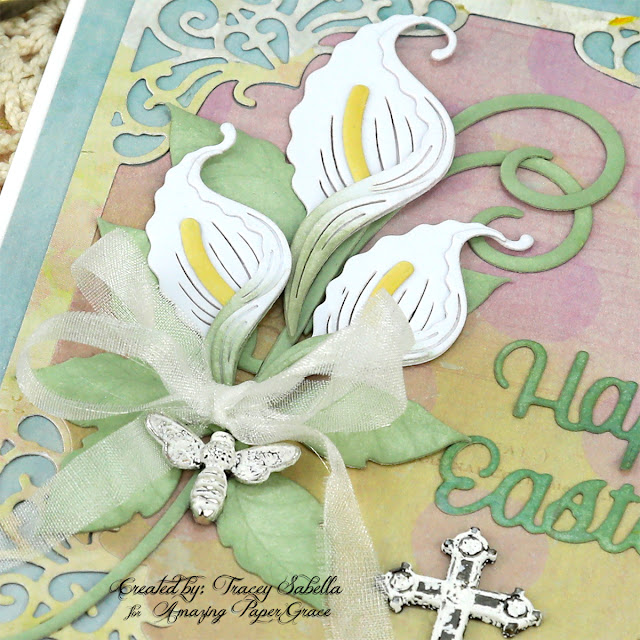
These gorgeous lilies are so easy to put together. They are layered for dimension, and no special tools are required for shaping. I just added a little green ink at the base of the petals like you would see in natural lilies and colored the stamen with yellow. The four pieces for each flower are then glued together. The beautiful leaves and curled vines are cut from white cardstock as well and colored with the same green. I used a toothbrush style applicator in a circular motion on the leaves to give the edges a little darker coloring for more dimension and layered them under the beautiful blossoms. 

Designer Tip: I've found that using repositionable tape to hold your die cuts in place on a piece of scrap paper makes inking a quick and easy technique, especially for small die cuts like these flower petals, leaves, and word sentiments.
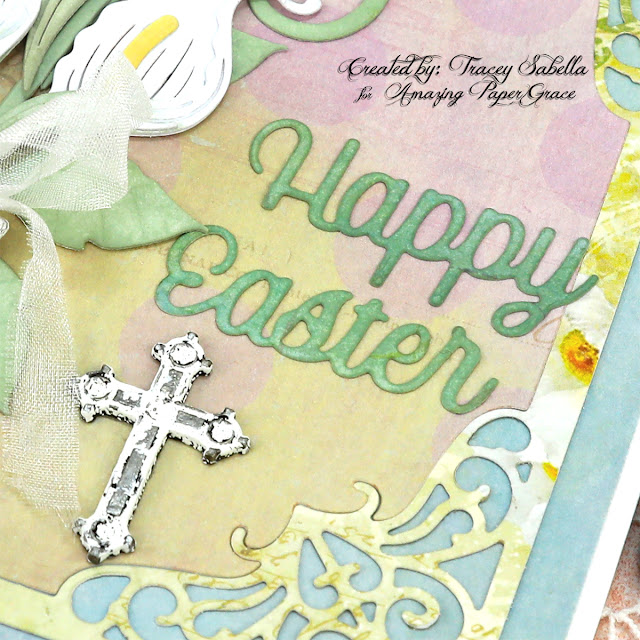
This lovely Easter sentiment is die cut from a coordinating green patterned paper using the S4-1205 Merry Everything Words and brushed with the same green ink to help make it pop.

The metal cross is heat embossed with white embossing enamel and while the enamel was still warm, I sanded and rubbed across it to expose some of the metal for a shabby effect. 
I've used the same enameling technique on the little bee attached below the double loop bow tied from a narrow strip of organza.

I've used three different patterned papers to bring in the colors of spring.
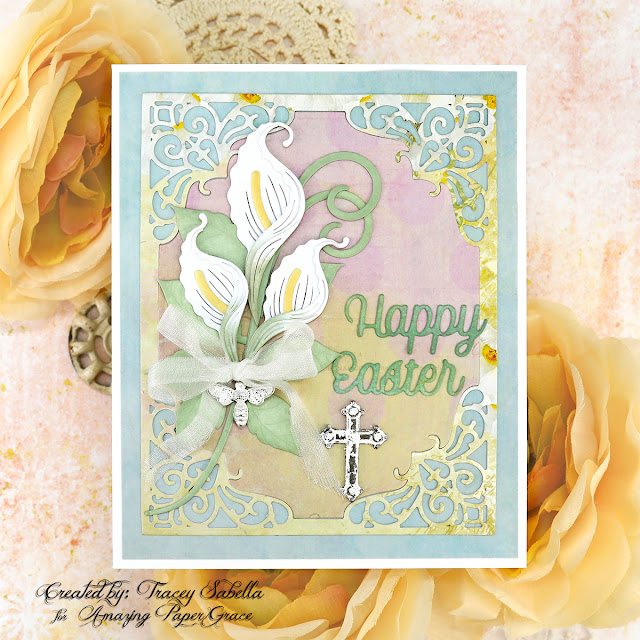
One final shot.

Amazing Paper Grace Dies:
 
Paper:
  • Craft and You ~ Spring Garden
  • K&Company ~ Celeste
  • Core'dinations ~ 8.5 x 11 Cardstock - Value Pack: White, 110lb

Ink:
  • Tim Holtz with Ranger ~ Distress Ink: Bundled Sage; Scattered Straw

Mixed Media:
  • Ranger ~ Embossing Powder: White
  • Ranger ~ Embossing dabber

Embellishments:
  • Momenta ~ Metal Stickers: Cross
  • Bee Charms ~ Purchased on Amazon
  • Organza Ribbon ~ White (Cut with raw edges)

Adhesives:
  • Scrapbook.com ~ Clear Double Sided Adhesive Roll, 1/4"
  • Art Glitter ~ Designer Dries Clear Adhesive
  • Tombow ~ Mono MULTI Liquid Glue
  • Beacon ~ 3-IN-1 Advanced Craft Glue
  • Scrapbook Adhesives by 3L ~ E-Z Dots, Repositionable

Tools:
  • Spellbinders ~ Platinum 6
Thanks so much for stopping by to view my card. I hope you've been inspired.

Monday, April 13, 2020

Designer Spotlight Guest Designer for the April Simon Says Stamp Monday Challenges Week 2: "E" is for?


Welcome to my creative space!


I'm back with my second project as the Spotlight Designer for Simon Says Stamp Monday Challenges during the Month of April. I am so delighted and honored to be guest designing for them this month!


This week's theme is:

'E' is for?  

Be sure to hop on over to the Simon Says Stamp blog HERE for all the details and to be inspired by the gorgeous design team projects.

For this "E" challenge I used the theme of Easter. We just celebrated this special holiday yesterday, so I created an Easter card. I decided to grab my alcohol inks to create a vibrant and sparkling background to go behind this gorgeous Tim Holtz die cut using his Sizzix Bouquet Die. The flowers are cut with his Wildflower Stems #1 and #2 dies which are colored with Distress Oxide Inks. Be sure to scroll down through my Tips and Techniques section for all the details.

Tips and Techniques

I just adore alcohol inks!! I used to use them a lot, but have gotten away from creating with them. I recently purchased the new 2020 colors and Alloys so thought this would be the perfect opportunity to use them. I purchased this pack of Silver Sparkle Alcohol Ink Cardstock last year, but never got around to trying it out. So I thought I would experiment with it. Honestly I thought I had created quite the mess until . . . 


I placed the black Bouquet die cut over top. 

So . . . I started out by dropping alcohol ink onto the paper then added 70% rubbing alcohol over top and tried to move the alcohol ink color. Well, that didn't go so well. I ended up wiping it off with more alcohol, but it had stained the paper. Yes, you can still see the stain marks. 

Then . . . I used a pipette to pull a line of alcohol across the paper. Then I added drops of alcohol ink into the wet alcohol. A felt applicator was then used to swipe the color across the sparkly cardstock. That worked MUCH better. Well, except the stains were still there. 

So . . . to add more color and maybe help hide the stains, I added puddles of alcohol and dropped alcohol ink and Gilded Alloy into the puddles and moved them with the "cool air" setting on a hair dryer. It created a nice effect, but still didn't cover up the stains. 

To be perfectly honest, I thought it looked, well, um, ugly . . . unattractive . . . you get the idea. I was ready to admit defeat and toss it in the trash. I figured I had learned a lot and knew how to move forward with a new sheet of sparkle paper. That would be alcohol first, then alcohol ink. 

But . . . on a whim, I decided to place the the black bouquet die cut over the alcohol ink background, mostly to have an idea of what colors looked nice to know how to move forward with the next background and then to my disbelief, it looked absolutely gorgeous. Who knew??? Can you believe this transformation?? 

Here's a close-up of the Wildflower Stems flowers. I die cut them from white cardstock, then colored them with distress ink. I mashed the ink pads onto my Glass Media Mat, spritzed a little water next to the color and used a paint brush to mix the colors and paint the die cuts.

Here's a close-up of the alcohol ink background behind the die cut. You can see how glittery the background is on the Silver Sparkle Cardstock when the light hits it.

And another section showing the blues, purples, and Gilded Alloy.

I dyed a length of rayon seam binding with Boysenberry and Vinyard Alcohol Inks along with Intrigue Alcohol Pearls. I dropped some rubbing alcohol onto the Glass Media Mat to soak the ribbon, then dropped the alcohol ink onto the soaked ribbon and scrunched it until it was completely colored. While it was still wet, I added a few more drops of color and just lightly scrunched it some more so the color would vary with some darker and lighter sections. I held the ribbon in a scrunched up ball with my tweezers while drying it with my Heat It Craft Tool, so it would be nice and crinkled when dry.

The ribbon is tied into a triple loop bow. I also colored a Tim Holtz pearl Bauble and Heirloom Rose with alcohol ink to adorn the bow.

This metal piece from the Tim Holtz Nature Adornments set is colored with alcohol inks. I used a Tim Holtz Alcohol Ink brush to paint the ink onto the metal.

I colored white cardstock with Distress Oxide ink in similar colors and then stamped this sweet Easter sentiment. The edges are brushed with more of the purple Distress Oxide Ink.


As you may know, the  Simon Says Stamp Store is accepting new orders, but have longer shipping times for the moment due to the coronavirus. With this in mind we have made the difficult decision to suspend the $50 voucher for this challenge.

We know that many people are staying safe at home and we would love it if you would continue to enter the challenges and have fun! We are all in this together! You have until Monday 8am Ohio time. 1pm UK time, 2 pm CET to join in. The challenge can be found HERE.


Supply List
Alcohol Ink Mountain Rose
Tim Holtz Idea-ology Heirloom Roses Embellishments
Tim Holtz Idea-ology Nature Adornments 
Tim Holtz Idea-ology Baubles 
Tim Holtz with Tonic ~ Travel Stamp Platform
Cardstock ~ White
Cardstock ~ Black
Hug Snug ~ Seam Binding
Scrapbook Adhesives by 3L ~ Crafty Power Tape
Home & Hobby ~ Extreme Double-Sided Tape - 1/2"
Tim Holtz with Tonic ~ Travel Stamp Platform

You can follow me on:
Facebook

Thanks for stopping by! I treasure your comments.

~ Blessings ~

Wednesday, April 16, 2014

Easter Cross for Helmar

Easter is just around the corner. It holds special meaning and great joy for me.
Our Savior overcame the cross for our sins to be forgiven.

I've created a special Easter decor project to help celebrate this year.
I've covered a resin cross with lovely spring colored flowers

Easter Cross

Tips and Techniques
I started out with a resin cross and adhered a variety of Wild Orchid Craft Mulberry flowers with Helmar 450 Quick Dry Adhesive. As you can see in the photo, I placed a generous squeeze of adhesive on the back of this white rose, then adhered it to the cross. I placed all the flowers and Scripture to get an attractive arrangement, then started adhering. This is the last flower to go on the cross.

Although I mostly used the 450 Quick Dry Adhesive, I also placed a few of the flowers at an angle using Helmar Liquid Scrap Dots


I selected this Easter Scripture stamp to use and die cut a tag to fit the size of my stamp. I stamped in a coordinating color and heat embossed with clear embossing powder for extra dimension. The tag is adhered with 450 Quick Dry Adhesive.


Helmar Products

Other Products
Resin Cross
Wild Orchid Crafts (Available at Really Reasonable Ribbon)
~ 15mm Open Roses: White
~ 20mm Open Roses: Ivory/Pale Pink; White
~ 25mm Cottage Rose: Mixed White/Cream; Mixed Pink; Mixed Purple/Lilac
~ 35mm Trellis Roses: Mixed Pink Tones
~ Cherry Blossoms ~ Mixed Pinks
~ Chrysanthemums: Mixed Pink/White
~ Cosmos Daisy Stem Flowers: Pink/White, Purple
~ Large Wild Rosebuds: 2-Tone Pink
~ Sweetheart Blossoms: 2-Tone Baby Pink; White
Spellbinders ~ Opulent Ovals
White Cardstock
Clearsnap ~ Donna Salazar - Mix'd Media Inx - Wisteria
Clearsnap ~ Clear Embossing Powder

Thanks for stopping by! I treasure your comments.

~ Blessings ~