Showing posts with label Stencil. Show all posts

Tuesday, June 1, 2021

"New Beginning" Mixed Media Canvas with VIDEO TUTORIAL for Little Birdie Crafts

Welcome to my creative space!

I simply adore the colors in the gorgeous Little Birdie Birds and Berries collection ranging from pinks to purples with lovely touches of green. I have used the ephemera pack along with flowers from this collection along with beautiful Little Birdie chipboard, more flowers from other collections, a fabulous stencil, and mixed media products to create this cheery layered canvas. 

Close-up photos and more details can be found on the Little Birdie Crafts Blog HERE.
Thanks for stopping over there if you have a chance to leave a comment.

If you would like to see a full supply list, please scroll down.
Little Birdie Crafts can be purchased at their online store.

Be sure to check out the current sales HERE.

Use code TRACEY05 for a 5% discount.

I receive a small commission at not cost to you.

I've created a full project video with voice instructions including how to:
  • Create a textured background with Grainy Texture Paste, Stencil, & Color Splash Mist
  • Build Layers with chipboard, ephemera, flowers, and molded pieces
  • Use Metallic Paint to highlight chipboard and resin clocks
  • Color chipboard with sprays
  • Create a grungy finish on molded pieces with paints and Metallic Wax
  • Use white gesso to soften colors
  • Add beaded texture to the flowers and background
Enjoy!


Thanks for stopping by! I treasure your comments.

~ Blessings ~

Monday, June 15, 2020

"Celebrate" Shabby Mixed Media Card for Little Birdie Crafts

Welcome to my creative space!

It is such a delight to work with gorgeous Little Birdie Crafts products!

My mom has a birthday coming up later this month, so I created this special card for her featuring the Little Birdie True Love Collection paired with coordinating Love and Roses flowers along with flowers from the Celebrate Life and Shabby Chic collections. I adore how you can combine flowers from a variety of Little Birdie collections so seamlessly. Fabulous Primed Chipboard pieces have been painted to coordinate and gorgeous images from the 12x12" paper set have been fussy cut to embellish. All the details of how I put this sweet card together can be found on the Little Birdie Crafts blog HERE.

Little Birdie Crafts can be purchased at the online store.

Use code TRACEY05 for a 5% discount.
I receive a small commission at not cost to you.

Little Birdie Crafts Supplies
Glass Bead Gel
Craft Pellets - Mini

Other Supplies
Chantilly Lace ~ White
Rhinestones ~ Green
Chunky Glass Glitter ~ Champagne
Kuretake ~ Zig - Clean Color Real Brush Markers - Mid Green 046
Ranger ~ Alcohol Ink ~ Lettuce
Tombow ~ MONO Multi Liquid Glue
X-PressIt ~ Double Sided Tape High Tack - 1/4"
Tim Holtz with Tonic ~ 5" Mini Snips Scissors
Ranger ~ Heat It Craft Tool


Thanks for stopping by! I treasure your comments.

~ Blessings ~

Thursday, November 14, 2019

"Birthday Wishes" Shabby Mixed Media Card for Studio75

Welcome to my creative space!

Hello dear friends! Today I'm sharing a sweet mixed media birthday card I created featuring the gorgeous Studio75 Hello Spring paper collection along with fabulous chipboard from the store. The Up in the Air stencil by SnipArt adds amazing texture to the background as well. 

I had so much fun painting the chipboard and adding background texture. Be sure to check out the details below.

Tips and Techniques
What gorgeous papers to work with! I adore the birdhouse image, so used this Anemone Birdhouse Frame from the Studio75 store along with the little bird from the Scrapiniec Spring Prodigy Bird Ave Set. These gorgeous flowers from Little Birdie Crafts coordinate perfectly with the background paper. The fabulous watercolor leaves are fussy cut from the Hello Spring 07 page.

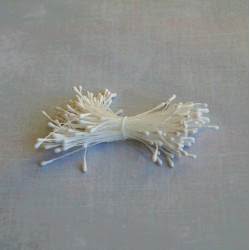
A close-up of the flowers. At the edges of the cluster you can see some of the flowers I fussy cut from the Hello Sping 06 sheet and stamens which I bunched together to add a bit more texture. The gear is molded from Finnabair's Cogs and Wings Mould then brushed with her White Gold Metallic Wax to coordinate.

I painted this sweet birdhouse portion of the frame with a wood grain to coordinate with the sweet birdhouse on the paper. I left the little bird untreated. The Scrapiniec chipboard hearts are painted in coordinating colors as well with this one strategically placed over the opening to the birdhouse.

The delicate flowers and leaves around the frame are painted and shaded. I adhered small rhinestones to the center of each flower using Bambino Glue. The background is stenciled with Finnabair's White Gold Icing Paste using the fabulous SnipArt Damask Stencil.

I added a little cluster to the bottom corner that includes a snippet of Organza Rose Trim along with this sweet Little Birdie rose.

More of the painted Scrapiniec Confetti Hearts Using Finnabair's Impasto Paints.

This sentiment from the Hello Spring 08 page is colored with Distress Ink and the heart is fussy cut from the 6x6" Hello Spring paper set

The card front is adhered to a 6x6" Blank Card from the store. I just adore these sturdy card bases that hold the weight of my mixed media creations so well.

Studio75 Supplies
https://studio75.pl/en/5379-hello-spring-paper-set-12-pcs-5902414100862.html https://studio75.pl/en/5380-hello-spring-6x6-paper-set-590241410094.html 

  https://studio75.pl/en/5386-hello-spring-06-5902414100923.html 

https://studio75.pl/en/5388-hello-spring-08-5902414100954.html 

  https://studio75.pl/en/2063-confetti-serduszka.html

https://studio75.pl/en/5877-budka-w-majowym-ogrodzie.html  https://studio75.pl/en/3442-up-in-the-air-damask-stencil-15x15.html 

https://studio75.pl/en/2322-rozetka-2-do-napisow-5902557820085.html  https://studio75.pl/en/592-roses-trim-ecru.html 

https://studio75.pl/en/2250-stamens-1mm-white.html  https://studio75.pl/en/2737-heavy-weight-cards-15x15cm-.html


https://studio75.pl/en/2651-klej-magiczny-w-tubie-45g-bambino-stmajewski.html?search_query=bambino+glue&results=36

Other Supplies
Little Birdie Crafts ~ Handmade Burlap - Renea, Natural & Cream
Little Birdie Crafts ~ Sparkle Flowers - Fiona, Carnation
Little Birdie Flowers from A.C. Moore ~ #106011789
The Paper Studio ~ Self Adhesive Gemstones - AB Round, 2mm
Prima ~ Finnabair - Art Basics: Gesso, Clear
Prima ~ Finnabair: Art ExtraVagance - Icing Paste: White Gold
Prima ~ Finnabair - Art Alchemy - Impasto Paint: Victorian Green; Manor Blue; Burlap; Snow White; Lemon Peel; Boudour Pink
Prima ~ Finnabair - Art Alchemy: Metallique Wax - White Gold
Tim Holtz with Ranger ~ Distress Ink - Frayed Burlap, Antique Linen
Tsukineko ~ Versafine Ink - Vintage Sepia
Amazing Casting Resin - White
DecoArt ~ Crafter's Acrylic - Cafe Mocha
Prima ~ Finnabair: Moulds - Cogs and Wings
Helmar ~ 450 Quick Dry Adhesive
Scrapbook Adhesives by 3L ~ Crafty Power Tape
Scrapbook Adhesives by 3L ~ EZ Dots Repositionable
Scrapbook Adhesives by 3L ~ Crafty Foam Tape - White
Tombo ~ Mono MULTI Liquid Glue

https://gracescraps.blogspot.com/

Thanks so much for stopping by! I treasure your comments

~ Blessings ~

Friday, October 19, 2012

First Dance ~ Tips and Techniques ScrapThat! October Kit

I hope you are having a delightful week and have some fun times planned for this weekend. I have some scrappy projects due next week, so I get to do some creating this weekend. Today, I'll be spending the day creating with my friend, Mandy who has some craft fair projects to work on. Then Saturday and Sunday I'm heading to a crop at our local craft store, Pat Catan's, for their monthly crop.

Today, I would like to share with you the details of my First Dance Layout created with the amazing October ScrapThat! Kit featuring Prima's Tea Thyme papers. This is our son and his beautiful bride sharing their first dance on their wedding day, December 2011.


Tips and Techniques:

Transparency Butterflies ~ These sweet butterflies were created by printing butterfly images onto inkjet transparency paper. While the ink was still wet, I covered the images with clear embossing powder and heat set. To prevent the transparency paper from shrinking and warping, I kept the heat tool further from the image than I normally would, and took my time melting the embossing powder. While the embossing was still hot and wet, I added more clear embossing powder and heat set again. Once it was set and dry, pulled the wings forward from the body for some added dimension.

Hand Stitching ~ I drew a curved, looped line around the border of the page stopping at the edge of the bricks and horizontal paper strip. I used this line to pierce stitching holes for my hand stitching.

Ceramic Stucco Bricks ~ I sprayed the back of my brick stencil with some removable adhesive, allowed it to dry, then placed it on my page where I wanted a brick wall image. I used a craft spatula to spread the Ceramic Stucco Medium over the stencil. After carefully removing the stencil, I used my heat tool to dry, then moved the stencil to coordinate with the bricks already on the page and repeated this process around the page. Once all the brick work was dry, I spritzed with several colors of inks and mists to get the brick color I was looking for. I love that they are mottled and the color varied just like it would be on an actual brick wall. You can't see it in the photo, but the walls in the reception hall were exposed brick, making this a perfect background for this page.


Altered Flowers ~ I altered the Petaloo flowers with several shades of mist and gesso. For the flower on the left side, I removed the center and used the pearls from the kit to create a new one. The Prima clock was a perfect addition to this cluster.

Photo Mat Layers ~ The layers behind the photo were fussy cut from scraps of the Prima paper. Two sheets of paper had lovely frame pieces that were just the right size to cut and layer. The colors didn't go with this page, so I misted them and inked the edges. I also added a doily from my stash that I misted before tucking into the layers. The square photo mat and layout edges were distressed with my Zutter Distrezz-It-All by Donna Salazar.


Vines ~ The swirled vine tendrils were created with wires cut from the kit flowers and leaves. I simply wrapped them around a small diameter paint brush, then pulled and bent them to look more natural.

Fussy Cutting ~ I added some fussy cut flowers to this cluster. I like to get a lot of milage out of my papers, so whenever possible I cut out paper that is covered up by other papers. For instance when I have a frame around my page, I cut it about 1 inch wide, so I still have a 10 x 10 inch piece of paper to use for photo mats, cutting flowers, fussy cutting .  .  .

If there are any techniques here that you would like a step by step tutorial for, please let me know!!

Thanks for stopping by! I treasure your comments.
~ Blessings ~