Showing posts with label Christmas. Show all posts

Monday, December 19, 2022

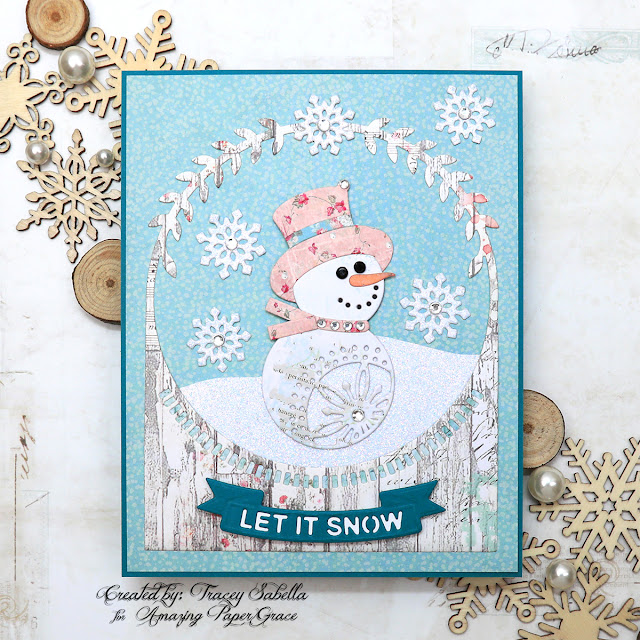
Let It Snowgirl Christmas Card for Amazing Paper Grace

Welcome to my creative space!

There's just something so sweet about a winter snowman or in this case snowgirl. This wintry Christmas card features the fabulous Amazing Paper Grace S5-533 Let It Snowman A2 Card Front die set.

When our children were young, we lived in North Carolina and didn't get those heavy wet snows that are perfect for building a snowman very often, but when we did we bundled up to build a huge snowman in our front yard and just like this die set, he had a wintry scarf, fun hat, rock eyes, and a carrot nose. We lived on a quaint but busy street and got lots of shout-outs by passersby. This sweet die set reminds me of those lovely wintry days in the snow with our children.

I just couldn't resist decorating her in a pink floral hat and scarf which is so beautiful against the snowy blue background. The snowbank is hand cut from the same white glitter paper used to die cut the fluttering snowflakes. 

For more close-ups and all the details on how to create this card, be sure to scroll down through the Tips and Techniques section below. 

Thank you Amazing Paper Grace for providing the dies used in this project.

11 Dies are included in the Let It Snowman A2 Card Front set.

Tips and Techniques
The body of the snowgirl is cut from the 49 and Market Holiday Wishes collection. I just adore the sweet blues and text that gives so much dimension to our wintry girl and it lightened up to nearly white for her darling face.

The other patterned papers used for the background pieces, hat, and scarf come from the Sweet Winter Backgrounds Paper Collection from Stamperia and work so beautifully with this darling die set. The snowy blue is so perfect behind the snowgirl and the wood grain pattern creates a lovely frame for the image.
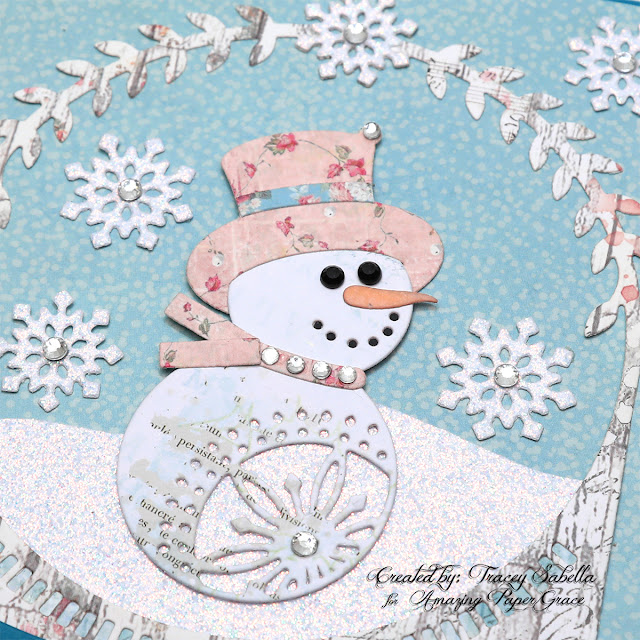
Our snowgirl is embellished with a pink floral scarf and hat. The carrot nose is cut from pale pink cardstock and inked with Dried Marigold and Hickory Smoke Distress inks to give it the carrot orange color. I didn't have pale orange cardstock, so used what I have on hand to create the right color. 

Her eyes are embellished with black rhinestones to look like lumps of coal, and a piece of black cardstock is place behind the circles forming her smile. For some added bling, a few clear rhinestones in different sizes are added to the scarf, tip of her hat and her snowflake belly.

The snowflakes are cut from white glitter paper and centered with a clear rhinestone for extra sparkle. The snowdrift is hand-cut from more of the white glitter paper.
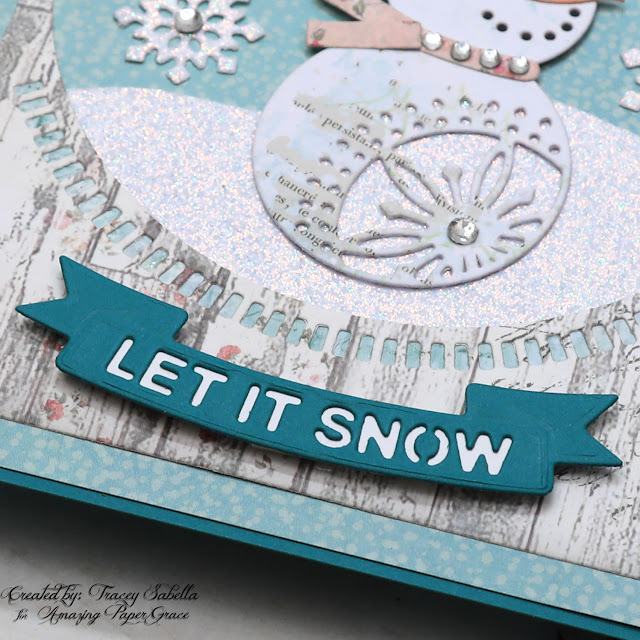
The banner for the sentiment is cut from a darker teal cardstock and the die-cut sentiment is backed in white. 

I just adore the die cut detail in the frame above the banner and wanted to make sure it was visible, so backed it with a piece of coordinating blue patterned paper. The fabulous design would have gotten lost had it been up against the white glitter paper. 
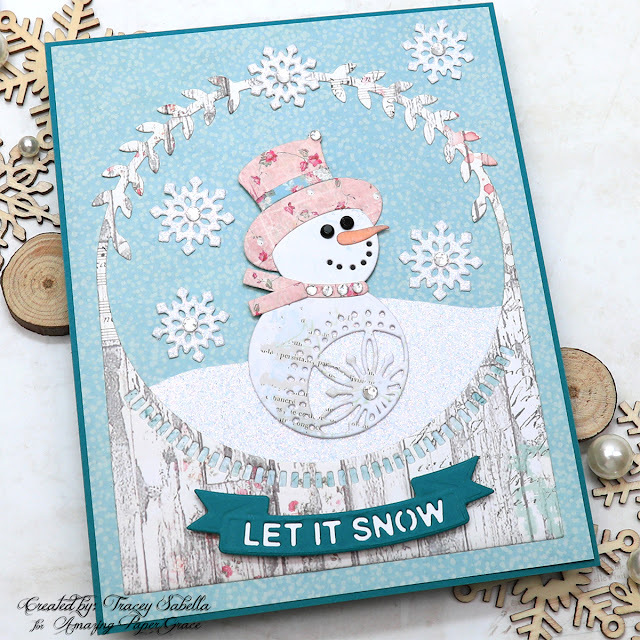
The gorgeous frame die is designed to fit an A2 card, but I cut a larger card base to allow more of the snowy blue paper to accent the card then framed it with a sliver of the dark teal cardstock used for the banner to tie everything together. 

Below you can find the products I used to create this project including some with compensated affiliate links to Scrapbook.com and Spellbinders. These links are at absolutely no cost to you. When you shop through the links below, I receive a small commission from the companies.  These commissions help me cover the costs of my blog and other expenses, which allows me to continue to provide you with FREE inspiration along with detailed Tips and Techniques provided for every project. Thank you so much for your love and support!

Amazing Paper Grace Sets:

Paper:

Ink:

Mixed Media:

Embellishments:
  • Stash - Rhinestones - Clear; Black

Adhesives:

Tools:

Monday, November 28, 2022

All Hearts Come Home for Christmas Gingerbread House Card for Amazing Paper Grace

 
Welcome to my creative space!

Christmas is in the air, and I just couldn't resist combining mixed media touches with wintry blues, and festive reds to create this cheery gingerbread house card featuring the All Hearts Come Home A2 Card Front die set (S5-534). I treasure spending time with family over the holidays, so this sentiment adds a warm personal touch.

I hope you enjoy this deconstructed version of this die set showing you another way it can be used. Instead of the card frame with trees, gifts, and Santa's sled with reindeer, I've die cut bits and pieces from this frame using different papers to create the elements for this card. 

The card edges may look familiar since they are from the Postage Edge Rectangles set (S5-540), part of the Postage Edge Shapes Collection released earlier this month. These sweet heartfelt images pair so perfectly with the postal edges! The snowflakes are cut from white glitter paper using the Let it Snowman set (S5-533), also from the Christmas Flourishes Collection.

I hope you'll scroll down through the Tips and Techniques section for more close-ups and all the details on how to create this sweet card including how I added the music score to the background along with snowy glittered texture.

Thank you Amazing Paper Grace for providing the dies used in this project.


Tips and Techniques
This sweet house is cut from gingerbread color paper filled with darling snowflakes and backed with a lighter patterned paper to brighten it up and of course a sweet red heart. The edges of the house are inked with Ground Espresso Distress Ink.

As you can see in the die set image above, the packages and trees are part of a card frame. I decided to cut them out and use them individually instead of using the entire frame. When die cutting the packages, I placed some washi tape on the back of the red patterned paper to help hold the inserts in place. I popped out the spaces in the ribbons and between the packages, then added more washi tape to the back to keep the textured inserts in place. The package edges are inked with more of the Ground Espresso ink. 

The house and gifts are popped up with foam tape to add dimension.

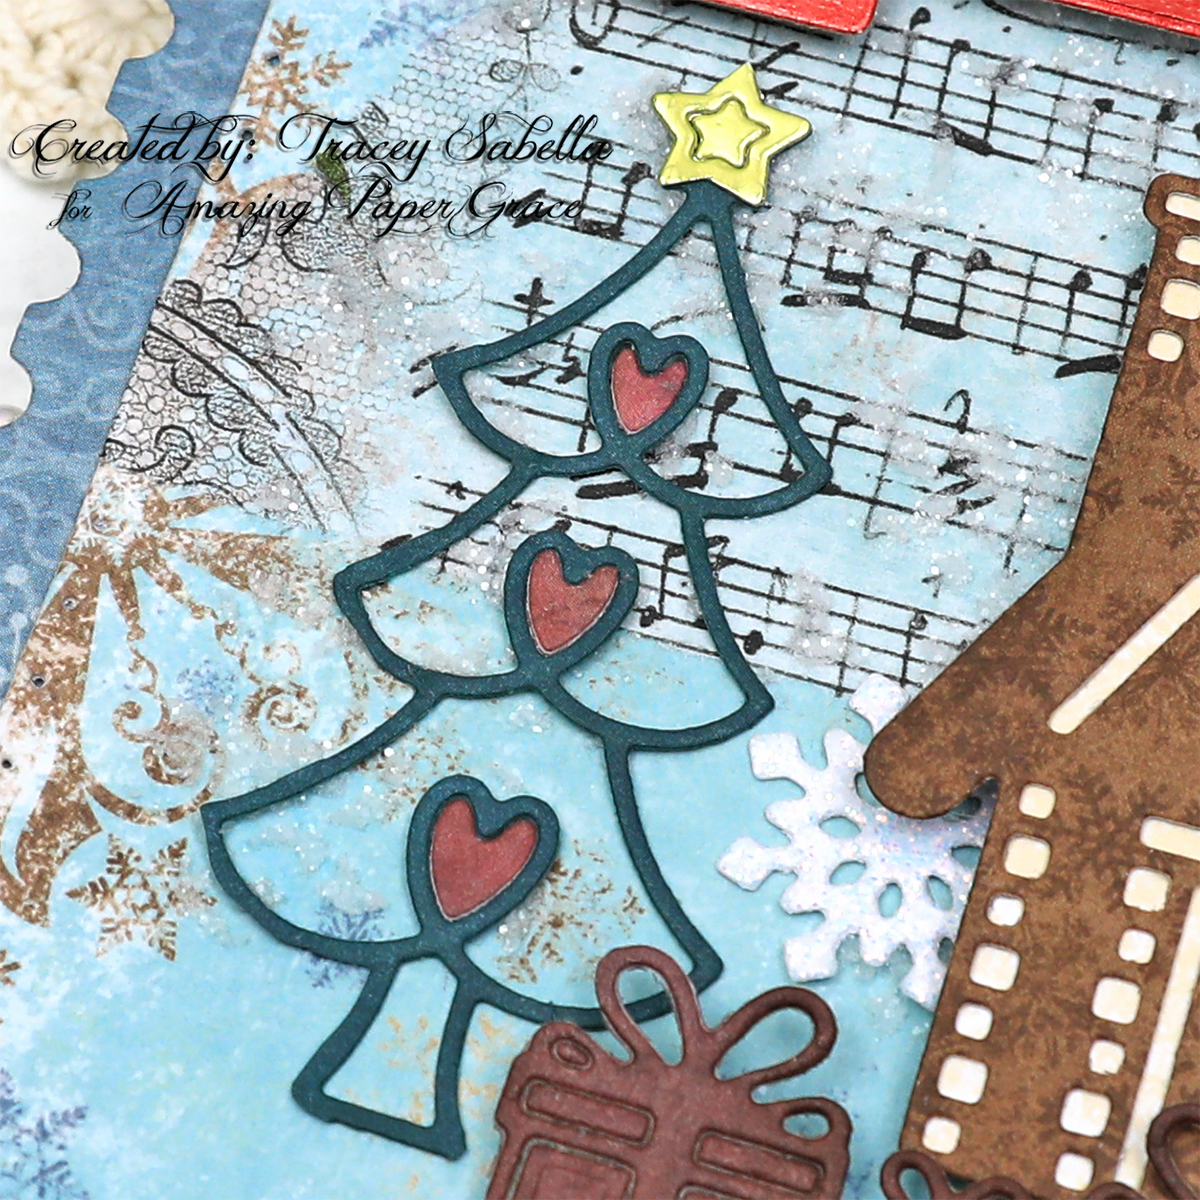
These delightful tree silhouettes are cut from green patterned paper. I just cut pieces of paper a little larger than the trees and used the frame die to cut them out, then trimmed off the excess paper with scissors. The centers of the trees are die cut with the same paper used for the packages to get the small hearts to insert into the trees. The stars are cut with the frame die using yellow metallic paper. Every Christmas tree needs a shining star topper, right? 

The green tree frames are rubbed with Pine Needles Distress Ink.  

Several frosty snowflakes are die cut from glitter paper using dies from the Let it Snowman set (S5-533).

For a bit of whimsy I added a torn bit of a music score. I had recently purchases a roll of Tim Holtz Halloween Collage Paper on clearance and hadn't put it away yet. The music notes just called out Christmas to me, so I tore them off the role to use here. It's adhered with collage medium, and I simply adore how the blue background shows through this thin paper.

The base paper was brushed with clear gesso and allowed to dry before adding the collage paper and stenciling. This helps reduce warping.

***Designer Tip***
Don't hesitate to think outside of the box and use supplies that are designed for a specific holiday all year long. Sure, you may not want to use snowflakes on a spring card, but this "halloween" music score could be used for any occasion.

I stenciled randomly over the background using Snowfall Grit Paste randomly through a damask stencil. The design on this stencil is small so it looks rather snowy. To add even more sparkle, I sprinkled Distress Rock Candy Glitter over the paste while it was still wet. The glitter stuck nicely to the paste. 

***Designer Tip*** 
When adding texture paste that you know you'll be glittering, be sure to make sure the rest of your background is completely dry first. The collage medium I used to adhere the music paper was dry to the touch, but still seemed a bit damp. I thought it was dry enough, but was wrong. The glitter stuck to the damp collage medium. Fortunately, I was able to remove most of the errant glitter by brushing it with a dry paintbrush, but it would have save time and trouble if I had set it aside until it was completely dry. 

When composing a card, I like to start in the center and work my way out. Here the house and presents are the focal point in the center, framed by the darling trees. To add to the design, I decided to add the music notes, snowflakes and glittered snowy texture. And of course the metallic red sentiment anchors the card by framing the top and bottom. The postal edges are a charming frame for the outer edges of the card. 

The sentiment pieces are cut from red metallic cardstock and the top is backed with the same yellow metallic paper as the stars. Like the house and gifts, the top sentiment is popped up with foam tape. 

Below you can find the products I used to create this project including some with compensated affiliate links to Scrapbook.com and Spellbinders. These links are at absolutely no cost to you. When you shop through the links below, I receive a small commission from the companies.  These commissions help me cover the costs of my blog and other expenses, which allows me to continue to provide you with FREE inspiration along with detailed Tips and Techniques provided for every project. Thank you so much for your love and support!

Amazing Paper Grace Sets:
Paper:
Stash - Patterned Paper

Ink:

Mixed Media:

Stencil:
SnipArt - Stencil - Up in the Air Damask 15x15 cm

Adhesives:
Beacon - 3-IN-1

Tools:

Thank so much for stopping by to view this sweet cheery Christmas card.
I hope you've been inspired.

Monday, October 31, 2022

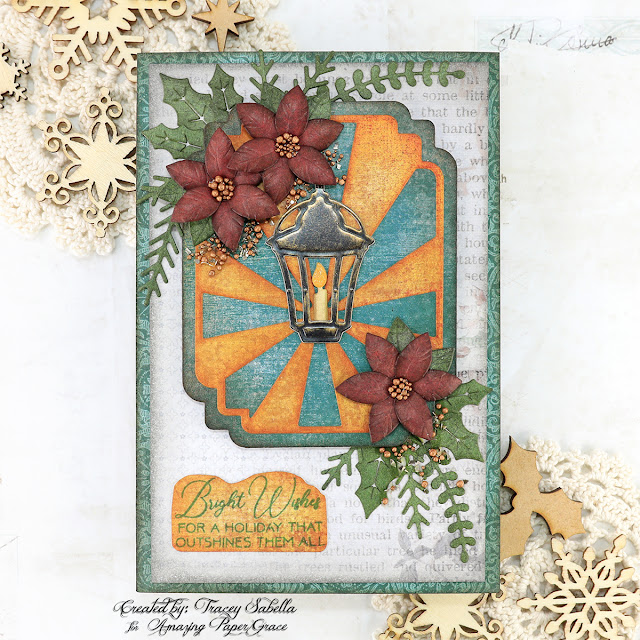
Bright Wishes Christmas Card for Amazing Paper Grace

 
Welcome to my creative space!

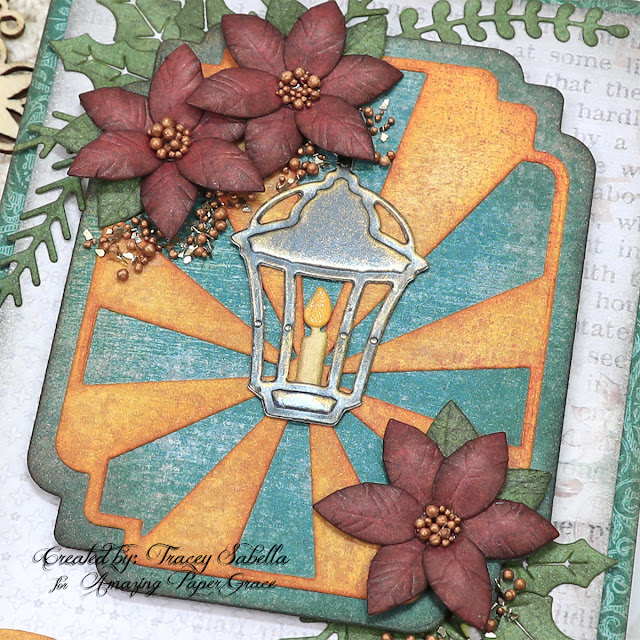
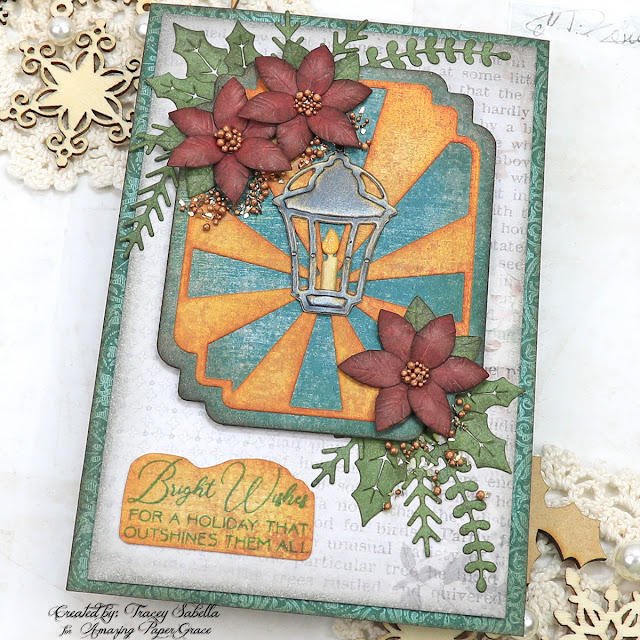
Christmas is such a heartwarming time of the year and this candlelit lantern in the Amazing Paper Grace Holiday Label Motifs die set represents this feeling so perfectly. Don't you just adore how the beautiful label looks like rays of warm candlelight radiating from the flame? The gorgeous poinsettias and foliage dies are included in this fabulous set.

Be sure to scroll down through my Tips and Techniques section for close-ups and all the details on how to create this cozy Christmas card.

If you would like to see more Christmas and cardmaking inspiration, please visit my Scrapbook.com gallery HERE.

Thank you Amazing Paper Grace for providing the dies used in this project.

13 dies are included in the Holiday Label Motifs Set.

Tips and Techniques
I selected Christmas paper from my stash to diecut for this card. The warm yellow gold is perfect to represent rays of light coming from the candle. It's paired with gorgeous teal to create the label design that pops against the light text background which is cut to 3 5/8 by 5 5/8 inches. A piece of pattered teal is cut slightly larger than the background to create the frame which is 4 x 6 inches. 

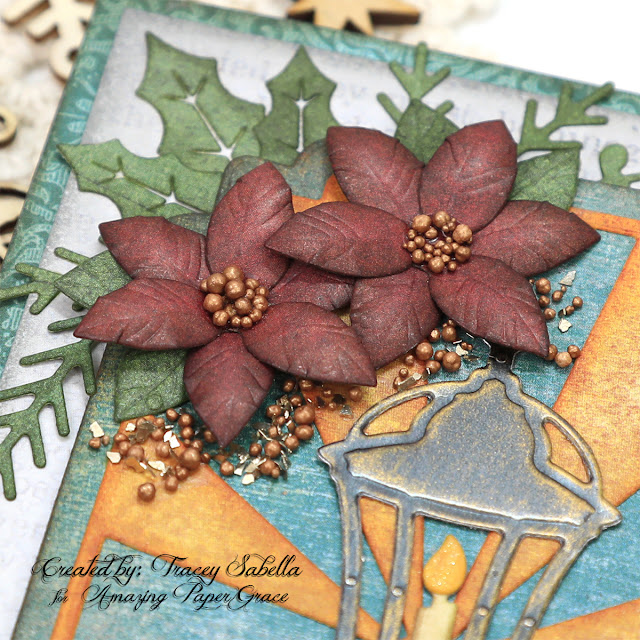
These gorgeous poinsettias are cut from a warm dark red and inked with Ground Espresso Distress Ink before shaping. Once shaped, I adhered two layers together offsetting the petals. The centers are filled with Third Place Prills for berries. 

***Tip*** I enjoy keeping my hands busy if I watch a bit of television in the evening, so cut and ink my petals in my studio, then shape and put them together while watching a show.

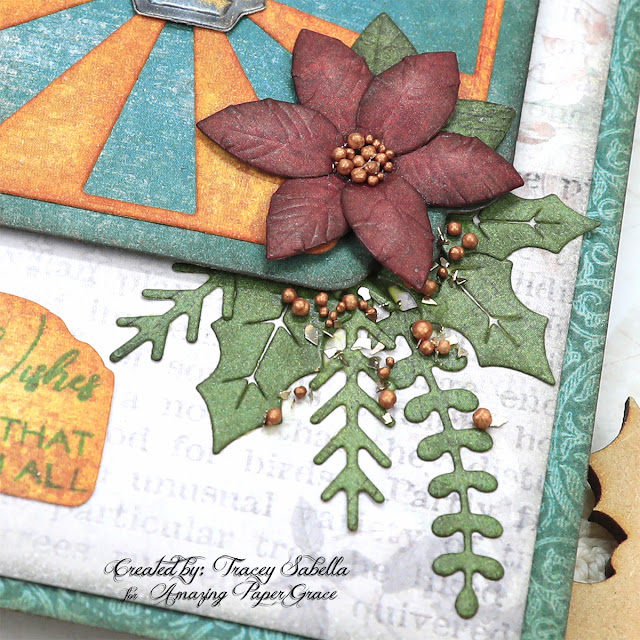
The holly leaves and foliage are cut from green patterned paper and inked with forrest moss. The foliage pieces are left flat. 

Texture is added by brushing soft gel medium over the foliage below the poinesttia blossoms and sprinkling on more of the prills and champagne colored chunky glass glitter. 

This gorgeous lantern is cut from black Metallic Kraft-stock and lightly dry brushed with Finnabair Vintage Gold Metallique Wax for a vintage feel.

The candle flame is cut from the same warm yellow paper then brushed with clear Wink of Stella to give a flickering effect. 

Inking paper edges gives a soft vintage shabby chic feel, so the yellow paper is inked with fossilized Amber and Rust Hinge, the teal with Ground Espresso, and the light text paper with Hickory Smoke. 

The sweet sentiment is from the Seasonal Motif Sentiments stamp set (STP-150) and stamped with Evergreen Bough Distress Archival Ink. I hand cut the sentiment. 

***Tip*** I attempted to stamp the sentiment directly to the light script background paper, but it wasn't quite straight. If this happens to you, there's no need to start over, simply stamp the sentiment onto a coordinating paper and adhere it over the "mistake."

How is your holiday card making coming along? I hope you've been inspired to create a homey Christmas card for someone special. 

Below you can find the products I used to create this project including some with compensated affiliate links to Scrapbook.com and Spellbinders. These links are at absolutely no cost to you. When you shop through the links below, I receive a small commission from the companies.  These commissions help me cover the costs of my blog and other expenses, which allows me to continue to provide you with FREE inspiration along with detailed Tips and Techniques provided for every project. Thank you so much for your love and support!

Amazing Paper Grace
Paper:

Ink:

Mixed Media:

Embellishments:
  • US Artiest - Mini Prills - Third Place
  • Stampendous - Chunky Glass Glitter - Champagne

Adhesives:

Tools:

Thanks so much for stopping by to view my card. I hope you've been inspired.

Monday, October 24, 2022

Joy to the World Christmas Card for Amazing Paper Grace

Welcome to my creative space!

"Joy to the World" is a favorite Christmas hymn, so I was just delighted to design with this fabulous and elegant Amazing Paper Grace Joy Flourish Doily die set (S5-532).

I started creating this card at a creative weekend with a dear friend. I had selected papers and die cut the doily frame, sentiment, and curls. I knew I wanted to add poinsettias, but thought I'd wait until I got home to finish the blossoms. I like to die cut my petals, and then form the blossoms while watching a bit of television in the evening. 

As it turns out I ended up going a little overboard creating blossoms for my poinsettia envelope project earlier this month using the gorgeous APG October Die of the Month: 3D Poinsettia Surprise Envelope. (This set is available only through the APG DOM subscription through October 28 HERE.) I had five extra poinsettias in purple. I wasn't sure they would go with the teal and reds I had selected for this card until I put them together and wow!! The colors look great together, don't you think?

Holly leaves from the Joy Flourish Doily set were die cut in teal patterned paper to add to the floral clusters and snowflakes are die cut in white glitter paper from the Let it Snowman set (S5-533).

You can view all the details on how I created this card with close-ups by scrolling down through the Tips and Techniques section below.

Thank you Amazing Paper Grace for providing the dies used in this project.


Tips and Techniques
The vintage background paper is cut to 5x5" and the edges are inked lightly with Gathered Twigs Distress Ink to give a shabby vintage feel. The outer frame in a dark teal patterned paper is cut to 5 1/4x5 1/4" giving a 1/8" frame around the card. This layer is inked lightly just at the very edge in Uncharted Mariner. 

The doily frame is cut in the same teal paper and inked with more of the Uncharted Mariner. This frame is backed in a neutral patterned paper which is inked around the edges with Gathered Twigs.  

Here are the poinsettias created with the 3D Poinsettia Surprise Envelope October Die of the Month. I used purple paper for the petals and teal for the center with green leaves. The berries are Pine by Me Prills. The petals, leaves, and centers are cut and inked before shaping, then glued together.

More of these gorgeous poinsettias. The holly leaves are from the Joy Flourish Doily set cut in the same teal, and inked with Uncharted Mariner.

The scrolled curls are cut from Gold metallic paper.

These sweet snowflakes are cut from white glitter paper with the Let it Snowman die set. 

Texture is added by adhering teal mica flakes, then going back in and adhering teal microbeads over the flakes that are underneath the floral clusters and sentiment die cut. Don't you just adore a bit of sparkle and shine on a Christmas card?!

Joy is cut from a dark red patterned paper and again from gold metallic paper. The pieces are offset when glued together to show a sliver of the gold underneath.

The banner for "To the World" is cut using a die from the Sweet Leaf Mini Slimlines set (S5-508). Once cut, the word sentiment is centered into the banner and die cut again.

I hope you've been inspired to pull out non-traditional colors to create a shabby vintage Christmas card for someone special in your life.

Below you can find the products I used to create this project including some with compensated affiliate links to Scrapbook.com and Spellbinders. These links are at absolutely no cost to you. When you shop through the links below, I receive a small commission from the companies.  These commissions help me cover the costs of my blog and other expenses, which allows me to continue to provide you with FREE inspiration along with detailed Tips and Techniques provided for every project. Thank you so much for your love and support!

Amazing Paper Grace Sets:

Paper:

Ink:

Mixed Media:

Embellishments:
  • US Artiest - Mini Prills - Pine by Me
  • Martha Stewart - Metallic Microbeads - Apetite
  • Mica Flakes - Teal

Adhesives:

Tools:
Thanks so much for stopping by to view my card. I hope you've been inspired.
Monday, October 10, 2022

Sugarplum Tweets Merry Christmas Card for Amazing Paper Grace

Welcome to my creative space!

Who knew these darling birds from the sweet Amazing Paper Grace Sugarplum Tweets die set (S4-1244) could be the centerpiece of a shabby chic card? As I was going through my stash of Christmas paper I realized the design here would be a perfect backdrop for these sweet birds on a slimline card. What do you think?

The beautiful poinsettias were extras I created for this month's 3D Poinsettia Surprise Envelope (DOMAPG-OCT22). I had this card all ready to put together except for the flowers when I realized that these extras were a perfect match. Don't you just adore when everything comes together like that? The adorable hat is embossed with the Holly Flourish Embossing Folder (SES-146) and the glittering snowflakes are from the Winter Label Motifs (S4-1240) set.

Be sure to scroll down through the tips and techniques section below for close-ups and all the details on how to create this card.

Thank you Amazing Paper Grace for providing the dies used in this project.

Tips and Techniques
This darling bird is cut from 49 and Market papers with the Sugar Plum Tweets die set (S4-1244) from the Christmas Flourish Collection. I assembled the body, wings, and tail, then inked the edges with Pumice Stone and Gathered Twigs Distress ink before assembling these pieces together. The bird is popped up with foam squares for dimension over the flourish which is also inked with Gathered Twigs ink. 

The poinsettia is die cut using the flower dies from the 3D Poinsettia Surprise Envelope (DOMAPG-OCT22) die set. The edges of the petals are inked with Speckled Egg Distress Ink and the leaves with Peeled Paint. Prills are added to the holes in center of the blossoms to resemble berries. The tiny rose is a bought flower from my stash and the white blossom was spritzed with Salvaged Patina and Speckled Egg Distress Spray Stains to color it. The poinsettia is also popped up on a foam square while the rose is adhered directly to the paper and nestled next to the poinsettia.

Here's the other bird from the Sugarplum Tweets set amongst more of the flowers. The hat is die cut from cream paper embossed with the Holly Flourish Embossing Folder (SES-146) then inked to highlight the texture.

The sparkling snowflakes are cut from silver glitter paper using dies from the Winter Label Motifs set (S4-1240).

Shimmering, snowy texture is added beneath each of the bird clusters using Stampendous Shaved Ice adhered with soft gel medium.

The sentiment was part of the patterned paper collection used for the background. I also added a piece of washi tape above it to repeat the Merry Christmas wishes. The paper sentiment block is popped up with foam tape and holly leaves from the Sugar Plum Tweets set are tucked in around it. 

The focal background paper is cut to just under slimline size and the frame piece is cut from coordinating teal patterned paper to slimline size. The edges of both papers are inked to add to the shabby vintage feel.

Below you can find the products I used to create this project including some with compensated affiliate links to Scrapbook.com and Spellbinders. These links are at absolutely no cost to you. When you shop through the links below, I receive a small commission from the companies.  These commissions help me cover the costs of my blog and other expenses, which allows me to continue to provide you with FREE inspiration along with detailed Tips and Techniques provided for every project. Thank you so much for your love and support!

Amazing Paper Grace:

Paper:

Ink:

Embellishments:
  • Stampendous - Fran-tage - Shaved Ice 
  • US Artiest - Mini Prills - Pine by Me
  • Stash - Small White Roses
  • Stash - Washi Tape - Merry Christmas

Adhesives:

Tools:
Thanks so much for stopping by to view my card. I hope you've been inspired.