Showing posts with label Corrugated Board. Show all posts

Tuesday, October 15, 2013

Fall Leaves for RRR Fall Leaves Challenge

Fall is in the air here in northeast Ohio. We live atop a large hill in an open field completely surrounded by forest. As I look out my kitchen window each fall day, I see such gorgeous colors that change day by day. The photos on this page were taken just last week, and my view is much different only a mere week later.

These photos are just perfect for the Really Reasonable Ribbon challenge starting today ~ Fall Leaves. I got to combine some of my favorite products on this page including ribbon, lace, cording and WOC flowers from RRR, Clearsnap Smooch Spritz and Mix'd Media Inx by Donna Salazar Designs, 7 Dots Studio 9th Wave collection, Prima Stencils and Helmar Adhesives.


And of course include some ribbon, lace or cording on your project! 

"Enjoy Fall"

To enter this challenge, create a card, layout, or any handcrafted project. Just be sure to follow the theme and use ribbon, lace, or trim somewhere on your project. 

Really Reasonable Ribbon Products

I used the Dusty Attic October Sketch as inspiration for this layout:

Tips and Techniques
I created this beautiful five-loop bow using White Seam Binding and the new Zutter Bow-it-All. this new bow tool is so handy and Bonnie has put together a fabulous video tutorial on making basic bow which can be found here. The Bow-it-All is so easy to use and creates tiny to large bows. I love how quickly I can put together a multi-loop bow and know that all the loops will be nice and uniform in size. There are a few hints to using this tool which Bonnie does a wonderful job explaining. 

After tying the bow, I brushed some Sea Breeze Smooch Spritz across the bow, heavier in some spots than others to get a mottled appearance. Then, I dry brushed the bow in spots with gesso. 

I also dry brushed many of the elements like this metal piece and flowers with more gesso. All the pale blue flowers tucked in around the larger orange flower are white WOC flowers tinted pale blue. A close-up and details follow. 

Bonnie sells a wide variety of gorgeous Wild Orchid Crafts flowers in the Really Reasonable Ribbon Store. I like to keep white flowers in my stash so that I can color them as I did here on this layout. I had a mostly used bottle of Donna Salazar's Sea Breeze Smooch Spritz. I added a little water and poured the colored liquid out onto my craft mat and with a fine tip paint brush, applied to these flowers. (I always save those nearly used up bottles of mist until I get every last drop from them. lol) Of course when dry a bit of gesso was brushed on. 

The rolled flower is created with Natural Jute Rope and the tutorial can be found here. Instead of dabbing with black ink, I brushed on gesso and dabbed with pale blue ink. You can also see the beautiful Chloe Lace I tucked into the layers surrounding the photos. 

 A side view of the focal cluster.

I adore texture and the May Arts Champagne netting was roughly cut along the edge and tucked under the edge of the painted corrugated board and photo. I added some blue ink under the tucked in flowers and butterfly, the netting took this color so beautiful giving a crackle appearance. 

This sweet butterfly came in a Bits and Pieces prize I won from C'est Magnifique earlier this year and is handcrafted by Cathi O'Neill. Yes indeed, I brushed it with the Sea Breeze Smooch as well. 

This Dusty Attic Foliage piece represents my fall leaves. I painted it with Super Heavy Gesso to apply a base of texture. I then brushed on several layers of ink in yellows, golds, orange, and red. It is raised and adhered using Tombow 3D Foam Pads

This Dusty Attic Wrought Iron piece is painted in metallic cobalt blue and dry brushed with gesso. Here you can see some of the mixed media background - stamping, molding paste, misting and paint. 

The title was created with the DA UPPER mini ABC chipboard letters on a background cut with Spellbinders Decorative Labels Twenty-Two, then inked. The letters were painted with DA Sunshine acrylic, then dabbed with Mix'd Media Inx. Finally, I sprayed them with Helmar Crystal Kote Glossy Spray to set the color and give a glossy shine. 

I hope you've been inspired to create a project for 


Be sure to stop by the RRR Blog for all the details and prize information.

The Really Reasonable Ribbon Store is a fabulous place to find that special ribbon or fiber to fit your paper crafting needs! 

Thanks for stopping by! I treasure your comments.

~ Blessings ~

Saturday, December 22, 2012

"Mother" ~ ScrapThat! Dec. Kit ~

I'm here with another Christmasy layout. Our son, Joseph, and his beautiful Rachel were married last December with the church and reception filled with lovely Christmas decor, so this Christmas themed kit worked perfectly for a wedding page. This is one of the rare pages including a photo of myself. Part of their wedding ceremony included coming down and giving each of the mothers a rose with an opportunity for me to bless them on their new life together. I'm so glad the photographer got a shot of this special moment. 


Today I would like to share the details of my layout using the
"Mother"
Main Kit with Amy's December Sketch

Here is Amy's gorgeous sketch:

December is a busy month, so we have extended our ScrapThat! Sketch Challenge. You have until December 30 to enter your sketch project. Anyone can enter, and kit products are not required. Details can be found in our forum

Tips and Techniques:

Flowers ~ The focal red poppy and white poinsettia are gorgeous flowers included in the main kit. I inked the bright white poinsettia to fit with the vintage feel of the page. I also did a bit of inking to the smaller green poinsettia. I used the kit cardstock to create the roses using my Donna Salazar Bitty Blossoms Spellbinders die set. I just love the flowers this die set creates. This gorgeous bow is also in the main kit and so easy to add such a lovely touch to my page. 

Leaves ~ There were 3 of the small green holly leaves in the kit, but I wanted more, so used one as a template to cut several from the kit cardstock. With a bit of inking and pinching, they look just like the originals.

Wire ~ I just adore the wired balls that came in the kit. I wasn't sure how I would use them at first, but discovered that when looped and twisted they were perfect for my clusters. 


Modeling Paste Stem ~ I found a lovely leafy stencil in the paint section of a local craft store, and it was so perfect for this page. I used some distress re-inker to tint the modeling paste without watering it down too much to get the lovely dark green color. I added a few pearls colored with cranberry alcohol ink for the berries. 


Bells ~ Have I mentioned lately how much I enjoy playing with Chipboard. My friend, Dana, posted a review on our ScrapThat! forum about Sophisticated Finishes products. I just had to try them out on this bell using the copper and patina. First you paint on the metallic color and when nearly dry but still tacky add the patina green which actually reacts with the copper to get the verdigris effect. You'll definitely be seeing more of this product on future projects!! The bow and holly were colored with Copics and Spica markers, then gold paint rubbed lightly over the red bow. 

Corrugated Board ~ Corrugated board is another of my favorites. Here I applied another new to me product - white opaque flakes, then painted with gesso, stamped with a script, inked then more opaque flakes. The opaque flakes are white in a medium that dries clear, and I realize once I painted over them, that while the texture was there, I lost a lot of the visual impact of the flakes. That's why I applied them again as a final step. If you are looking to try this technique out, you could skip the first step and just apply them on top. 


Heat Embossing ~ I'm always looking to my stamps to see if I can find one to work as a title or sentiment. This one was perfect for my page title. Because I wanted it to pop, I heat embossed it with gold embossing powder. 

Thanks for stopping by! I treasure your comments! 
~ Blessing  ~

Have a blessed and wondrous Christmas with your loved ones. 

Tuesday, November 27, 2012

Beautiful ~ ScrapThat! November Kit

This morning's snowfall has melted away, but left a hint of the winter to come. I have one final layout from the gorgeous November ScrapThat! Kit to share with you today. It was really a joy to work with this amazing kit featuring Bo Bunny Serenade and full of so many wonderful embellishments.

This photo of Rachel and her bridesmaids taken before the wedding is one that really caught my eye. I talked with her about it over Thanksgiving and found out that it is a shot that Rachel suggested to the photographer. I love how the girls look like they are having so much fun peaking out from behind the columns. 

"Beautiful" 
~Using the MK, EAO, & FAO Kits ~

I used Amy's gorgeous November Sketch:

Tips and Techniques:


Corrugated Board ~ You can see the corrugated board layered behind my photo. I have so much fun with this household item. Whenever I get some packaging that has the narrow little corrugation, it goes into my stash. Here I used a foam brush to lightly apply some black paint to the top ridges of the corrugation and edges. When dry, I applied some Ranger Rock Candy Crackle Paint for some great texture. 

Hand Stitching ~ After the paint was dry on the corrugated board, I used my handy piercing tool to create stitching holes around the curved edge along with some x's.

Misted Rock Salt Chipboard ~ My tutorial for the grungy finish on the chipboard door can be found here.

Curled Vine ~ The jeweled Prima leaves came with brown wire stems, which I pulled off to create the vines in my cluster. I wrapped the wire around a narrow metal bar for making wire coils, but anything like  a knitting needle, or paint brush would work. 


Flowers ~ The November ScrapThat! main kit included this gorgeous WOC poppy and the sweet little white poppies. The Flower Add-On Kit included the amazing Prima Gracie vine and lovely Cabaletta blossoms in white, black, and Grey. I layered some of the black tulle under the red poppy.

Punched Frame ~ I needed a different size frame than my punch set would allow, so I punched it larger, trimmed the ends and overlapped the ends resulting in the lovely corner.

Chipboard ~ I simply used some metallic paint on this Dusty Attic Holly piece to tuck under the flower cluster.

Distressing ~ Of course I used my Distrezz-It-All to distress all the straight edges.

My sweet friend, Helen Tilbury, is having an amazing give-away on her blog, Scrap Addict. It is international and open to everyone. You just need to be one of her followers. Her work is amazing, and you will enjoy following her gorgeous work!! Look what all she is including in her package:


Thanks for stopping by! I treasure your comments.

~ Blessings ~ 

Tuesday, August 7, 2012

Corrugated Butterfly Tutorial

I hope you are having a pleasant week. It is forecast to be a cooler week here, which is a delight to me. I went to visit my parents yesterday and shared such a peaceful ride on their pontoon boat for a lovely evening. What a blessing to spend time with family surrounded by the beauty of God's creation. 

Today, I have a Technique Tuesday Tutorial for you. I have had many kind words on my Corrugated Butterflies, so I thought I would share the steps in creating them. They are actually quite easy to make. 

Here are three I've created. You can see that depending on how you paint, ink, and embellish these sweet butterflies you can get very different looks to go with any color scheme and scrappy style. 


Corrugated Butterfly Tutorial

Supplies:

Supply List:

*Big Shot or other die cutting machine
*Tim Holtz Alterations Movers and Shapers Mini Butterflies or other butterfly shaped heavy die that will cut through corrugated cardboard
*Tim Holtz Alterations Base Tray
*Donna Salazar Zutter Corrugated Board. You can also use scrap packaging cardboard, however be sure to spritz it with some acid free product, and Donna's corrugated board is so easy to use since it is designed for the top layer to release from the corrugated inside easily. 
*Coloring products like acrylic paint, Distress Ink, Smooch Spritz are my favorites, but anything you have on hand should work
*If using acrylic paint, a foam brush works better than a regular bristle paint brush
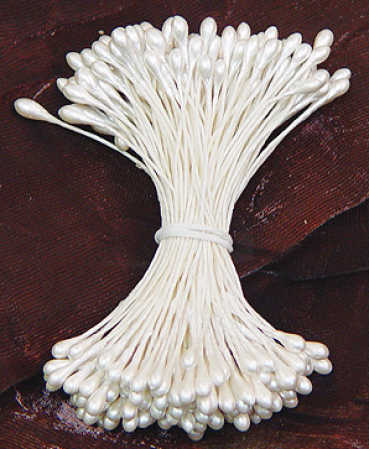
*Something to created antenna - thread covered floral wire and flower stamens are my favorites
*Glossy Accents or other fast drying glue

Step One ~ Cut Butterflies

Cut small rectangles of your corrugated board the size of your butterfly die(s). If using the movers and shapers dies, place the butterfly dies in the mover and shapers base tray, place the corrugated board on top of the dies, sandwich between the clear cutting plates and roll through your die cut machine to cut.

Here is what it will look like before sandwiching between the plates:

Then after it has been run through your machine:

Step Three ~ Reveal the Corrugation

Remove the top liner paper to reveal the corrugation below. If you are using Donna's Zutter Corrugated Board, you can remove it in one piece and save the shape for another project!! When you remove the liner, little bits and pieces of it will be stuck to the corrugation - I like to leave some of this for the added texture and grunginess that it adds.


Step Four ~ Painted Peaks

When going for a more delicate, girly look, I like to lighten up the corrugated bord with  a lighter color. If you are going for a darker, grungier look you could use a darker paint or skip this step entirely.

For this example I will start by painting the "peaks" of the corrugated board with some antique white acrylic paint. I like to paint just the peak, allowing the natural color of the corrugation to be visible down in the valley of the corrugation. From some trial and error, I've found that a foam brush works best to achieve this effect. I place a small spot of paint on my craft mat and brush some paint across the mat so I only have a small amount of paint on the foam brush. (If you have too much paint on the foam, it will still drip down into the valleys.) 

You can see what I mean in this photo.
(Excuse my mat - it was cleaned, but my well loved and used craft mat is quite stained.)

Now that you have the paint on your foam brush, use a light hand to brush just the peaks of your butterflies. I do like a little paint in the "valleys" right at the very edge, so I go back and hit the very edges of the valleys with a bit of paint as well. 

Here are my painted butterflies:

Step Five ~ Inking/Misting

Ink your edges to coordinate with your project. I like to used Distress Inks and usually apply several to achieve the desired color. Also applying several colors can add depth and dimension. Really though, you can go wild here if you want inking, painting, misting .  .  . the entire butterfly as in my first example at the top of my post with the rusty tones. 

Here is my example with just the edges inked using a combination of purples and brown:

Step Six ~ Antenna

I like to add some kind of antenna to my butterflies. My two favorite materials to use are flower stamens or thread covered wire from the floral department. Today I am using the floral wire. Simply cut off a small length - double the body height plus enough for the two antenna. Fold in half and curl the ends - I use a pair of round tip jewelry pliers, but you could curl them around a toothpick, hole piercer, or any other small round object. Use glossy accents or other fast drying glue to adhere them to the back of the butterfly. You might notice that I had green wrapped floral wire in my supply photo - I simply inked them with walnut stain Distress Ink. 


The really easy peasy way to add antenna is to pick up a pack of stamens from the floral department, fold them in half or if too long, trim them down to the right length and glue them to the back. My third example at the top of this post shows an example done with stamens.
Step Seven ~ Bling

I like to add small pearls or rhinestones down the body of the butterfly to finish it off. If you don't have the right color, a bit of alcohol ink will transform them to a color that will be just right. 

Here are the finished butterflies ready for my next project.

I hope you have enjoyed this tutorial and will give it a try. If you do, I'd be delighted for you to leave a comment and a link so I can hop over and see your creations.

Now for a bit of sweet news. My Beautiful Life layout of our dog, Ellie, was selected as the top entry at the Scrapping Everyday Miracles challenge to scrap with the theme Created Beauty. And yes, it has one of my Corrugated Butterflies!! What a sweet challenge site encouraging us to find the blessings God gives us in our everyday lives and to scrap them. Be sure to stop by their blog and check out their wonderful site and challenges. 


Thanks for stopping by!! I treasure your comments. 

~ Blessings ~