

Welcome to my creative space!
Spring is a time for new beginnings with the scent of sweet blossoms, leaves budding and popping, and new life as animal babies come along while butterflies emerge from their cocoons, so these sweet spring images from the gorgeous Amazing Paper Grace Spring Labels Motifs die set (S4-1238) are just so perfect to celebrate a new beginning in the life of someone special. This could be used for a graduation, new job or any new endeavor one may be entering. The sweet sentiment is from the coordinating Seasonal Motif Sentiments Stamp Set (STP-150). I also die cut the lovely background medallion using the Circle Meets Square Set (S5-491).
To learn more about the techniques used to create this shabby mixed media card including the gorgeous flowers and lovely butterfly, be sure to scroll down to view my 'Tips and Techniques' section below.
Thank you Amazing Paper Grace for providing the dies used in this project.
Tips and Techniques
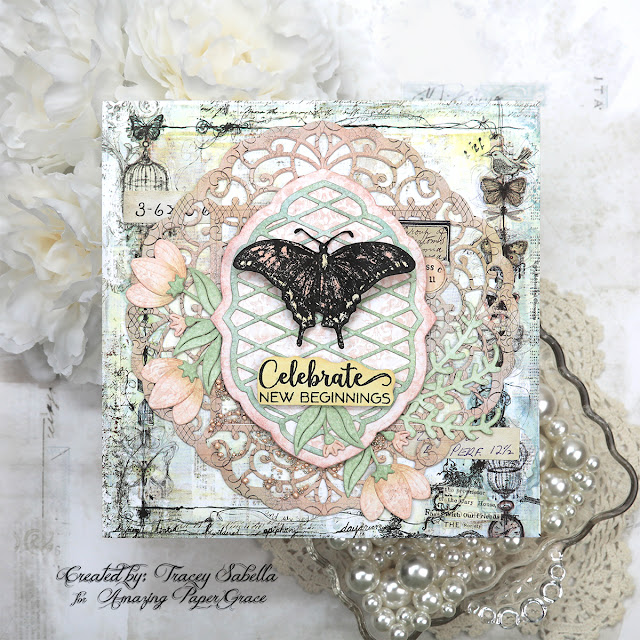
This 6x6" card is created using older papers from my stash from a 6x6" paper pad, so the colors coordinate beautifully. I often add a frame around the edges of my card, but the focal base paper has a beautifully drawn frame around the edges, so I didn't feel that a border was needed here.
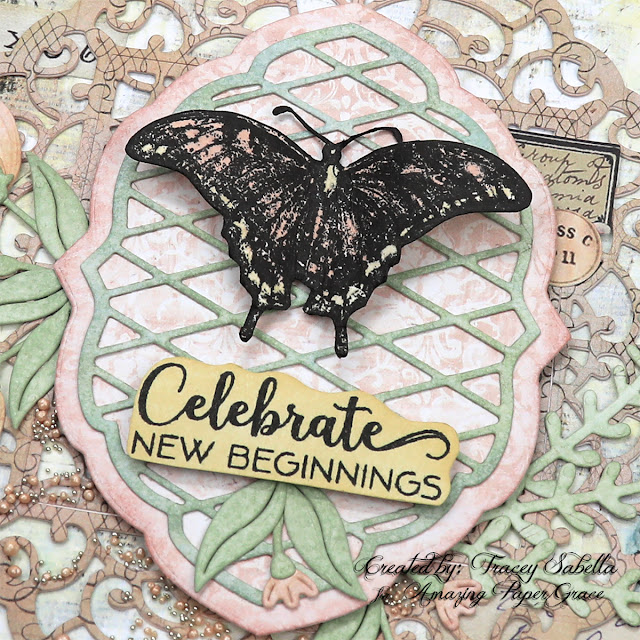
What a sweet sentiment from the Seasonal Motif Sentiments (STP-150) stamp set. It is stamped onto smooth white cardstock with permanent ink. Once the ink was dry, I colored it with Scattered Straw Distress Ink using an ink blending brush. To anchor the sentiment, a tiny die cut blossom and leaves are added below to fill in this space beautifully.
While this die set is focused on spring, the label and lattice pieces could be a focal point for any occasion or season. I like an organic feel to my die cuts, so randomly added Bundled Sage; Iced Spruce, and Speckled Egg to the lattice and Victorian Velvet just to the edges of the pink layer. This label layer is popped up by adhering with foam squares in the center leaving the edges free to tuck flowers under.
This die set works well for adding a focal element like this butterfly. You could use a pre-made embellishment of your choice. Here I stamped a butterfly from the Tim Holtz Botanic Collage set onto the smooth side of Distress Watercolor Paper with permanent black ink then colored it using coordinating distress inks. I smooshed an ink pad onto my craft mat and picked up the ink with a fine tip paint brush to apply the ink. Once colored, I fussy cut the image.
***Tip*** The antenna are too thin to cut out, so leave a bit of a margin around them, then go back with a black marker and color them in. I also use the marker around the edges so the white core of the paper didn't show. I use the marker from the back side for this edging, so I don't slip and color onto the stamped image.
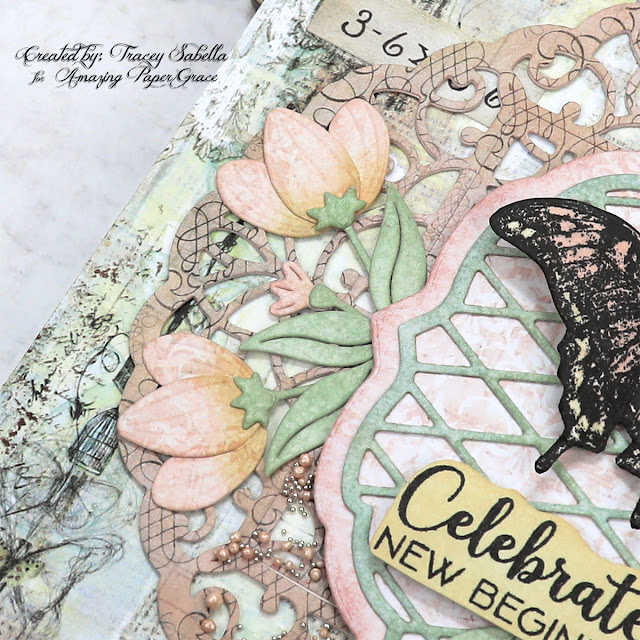
The flowers included in this die set are just so sweet. After die cutting, I brushed the base of each petal with Scattered Straw Ink and a little Victorian Velvet ink around the edges. The foliage is inked around the edges with Bundled Sage. This gives definition to make them more visible against the busy background.
***Tip*** I find that tweezers help me place these intricate blossoms.
Another blossom is added to the other side as well as a few sprigs of foliage.
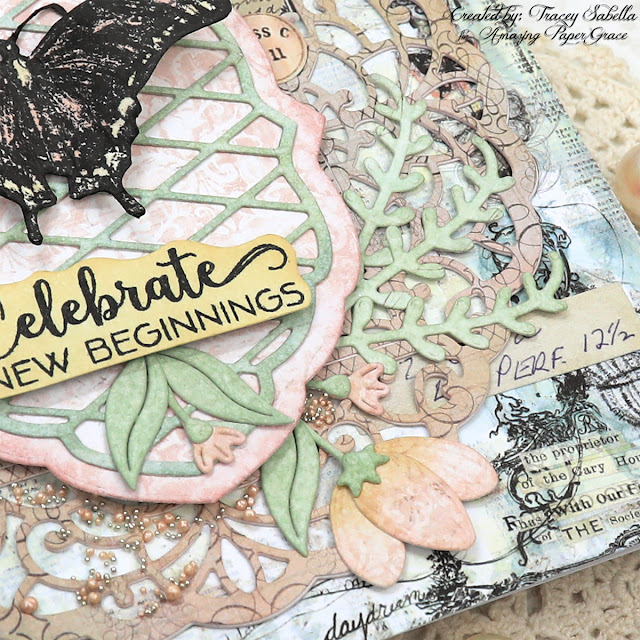
Texture is added around the bottom nestled around the blossoms and over the medalion. Matte Soft Gel Medium is used to add the peachy prills and white gold microbeads to add some bling.
I've tucked in number and label snippets from Tim Holtz Idea-ology. You can see a couple of them in this shot.
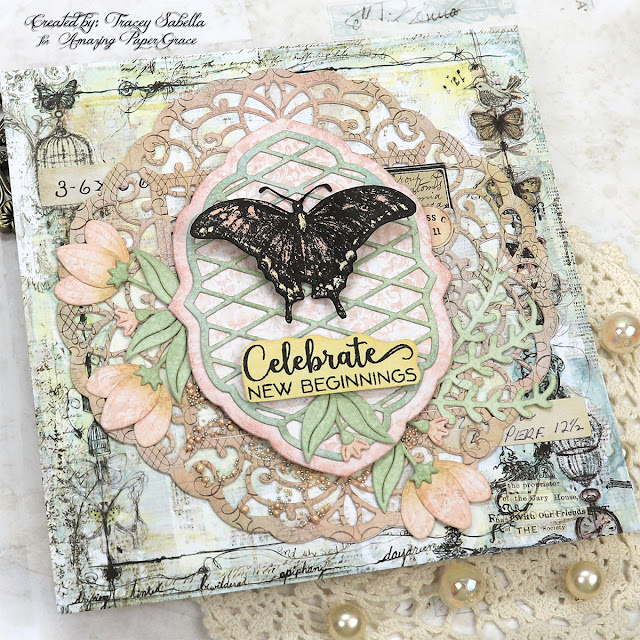
The larger medallion piece is die cut using the gorgeous Circle Meets Square die set (S5-491). I darkened it up a little with Victorian Velvet Distress ink to make it more visible.
***Tip*** If you have die cut a piece like this medallion, and it ends up blending into the background more than you expected, just brush on some coordinating ink in a darker shade of color to help it pop.
Below you can find the products I used to create this project including some with compensated affiliate links to Scrapbook.com and Spellbinders. These links are at absolutely no cost to you. When you shop through the links below, I receive a small commission from the companies. These commissions help me cover the costs of my blog and other expenses, which allows me to continue to provide you with FREE inspiration along with detailed Tips and Techniques provided for every project. Thank you so much for your love and support!
Supplies:
Amazing Paper Grace:
Paper:
- Ranger Ink - Tim Holtz - Distress Watercolor Cardstock - 4.25 x 5.5 - 20 Pack
- Core'dinations - 8.5 x 11 Cardstock - Value Pack: White, 110lb
- Prima Marketing - Epiphany - 6x6 Paper Pad
Ink:
- Ranger Ink - Tim Holtz - Distress Ink Pads - Iced Spruce
- Ranger Ink - Tim Holtz - Distress Ink Pads - Speckled Egg
- Ranger Ink - Tim Holtz - Distress Ink Pads - Victorian Velvet
- Ranger Ink - Tim Holtz - Distress Ink Pads - Antique Linen
- Ranger Ink - Tim Holtz - Distress Ink Pads - Mini Kit - Ten (Tattered Rose; Bundled Sage)
- Ranger Ink - Tim Holtz - Distress Ink Pads - Mini Kit - Four (Scattered Straw)
- Tsukineko - VersaFine - Instant Dry Pigment Ink Pad - Onyx Black
Stamps:
Mixed Media:
- Ranger Ink - Tim Holtz - Distress Collage Medium Matte
- Kuretake - ZIG - Fudebiyori - Brush Marker - Black
- Finnabair with Prima Marketing - Soft Matte Gel
Embellishments:
- Idea-ology - Tim Holtz - Halloween - Ephemera Snippets - Curator
- Idea-ology - Tim Holtz - Ephemera Snippets - Number Strips
- US Artiest - Mini Prills - Fuzzy Navel
- Finnabair with Prima Marketing - White Gold
Adhesives:
Tools:
- Spellbinders - Platinum 6 - Die Cutting and Embossing Machine
- Tonic Studios - Tim Holtz - Haberdashery Scissor - 5 Inches
- EK Success - EK Tools - Craft Tweezers
- Tonic Studios - Tim Holtz - 12.25 Inch Maxi Guillotine Trimmer
- Sizzix - Tim Holtz - Alterations Collection - Sidekick - Starter Kit - Black
Thanks so much for stopping by to view my card. I hope you've been inspired.
~ Blessings ~

No comments:
Post a Comment
Thanks for taking the time to stop by and leave a message! I treasure your comments.