Showing posts with label Hand Crafted Flowers. Show all posts

Sunday, August 14, 2022

Introducing Amazing Paper Grace Seasonal Label Motifs Collection with Cards Two Ways

Welcome to my creative space!

This Amazing Paper Grace Fall Label Motifs die set (S5-519) is such a versatile and gorgeous die set and is part of the new Seasonal Label Motifs Collection.

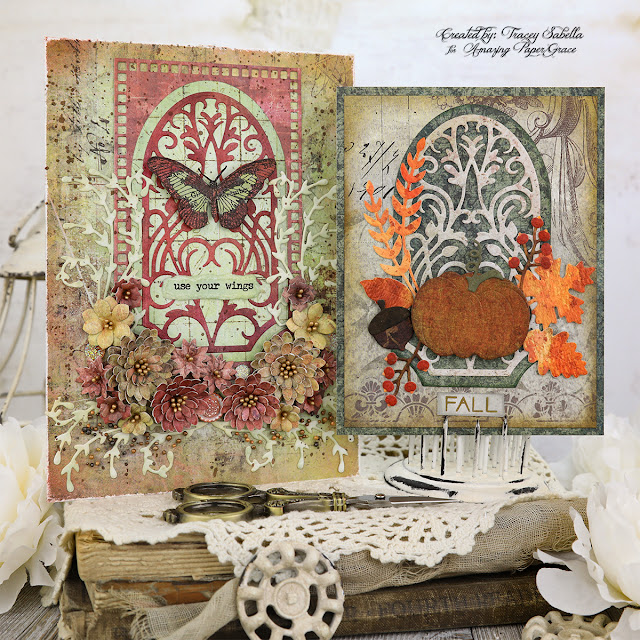
My first card fits the fall theme of this set featuring this sweet pumpkin and acorn surrounded by gorgeous watercolor fall foliage. What a beautiful way to welcome in the fall season which is the favorite of so many. The sentiment is from the Seasonal Motif Sentiments stamp set (STP-150). 

Then I wanted to show how to use this lovely set for a non-fall card using the gorgeous label and background inlay. I layered a stamped and hand colored butterfly over the inlay and surrounded them with handcrafted flowers using Petite Floral Potpourri (S3-420) and Cinch and Go V (S4-995) dies along with foliage die cut using the My Sweet Friend (S5-512) set. The border around the inlay uses the Eyelet Lace Frame (S6-184) die set.

Be sure to scroll down through the Tips and Techniques section below for more close-ups and all the details on how I put these lovely cards together. 

Today's projects were created with dies provided by Amazing Paper Grace.

My Projects for Today


Tips and Techniques
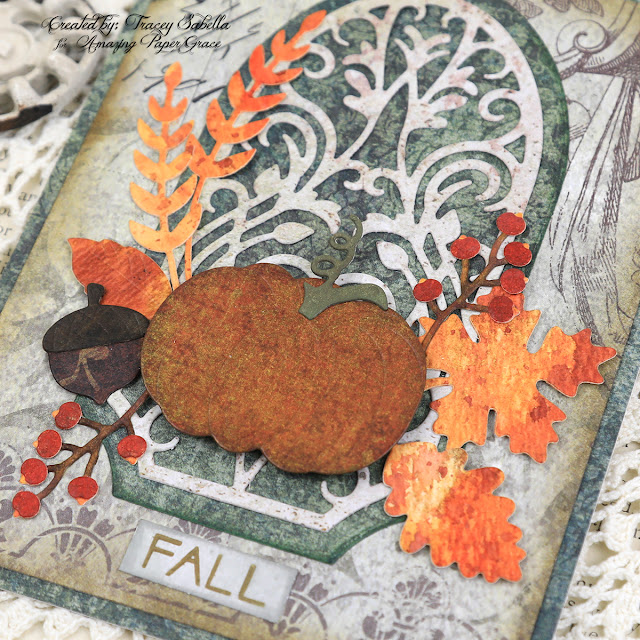
I layered fall orange, yellow and red color mists onto watercolor paper and die cut it to create these amazing fall leaves. I just adore the organic feel these grungy colors create. The berries are die cut from the same paper, then rubbed with red distress inks to deepen the color. The berry branch is also cut from this paper. The stems are colored brown, and the berry section is left in the original color so that the tips of the berries are this lovely fall orange color. 
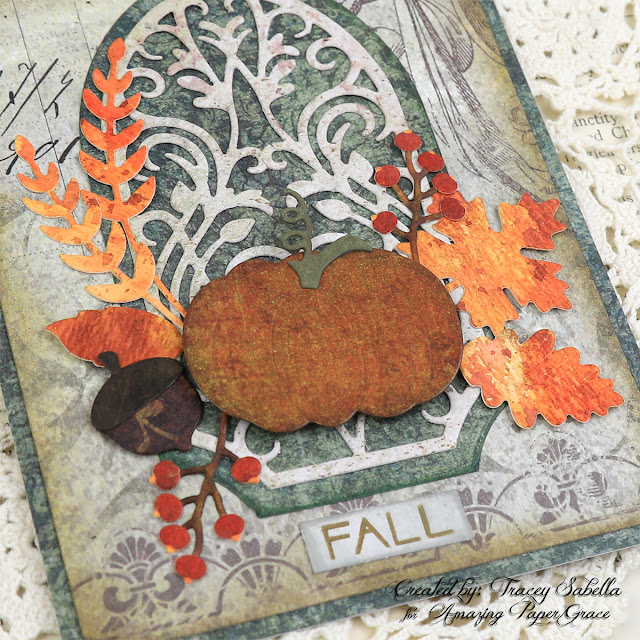
Beautiful fall color patterned papers are die cut to create the pumpkin, acorn, label and inlay as well as for the background layers. The edges are inked where appropriate to help give definition. The fall sentiment from the Seasonal Motif Sentiments Clear Stamp Set (STP-150)
is stamped with brown permanent ink onto white cardstock, then colored with distress inks.
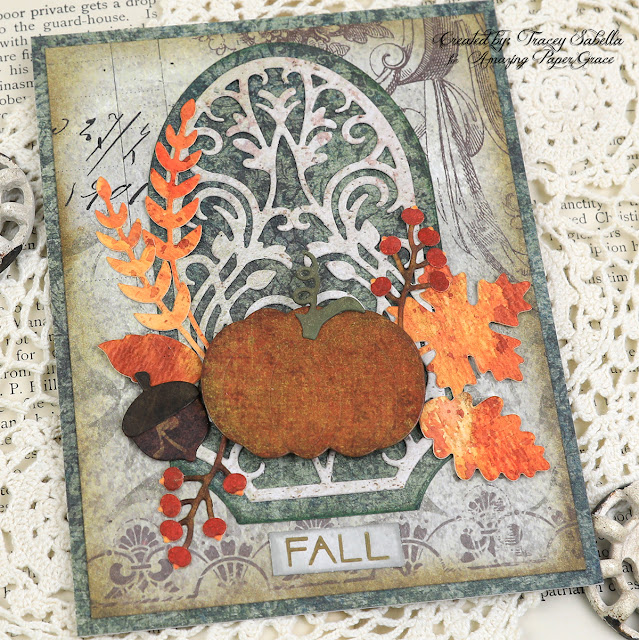
One final shot of this beautiful fall card.
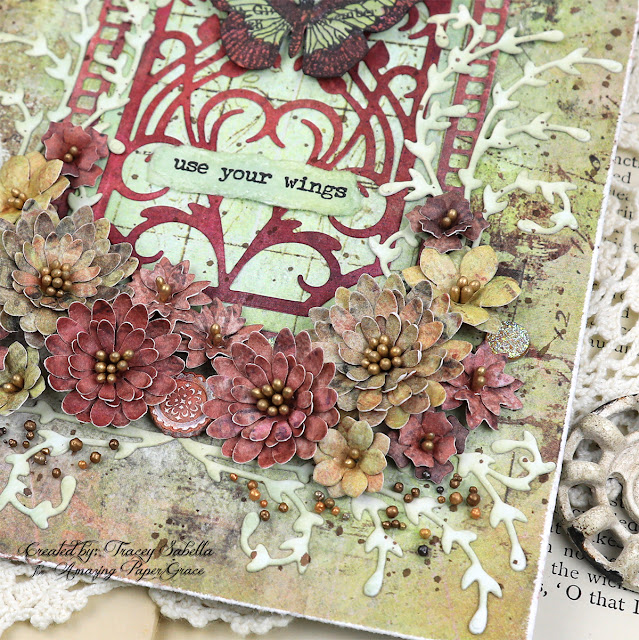

I've used beautiful summery patterned papers to cut daisies using the Cinch and Go V die set (S4-995)  paired with smaller flowers die cut with the Petite Floral Potpourri set (S3-420).  The flowers are shaped and centered with gold stamen. 

This sweet sentiment pairs beautifully with the lovely butterfly and is stamped onto white cardstock and colored with distress inks to coordinate with the background. 
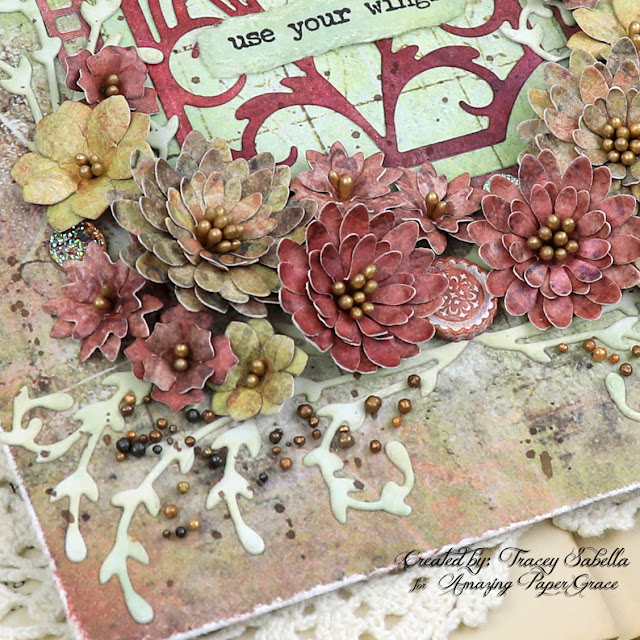
This beautiful foliage is die cut with the My Sweet Friend set (S5-512) from white cardstock and colored randomly with distress ink. 

The background paper is distressed around the edges using the edge of my scissors blade. After adhering the foliage, the background was spattered with black India ink. 

The medallion in the center of the flowers was silver. I brushed it with white gesso then applied Finnabair waxes to color this beautiful piece. 

Prills are scattered below the floral cluster to add texture. I brushed the area with Finnabair Matte Soft Gel Medium, then loosely scattered the prills over the wet medium. The gel dries matte and perfectly clear, so is not visible once dry. 
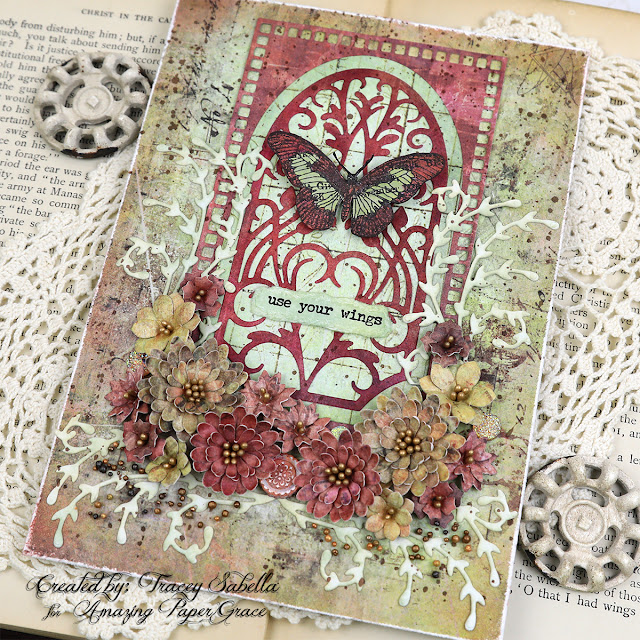
This inlay piece is just so gorgeous and particularly striking in red. The outer layer is die cut using a die from the Eyelet Lace Frame set (S6-184).

The gorgeous butterfly is stamped, then colored with distress inks by pressing the ink pad onto my craft mat and picking up the ink with a round fine tip paint brush to color the lovely image. The butterfly is fussy cut to layer over the inlay. 

The Seasonal Label Motifs Availability:
These dies and plates are available from Spellbinders right now! Click here: The Seasonal Label Motifs Collection.

Below you can find the products I used to create this project including some with compensated affiliate links to Scrapbook.com. These links are at absolutely no cost to you. When you shop through the links below, I receive a small commission from Scrapbook.com. These commissions help me cover the costs of my blog and other expenses, which allows me to continue to provide you with FREE inspiration along with Tips and Techniques provided for every project. Thank you so much for your love and support!

Supplies:

Amazing Paper Grace:

Paper:

Ink

Stamps:

Mixed Media:

Embellishments:
  • Finnabair with Prima ~ Melange Art Pebbles - Sugar
  • Momenta ~ Metal Stickers - Mini Medallion
  • US Artiest ~ Mini Drills - Taken for Granite

Adhesives:

Tools:

For more The Seasonal Label Motifs Collection Inspiration
Visit each Creative Team blog linked below for their take on creative paper crafting ideas using  The Seasonal Label Motifs Collection.

I would adore hearing from you! Please leave a comment below letting me know how you will use these gorgeous dies!


Thanks for stopping by! I treasure your comments.

~ Blessings ~

Monday, July 18, 2022

Easter Card with Lilies for Amazing Paper Grace

Welcome to my creative space!

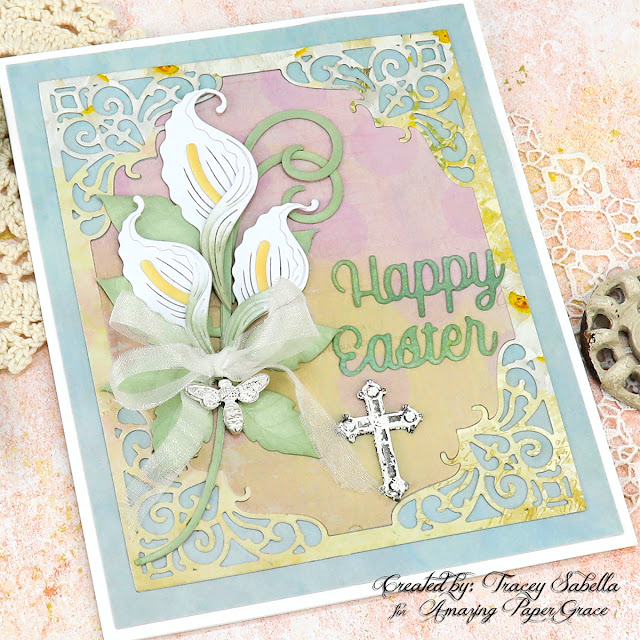
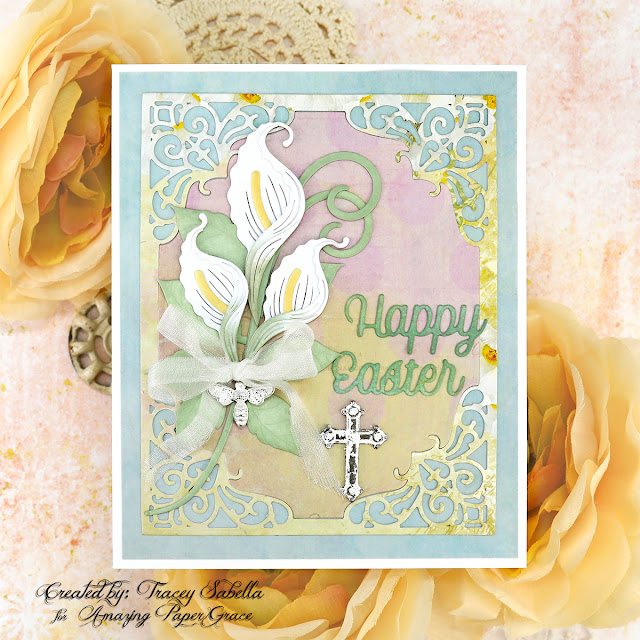
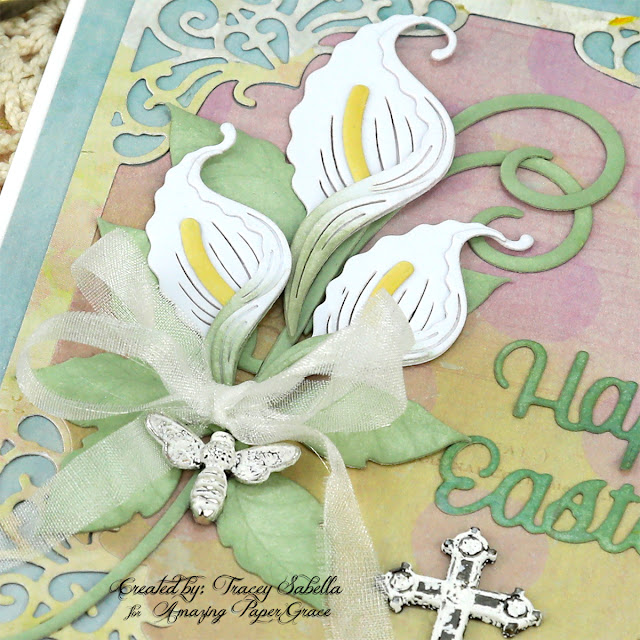
As soon as I saw these gorgeous Amazing Paper Grace Layered Lilies dies (S4-1192), I thought of Easter and just had to create a card to celebrate this blessed holiday in lovely spring colors. So instead of Christmas in July, today we have Easter in July!

I've also use the gorgeous Filigree Marquis (S4-1164) die set for the scrolled background and this lovely Easter sentiment is from the Merry Everything Words set (S4-1205).

Be sure to scroll down through the "Tips and Techniques" section below for close-ups and all the details on how to create this beautiful butterfly Easter Card.

Thank you Amazing Paper Grace for providing the dies used in this project.

Tips and Techniques
These gorgeous lilies are so easy to put together. They are layered for dimension, and no special tools are required for shaping. I just added a little green ink at the base of the petals like you would see in natural lilies and colored the stamen with yellow. The four pieces for each flower are then glued together. The beautiful leaves and curled vines are cut from white cardstock as well and colored with the same green. I used a toothbrush style applicator in a circular motion on the leaves to give the edges a little darker coloring for more dimension and layered them under the beautiful blossoms. 

Designer Tip: I've found that using repositionable tape to hold your die cuts in place on a piece of scrap paper makes inking a quick and easy technique, especially for small die cuts like these flower petals, leaves, and word sentiments.

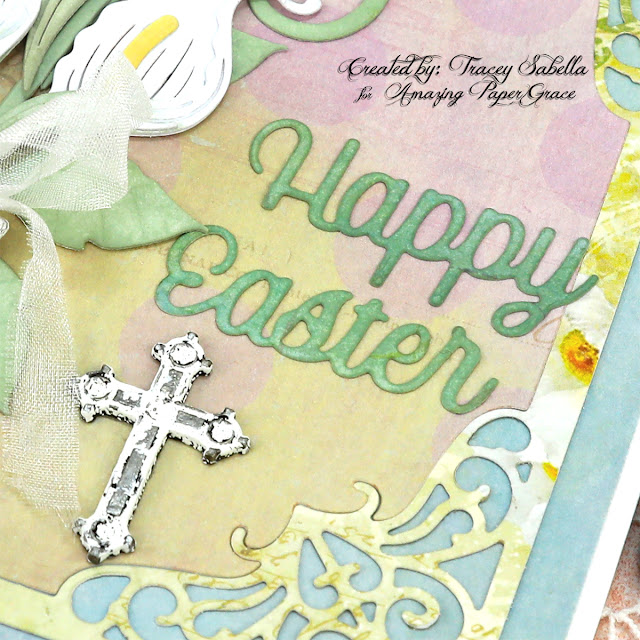
This lovely Easter sentiment is die cut from a coordinating green patterned paper using the S4-1205 Merry Everything Words and brushed with the same green ink to help make it pop.

The metal cross is heat embossed with white embossing enamel and while the enamel was still warm, I sanded and rubbed across it to expose some of the metal for a shabby effect. 

I've used the same enameling technique on the little bee attached below the double loop bow tied from a narrow strip of organza.

I've used three different patterned papers to bring in the colors of spring.

One final shot.

Amazing Paper Grace Dies:
 
Paper:
  • Craft and You ~ Spring Garden
  • K&Company ~ Celeste
  • Core'dinations ~ 8.5 x 11 Cardstock - Value Pack: White, 110lb

Ink:
  • Tim Holtz with Ranger ~ Distress Ink: Bundled Sage; Scattered Straw

Mixed Media:
  • Ranger ~ Embossing Powder: White
  • Ranger ~ Embossing dabber

Embellishments:
  • Momenta ~ Metal Stickers: Cross
  • Bee Charms ~ Purchased on Amazon
  • Organza Ribbon ~ White (Cut with raw edges)

Adhesives:
  • Scrapbook.com ~ Clear Double Sided Adhesive Roll, 1/4"
  • Art Glitter ~ Designer Dries Clear Adhesive
  • Tombow ~ Mono MULTI Liquid Glue
  • Beacon ~ 3-IN-1 Advanced Craft Glue
  • Scrapbook Adhesives by 3L ~ E-Z Dots, Repositionable

Tools:
  • Spellbinders ~ Platinum 6
Thanks so much for stopping by to view my card. I hope you've been inspired.

Monday, June 20, 2022

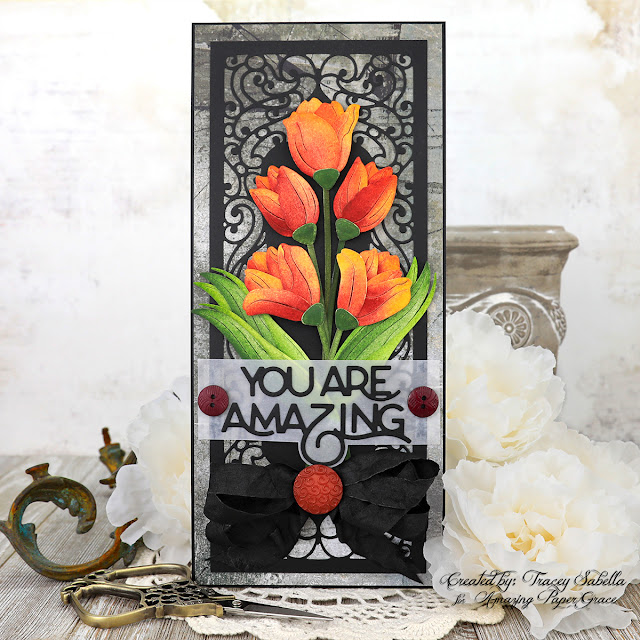
Watercolor Tulip Card for Amazing Paper Grace

Welcome to my creative space.

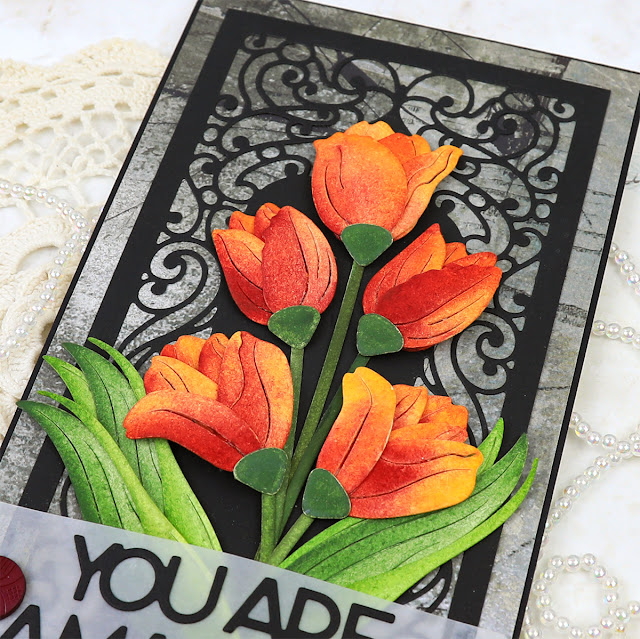
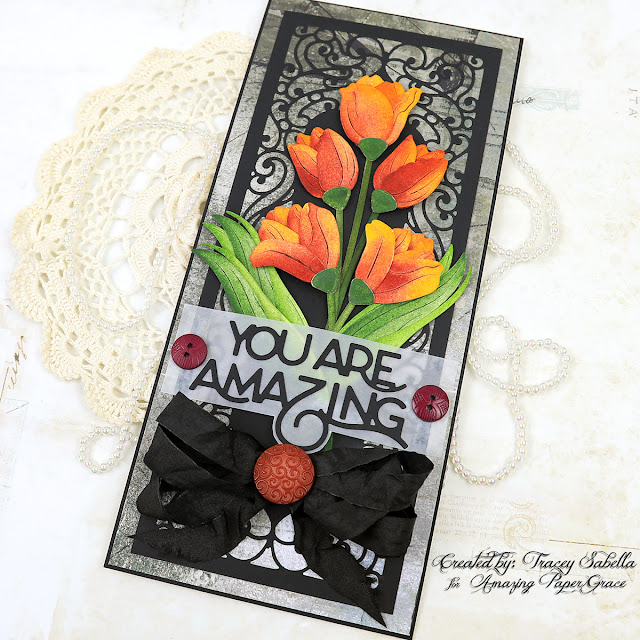
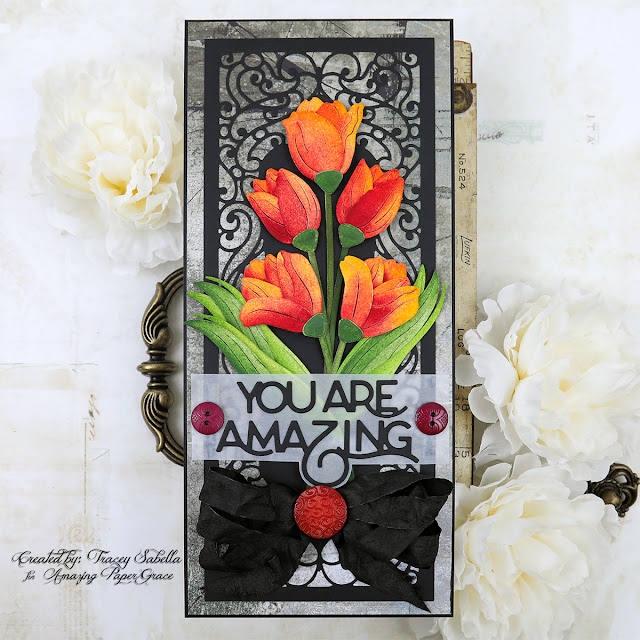
As soon as I saw this gorgeous Amazing Paper Grace Layered Tulips dies (S4-1195) I thought of the vibrant red and orange/yellow blossoms I grew up adoring. I've used a wet on wet watercolor technique for these tulips cut from watercolor paper.

I was inspired by this lovely photo.

The scrollwork layer is cut using the fabulous Half Slimline Bracket (S4-1199) with this fabulous sentiment cut from the newly released You're Amazing (S4-1203) set from The Right Words collection. I kept with darker grungy colors for my background to keep with my shabby aesthetic and to  help the colors in these vibrant beauties to pop.

Be sure to scroll down through the "Tips and Techniques" section below for close-ups and all the details on how to create this beautiful card and gorgeous tulips.

Thank you Amazing Paper Grace for providing the dies used in this project.

Tips and Techniques
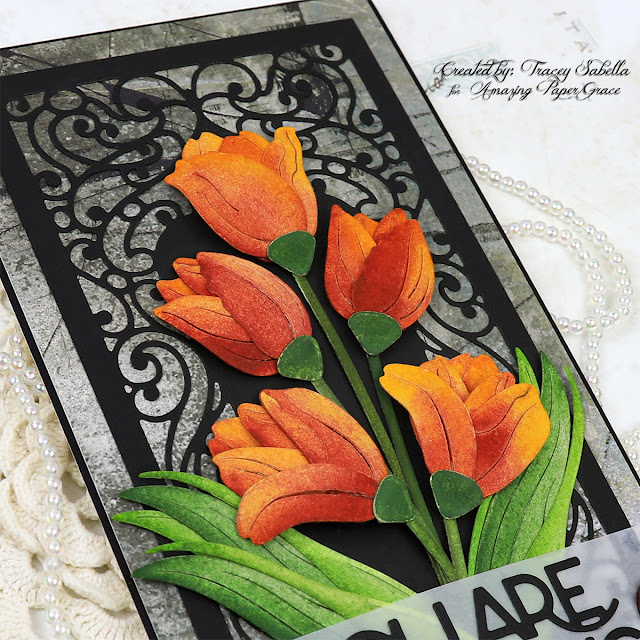
I used watercolor paper to cut these blossoms and foliage. I pulled out all the die cuts for one tulip blossom and used a wash brush to apply a generous layer of water across each petal and while wet brushed first with the yellow/orange color, then while wet came back in with the red and brushed down the left side of each petal and towards the bottom across the entire petal. At this point, I used a dry paper towel to pat off any of the red where I wanted more yellow to show through where needed. 

I just adore how the colors bloomed into each other to create such an organic flow of color that looks so much like the real tulip flowers in the photo above. I repeated this process for each of the five blossoms.

I used the same watercolor technique on the beautiful leaves using greens. The green bases and stems are washed in a solid green color. 

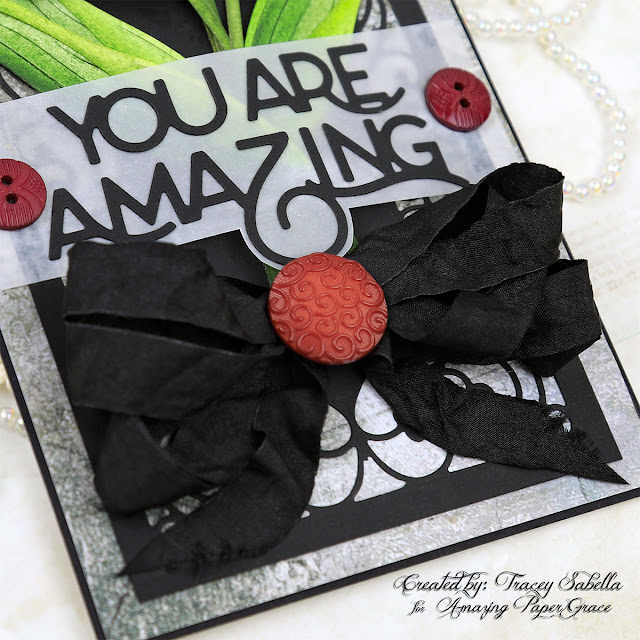
This fabulous sentiment is cut from black cardstock with the You're Amazing die set (S4-1203). I backed it with vellum that has a cloudy design in it. I trimmed around the bottom of the vellum to let more of the background show through and to add a lovely design element to the card.

I used black wrinkled ribbon to tie a three loop bow for a lovely embellishment and to help fill in this bottom area. I had laid everything out before gluing the blossoms down, but still ended up with more space on the bottom than I really wanted, so this bow was a perfect solution and really adds a gorgeous touch to this card. 

I pulled in the colors of the tulips by adding a lovely swirled button to the center of the bow and a couple smaller buttons to each side of the sentiment. 


If the scrollwork design looks familiar, it's cut from the Half Slimline Bracket die set (S4-1199) which I used on my tag with Distress Oxide blending earlier this month. Wow, two strikingly different looks using the same die set. This time I cut the design directly into the paper without using the edge die, then flipped the die and matched up the design to die cut it a second time for the mirror image. The outside edge was then cut to allow a 1/4 inch border.

Once the black scrolled piece was cut, I laid the tulips on top and tried several patterned papers underneath to decide which one worked best. I like this grey grungy design which gave a nice contrast to the black die cut layer and helped the colors in the blossoms to pop so beautifully. 

Amazing Paper Grace Dies:

Paper:
  • Prima - Art Philosophy ~ 12 x 12 Watercolor Paper Pad
  • Dress My Craft ~ A4 Cardstock - Black - 10 Pack
  • Blue Fern Studios ~ Chesterville Collection

Mixed Media:
  • M. Graham  ~ Artists' Watercolors

Embellishments: 

Adhesives:
  • Scrapbook.com ~ Clear Double Sided Adhesive Roll, 1/4"
  • Tombow ~ Mono MULTI Liquid Glue
  • Helmar ~ 450 Quick Dry Adhesive
  • Beacon ~ 3-IN-1 Advanced Craft Glue
  • Beacon ~ Fabri-Tac 

Tools:
  • Spellbinders ~ Platinum 6


Thanks for stopping by! I treasure your comments.

~ Blessings ~

Monday, March 28, 2022

"Own Your Dreams" Shabby Card with Amazing Paper Grace

Welcome to my creative space!

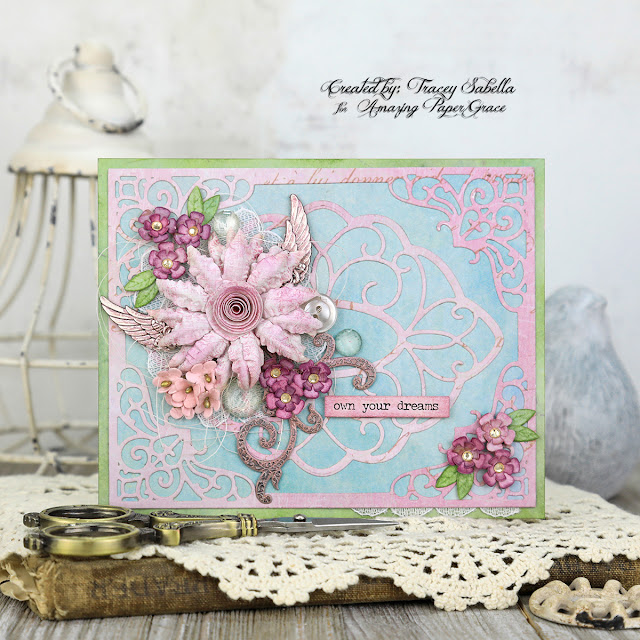
It's such a joy to be here and have the opportunity to share my passion of mixed media paper crafting with you! Today I have created a sweet and encouraging card to share featuring the Amazing Paper Grace Filigree Marquis die set (S4-1164) from the Classically Becca Collection. If you stop by regularly, you know I'm ready for spring after a long white winter (There's more snow on the ground here at the end of March.) so I've selected beautiful spring colors to use for the card. 

This die set includes the tiny sweet flower and leaf dies used to create the purple blossoms which I've paired with a larger flower and cluster of smaller pink blossoms from Little Birdie Crafts. As you scroll down through the Tips and Techniques section, you will discover the details on how I put this card together. 

Thank you Amazing Paper Grace for providing the dies used on this card!

Tips and Techniques
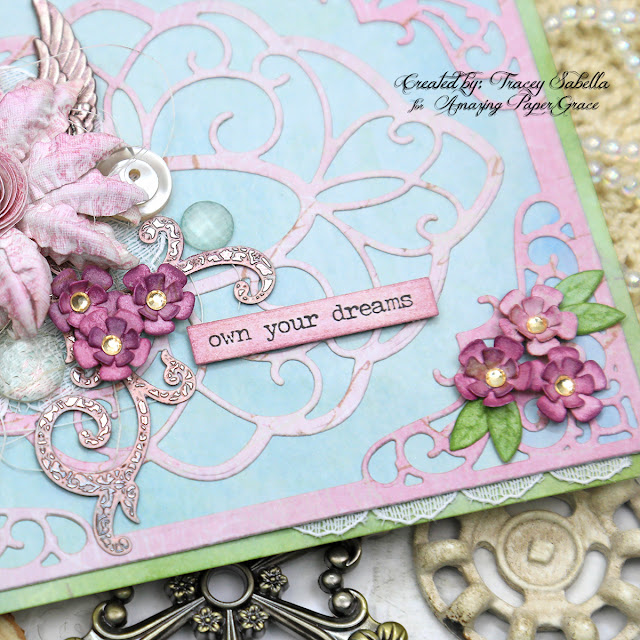
The beautiful scrolled background is a purplish pink printed paper die cut using the Filigree Marquis set. There are two pieces, an intricate frame and a medallion that perfectly fits inside the frame. I layered these gorgeous shapes over robin's egg blue patterned paper and framed the entire card with green. The green patterned paper was a little too light for my taste, so I darkened it up a little with some Peeled Paint Distress Ink.

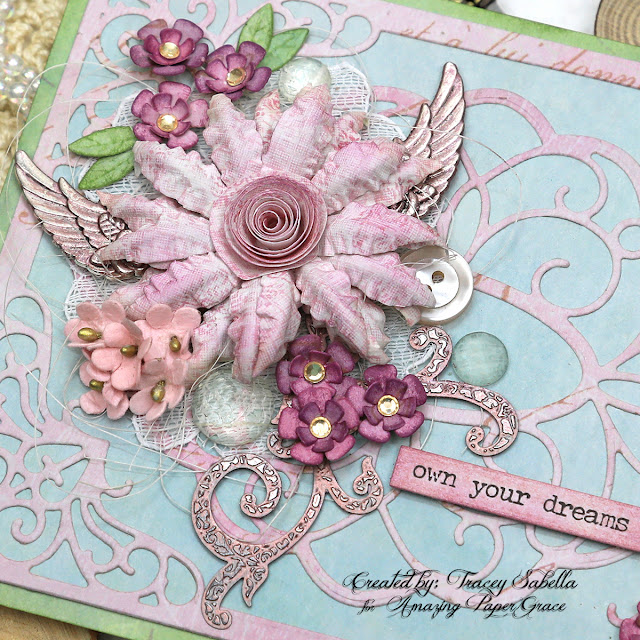
These darling little blossoms are cut with the flower dies included in the Filigree Marquis die set. They're cut from the same pink paper as the background. I wanted to add a pop of color, so inked the edges a bit with Seedless Preserves Distress Ink before shaping them. I cupped the petals forward, then rolled the larger petals back with the end of my stylus and finished them off with a tiny golden rhinestone. The leaves are die cut from the paper used to frame the card and rubbed with the same Peeled Paint ink. 

I hand cut a motif from a lace strip to tuck under the main flower cluster and had this scalloped edge piece left over that was perfect tucked into the paper layers here. The sentiment is from the Tim Holtz Small Talk set and inked with Victorian Velvet Distress Ink and just the tiniest amount of Seedless preserves to coordinate with the die cut layers. While it would have been fine to leave it white, I just like the soft color inking gives to the sentiment. 

I pulled a few embellishments from my stash to create the focal cluster including gorgeous Little Birdie Crafts flowers, Finnabair Diamond Art Pebbles which are nearly clear with faceted domes that reflect colors from the card beautifully, and a vintage button along with metal wing charms (from Amazon) and an older metal flourish from my stash. The Metal pieces are colored with Finnabair Metallique waxes in pinks and purples to coordinate.

I've added textural elements by layering the flowers over the lace piece I mentioned earlier and a bed of natural sisal fiber.

Amazing Paper Grace Die Sets:

Paper:
  • Miscellaneous printed papers from my stash
  • Cardstock ~ 110lb white for card base

Ink:
  • Ranger ~ Distress Ink: Peeled Paint; Seedless Preserves; Victorian Violet

Mixed Media:
  • Finnabair with Prima Marketing ~ Metallique Wax: Rose Gold; Heather Hills; Sweet Rose

Embellishments:

Adhesives:
  • Beacon ~ 3-IN-1 Advanced Craft Glue
  • Beacon ~ Fabri-Tac
  • Double Sided Tape ~ 1/4" 
  • Tombo ~ Mono MULTI Liquid Glue
  • Scotch Quick-Dry Adhesive

Tools:
  • Spellbinders ~ Platinum 6
Thank you Little Birdie Crafts for supplying products used to create this card.

Little Birdie Crafts can be purchased at their online store.

Use code TRACEY05 for a 5% discount.

I receive a small commission at not cost to you.


Thanks for stopping by! I treasure your comments.

~ Blessings ~
Friday, October 22, 2021

Amazing Paper Grace New Release: Sweet Serenade Blog Hop ~ Shabby Boxed Notecard Set

Welcome to my creative space!!

The Sweet Serenade Notecard Collection is simply to extend a sweet thought or warm greeting to let them know you’re thinking of them through a heartwarming notecard. The inspiration behind this collection is the ability to create beautiful notecards. Everything in this collection coordinates together from the card base to the embellishments to the stamps to make wonderful notecard creations! Notecards also make a wonderful gift as a boxed set! Swoon your family and friends with a special handmade gift! Make it seasonal for fall or for the holidays. Maybe a specific style such as soft vintage, clean and simple, or even a mixed media twist!

Today's projects were created with dies provided by Becca Feeken of Amazing Paper Grace.

The focal die set I'm using for my notecard set is: 


I've also used these stamp sets from the collection:


These gorgeous die sets are also part of the Sweet Serenade Collection:


All flowers are created with the fabulous:


Here are some close-ups of my notecart set
A handmade notecard set is such a wonderful and thoughtful gift. The Scalloped Symphony Notecard Die Set includes all the amazing dies needed to create a beautiful set for someone special in your life, or to create a batch of gorgeous cards to send out for any occasion.

This handcrafted kraft cardstock box is embellished with a medallion cut from 110lb white cardstock using the Scalloped Symphony Notecard Die Set. I added a touch of mixed media by heat embossing the medallion with embossing enamel. This is an easy way to add texture and a bit of shine to any die cut project. The edges of the patterned paper block are inked to add contrast and a shabby/grungy feel.

The flowers and foliage are created with the Petite Floral Potpourri Die Set. The flowers are cut from coordinating patterned paper and the tips of each petal are inked for contrast. A stylus is used to shape the petals and prills are added to the center of each blossom. The foliage is cut from a neutral patterned paper and colored with distress ink.  

Card Close-ups:
The card bases are cut with the border die from the Scalloped Symphony Die set which includes a piece to place in the center to score the card so it's easy to fold in just the right place!

The card medallions on each card are heat embossed like the lid of the box. The envelopes are hand crafted from coordinating papers. Each of the sentiments is stamped onto coordinating paper using the stamp sets included in this collection.

I thought you might enjoy seeing a close-up of each card.


One final photo showing the boxed set:

Designer Tip: 
When folding the cards, match up the holes
on the bottom for perfect alignment.

Sweet Serenade Notecards Availability:
These dies and plates are available from Spellbinders right now! Click here: Sweet Serenade Notecards Collection.

Supplies:
Accessories:
Stamps:
Paper:
Blue Fern Studios ~ Serendipity Collection
49 and Market ~ Vintage Artistry 6x6" Pad
Kraft Cardstock
White Cardstock
Ink:
Ranger ~ Distress Ink: Vintage Photo; Bundled Sage
Versafine ~ Onyx Black
Mixed Media Supplies:
Stampendous ~ Aged Spice Embossing Enamel
Prills ~ Express-O-Yourself
Tools:
Scoring Board
Wagner ~ HT 400 Heat Gun

For more Sweet Serenade Notecards Collection Inspiration
Visit each Creative Team blog linked below for their take on creative paper crafting ideas using the Sweet Serenade Notecards Collection!

Visit Tracey Sabella <<You are here>>

Please comment: Which Sweet Serenade Notecards set speaks to you?

Follow me on Facebook!

Follow me on Instagram!

Follow me on YouTube!


Thanks for stopping by! I treasure your comments.

~ Blessings ~