Showing posts with label A2 Card. Show all posts

Monday, March 28, 2022

"Own Your Dreams" Shabby Card with Amazing Paper Grace

Welcome to my creative space!

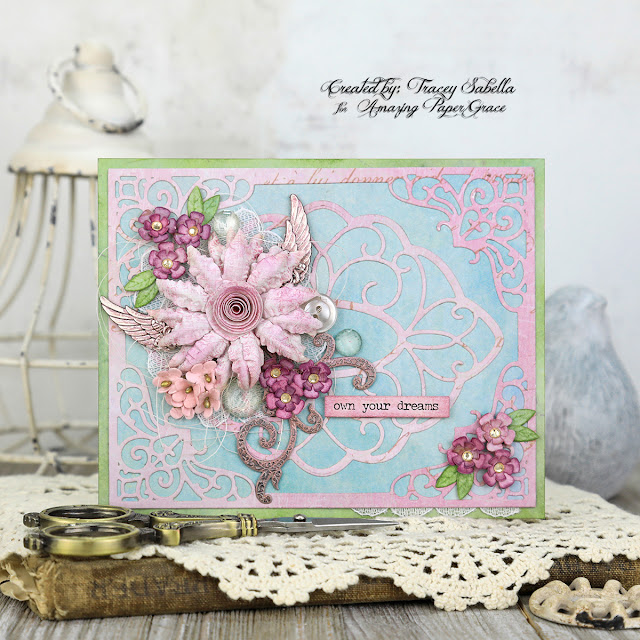
It's such a joy to be here and have the opportunity to share my passion of mixed media paper crafting with you! Today I have created a sweet and encouraging card to share featuring the Amazing Paper Grace Filigree Marquis die set (S4-1164) from the Classically Becca Collection. If you stop by regularly, you know I'm ready for spring after a long white winter (There's more snow on the ground here at the end of March.) so I've selected beautiful spring colors to use for the card. 

This die set includes the tiny sweet flower and leaf dies used to create the purple blossoms which I've paired with a larger flower and cluster of smaller pink blossoms from Little Birdie Crafts. As you scroll down through the Tips and Techniques section, you will discover the details on how I put this card together. 

Thank you Amazing Paper Grace for providing the dies used on this card!

Tips and Techniques
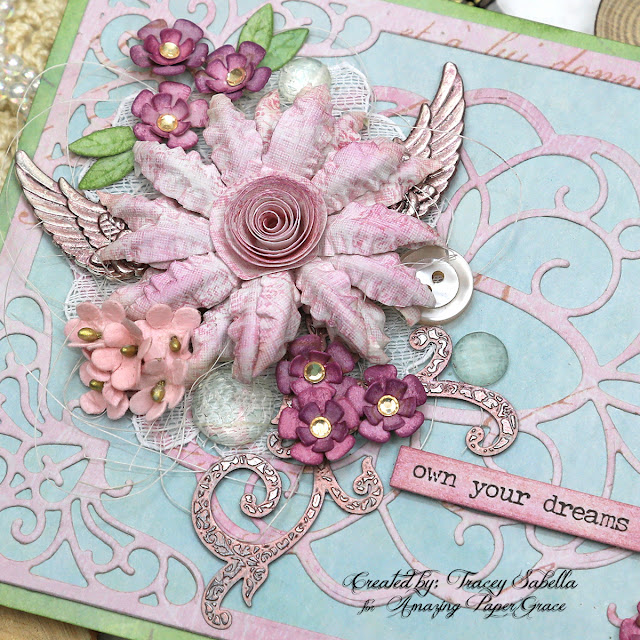
The beautiful scrolled background is a purplish pink printed paper die cut using the Filigree Marquis set. There are two pieces, an intricate frame and a medallion that perfectly fits inside the frame. I layered these gorgeous shapes over robin's egg blue patterned paper and framed the entire card with green. The green patterned paper was a little too light for my taste, so I darkened it up a little with some Peeled Paint Distress Ink.
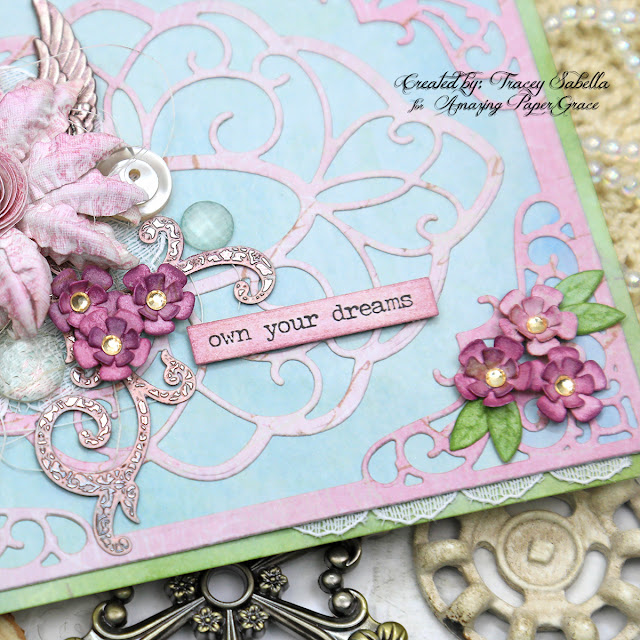
These darling little blossoms are cut with the flower dies included in the Filigree Marquis die set. They're cut from the same pink paper as the background. I wanted to add a pop of color, so inked the edges a bit with Seedless Preserves Distress Ink before shaping them. I cupped the petals forward, then rolled the larger petals back with the end of my stylus and finished them off with a tiny golden rhinestone. The leaves are die cut from the paper used to frame the card and rubbed with the same Peeled Paint ink. 

I hand cut a motif from a lace strip to tuck under the main flower cluster and had this scalloped edge piece left over that was perfect tucked into the paper layers here. The sentiment is from the Tim Holtz Small Talk set and inked with Victorian Velvet Distress Ink and just the tiniest amount of Seedless preserves to coordinate with the die cut layers. While it would have been fine to leave it white, I just like the soft color inking gives to the sentiment. 

I pulled a few embellishments from my stash to create the focal cluster including gorgeous Little Birdie Crafts flowers, Finnabair Diamond Art Pebbles which are nearly clear with faceted domes that reflect colors from the card beautifully, and a vintage button along with metal wing charms (from Amazon) and an older metal flourish from my stash. The Metal pieces are colored with Finnabair Metallique waxes in pinks and purples to coordinate.

I've added textural elements by layering the flowers over the lace piece I mentioned earlier and a bed of natural sisal fiber.

Amazing Paper Grace Die Sets:

Paper:
  • Miscellaneous printed papers from my stash
  • Cardstock ~ 110lb white for card base

Ink:
  • Ranger ~ Distress Ink: Peeled Paint; Seedless Preserves; Victorian Violet

Mixed Media:
  • Finnabair with Prima Marketing ~ Metallique Wax: Rose Gold; Heather Hills; Sweet Rose

Embellishments:

Adhesives:
  • Beacon ~ 3-IN-1 Advanced Craft Glue
  • Beacon ~ Fabri-Tac
  • Double Sided Tape ~ 1/4" 
  • Tombo ~ Mono MULTI Liquid Glue
  • Scotch Quick-Dry Adhesive

Tools:
  • Spellbinders ~ Platinum 6
Thank you Little Birdie Crafts for supplying products used to create this card.

Little Birdie Crafts can be purchased at their online store.

Use code TRACEY05 for a 5% discount.

I receive a small commission at not cost to you.


Thanks for stopping by! I treasure your comments.

~ Blessings ~

Monday, February 7, 2022

"Let's Party" Birthday Card for Amazing Paper Grace

Welcome to my creative space!

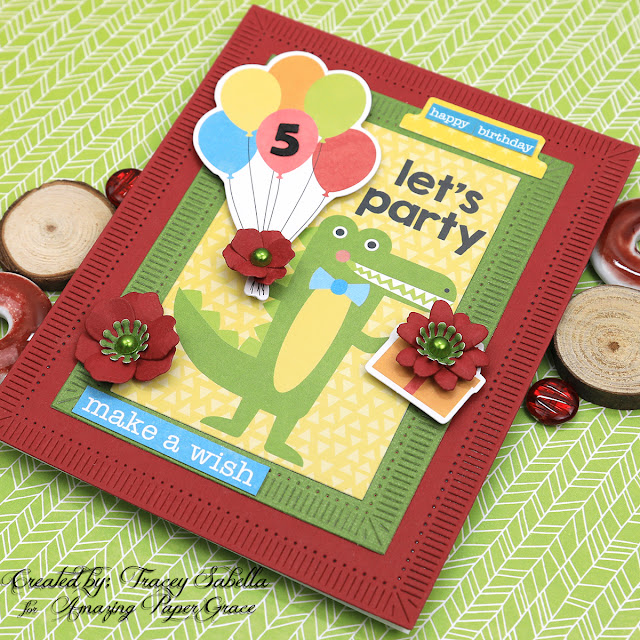
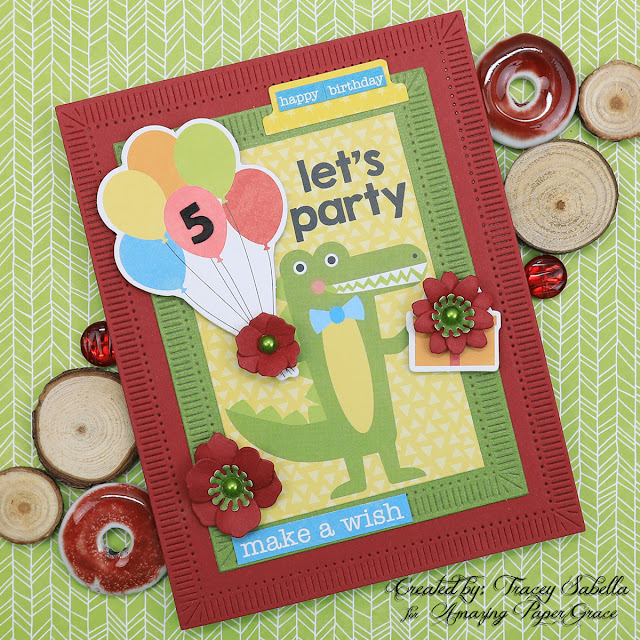
Our sweet little granddaughter is turning five already. She's enamored by huge animals like dinosaurs, crocodiles, and hippos, so I just couldn't resist pulling out this fun paper with an adorable birthday croc. She's also quite girly, so I'm featuring flowers die cut with the beautiful Amazing Paper Grace Cinch and Go Blossoms set (S4-1163) from the Classically Becca Collection. These beautiful blossoms add a sweet feminine touch that works so well with this darling clean and simple birthday card.

To add texture to the layers, I die cut the green and red cardstock frames using the Fluted Classics Rectangles Dies (S5-475) from the Fluted Classics Collection. 

When I think of Becca's Amazing Paper Grace designs, I picture elegant feminine grace. If you've been following my work with her dies, you have seen some of her designs take on a more grungy and shabby chic feel. Today I'm taking yet another twist to show you how perfect they can be for a clean and simple card for a child. There are so many amazing ways to use these fabulous dies!

I appreciate all styles of paper crafting and while I don't typically create in the clean and simple style, it just seemed right to create a darling birthday card for our granddaughter.

Tips and Techniques
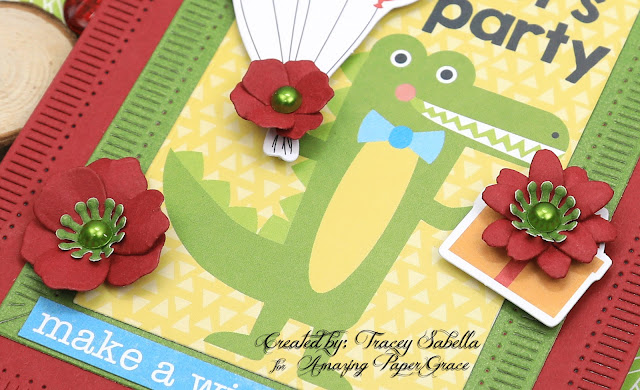
Here's a close-up of these sweet blossoms. They're die cut from red cardstock, then shaped. I've used two sets of petals for each blossom. Each one is centered with a green flatback pearl and the two larger flowers also have stamen die cut from green cardstock. This beautiful die set includes these two styles of flowers in a variety of sizes including these tiny blossoms. 

The green and red layers framing the focal image are die cut with Fluted Classics Rectangles Dies. Don't you think this fluted design is a perfect complement to the fun birthday croc image?

The balloons and flower embellished gift are popped up with foam squares and foam tape. The numeral 5 was a white cardstock sticker that I colored with a black marker to pop against the colorful bunch of balloons.

The dots and slits in this fluted die cut design allow you to see through to the next layer just a tiny bit, so I backed the red layer with a sheet of black cardstock to give a shadowed effect to the design, rather than a hint of bright white used for the card base. 

Amazing Paper Grace Dies:

Paper:
Jillibean Soup ~ Souper Celebration
Cardstock: Green; Red

Ink:
Faber Castell ~ Pitt Artist Pen - Big Brush, Black

Embellishments:
Jillibean Soup ~ Souper Celebration - Label Stickers
Jillibean Soup  ~ Souper Celebration - Pea Pods Die Cut Embellishments
Flatback Pearls: Green

Adhesives:
Scrapbook Adhesives by 3L ~ 3D Foam Squares
Double Sided Tape ~ 1/4" 
Scotch ~ Quick Dry Adhesive
Beacon ~ 3-IN-1 Advanced Craft Glue
Beacon ~ Fabri-Tac
Tombow ~ Mono MULTI Liquid Glue
Foam Tape ~ 1/4"

Tools:
Spellbinders ~ Platinum 6


Thanks for stopping by! I treasure your comments.

~ Blessings ~

Monday, January 24, 2022

Interactive Birthday Flip Card for Amazing Paper Grace


Welcome to my creative space!

I'm really enjoying creating interactive cards with the fabulous Amazing Paper Grace Garden Shutters Collection. This sweet birthday card features the Daisy Delight Garden Shutters A2 Card Base (S5-479) die set. We're in the dead of winter with over a foot of snow on the ground and more on the way with temperatures below zero at night, so I just couldn't resist pulling out summery blues and yellows for this card to go with the beautiful daisies. A girl can dream, right?? 

Here's a view of the card with the shutters open:

It's such a fun and beautiful card. The sentiment and sweet daisies are included in the die set. The pull tabs are created using the Butterfly Bliss Garden Shutters 5x7 Card Base Set (S6-183).

Thank you Amazing Paper Grace for providing the dies used in this project.

Tips and Techniques
Don't you just adore the intricate lattice that fits the shutters? I cut a solid background piece and the lattice pieces from the same grungy blue paper (which is the back of the yellow patterned paper), then inked the lattice with a darker blue so it would pop against the lighter background. This entire card was cut from just one piece of 12x12" paper including the three base and shutter pieces, the lattice, and the pull tabs. I used scraps from my stash to cut the daisies.

This interactive card is three layers deep. You can cut all three pieces from the same 12x12" piece of paper like I did here or use papers that coordinate. Keep in mind that the middle piece is die cut for the shutters that flip, so the back of the paper will be part of the design as well. 

The pull tabs are cut from the back of my patterned paper and the edges are inked. A second solid tab piece is cut. I inked this piece with the same darker blue I used on the lattice, so the word pull would be more visible.

There are three different daisies in this set. Each one has three pieces - two sets of petals and a center. Each flower is a separate die with all three pieces, so it's easy to know which pieces go together. After die cutting, I inked the petals before shaping. The centers are inked and would look great with just the inking, but for added texture and a bit of glittery sparkle I adhered Gold Flower Soft to the centers.

This sweet birthday sentiment is included in the set. I used Tombow Mono MULTI liquid glue on the back and let it dry before adhering. This glue stays tacky when dry works well for intricate die cuts like this. I used a ruler to help line up and center the sentiment pieces.

Amazing Paper Grace Dies

Paper:
Blue Fern Studios ~ Happy Accident
Patterned Paper Scrap ~ Yellow (for daisies)

Ink: 
Ranger ~ Distress Ink: Scattered Straw; Faded Jeans; Broken China

Mixed Media: 
Flower Soft ~ Gold

Adhesives:
Scrapbook Adhesives by 3L ~ 3D Foam Squares
1/4" Foam Tape
Beacon ~ 3-IN-1 Advanced Craft Glue
Red Line Tape ~ 1/8"
Tombo ~ Mono MULTI Liquid Glue
Scotch ~ Quick Dry Adhesive


Thanks for stopping by! I treasure your comments.

~ Blessings ~
Monday, November 1, 2021

"All is Calm" Shabby Christmas Card for Amazing Paper Grace

Welcome to my creative space!

The Amazing Paper Grace Holiday Medley Collection is such a blessing to work with to create gorgeous Christmas cards. Today I'm featuring the All is Calm Word Frame die set (S5-1146) to create this sweet A2 Shabby Chic Christmas card with touches of mixed media.

Amazing Paper Grace provided the dies used in this project.

Tips and Techniques:
The sentiment is heat embossed with Stampendous Aged Green Embossing powder to add a textured shabby finish and set on an oval piece with inked edges to help the sentiment pop.

I've added a few metal pieces and resin roses from the Tim Holtz Idea-Ology collection. The metal pieces are rubbed with wax for a gold color. Prills are scattered around the sentiment for added texture. 

The square die cut from the All is Calm set is also heat embossed, this time in Aged Scarlet for a pop of Christmas Red. The clusters are accented with holly leaves cut using the Merry Filigree Card Builder set (S5-464) from the Holiday Medley Collection and the filigree texture on the background is cut with the Celebrate Scrollwork Card Builder set (S5-465).

The paper edges are distressed and inked for definition and to add to the shabby feel of this card. Flowers are from 49 and Market.

One final look!

Amazing Paper Grace Dies:

Other Supplies:
Blue Fern Studios ~ Spring Parade
49 and Market Flowers: Botanical Potpourri - Buttermilk
Prima Marketing ~ Soft Matte Gel Medium
Prima Marketing ~ White Gold Microbeads
Prima Marketing ~ Metallique Wax - Vintage Gold
Stampendous ~ Embossing Enamel: Aged Scarlet; Aged Green
Ranger ~  Emboss It Dabber
USArtquest ~ Prills: Guilt Trip
Helmar ~ 450 Quick Dry Adhesive
Tombo ~ Mono MULTI Liquid Glue


Thanks for stopping by! I treasure your comments.

~ Blessings ~