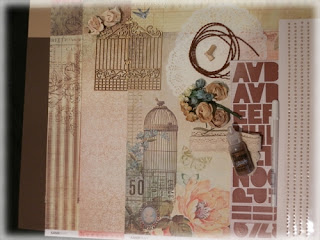
Showing posts with label ScrapThat April 2013 Kit. Show all posts

Thursday, April 18, 2013

"Flower Girl" details for ScrapThat!

You may remember another flower girl page with my sweet niece, Abby. She was the flower girl in Joseph's wedding and again here for Elizabeth. It is obvious by her charming smile that she greatly enjoyed the honor!!

I used the April ScrapThat! Kit featuring Donna Salazar's Natural Beauty Collection and add-on kits to created this page.

"Flower Girl"
MK, EAO, FAO

Tips and Techniques:

Handcrafted Flowers ~ The two flowers in the top left of cluster were created using thick mulberry paper and Donna Salazar's Grand Peony and Bitty Blossoms dies. It's hard to see here, but the larger of the two also is edged with white puffy paint for added texture and dimension.

Kit flowers ~ The FAO is loaded with gorgeous flowers. The large focal flower is by Petaloo and the canvas flower is Prima. The tiny white roses are in the main kit. The main kit leaves were gold and green which didn't quite work with the colors on this page, so I painted them with gesso, stamped with a large font script, then inked the veins and edges. I also tucked in one of the EAO metal roses. The flourish is from my stash.


Fussy Cutting ~ I fussy cut the bird and cage to tuck into my cluster.

Flowers ~ More of my Bitty Blossoms mulberry paper flowers and little white MK roses. The larger rose here is by Zva and in the MK. 


Chipboard ~ This gorgeous Fabscrap sign is included in the MK. The post was painted with a thick coat of antique gold metallic paint. While still wet, I used my heat tool to bubble the paint to achieve this lovely texture. I also rubbed on a little black soot distress ink to highlight the texture. The sign piece was painted. When dry, I inked the edges then covered with Crackle Accents. (Crackle Accents acts as a resist, so ink first, then cover with this medium.) I allowed the sign to dry overnight, allowing these lovely cracks to form. The title letters were cut using my Tim Holtz Typeset die and a scrap of kit paper. I inked the edges to help them pop.

Distressing ~ I used my all time favorite scrapbooking tool, my Donna Salazar Distrezz-It-All. I love how quick it is to get this lovely distressing on my straight edges!! 

Stenciling ~ I stenciled this flower using my Plaid Summer Floral stencil and Golden Light Molding Paste. I have found that my local craft stores carry quite a selection of beautiful stencils in their paint department, so if this is a technique you've been wanting to try check out your paint department for stencils. When using molding or texture paste, it is important to used "flexible" texture paste or "light molding paste. Paper has a lot of give and the regular versions of these mediums can crack on paper. (Ask me how I know. lol) I also used my Donna Salazar Houndstooth stencil along the bottom of the page. After the molding paste dried, I spritzed with Tattered Angels Moonlight Glimmer Mist and just a little water, then held the paper up and tapped it to achieve the drips. 

Corded frame ~ I just adore the cording in the MK. It is not regular Jute, but covered in a soft, natural wrapping and it looks solid rather than twisted. It looped beautifully for my photo frame. I got a little happy with the glue and it was visible in a couple places, so I added a few of the little MK white roses in strategic places. 

Punched Doily ~ It was so easy to create my blue punched doily. I cut a circle from the kit paper, then used my Martha Stewart French Scroll punch on the edges. Leave the side wings closed for this technique and turn the punch upside down so you can see the design as you are punching. Make your first punch, then line up the next cut with the edge of the punch just barely touching the previous cut and make sure the top of the punch is even with the edge of your circle. Most likely your punches with not match up when you get back to the first punch, but that is OK since part of the doily edge is under the flower clusters. I put one of the tiny MK pearls in the center of each visible scallop. The layered white doilies are from my personal stash. 


Peek-A-Boo ~ I wet the edge of the paper and pushed it up. Once dry, I decorated it with more of these sweet MK roses and the EAO Maya Road Metal Roses. Some of the metal roses were a little squished in the package, but easily reshaped to form these little beauties. 

I am hosting the ScrapThat! DT Challenge this month to use fibers other than lace and ribbon on your project such as cording, thread, fabric . . . Stop by the ScrapThat! Forum to check out the details and enter your project. 

While you are there be sure to check out Amy's Sketch Challenge as well. 

If you are looking to purchase high quality scrapbook kits, stop by the ScrapThat! Store to do some shopping. 

Thanks for following me on Bloglovin:

Follow on Bloglovin

Thanks for stopping by! I treasure your comments. 

~ Blessings ~ 

Wednesday, April 17, 2013

Birthday Card Details for ScrapThat!

Birthdays are always a special time of celebration. My husband, Gary, had a birthday earlier this month, and I created this card for him. We rarely celebrate on our birthdays so having this card to give him helped make it a special day. Yes, we did celebrate this past weekend by having all our children gather here with us for dinner and a sweet time of fellowship together. 

I created this card using the April ScrapThat! Kit featuring the Donna Salazar Natural Beauty Collection. The colors and designs of these papers are so perfect for a masculine touch!

Birthday Card
MK

Tips and Techniques:

Stamping ~ Each of these banner flags except the bird was stamped using a variety of stamps from Donna Salazar (Ruler), Tim Holtz, and Inkadinkado. The red heart was also heat embossed with clear embossing powder. I love you was hand written and Happy Birthday was created with my printer. 

Doodling ~ I doodled around the edges of most of the flags. 

Distressing ~ I used my Tim Holtz distress tool around the edges of the mat and the flags were inked on the edges. 


Handcrafted Flowers ~ I used scraps of the kit paper with Donna Salazar's Rose Creations dies to create these sweet flowers. I inked them with brown distress inks to keep a masculine feel. The centers are the kit pearls colored with alcohol ink. The leaves were also cut from kit paper scraps, but with Donna's Bitty Blossoms dies. They were pinched to add veins and colored with green distress inks. 

Cording ~ I had one small piece of the kit cording left. This cording is so gorgeous that I pulled the scrap apart and tucked it into my cluster. 

Chipboard ~ I inked this Dusty Attic piece in greys and black soot Distress Inks, then covered with clear embossing powder and heat set for a glossy finish. 

Burlap and Bow ~ I backed a strip of the burlap with iron on interfacing to give stability, then spritzed with spray ink in a color similar to the burlap. I cut a strip and adhered it around the front to the back of the card, trimming even at both edges. Then on top of that I adhered sheer ribbon leaving a length on both ends long enough to tie a nice bow. The front mat is adhered over the ribbon to the front of the card.

I'm hosting the ScrapThat! April DT Challenge. All you need to do is include cording, fabric, thread . . . on your project. Stop by the forum for all the details and to enter your project. I'll be drawing a name to select a random winner for a package of gorgeous Prima paper, and if we get more than 10 entries I'll be selecting a second winner to receive 6 of my handcrafted twine flowers in a variety of sizes and spring colors. We only need two more entries for me to give away my special prize. 

Don't forget about Amy's April Sketch Challenge. All the details can be found here. 

Our ScrapThat! store can be found here. We are currently accepting new subscribers. 

Thanks for following me on Bloglovin:
Follow on Bloglovin

Thanks for stopping by! I treasure your comments.

~ Blessings ~ 

Tuesday, April 16, 2013

"The Journey Awakens the Soul" Details for ScrapThat!

We are so happy to have Andrew added to our family. This photo was taken before their October wedding ceremony as he contemplates his future with our Elizabeth. 

I created this layout with the gorgeous ScrapThat! April kit featuring Donna Salazar's Natural Beauty collection and gorgeous Prima Flowers and Trinkets.

"The Journey Awakens the Soul"
MK, EAO, FAO

Tips and Techniques:

Corded Paper Rays ~ This close-up shows the lovely dimension much better!! I've been inspired by Frank Garcia's work with cording and thought I'd put my spin on it for this page. I cut the paper from this upper corner in toward the center of the page. I reinforced each point with an additional little triangle of paper, then pierced each point. I knotted the end of a length of cotton crochet thread and used a needle to pull the thread through a point leaving the knotted end on the bottom. I extended the cord across the page and pierced another hole near that edge and pulled the thread through to the back. I also adhered each paper point in place. 

Burlap Banner ~ I cut the kit burlap into banner flags and tucked one between each point. 

Handcrafted flowers ~ I used thick handmade mulberry paper with rose creations dies to create these dreamy flowers. The centers are the darling EAO Maya Road Metal Rose Trinkets. 

Corded Hearts ~ This gorgeous Prima strand of corded hearts was just perfect to extend the corded points and banner. 


Flowers ~ These Prima flowers are so gorgeous that I left them as is. The small white flower is handcrafted with the same mulberry paper and Donna Salazar's Bitty Blossoms dies. The leaves are from a scrap of kit paper colored with distress inks and pinched for dimension. 

Gears ~ I used Donna Salazar's Sprightly Sprockets dies to cut gears from a scrap of thin chipboard. I painted them black, then dabbed with a gold paint dauber and while still wet, heat set to bubble and add texture. 

Chipboard ~ My friend, Mandy, gave me the tag and bird chippies while I was working on this page and they were a perfect fit. I painted them, then lightly inked to highlight the raised designs. I used a scrap of jute from the burlap to tie onto the tag. The flourish is by Blue Fern Studio, which I also painted and inked. 

Title ~ The metal title piece was silver. I applied alcohol ink to color.

Scrapping Everyday Miracles has posted their April Sketch Challenge. They added a card sketch too, so there are two sketches to work with. I look forward to seeing your project posted there. For the sketches and challenge details, go here. 

Thanks for stopping by! I treasure your comments! 

~ Blessings ~

Friday, April 12, 2013

Stickled Butterfly Tutorial and "A Friend Knows You" Card Details

There's always something special about each birthday. My special scrapbooking friend, Mandy, has some very special traditions indeed since her birthday falls on St. Patrick's day. I created this card for her with a wee touch of the Irish in the greens and Irish blessing inside using the April ScrapThat! Main Kit.

"A Friend Knows You"
MK

Today I'm sharing the techniques on how I created the sweet butterfly in my:

Stickled Butterfly Tutorial


Often I'm looking for just the right embellishment and don't have the right size, shape or color in my stash. Here is an easy way to add a lovely butterfly to your project using supplies from your kit along with a few items most of us have on hand. 

Supplies: 


Supply List:
~ Sizzix Big Shot or other die cut machine (Not pictured)
~ Scrap of paper **April MK
~ Donna Salazar Wonderful Wings Spellbinder die. You could also use a different die, a punch or electronic cutting machine image.
~ Clear Rock Candy Stickles **April MK
~ 2 pieces of covered wire **April MK (Cut off of small roses)
~ Kaisercraft Lemon Pearls **April MK
~ Selection of inks in the colors of your choice. For this butterfly, I used Ranger Distress Ink in Scattered Straw, Tea Dye, Rusty Hinge, and Vintage Photo. Not pictured - I also used black soot to color the green wire for the antennae
~ Adhesive - I used glossy accents (Not pictured)

Step 1. Cut butterfly from paper scrap.


Step 2. Color butterfly with inks. Start with the lightest color across the entire butterfly and then add the next darker color staying closer to the edge of the wings each time so you get a ombre effect from the body to the tip of the wings.

Scattered Straw

Plus Tea Dye

Plus Rusty Hinge

Plus Vintage Photo

Step 3. Squeeze distress stickles generously on the entire butterfly and spread out with your finger or a paintbrush.

Step 4. Allow to dry. I let mine sit overnight. You can use a heat tool with distress stickles since the glitter is glass; however, I find that the medium the glitter is suspended in tends to bubble when heated, and I prefer to air dry for this technique. 


Step 5. Color the wire pieces with ink in the color of your choice. Curl the ends of the wire. I used round nosed pliers, but you could wrap the end of the wire around a toothpick. Glue the wires to the back of your butterfly. I use glossy accents as my adhesive. 

Step 6. Place self-adhesive pearls down the center of the body. You can see that I used different size pearls here than for the butterfly in the card, so just use whatever pearls you have left after creating your other projects. 

Step 7. These butterflies are quite flexible and you can fold up the wings and gently curl them to add graceful dimension as seen in the close-up on my card.

You can change up these sweet sparkly butterflies to coordinate with your project by using different ink colors as well as altering the size or shape of your butterfly. The sky is the limit. 

Now I'll share the details of my card with you.

Tips and Techniques:


Handcrafted Flowers ~ I used thick handmade mulberry paper and Donna Salazar's Bitty Blossoms flowers to create the white flowers and the same dies and a paper scrap to create the leaves. The rust flower was an extra from a previous ScrapThat! Kit.

Word Art ~ I received this gorgeous Shakespeare Word Art created by Cec at Sugar Creek Hollow as a prize for entering my work at this wonderful challenge site. 

Pearls ~ I added adhesive backed pearls from my stash to accent the frame. If you don't have the right color, a little alcohol ink or a swipe with an alcohol ink marker will change a light colored pearl to the color of your choice. 

Inking ~ I inked the edges of the card and mats for a shabby vintage feel. 


Die Cut Mat and Frames ~ These were cut with my Cricut Expression 2 along with the Close to My Heart cartridges, Art Philosophy and Artiste. I wanted to use these cartridges in particular since my friend, Mandy, is a CTMH consultant. 

Irish Prayer ~ I found this prayer on the internet and used the Irish looking UnZialish font to type it up on my computer. 

~ ~ ~ ~ ~ ~ ~

ScrapThat! is celebrating National Scrapbooking Day by holding a round robin. Check out the details here. 

I have the ScrapThat! DT challenge this month, and if we get 10 or more participants I'll be giving away an extra prize ~ 6 of my handcrafted twine flowers in a variety of spring colors and sizes. So come join my challenge to incorporate fibers and/or cording into your project. You may also enter it in other contests, so if you have a project that fits the requirements, stop by ScrapThat! and show us your gorgeous work. The challenge details can be found here.

And you won't want to miss Amy's gorgeous April ScrapThat! Sketch Challenge.

I hope you'll try out my sparkly Stickled Butterfly!!
I'd love to see your version, so please leave a comment with a link
and I'll drop by to see your creation. 

I also have some very exciting news to share. I've had two submissions accepted for publication at Scrapbooking.com for the upcoming May Issue. This is a free on-line scrapbooking magazine with lots of great projects, information, and tutorials. You can find them here: www.Scrapbooking.com. I'll be sharing links when they go live. 

Thanks for following me.
Follow on Bloglovin

Thanks for dropping by! I treasure your comments.

~ Blessings ~

Friday, March 29, 2013

ScrapThat! April "Within Nature" Reveal and Blog Hop

I'm part of two blog hops this weekend so please be sure to check out my SEM Blog Hop post where I get to share some exciting news. 

Welcome to the ScrapThat! 
April Kit Reveal and Blog Hop!! 

If you came here from 
Donna Salazar
you are on the right track!

If you want to start at the beginning or lose your way, here is the Blog Hop order:
Scrap That!!

We are so excited to share the details about our newest kit featuring brand new papers
created by Donna Salazar for GCD Studios.

 The Queen of Girlie Grunge herself, Donna Salazar, will also be joining our hop!

When you get to her blog, scroll down and you will see a familiar face - our own fabulously talented DT Leader, Tracey S., is one of 5 artists chosen to be on the 2013 Donna Salazar Guest Design Team! We are so proud of her !!

We are so thrilled to welcome the beautiful and creative artist
Lynn Shokoples
as our April Guest Designer!!!


Hi everyone! My name is Lynn Shokoples and I live in Edmonton, Alberta, Canada. I've also been blessed to join the Bo Bunny and Quick Quotes design teams this year. When I'm not scrapbooking I'm a wife, and a mom to two wonderful young adults, Nicole who's 25 and Ryan who is 20 and my new son-in-law Christopher. I'm so thrilled and honored to be a Guest Designer this month with such a group of talented artists here at ScrapThat. I love to blog and love to meet fellow scrappers, so please feel free to stop by anytime. 

Stop by and visit Lynn's blog at http://scrappyhappymom.blogspot.ca/

Now, without further ado,
 introducing our fabulous April Kit, "Within Nature"

Featuring the GCD/Donna Salazar collection, "Natural Beauty." Opening the box to this kit feels like opening your closet and finding your most favorite, comfortable clothes packed with a little bling! The colors are rich and vintage and range from elegant pale neutrals to muted pinks, to deep denim blues and sages. These are paired with textured blooms from Prima, Petaloo and more!

Take a look:

Main Kit

Embellishment Add-On

Flower Add-On

Paper Add-On

More details on this  Collection can be seen here: ScrapThat! Store 

We are currently accepting new
Kit Club Members.
For more information,
complete the form on the link below:
New Subscriber 

Look at the beautiful sketch Amarilys has created for April:

See details about the challenge here: Sketch Challenges
Be sure to also check out the details of our monthly DT challenge
 hosted in April by Tracey S. here: DT Challenge

Everyone is welcome to participate.
All entries for both challenges are due by April 24th
Something new! All winners of our challenges, including Layout of the Week, will be eligible to receive 10% off any 2012 Kits-includes Add-ons!

This April Kit was amazing to work with. It is no secret I adore working with Donna Salazar's fabulous designs. This collection is totally gorgeous "Girlie Grunge" with the earthy neutrals, greens, and blues and the girlie pinks. As you'll see with our DT Creations this kit can go in so many different directions. My first project today is a page inspired by Amy's oh so lovely April sketch. 

My niece was the sweet flower girl in Elizabeth's wedding this past October. Isn't she darling?

"Flower Girl" 
MK, EAO, FAO

In place of the single doily in the sketch, I layered paper doilies along with a doily I punched with one of my decorative corner punches. I fussy cut the cage and bird to add to my cluster. This cording is so gorgeous and unique. It is quite thick, but so soft and easy to work with. I pulled some thick handmade mulberry paper from my stash along with my Donna Salazar dies to make a few flowers to add to the gorgeous MK and FAO flowers. The kit and FAO flowers are so fabulous!! I usually do something to alter my flowers, but these are so pretty and so perfectly coordinated with the papers, that I used them straight out of the package. The flourish is from my stash. 

I have used lots of techniques on this page, so be sure to watch for my featured project post where I will be sharing all the details with close-ups. 

~ ~ ~ ~ ~ ~ ~

Next up is a photo of Andrew before the wedding - contemplating his future with Elizabeth. Such a special photo and I wanted to create a special layout for it. 

"The Journey Awakens the Soul"
MK, EAO, FAO

I love the earthy organic feel to this particular paper and thought it would be perfect for this more masculine page. I have been inspired by the work Frank Garcia is doing with cording on his pages and enjoyed giving it a shot. Here's a little tip if you want to give it a try. Be sure to reinforce the point of the paper where you plan to connect the cording. Drop by Frank's blog for more inspiration. 

To get the banner effect under the curled paper, I cut flags from the kit burlap and layered with some mulberry paper flowers I created. The beautiful flower centers are from the EAO Kit. These little metal roses are just so sweet. Don't you just adore the Prima focal flower. It comes already inked, and layered with the fabulous button in the center ~ it looks so gorgeous without any altering.

I know there are a lot of creative things that can be done with the corded Prima Hearts in the EAO Kit, but I couldn't resist placing them across the page just the way they came out of the package. I'll be sharing the details of how I created the gears from scraps and my Sprightly Sprockets dies. The chipboard and title plate are from my stash. 

~ ~ ~ ~ ~ ~ ~

One of my close scrapbooking friends, Mandy, celebrates her birthday on St. Patrick's day. I couldn't resist using the greens in this collection to create a card for her. 

Birthday Card ~ Mandy
MK only

I used my Cricut along with the CTMH Artiste and Art Philosophy cartridges for the shapes. The orange tinged flower was left from my February Kit, and I used the kit pearls for my Wonderful Wings butterfly body. (Mandy is a CTMH consultant, so if you are looking for one of these cartridges, stop by her blog for details on how to order one.) Be sure to stop by on March 8 for a photo tutorial to create my sparkling butterfly.  

~ ~ ~ ~ ~ ~ ~

My husband's birthday is coming up in April, so I made him a card too. I'm not too worried that he will see his card, since he'd rather play golf than look at my blog. He's so supportive of my craft, and I wanted to create an extra special card for him. 

Birthday Card ~ Gary
MK Only

The banner flags are all hand cut and most of them stamped. The center red heart was also embossed. The flowers and leaves were cut from kit paper using Donna Salazar's Rose Creations for the flowers and Bitty Blossoms dies for the leaves. I had one little snippet of that gorgeous cording left, so I pulled it apart and tucked the curled pieces into my cluster. The chipboard and ribbon are from my stash. 

Now on to our Blog Hop Details:

Our Blog Hop features 11 fabulous hop sites including our Design Team blogs. 
We have been scrapping away and are so excited to show you our  creations! 

Two Prizes are up for grabs this month !

Donna Salazar will be drawing a winner from hoppers who comment on her blog for this amazing prize package including some of her new products from the Family Jeans collection and one of her brand new stencils.
 Be sure to check out her blog for additional details.

Next up is our SPECTACULAR April Blog Hop Prize
"Serendipity".
This kit is chock FULL of fabulous scrapbooking products including the amazing Sweet Nothings Collection from Kaiser Craft. With rich warm colors, and rustic embellishments like wooden gates and bronze cord, this kit lends itself beautifully to heritage layouts layouts.  We have included a white pen for you to use when creating a faux stitching effect.

thumbnail_April 2012 Serindipity Kit 021.jpg

To qualify for this month's FABULOUS Prize, 
you must complete the following:

* Visit each blog listed on the hop to see what each designer has created using this month's kit and sketch(comments are very much appreciated).

* Each designer's blog hop post will feature a word to make up a secret sentence,
collect these words along the way.

* You must become a FOLLOWER of each blog along the way 
and LIKE us on our Facebook Page!

* Post the ScrapThat! Blinkie on your blog.

* For your last stop on our Blog Hop return to the ScrapThat! Chat Blog.
Leave a comment letting us know you have
completed the hop.
(Please do NOT include the secret sentence in your comments.)
*Email the secret sentence to Tracey Sabella:tracey@scrapthat.ca

The Blog Hop ends Sunday, March 31 at Midnight EST

The prize MUST be claimed within 3 days of the forum announcement which will also be made on the ScrapThat! Blog.
~ If left unclaimed a NEW winner will be chosen ~
**Winner will pay actual shipping costs for sending the kit from Canada.**
Shipping costs will be invoiced via PayPal unless you are a kit member,
 then your prize will be shipped with your monthly kit.
Prizes won during the month will be mailed out the first week of the following month.
Due to Customs clearance, International mailings sometimes take 30-75 days to receive.

My secret word is: 
and

Next hop over to :
For your final stop, return to the ScrapThat! Blog 
to let us know you have completed the hop.

Remember ~ only send the secret sentence to tracey@scrapthat.ca

Thanks for following me with Bloglovin.

Happy Hopping!

Wednesday, March 27, 2013

ScrapThat! April "Within Nature" Sneak Peeks

It's almost time for our ScrapThat! April Reveal.

Kaitlyn has outdone herself with this fabulous kit filled with amazing products in fabulous earth tones, blues and greens. Our designers have created some gorgeous inspiration for you and here's a little peek.


Here are a few more sneaks from my projects:


Be sure to stop back by on Friday for the Reveal and Blog Hop. 

We have a very special stop along the way with the designer of our featured
paper collection offering an additional prize this month.

The ScrapThat! grand prize is this gorgeous "Serendipity" Main Kit.


See you on Friday!

Thanks for stopping by! I treasure your comments.

~ Blessings ~