Showing posts with label Scrap-Friendzy. Show all posts

Friday, June 8, 2012

Camp-Friendzy Blog Hike

Welcome to stop #8 on your Camp-Friendzy Blog Hike. I'm so glad you decided to join us. If you've just wandered by my blog for a visit and would like to join in on the fun, head over to the Scrap-Friendzy Blog to start at the beginning of the hike.

For those of you who plan to attend Camp-Friendzy, you can earn your Blog Hike Badge by following and commenting on each blog you come across on your nature hike. Once you've finished your hike through each of our design team's blogs, let us know in the "Badge Me Baby!" section of our forum and we'll add this badge to your signature. Even if you are not a Scrap-Friendzy camper, you'll want to be sure to take the hike for the RAK opportunities many of the DT are offering and to see the fabulous projects and inspiration you'll find along the way. 

If you are new to Scrap-Friendzy, we'd love to have you join us this summer for Camp-Friendzy, beginning June 11. There will be three challenges a week with lots of badges to earn and a RAK put together by one of our DT's each week. We will even have a Camper of the Year Award at the end of camp. If you would like more information about this fun event at Scrap-Friendzy, click HERE.

Whenever I go on a hike, I like to take time to explore the flora and fauna. On this stop in your journey, you will be seeing some of the things you might find on a hike in the embellishments of my layout ~ a butterfly, flowers, and leaves:


Here is a close-up of the larger flowers:

I used Donna Salazar's Antiquities paper, along with her Rose Creations,
Grand Peonie, and Carnation Creations dies to create the flowers and
long leaves, and the Distrezz-It-All to create the distressed edges.
I was so excited to learn that my layout won Donna's
May Girlie Grunge Sketch Challenge.

I hope this inspires you to grab your scrapping supplies and come join the fun this summer at Camp-Friendzy!!

Your next stop on the hike is #9 Tracy. 

Just in case you have gotten lost along the way, here is a map of all the Blog Hike stops:

Stop #1: SCRAP-FRIENDZY BLOG

Stop # 2: AMY'S BLOG

Stop # 3: CHERYL'S BLOG

Stop # 4: ROCHELLE'S BLOG

Stop # 5: SANDY'S BLOG

Stop # 6: TABITHA'S BLOG

Stop # 7: TAMMY'S BLOG

Stop #8 : TRACEY'S BLOG ~ You are here

Stop # 9: TRACY'S BLOG

Stop # 10: SCRAP-FRIENDZY

I'm offering a RAK during the Blog Hike. To get your name in the hat for my prize you just need to do two simple things by Sunday, June 10, midnight CST:

1. Comment on this post.
2. Follow this blog. If you are already a follower, let me know in your comments.

I be posting my winner on Monday, selected by Random.org. Be sure to stop back by to see if you are a winner. Good luck!!

Thanks for stopping by! I treasure your comments.

~ Blessings ~ 

Thursday, June 7, 2012

Sneak Peak for Camp-Friendzy's Blog Hike

Don't forget, Scrap-Friendzy's Blog Hike starts tomorrow (Friday) at 6 pm CST. You won't want to miss the campy inspiration by our talented design team. 

Here is just a little sneak peak of the layout I'll be posting for your inspiration tomorrow:


I'll be offering a RAK to those who comment and follow, so be sure to come back this weekend.

Thanks for dropping by! I treasure your comments.

~ Blessings ~ 

Sunday, April 8, 2012

Easter Card - Bo Bunny Card Challenge Tuesday

Wishing each of you a blessed and joy-filled Easter. 

I have an Easter Card for you that I designed to enter the Bo Bunny Card Challenge Tuesday contest. The challenge is to use a shaped card and a handmade flower. Here is my card:


I posted an earlier version of this card last week, to show the butterfly made with the Tim Holtz March tag technique. I changed out the kraft layer in my flower to yellow and added the stick pin and some more inking. 

Here is a close-up of the flower. 


I have posted a tutorial for the twine flower portion of this layered flower. The other layers were cut with the Tattered Floral die. 

The shaped card was cut using the Art Philosophy Cricut cartridge by Close to My Heart. Thanks Mandy for letting me use it!! I cut the base card with white card stock and then cut the scalloped circle from Bo Bunny Barefoot and Bliss Word. The yellow layer in my flower and scalloped mat for my sentiment inside the card were also cut from this paper. I used snippets of Bo Bunny scraps I had in my stash for the butterfly and leaves. 

This was my first time at color work. I used the Berol Prismacolor Pencils and blending pencil. 

I went to my bead stash to create the stick pin. My former craft hobbies come in handy for scrapbooking! 

The leaves were cut with the Spellbinder Foliage dies, then crinkled and inked for dimension. 

If you're interested in participating in an online crop, head over to Scrap-Friendzy to see the great challenges that are being posted. The crop starts today with three challenges, and there will be 2 more challenges posted each day through Thursday. You'll have until April 15 to complete your paper craft projects to have your name in the hat for the Hippity Hop Crop grand prize and til the end of the month to be entered for the Girlfriend of the month prize and honors. I'll be posting this card as the inspiration for my challenge today. 

Thanks for stopping by and I hope you have a blessed Easter. 

~ Blessings ~

Saturday, March 3, 2012

Sisters and My Very Own First Sketch

I created this layout for the Scrap-Friendzy January Sketch-A-Thon, but for some reason never got it posted. This one was a quickie for me, created in a couple hours one afternoon using this gorgeous g.c.d. studios paper, a Martha Stewart punch, Kaisercraft butterfly, and Petaloo flowers, with lace and a doily from my stash. What wonderful memories are captured here with our two oldest daughters back when we lived in North Carolina! Don't they look happy together? They are still good friends and share an apartment together. 

Pin It

For the Sketch-A-Thon, I created my first ever sketch. I'm not sure I'm cut out to be a sketch artist, but had fun creating this one, which I used as the basis for this page. 

Pin It

I would be honored if you use this sketch for inspiration. Let me know if you do. 

Techniques:


To put this together so quickly I used mostly premade items like this flower cluster using flowers from several of Petaloo's collections.


Wood Butterfly: I used this wonderful Kaisercraft wood cut-out. I painted it with black acrylic, then dry brushed on some brown metallic acrylic for some shimmer and added dimension. 

Don't forget, at Scrap-Friendzy we're celebrating Dr. Seuss' birthday with a month of Seuss inspired challenges. I hope you'll join us!! 

Thanks for dropping by! I treasure your comments.

~ Blessings ~

Wednesday, February 29, 2012

Scrap-Friendzy Happy Birthday Dr. Seuss Month


Scrap-Friendzy is the funnest scrappy place to hang out on the web, and this month we have a special treat in store for you. Our Design Team members will be providing a Dr. Seuss inspired challenge every Monday, Wednesday, and Friday in March. So if you're looking for a forum based place to inspire your scrapbooking creativity, be sure to come on over to check out Scrap-Friendzy. At the end of the March we'll select a Girlfriend of the Month to receive a fabulous prize package sponsored by our wonderful owners, Amy and Cheryl. 

(Ahem, you're layouts need not include a Cat in a Hat or a Grinch with a Max, but these fun stories have inspiration galore.)

I hope to see you come join in the fun at Scrap-Friendzy!

Thanks for dropping by!

~ Blessings ~

Tuesday, February 14, 2012

Love Stories ~ ScrapFIT Step Class

I made this Valentine for my wonderful husband, Gary. We'll be married 30 years this summer!!
I decided to try out a couple new techniques while creating this card. First, I used Shelia's fabulous technique of covering chipboard with fabric. Head on over to ScrapFIT for her wonderful tutorial. If you use this technique on one of your projects and link it at ScrapFIT, you could be selected to be the Featured FITgirl of the Month.

I also used a punch technique by Susie posted over at Scrap-Friendzy in this week's Technique Tuesdayz - something new we started this month - another opportunity to earn Girlfriend of the Month Pointz. Her tutorial can be found over at Scrap-Friendzy in the Technique Tuedsayz section. 


Techniques:

Covered Chipboard ~ Check out Shelia's tutorial at ScrapFIT. I also took this one step further and stamped the heart image onto the fabric with Archival ink before adhering it to the chipboard. Then, I stamped and embossed with glitter embossing powder the same design on my card. When the fabric covered heart was done, I adhered it over the image stamped and embossed on the card. Also I started out with a piece of plain muslin, so I spritzed it with glimmer mist to color it and let it dry before stamping. I took some inspiration from the video in Tim Holtz' February 12 Tags of 2012 to place the heart in the center of the stamped heart image. 

Patterned Strip-Pieced Border Punch ~ First I found scraps of red paper that would coordinate with my heart, and cut them into strips of different widths. Then I adhered them to the edge of a piece of thin printer paper. You want to be sure to abut the strips but NOT overlap them, as this would make them too thick to punch easily. Also be sure not to put your adhesive down where you will be punching, so you don't gum up your punch. For a photo tutorial of this technique, head over to the Technique Tuesdayz section of Scrap-Friendzy.

Inking ~ My card started out a pale cream color. I rubbed multiple colors of distress ink over the front of the card, then spritzed on water with a mini mister (any kind of mister should work). I spritzed a small area at a time and tilted the card so the pooled water would drip in different directions. I then dried it with my heat tool. My paper was a bit warped after all this, so I used an iron set on low to press it flat again. Either use a dedicated craft iron, or place a scrap of old fabric over the card so you don't transfer ink to your favorite clothing. 


Heat Embossing ~ I used two different embossing powders. For the heart image I used a black glitter powder and for the sentiment I used the aged black powder by Stampendous that has a blend of gold and black. It's amazing how these wonderful colors show up in the final image! I stamped the images with Ranger's Archival Ink, which is a slow drying ink, then sprinkled on the embossing powder right away while the ink was still wet, and used my heat tool to melt the embossing enamel. 

Glitter Ribbon ~ With my card having a distressed appearance, my ribbon looked too "pretty" so I grunged it up by squirting on some black glitter glue and rubbed it across the center of the ribbon. I did this on my craft mat and then let it dry before adhering it to the punched border strip. 

Paper
Cardstock ~ Stash
Scraps ~ Stash
Chipboard Scrap ~ Stash

Technique Products
Ribbon ~ Stash
Ranger ~ Glossy Accents
Muslin ~ Stash
Tattered Angels Glimmer Mist ~ Starfish
Zing Textile Marker ~ Green Gray
Mod Podge ~ Gloss Lustre
Ranger Distress Ink ~ Vintage Photo, Weathered Wood, Old Paper, Frayed Burlap, Walnut Stain, Aged Mahogany, Black Soot, Pumice Stone
American Crafts Zing Embossing Powder ~ Glitter Black
Stampendous Embossing Enamel ~ Aged Black
Ranger Archival Ink ~ Jet Black
Studio G Glitter Glue ~ Black
Ranger Stickles ~ Black Diamond

Tools
Martha Stewart Punch Around the Page Punch ~ Topiary
Cloud 9 Design Rubber Cling Stamps ~ 8 x 6 Love Phrase
Vistual Artistry Stampers Anonymous ~ City Central
Ranger ~ Mini Mister
Martha Stewart ~ Scoring Board
Tonic Studios ~ Red handle scissors
Inkssentials ~ Blending Tool and Foam
Stampers Anonymous ~ Grid Blocks
Fiskars Craft Knife and Self-Healing Mat
ATG Tape Gun

Thanks for stopping by! I treasure your comments.

~ Blessings ~

Friday, February 3, 2012

Scrap-Friendzy's Get Your Game On Blog Hop

Welcome to Scrap-Friendzy's "Get Your Game On" Blog Hop! Our DT has come up with an exciting game plan that'll get you scrappin' this weekend! Our hop runs from now until February 5 at Midnight CST. (That's 1 am - Feb 6 for my fellow EST scrappers!)

If you're blog hopping along, you should have arrived from Amy's blog. If you just happened by and would like to join in on the fun, go to the Scrap-Frienzy blog to start at the beginning.

But this is not your average Blog Hop! We've got some extra fun with a Touchdown Challenge! At every stop on your hop, you'll find a special "ingredient" from each DT Member. Your challenge is to take any 6 of the "ingredients" and use all 6 to complete a single project. If you're brave and daring, you can make a field goal for the extra point by using 7 of the listed "ingredients" to get your name in the hat a second time for our blog hop grand prize. All you have to do is upload your project in the Gallery and link it back to the "Get Your Game On" blog hop thread in the Scrap-Friendzy forum to be eligible for the Grand Prize and earn 25 bonus Friendz Pointz for February Girlfriend of the Month!!

Don't forget ~ This BLOG HOP is just the beginning and there will be challenges all through the month of February to earn poinz for your chance to be featured as Girlfriend of the Month!

Since this is a Superbowl weekend blog hop, I have a football rivalry layout to share with you. This is a layout of our son, a Cleveland Browns fan bantering with Rachel, now his wife and an avid Pittsburgh Steelers fan. Anyone from this part of the country knows what huge rivals these two teams are.


For details on this LO see my Love is a Battlefield post.

As you can see I used plenty of metal on this layout. So the "ingredient" I have for you to use is metal - anything metal ~ it might be wire, a brad, eyelets, a button or even a key ~ you get the idea. 

Don't forget, once you create your project with 6 or 7 design team "ingredients," link your layout at Scrap-Friendzy in two places - the gallery and in the forum. I can't wait to see what you create.

What's a blog hop without prizes. If you're one of my followers (new or a regular) and leave a comment here on this post by the February 5th deadline, you're name will go in the hat for a set of hand crocheted flowers - created by me. Several each in sparkly black and sequined beige. Sorry I'm away for the day and didn't have a chance to post a photo for you.

You're next hop is our talented Amanda.

Just in case you've gotten lost along the way here's a list of hops by our Scrap-Friendzy design team.

Tracey You're Here now.

Thanks for hopping by!!

~ Blessings ~

Tuesday, January 24, 2012

Birthday Card ~ Bo Bunny Card Challenge Tuesday

I tried my hand at something a little different. We're having a Sketch-A-Thon at Scrap-Friendzy. I created a card sketch and a birthday card for our daughter who enjoys a fun and funky style.

I used the card challenge at Bo Bunny to use the following items on her card: ribbon, at least two buttons, patterned paper with dots, and chipboard. 


Here is the card sketch I posted on Scrap-Friendzy - my first. 


I enjoy dabbling in a variety of styles, so it was fun 
to create a card based on our DD's fun style.

One of the things I enjoy about using Bo Bunny Products is the ability to mix and match from different lines. For this card I used six Bo Bunny Products from six different lines: 

Bo Bunny Paper
Love Shack ~ Shimmy
Flower Child ~ Harmony
Paradise ~ Lingo

Bo Bunny Embellishments
Vicki B. ~ Buttons
Gabrielle ~ Layered Chipboard
Garden Girl ~ Noteworthy

Other Products
Black Cardstock - Stash
Distress Inks ~ Broken China, Rusty Hinge, Black Soot, Aged Mahogany
Clearly Better Ink ~ Black
Happy Birthday Stamp - Stash
Ribbon - Stash
Scotch ATG Tape Runner
Fiskar Craft Knife
Fiskar Self-Healing Mat
Martha Stewart Ruler
Boss Kut Gazelle

Techniques
Ribbon ~ The color of my ribbon was too light and too blue, so I used a foam makeup wedge to rubb Broken China and Evergreen Bough Distress Ink into the ribbon to get just the right color. The dots acted as a resist and stayed perfectly white. 

If you decide to try a card with my sketch, I'd love to see it. Leave a note and link in my comments and I'll hop right on over. Better yet, come on over to Scrap-Friendzy and join in for the Sketch-A-Thon fun!!

Thanks for stopping by ~ I treasure your comments!

~ Blessings ~

Sunday, January 1, 2012

Love Never Fails ~ ScrapFIT Workout #59 - Inspired by the Music!

I have to admit, I was a little stumped when I saw this challenge, but then I remembered Joseph and Rachel's engagement photos included some of Joseph in his Cleveland Browns jersey and Rachel in rival Steelers jersey "battling" it out.

ScrapFIT Workout #59 ~ Inspired by the Music!
 - Love is a Battlefield

I love 80's music and we are working out with Pat Benatar this week! Her song "Love Is A Battlefield" is your inspiration for this workout! I can't wait to see how this makes you move! Your can find the lyrics here.


I hope you are inspired to put your scrapping to the music and join us for this fun Workout. Be sure to hop on over to ScrapFIT to see the inspiration by our fabulous DT!!

The winner of this Workout will receive this amazing collection of goodies
sponsored by Boys Rule Scrapbook Kits: 


Boys Rule is a monthy scrapbook kit club for those who love to paper craft boy subjects. Cool embellies are paired with handsome papers each month that you will love to play with and includes exclusive embellies with each kit . . . all different and very unique. It's fun to create when you have a complete kit that is designed for the memories of dirt, grunge, and smelly things!


Techniques:


My metal, eyelet, and wire work was inspired by Misty at Perfectly Imperfect - Thanks for the inspiration, Misty!!

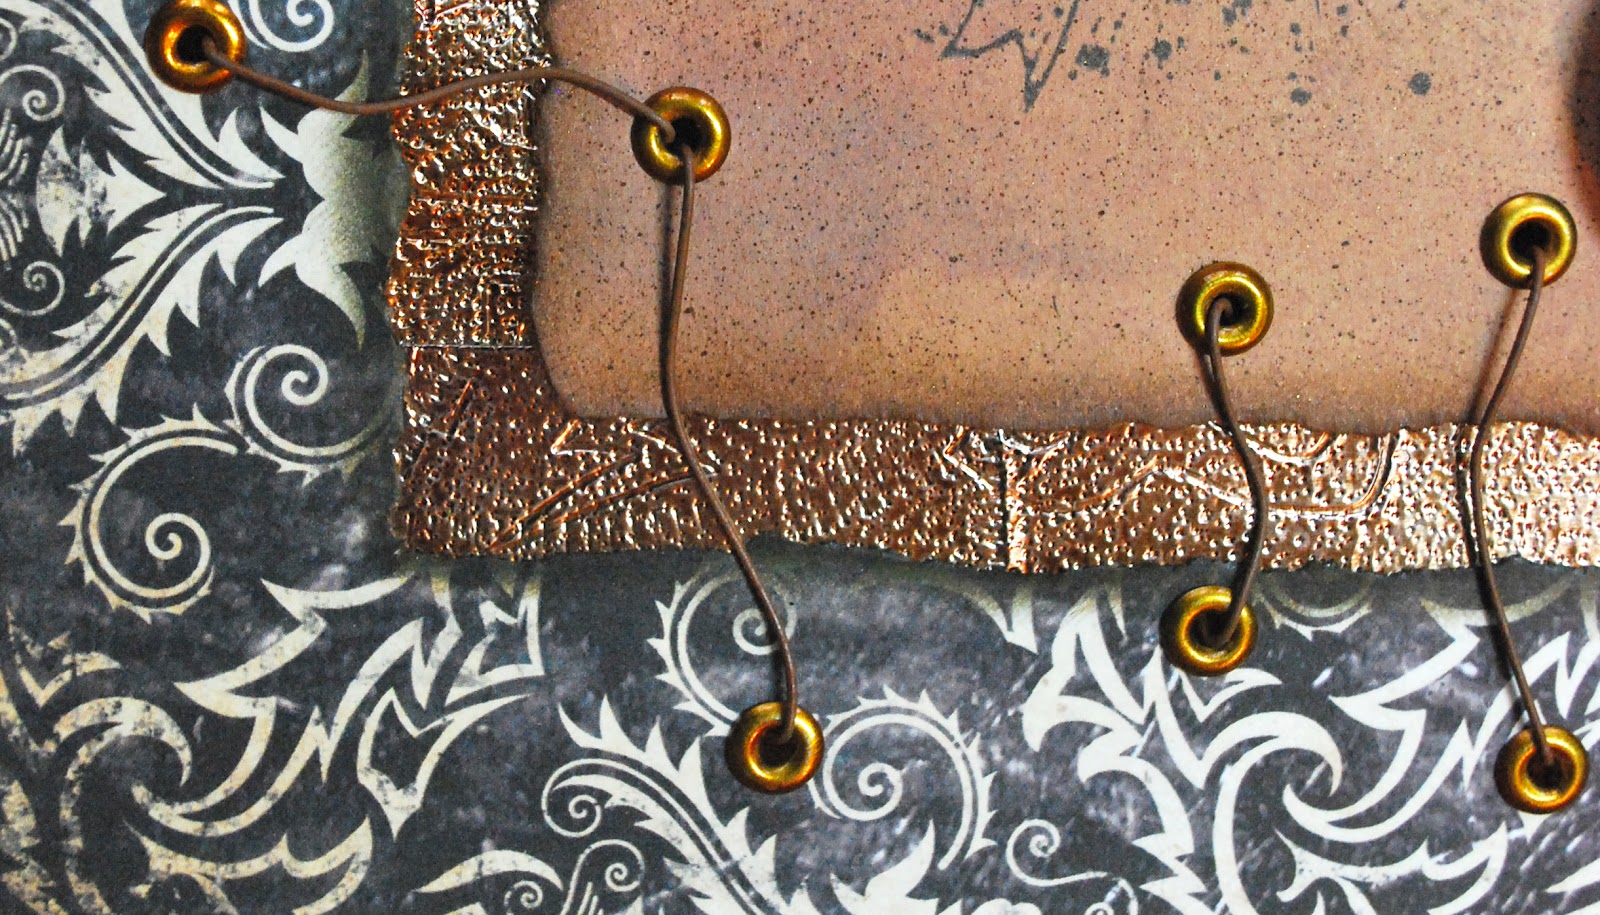
Metal Work ~ The metal work was created with aluminum tape from the hardware store - in the piping section. I adhered it to a piece of cardstock then placed it over foam. With craft metal working tools, I doodled random images into the metal then ran a couple different metal roller tools over it to give the dots and lines. Once it was sufficiently distressed, I used Ranger alcohol inks with the felt tool to apply rust, terra cotta, caramel, and espresso to the metal strips. (If you have crafting metal in your stash that is large enough - that would work as well. Of course with this distressed look - pieced together metal strips would work just as well.)

Eyelets and Wire ~ I randomly set eyelets into the outer and inner papers - 9 on each outside edge and 8 on the inside edges so the wire would share an inside eyelet at each corner. I had this old rusty scrapbook wire in my stash and knew it would be perfect here. I cut each wire a little longer than the span between the eyelets and bent each end underneath to hold it in place. I wanted a random grungy look, so I also bent most of the wires a bit to avoid a stiff look. 


Punchenella ~ I like to use what I have on hand, and a friend had given me this length of iridescent punchenella with square holes. The design was perfect, but the color not so much, so I ripped the punchenella to give rough edges and then painted it black with craft acrylic paint, Voila - transformed into the perfect grungy accent. 

Altered Flowers ~ I had these wonderful charcoal Petaloo Flowers, but they weren't quite dark enough, so I inked two of them up with my pumice stone Distress Ink, to get the color I was looking for and removed the bright green leaves from the bottom. 

Layered Vintage Buttons ~ I have a collection of vintage buttons  inherited from my mother-in-law and picked up at yard sales. I applied black alcohol ink to a couple silver filigree buttons and  then sanded for the raised details to stand out. I used glue dots to adhere them over larger black buttons. The black buttons were old and used with wonderful wear marks/patina on them - if they were new, you could sand them randomly to give then some "age." I also included one large black button with wonderful detail without the layered metal button. If you don't have vintage buttons in your stash, fabric stores like Joanns hae a nice collection of buttons that should work with a bit of distressing. 


Dictionary Page ~ Take a look at the upper left corner of the layered dictionary page and you will see the word "battlefield" ~ a nice little tie-in for this fun Workout. I have an old unabridged dictionary that lost its cover, so I can find just the right page for my projects. I inked the page to age it and rubbed the torn edges with some black soot Distress Ink. If you don't have an old dictionary laying around (one of the benefits of being a home educator - LOL!) you can do a Google image search for dictionary pages and print one up to use on your layout. 

Misting/Stamping ~ Although my background paper has a grungy feel, I wanted even more, so I misted and then stamped with several grungy background stamps using pumice stone distress ink. Then, with the darker black soot, stamped my focal images of 1 Corinthians 13 and the grungy heart image to which I added in my handwriting "Love Never Fails" to finish out that verse and bring home the focus of this page. 

Paper
Authentique ~ Glowing - Music Notes
Idea-ology ~ 12 x 12 Paper Stack - Lost and Found

Embellishments
Around the Block ~ Flair - Big Metal Brads
Pixie Press ~ Antique Charm Collection - Rusty Metal Wire
Idea-ology ~ Keyholes, Gears, Word Sticks
Petaloo ~ Canterbury Rose - Charcoal, Canterbury Collection - Holiday Leaves, Gilded
Punchenella ~ Thanks Mandy!
Black Lace x 2 ~ Stash

Technique Products
Aluminum Tape ~ Shurtape AF912 (from hardware store)
Stripped Cardboard ~ Found Objects Stash
Glitz ~ Clear Stamps - Distressings
Recollections Rubber/Wood Stamp - Script
Prima ~ Clear Acrylic Stamp - Brick 3
Visual Artistry ~ Clear Stamps - City Central
Cloud 9 Design ~ Rubber Cling Stamps - 8 x 6 Love Phrase
Ranger Distress Inks ~ Pumice Stone, Black Soot, Rusty Hinge, Walnut Stain
Ranger Alcohol Ink ~ Ruse, Caramel, Terra Cotta, Espresso
Smooch Spritz ~ Log Cabin
Zig ~ Writer - Pure Black
Eyelets ~ Stash

My journaling was inspired by the Bird is the Word Challenge to use the word Wonder. "It's a wonder they found love despite the Browns ~ Steelers rivalry."

One more important reminder. The Scrap-Friendzy Sketch-A-Thon starts today. If you're looking to get a jump start on your 2012 scrapping, come on over and join us for a sketch every day in January along with RAK's, and games. The girlfriend with the most pointz at the end of the month gets a prize package and will be featured as the "Girlfriend of the Month" during the month of February with the opportunity to create a challenge for our February theme. I hope you'll come on over and join us!!

Thanks for dropping by! I treasure your comments.

~ Blessings ~

Thursday, December 1, 2011

Family ~ ScrapFIT Workout #57 Reveal

It's time for another fabulous ScrapFIT reveal. The first Workout for December is Word of the Year.


It's almost a new year!!! What single word best describes how you want to embrace the new year? Here's your chance to think about how you want to change, improve, create, define or challenge the new year! Share with us a layout or altered project that showcases your Word of the Year!

The word I selected is Family. There are so many changes going on in our family, and I want to embrace the new directions our family is taking. Our son, Joseph, is getting married on December 10 and giving us a lovely new daughter, Rachel (bottom right photo). These photos were taken last week during our Thanksgiving celebration with extended family. We weren't all there at the same time, so I created a collage of photos to include everyone. 


We have a gorgeous Echo Park kit to give to the winner of Workout #57 donated by Paper Lovelies. Be sure to stop by their store and check out their monthly kits for only $15 each!!


I hope you'll join us in creating a project to embrace the new year. Be sure to hop on over to ScrapFIT to see the inspiration by our fabulous design team and to link up your creation. 

Techniques:


Hand Crafted Flowers ~ I used the Spellbinders Rose Creations Die to cut both the petals and rose leaves for these flowers. I just love all the different sizes and that the petals are not all exactly the same shape. This makes for more realistic flowers. 

For each blossom, I cut 3 sizes of the petals and 4 sizes for the largest flower. I wanted to use the two papers from the background, so I alternated the papers for each size. I cut two petal shapes for the largest size used for that particular flower and one of each of the other sizes. I tried two of each size initially, but found the finished flower to be more thick and fluffy than I wanted for this page. 

To get the texture, I wet the cut petals by dipping them in water. You want them damp but not sopping wet. With my fingers, I pleated each petal, then lightly twisted them together to form a bud-like shape. You can set them aside to dry over night, or if you're like me, hold them with tweezers and dry them with your heat tool. If you use the heat tool, they may not be all the way dry in spots - so be very careful in opening them, because the damp spots will tear very easily. (The completely air dried ones can rip too, but not quite as readily.) 

At this point I inked the petal edges and on the yellow petals inked lightly over the entire petal to give more visual dimension. I wanted the pattern on the black/tan paper to be prominent, so I only inked the edges of those petals. 

I put the blossoms together with a decorative brad, and arranged the petals before closing up the back of the brad. You could also use glue or glue dots to hold them together and use a stick-on decorative center as well. 

For the leaves, I fold them in half to get a center vein, then use my fingers to pinch along each side to get the smaller veins you would find in a real leaf. Then I ink the edges and lightly across the entire leaf. 

Fabric Ruffle ~ This is so easy peasy!! I just tore a strip of fabric (make little snips on the edge of the fabric the width you desire and simply rip the fabric). I machine basted down the center and then lightly gathered it up to make the ruffle. (If you don't have a sewing machine, a quick run of hand basted stitches down the center will work just as well.) I pulled some of the threads off the edges to give a rustic look. I used 3 rows of my Scotch Tape Runner to adhere it to the page.

Fussy Cutting ~ I fussy cut the bracket mat under the flower cluster and hid the bird (that I didn't think went with this layout) under the flowers and leaves. 

I want to say thanks to Amy Gaskins for the fabulous inspiration. The wonderful November Scrap-Friendzy challenges were focused on scraplifting pages from our gallery, and I selected one of Amy's gorgeous pages to lift. If you're looking for a fun forum based scrappy place to hang out with 3 challenges each week, run don't walk to ScrapFriendzy and join our uplifting group of girlz for loads of scrappy fun. December's theme is Scrap Your Stash. 

Paper:
My Mind's Eye ~ Lost & Found Two Sunshine Collection - 
"Memories" Blossoms, "Lovely" Plaid, "Sunshine" Music
Authentique ~ Foundations
Basic Grey ~ Fruitcake - Pine

Embellishments:
Tan Loose Weave Fabric - Stash
The Paper Studio ~ Spare-Parts - Brad Assortment Browns
Zva Creative - Adhesive Pearl Swirls

Technique Products:
Spellbinders ~ Donna Salazar - Rose Creations Dies
Ranger Distress Inks ~ Pumice Stone, Walnut Stain, Forest Moss
TPC Studio ~  Clearly Better - Chocolate
Hot Off the Press ~ Artful Collection acrylic stamps
7gypsies ~ Clear Stamp Ink - Family

Tools:
Tonic Studios ~ Paper Distresser
Sizzix ~ Big Shot
Visual Artestry ~ Stamp Gird Blocks
Fiskars ~ Kraft Knife
Fiskars ~ Self Healing Craft Mat
EK Success ~ Honey Bee Scissors (My favorite for fussy cutting)

Thanks for stopping by! I treasure your comments.

~ Blessings ~

Sunday, October 2, 2011

Share the Future Together ~ ScrapFIT Workout #53 Reveal

It's reveal day at ScrapFIT for workout #53 The Journaling Goes Round and Round.

It's important to add journaling to our layouts so generations after us will know the details and feelings of the pictures. For this Workout I want your journaling to "go around" the outside of something. It can go around the outside of your page, around your photo or even around an embellishment. Show us how you journal around!

For this challenge, I created from Joseph and Rachels engagement photo shoot. This is Rachel's favorite photo taken that day.

I was so excited to see this challenge, since I enjoy journaling around things. Like many of you, I'm not a huge fan of my own hand writing, but it doesn't seem to bother me so much when I write around things in a small hand. I wrote out the love verses from 1 Corinthians 13 around the heart. I actually fit most of them in before running out of room. I tucked the reference into the bottom inside of the heart. To do this, I traced the heart onto my layout in light pencil, marking my photo placement. I used this line to write my journaling, then erased the line before adhering the heart.

Click on photo and then click again to view close-up.

I hope you have been inspired to join us at ScrapFIT for this fabulous journaling workout!! Once you complete your project go here to link it up. You'll want to see the fabulous projects created by our design team posted at ScrapFIT as well.

The lucky winner of Workout #53 will receive this lovely kit by The Paper Bakery Kit Club:


The Paper Bakery is offering a special discount to ScrapFIT followers this month. See the Workout #53 description at ScrapFIT for details. Be sure to drop by The Paper Bakery to see their gorgeous kits, full of wonderful goodies!!

Techniques:
Cardboard Heart:
I was inspired to create this heart by the wonderful work of Marilyn Rivera. First I drew a heart on a large scrap of card stock, then took a piece of cardboard box to size and stripped the front layer off. I used the heart template I drew to cut out the cardboard shape, then spritzed it with an acid neutralizing spray front and back. I used three shades of distress ink to get the color and shading I desired for this particular LO. Finally I wrapped some red DMC embroidery floss around the top right part of the heart in a repeated V shape for some added texture.

Masking:
Before masking, I spritzed the area with some mist for some extra visual texture. I recently purchased several stencils. The shape on the right side of the heart was created by rubbing distress ink over a portion of one of the stencils. I then added some rhinestones for some extra bling.

Embossing Metal/Alcohol Ink
This technique can be done with colored or plain aluminum sheet metal. Cut the desired shape with some old scissors (I have a pair of old kitchen shears I reserve for my sheet metal so I don't dull my good scissors.) You can also cut a shape with a die cut machine like a Big Shot. Once you get your shape cut, place it in an embossing folder and run it through the machine again to emboss. If you don't have access to embossing folders/machine. You could also free hand emboss your metal. I chose three alcohol inks to get the colors I wanted for my layout, and used a felt applicator and dabbed it on until I got the texture I was looking for. The longer you dab at alcohol ink, the smaller the "blotches" become. They are quite large at first, but as the ink starts to dry some they become smaller and smaller. It might take a couple of minutes, so be patient if you want smaller separations between your colors.

Altered Chipboard:
The chipboard swirl was coated with a very thick coat of white puffy paint. After applying the puffy paint, you really need to set it aside for at least an hour. Then use a heat tool to make the paint bubble and puff up. Once it cools down a bit, you can paint it in the color of your choice. I mixed a couple different metalic paints together for this swirl. If you have a variety of paint colors, you only need to purchase puffy paint in white, and perhaps black.

Altered Brad Flower:
The pink flower was a white brad that I painted with metalic paint. The clear rhinestone in the center was altered with alcohol ink. The rhinestones attached to the chipboard swirl and masked area were also colored with alcohol ink. No need to purchase rhinestones in a bunch of colors if you have alcohol ink. I've even mixed drops of different alcohol inks on my craft mat to get the shade I'm looking for.

Altered Tissue Tape/Paper
I cut a rectangle of chipboard to place behind my embossed metal and covered it with tissue tape. To get the desired color, I rubbed it with distress ink. The tissue tape has a shiny texture, so I rubbed it with some paper towel after inking to remove any excess ink so it wouldn't smear onto other parts of my LO as I was working on it. I don't need to do that when working with regular paper/cardstock. The little hearts, title letters/word blocks started out as a scrap of of the MME paper that I cut the postage images from. I just took plain sections of that scrap and rubbed them with several colors of distress ink until I got the desired look, then printed my word blocks and cut the letters and shapes. I had some coordinating paper that would have worked, but I didn't want to cut into it for the little pieces that I needed for this layout. (Yes, I use my distress inks a lot and own all the colors including the gorgeous new fall limited edition ink pads.)

Stitching:
I got away from hand stitching on this page and went with a couple rows of straight machine stitching around the border of the page.

Paper:
Cosmo Cricket ~ Fleuriste - Flora Bella
MME Lost and Found ~ Portobella Road "Family" First Class

Embellishments:
Idea-ology ~ Mini Paper Clips
Deluxe Designs ~ Freeze Frames - Natural Wood
Darice ~ Rhinestones
Creative Imaginations ~ Love Bird Metal Flower Brads
Idea-ology ~ Swivel Clasps

Technique Products:
Ranger Distress Ink ~ multiple colors
Ranger Alcohol Ink ~ multiple colors
Tombo ABT ~ N15
Zig Millennium 05 ~ Pure Violet
Moo Eraser
Recollections Stamp ~ Script
Idea-ology Tissue Tape ~ Sketch Pad
Jacquard Lumiere ~ Metallic Acrylic Paints - multiple colors
Delta Stencil Magic ~ Elegant Fleur-De-Lis
DecoArt Paint ~ Dazzling Metallics - Renaissance Brown
TPC Studio ~ Clearly Better Ink - Chocolate
Smooch Spritz ~ Log Cabin
DMC # 902
Walnut Hollow Colored Metal ~ Light Blue Aluminum

Tools:
Boss Kut Gazelle
Font ~ Pieces of Eight - from the internet
Big Shot
Darice Embossing Folder
Make It Acid Free Spray

I've entered this in the Bird is the Word "Share" Challenge.

Thanks for stopping by. I treasure your comments.

~ Blessings ~