Spring is just around the corner as the temperatures here in Ohio are starting to warm and melt the winter snows. We actually saw green grass this week before waking to yet another glistening, snow covered day yesterday morning. I don't know about you, but I'm ready for the soft delicate flowers of spring along with fluttering butterflies.
I've used the fabulous Amazing Paper Grace March Die of the Month: Bella Ovalette to create these two spring inspired cards.
Do you ever start a project and it doesn't turn out how you envisioned and is destined to be discarded? That happened to me with the shaped card on the right. The yellow was too bright, and the green turned out too dark. The contrasts were just too much for my taste, so I put it to the side and started over with the card on the left by die cutting muted neutrals and whites for the background.
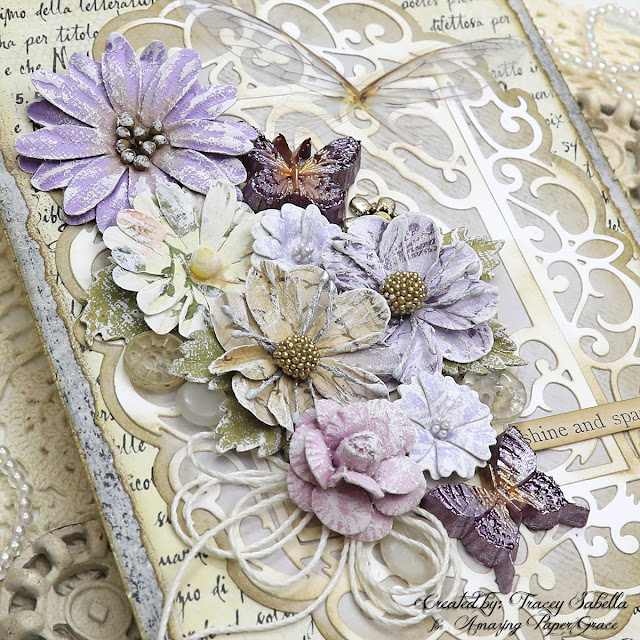
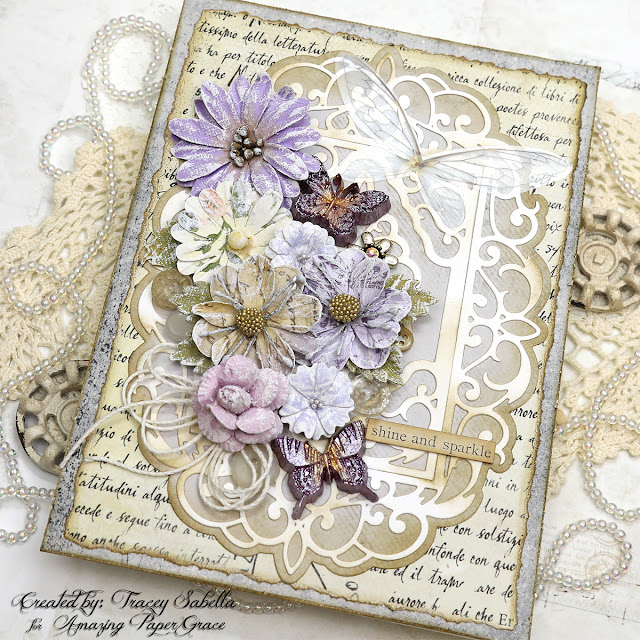
The scroll work pieces cut from white are inked with Frayed Burlap distress ink to give them the vintage, shabby look I was going for. Subtle spring purples, pinks, and yellows are added with flowers and resin butterflies. I adore combining flowers in a variety of sizes and shapes, so used a few Little Birdie Crafts flowers for the larger blossoms, and handcrafted the two smaller pale purple ones using the flower dies included in the Bella Ovalette set.
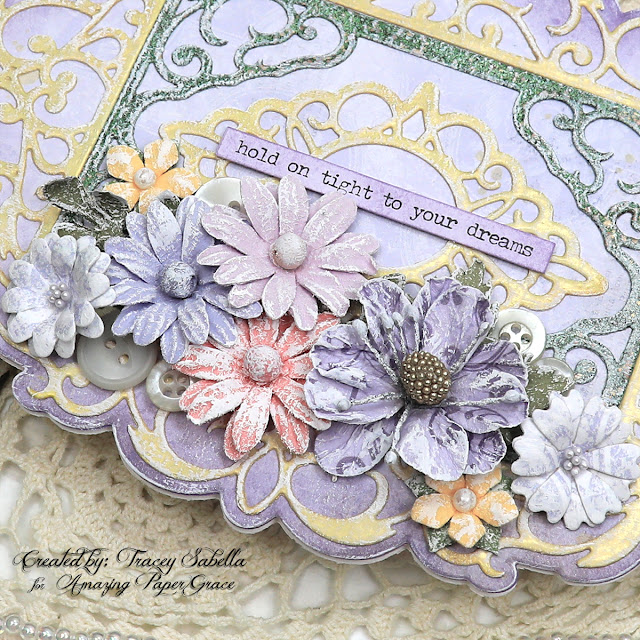
Now it was time to create an accessory, and I got to thinking about the first card I had started. I have a thing for salvaging hopeless projects, and wasn't quite ready to give up on it yet. I had cut green patterned paper to place behind the die cuts, and again it was too bright, so I decided to discard it and create a shaped card. I die cut the base from white cardstock and kept the remaining pieces which I had already assembled and glued down. The yellow and green pieces are heat embossed with enamel powder, so inking them wasn't really an option, so I dry brushed the entire piece with white gesso and breathed a sigh of relief as this softened and blended the colors perfectly. Then to finish it off, I just added the cluster of flowers and a sentiment. I used more Little Birdie Crafts flowers along with two more of my handcrafted flowers cut with the Bella Ovalette dies.
Many thanks to Amazing Paper Grace for providing the dies used in this project!
There are 12 dies included in this Bella Ovalette die set.
I just adore the gorgeous design of these beautiful die cuts!! The solid outer layer is cut in a light grey patterned paper that's edged with brown inking. The intricate layers are cut from white cardstock and randomly inked with brown for a grungy shabby chic feel. The flowers are lightly dry brushed with white gesso and arranged to cascade down the left side of the card along with resin butterflies painted with metallic acrylic paints. I make the resin pieces to keep on hand so all I need to do is add a bit of paint or waxes for a quick and easy embellishment. I've also tucked in a few vintage buttons around the edges and tied a 4-loop bow from bamboo cord to add a soft touch.
The two smaller flowers near the butterflies are cut with the flower dies included in the Bella Ovalette die set. They are die cut and shaped. Each blossom has two layers which are adhered together with offset petals. Each petal section has a hole in the center, making it easy to add a few stamen to each flower.
I cut a 5 1/2 by 7 1/2 inch piece of script paper and tore off the edges before adding a touch of ink to them. The back layer is cut from grey patterned paper. The black dots were more visible on the left side so I used a natural bristle paint brush to pick up some black soot ink and stippled around the edges to pick up this design around the other sides. I used a printed sentiment and added brown ink around the edges.
To add a little balance to the design, I added a transparent butterfly to the top right corner. This gives more weight to that corner, but still allows you to see the gorgeous die cut design beneath it.
I've used some of the same flowers here and added a couple tiny yellow blossoms along with the two handcrafted die cut flowers. A few vintage buttons are tucked in around the edges. I'm so blessed to have had friends and family members bless me with their family button boxes and adore using these treasures on my creations. You could also use bought buttons or any little trinkets you might have on hand.
You can see here how dry brushing the background layers with white gesso adds a soft touch and tones down the vibrant colors to these lovely pale spring colors. It also adds some beautiful visual texture.
The base layer is cut from a lightly patterned purple paper and then edged with Dusty Concord Distress Ink. The printed sentiment is also colored with this ink.
Supplies:
Accessories:
Paper:
- Vintage style scraps from my stash
- Cardstock: Kraft; White
Ink:
- Ranger ~ Distress Ink: Frayed Burlap; Black Soot; Dusty Concord
Mixed Media:
- Finnabair with Prima Marketing ~ Sparks Acrylic Paint: Iris Potion; Ginger Magic
- Finnabair with Prima Marketing ~ Gesso, Clear
- Prima Marketing ~ Silicone Mould: Regal Findings
- Amazing Casting Resin ~ White
- Liquitex ~ Gesso, White
- Stampendous ~ Embossing Enamel: Aged Green
- Ranger ~ Embossing Pearl: Pale Gold
- Ranger ~ Micro Glaze
Embellishments:
- Little Birdie Crafts ~ Handmade Flower - Wendy, Purple
- Little Birdie Crafts ~ Handmade Flower - Angel Rose Fairy Sparkle
- Little Birdie Crafts ~ Handmade Flower - Fairy Garden, Fairy Sparkle
- Little Birdie Crafts ~ Handmade Flower - Valerie, Pearl Pink
- Little Birdie Crafts ~ Handmade Flower - Elira, Boho Vibes
- Tim Holtz with Idea-ology ~ Clipping Stickers
- Tim Holtz with Idea-ology ~ Small Talk
- Tim Holtz with Idea-ology ~ Transparent Wings
- Hemptique ~ Bamboo Cord, 20lb
- Vintage Buttons
- Stamen
- Jewelry Finding
Adhesives:
- Double Sided Tape ~ 1/4"
- Beacon ~ 3-IN-1 Advanced Craft Glue
- Beacon ~ Fabri-Tac
- Tombo ~ Mono MULTI Liquid Glue
- Helmar ~ 450 Quick Dry Adhesive
Tools:
- Spellbinders ~ Platinum 6
- Wagner ~ HT 400 Heat Gun
Thank you Little Birdie Crafts for supplying products used to create this card.
Little Birdie Crafts can be purchased at their online store.
Use code TRACEY05 for a 5% discount.
I receive a small commission at not cost to you.
For more Bella Ovalette Inspiration from the Creative Team:
Visit each blog linked below for their take on creative paper crafting ideas with Bella Ovalette, the Amazing Paper Grace March 2022 Die of the Month!
Visit Joanna Wisniewska
Visit Patricia Manhire
Visit Agnieszka Posluszny
Visit Anita Kejriwal
Visit Katarzyna Bobrowska
Visit Tracey Sabella << That's me! >>
Visit Robin Clendenning
Visit Rajni Chawla
Visit Kate Skonieczna
Visit Margie Higuchi
Visit Becca Feeken at Amazing Paper Grace
The Amazing Paper Grace Die of the Month is available exclusively at Spellbinders Paper Arts during March 2022, Bella Ovalette along with other membership perks.
View this month’s Amazing Paper Grace Die of the Month!
I would adore hearing from you!
Please leave a comment below letting me know how you will use these gorgeous dies!
Thanks for stopping by! I treasure your comments.
~ Blessings ~


Tracey, coming to your blog is just like looking over your shoulder when someone is making something they are passionate about. I drink up every word! I love it that you explained why and how you did everything and it makes me want to try that very technique. You are so very gifted, patient and generous with your time and explanation. You bless those around you in so very many ways. Incidentally, I can't even imagine you have a card that didn't go the way you planned. These makes are exquisite and so very thoughtful. The beauty that comes from those hands is indeed a gift to us all. So many hugs for you my friend 💗
ReplyDeleteDear Becca, Thank you so much for your kind and sweet words. It means so much! It's such a joy to work with your gorgeous designs! 💕 ~ Blessings, Tracey
DeleteThese are both beautiful!! I love your shabby chic style and how you have added all the elements together to create fabulous cards.
ReplyDeleteThanks so much for your sweet and thoughtful words dear Patricia. It means a lot! 💕 ~ Blessings
DeleteSeeing the end result of both of your creations, I cannot believe that you ever had an issue with the shaped card. They are both beautiful and I love the vintage feel to them. Thanks for including how you went about creating your cards and thanks for sharing with us.
ReplyDeleteThanks for your sweet comment dear Beverly! It means a lot and you are so welcome! Yes, dry brushing with the white gesso made quite the transformation! 💕 ~ Blessings, Tracey
DeleteI really appreciate that you shared your story of creating a card that didn’t turn out like you planned, starting new but going back to the original card and ending up with a beautiful card plus the second card too! Both cards are lovely and I like that you were able to salvage the first card and turn it into a card you are proud of. This happens to all of us but your example encourages us to not give up! Thank you for your example!
ReplyDeleteSandi Smith
You are so welcome and thank you for your kind and sweet words dear Sandra. I'm so glad that my story is an encouragement to you. It means a lot to me!! 💕 ~ Blessings, Tracey
ReplyDeleteYou are SO blessed with talent. You inspire me. I'm 71, 72 soon and Shabby chic something I want to try I have so much stuff. I had to store from APG club because the exchange rate was too much. But I can still get some dies locally. I'll make do with your inspiration. Hugs
ReplyDeleteThanks so much for your delightful comment dear Chris!! It means a lot. Please don't hesitate to let me know if you have any questions. I'll be glad to answer. I'll see them quickest if you message me on Facebook. I hope you have a lovely day! 💕 ~ Blessings, Tracey
Delete