
 Welcome to my creative space!
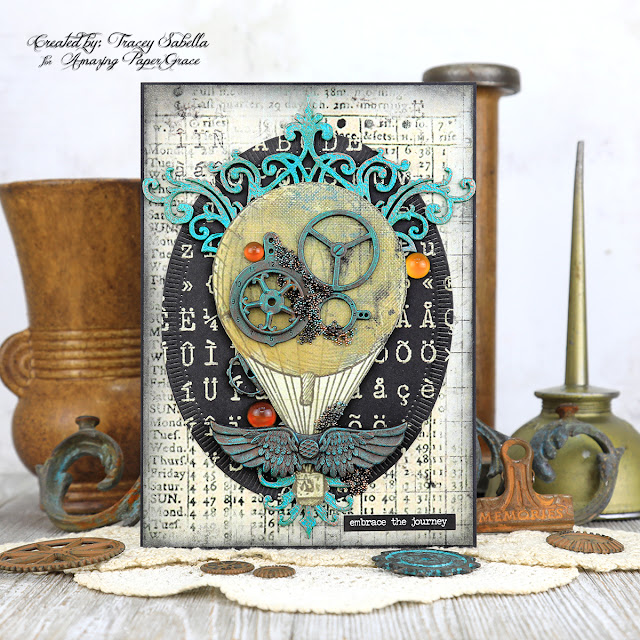
I simply adore the Amazing Paper Grace Fluted Classics die collection designed by Becca Feeken. Here I'm featuring the Fluted Classics Ovals set (S5-474). As soon as I saw these dies, I just knew the fluted design would work so perfectly in the steampunk style. What do you think?
My husband has a birthday coming up, so I created this card for him in a more masculine style, but I know a lot of gals who would simply adore this as well. The "embrace the journey" sentiment allows this card to be used for many occasions from birthdays to graduations, or anyone moving into a new phase of life.
I wanted some nice contrasts so I used the largest fluted oval die to cut a dark panel to go behind the lighter hot air balloon so it pops and then cut a 5x7" panel in a lighter color trimmed with a sliver of a frame in black. Be sure to scroll through these photos for all the details on how I created this classic steampunk card.
Tips and Techniques
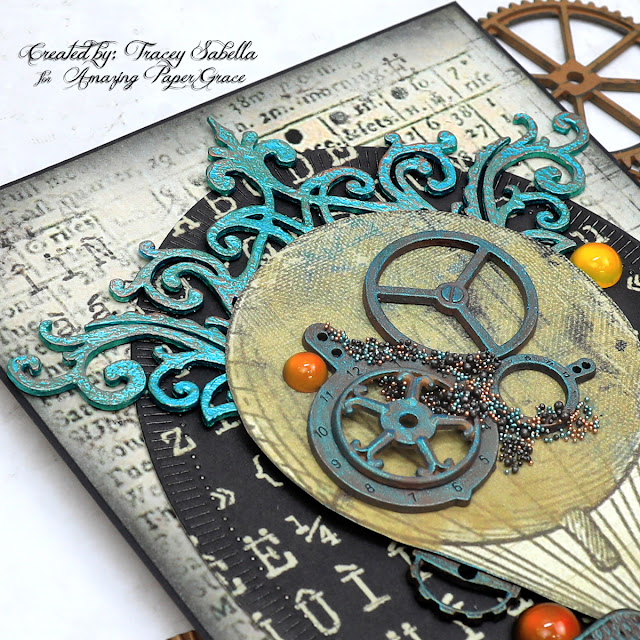
Just look how gorgeous these fluted edges look with the steampunk design! I fussy cut this hot air balloon from a paper in the older Prima Romance Novel collection and embellished it with gears and mechanical pieces to give it that steampunk feel. Any vintage hot air balloon can be transformed into a steampunk beauty by adding a few gears! The metal pieces were in different metals (silver, brass, copper) from a couple different manufactures, so I used art waxes to color them and give a cohesive feel. A few prills and microbeads in black and copper tie everything together with grungy texture. A few baubles add a nice touch of coppery color.
I cut apart an ornate corner chipboard piece to tuck in above and below the balloon, It's brushed with white gesso (to make the next color which is a little translucent be true to color and not muddied by the natural chipboard color), then metallic peacock paint. Finally I added patina by rubbing it with touches of brass and copper art wax.
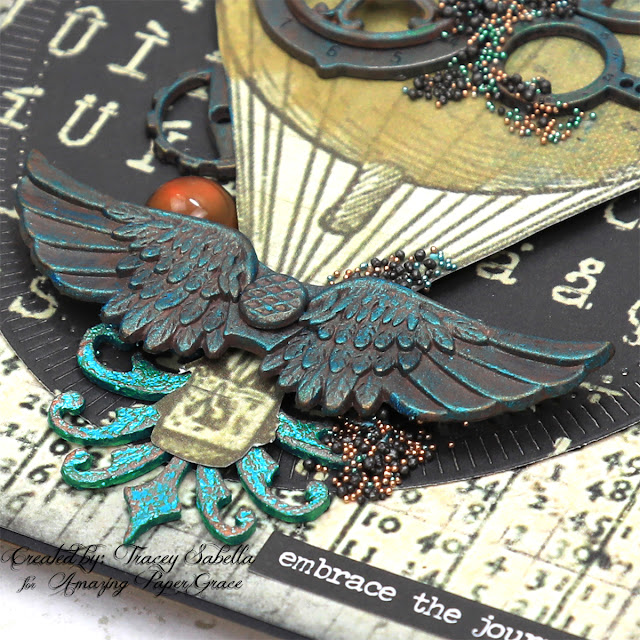
These metal steampunk wings are also colored with art waxes and a screw brad placed into the center. You can see more of those fabulous fluted edges behind the wings.
This gorgeous bit of chipboard was too fabulous to be hidden behind the balloon, so I snipped it off and placed it behind the basket to help draw your eye across the card with more of this rich patina at the bottom.
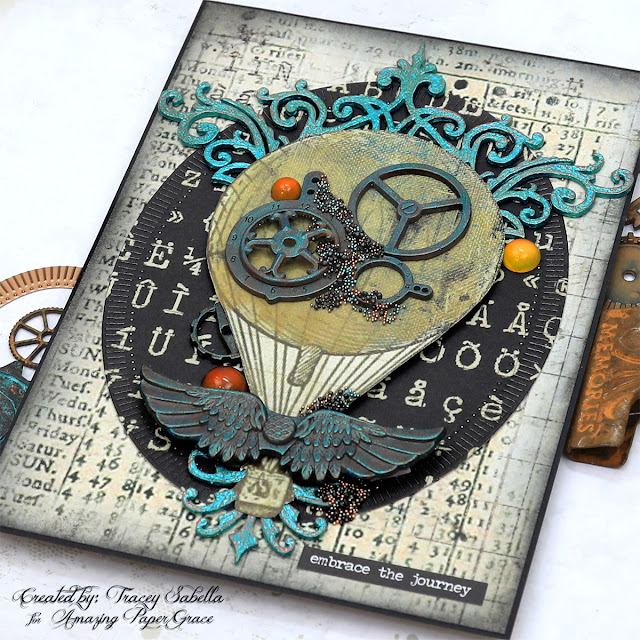
One final look. You can see how the contrasting layers work beautifully together to make all the steampunk details pop. While a simple oval might have worked for the dark center piece, the fluted edges from this fabulous die give a perfect steampunk edge to this layer.
Amazing Paper Grace Dies:
Paper:
- Prima Marketing ~ Romance Novel Collection
- Cardstock ~ Black
Ink:
- Ranger ~ Distress Ink: Black Soot
Mixed Media:
- Finnabair with Prima Marketing ~ Metallic Wax: Peacock; Copper; Bronze Age
- Finnabair with Prima Marketing ~ Matte Wax: Patina Green; Rusty Red; Rusty Brown
- Finnabair with Prima Marketing ~Soft Matte Gel
- DecoArt ~ Dazzling Metallics: Peacock Pearl
- Liquitex ~ Gesso, White
Embellishments:
- Finnabair with Prima Marketing ~ Mini Brads - Screws
- Finnabair with Prima Marketing ~ Mechanicals: Winged; Machine Parts
- Finnabair with Prima Marketing ~ Melange Art Pebbles: Vintage
- Tim Holtz with Idea-ology ~ Clipping Stickers
- 7gypsies ~ Gears - Industrial
- Chipboard ~ Ornate Corner
- Finnabair with Prima Marketing ~ Microbeads: Copper
- Martha Stewart Crafts ~ Microbeads: Apatite
- US Artiest ~ Prills - Power Outage
Adhesives:
- Double Sided Tape ~ 1/4"
- Beacon ~ 3-IN-1 Advanced Craft Glue
- Beacon ~ Fabri-Tac
- Tombo ~ Mono MULTI Liquid Glue
- Foam Tape ~ 1 inch
Tools:
- Spellbinders ~ Platinum 6

Thanks for stopping by! I treasure your comments.
~ Blessings ~
No comments:
Post a Comment
Thanks for taking the time to stop by and leave a message! I treasure your comments.