Wednesday, September 24, 2014

Published in the September Issue of Scrapbooking.com

It's always so amazing to have my work published,
and I'm thrilled to share that two of my layouts are in the

Please click on the links to view the articles:

Never Let Me Go ~ Featured Article - Love & Weddings


Be sure to check out the entire September Issue of Scrapbooking.com Magazine.
You are sure to be inspired and best of all it's free!

~ Blessings ~

Monday, September 22, 2014

"Life Is Good" Layout for Donna Salazar

We recently took a trip to Iowa to visit our wonderful friends, Ralph and Chris. Ralph was our pastor for many years and is now preaching in the church he grew up in. Gary and Ralph are best of friends and we had a great visit. This is a photo of the guys by the corn field on their family farm.

I've based my layout on the gorgeous Girlie Grunge Sketch-n-Color created for Donna by Mistra Hoolahan. I hope you'll grab some of Donna's fabulous products and join me in using this month's color palette and sketch.

"Life Is Good"
Life is Good by Tracey Sabella for Donna Salazar, handcrafted flower, masculine, chicken wire


Tips and Techniques
Life is Good by Tracey Sabella for Donna Salazar, handcrafted flower, masculine
Here's a close-up of the lower flower cluster. I've created the brown paper rose using patterned paper cut with Donna's Spellbinder's Rose Creations dies. The green twine flower is handcrafted as well and a tutorial can be found HERE

The Here & Now sentiment is fussy cut from the Natural Beauty embossed image sheet along with the birds flying at the top of the page, while the clouds are cut from the Family Jeans sheet.

Life is Good by Tracey Sabella for Donna Salazar, handcrafted flower, masculine
I've also tucked in a few feathers and strands of sisal fibers. I've altered the background with chicken wire stenciling, splatter, and Donna's Sea Breeze Smooch Spritz. I've even tucked in some crafting chicken wire next to the photo, in keeping with the farm photo.

Life is Good by Tracey Sabella for Donna Salazar, handcrafted flower, masculine
The blue flower is created with Donna's Spellbinders Bitty Blossoms dies using her Mix'd Media Stax 2 Mulberry Paper. I've spritzed it with her Clearsnap Sea Breeze Smooch Spritz and dry brushed all the flowers with gesso. The "friends" tag is cut with one of Donna's Creative Page Tabs dies.


Donna Salazar Products
GCD Studios ~ Natural Beauty - 12" Pad; Image Sheet
GCD Studios ~ Fun & Funky - 12" Pad
GCD Studios ~ Family Jeans - 12" Image Sheet; Die Cuts
GCD Studios ~ Mix'd Media Stax 2 - Mulberry Paper
GCD Studios ~ Botanique - 12" Pad; Bloom in Spring - 12" Pad
Clearsnap ~ Mix'd Media Inx - Denim 
Clearsnap ~ Mix'd Media Inx - Indigo
Clearsnap ~ Mix'd Media Inx - Stormy
Clearsnap ~ Smooch Spritz - Wood Stain
Clearsnap ~ Smooch Spritz - Sea Breeze
Spellbinders ~ Rose Creations
 Spellbinders ~ Bitty Blossoms
Spellbinders ~ Creative Page Tabs

Other Products
Petaloo ~ Penny Lane, Ruffled Roses, Sithouette
Petaloo ~ Textured Elements - Burlap Blossoms, Natural (1201000)
May Arts ~ Burlap Woven Ribbon, 1/2"
Darice - Hemp Twine, Green
Darice - Chicken Wire
Darice - Feathers
Decorative Sisal, Brown
Golden ~ Soft Gel, Matte
Liquitex ~ Gesso, Clear, White
Viva ~ Ferro Special Effect Paste - Graphite
Higgins ~ India Ink, Black
TCW ~ Chicken Wire REversed 12"
DCWV ~ Stencil (EM 033-00021)
Helmar ~ 450 Quick Dry Adhesive
Helmar ~ Premium Craft Glue
Helmar ~ Zapdots, Black 1/2" Round
Helmar ~ Liquid Scrap Dots
Spellbinders ~ Artisan X-plorer

Thanks for stopping by! I treasure your comments.

 ~ Blessings ~

Wednesday, September 17, 2014

"Hand in Hand" Mixed Media Card for Leaky Shed Studio

Our daughter, Elizabeth, and her husband, Andrew, will be celebrating their second anniversary next month. I've created a special celebration card for them featuring Leaky Shed Studio Chipboard with mixed media finishes.

"Hand in Hand"

Tips and Techniques
This Harja Flourish Zwei is just the right size to accent a flower or cluster on a card. I painted it with Clear Viva Crackle Paint, then when dry a blend of metallic/pearlized paints in colors pulled from the background. When the paint was dry, I spread glue randomly at the edges of the flourish and sprinkled with microbeads and mini marbles for some lovely shimmer.

The background was stenciled with the TCW Mini Art Is sentiment stencil and splattered with black ink. I've also placed pearls of Viva Halo Iridescent Glitter Liner around the cluster. The background edges were stitched then distressed with my Zutter Distrezz-it_All.

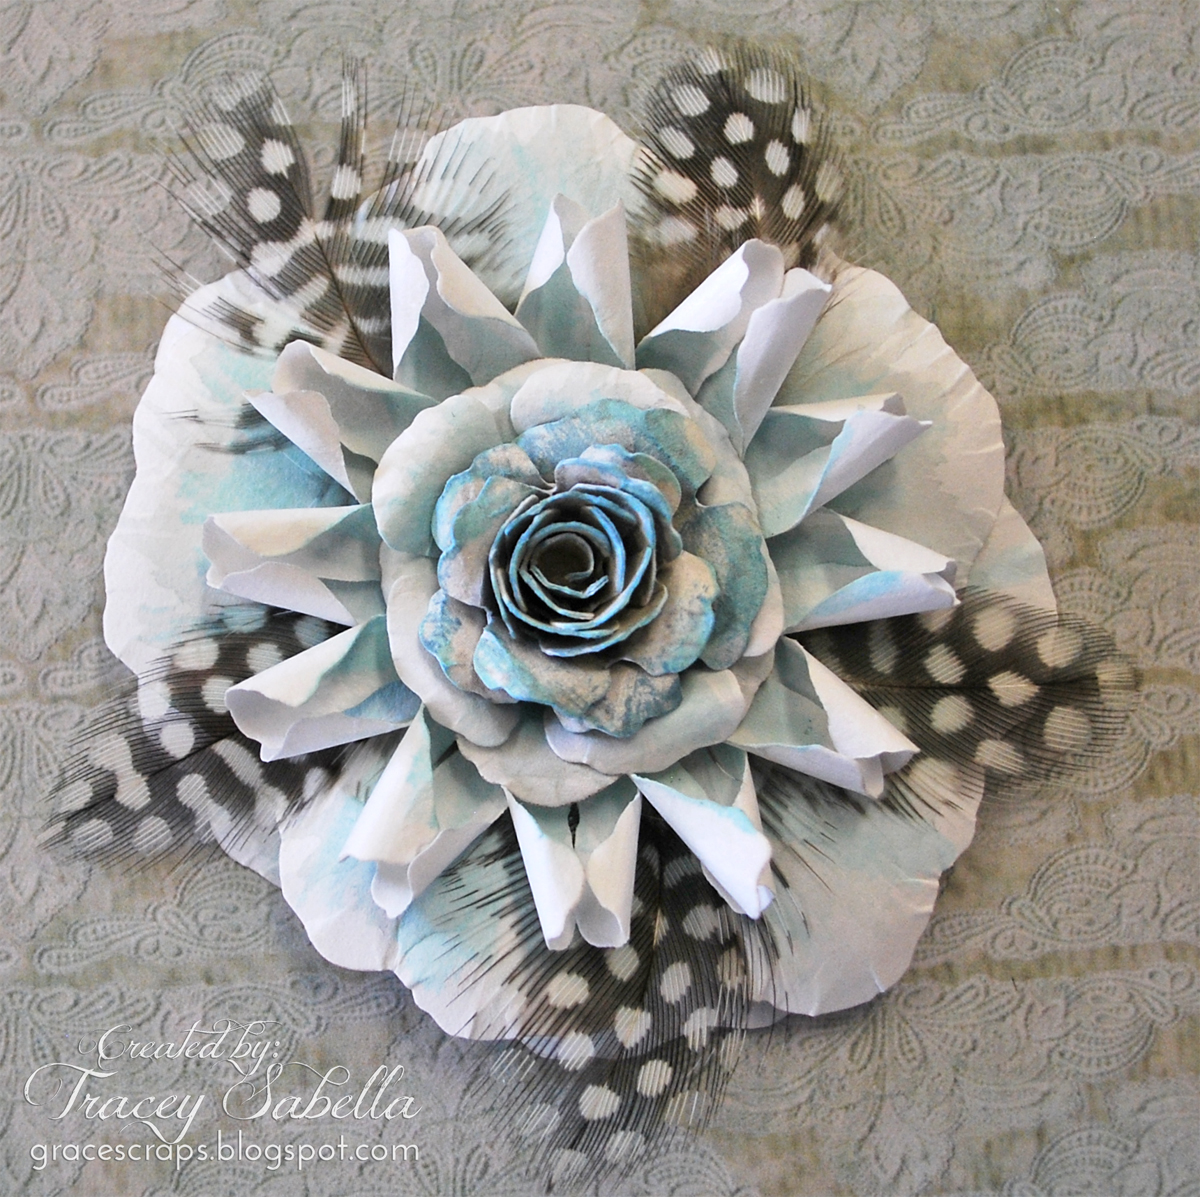
My Feathered Rose is created with white cardstock, ink, feathers, and Spellbinder dies by Donna Salazar. A tutorial for this flower can be found HERE

This Leaky Shed Studio Spring Dragonfly was painted with metallic paint and when dry, spread with glue and Twinkle Dust Glitter by Clearsnap. It shimmers so beautifully.

Here's a peek of the inside of the card with the sentiment stamped on a die cut. Seam binding ribbon is pulled through the edges and the background is lightly dry brushed with white gesso.

One final shot.

I hope you've been inspired to try out mixed media techniques
on your next Leaky Shed Studio project.


Leaky Shed Studio Products

Other Products
BoBunny ~ The Avenues
BoBunny ~ Enchanted Garden - Spellbound
Cardstock ~ White
GCD Studios by Donna Salazar ~ Natural Beauty Collection
Darice ~ Guinea Feathers
White Thread
Beadies ~ Microbeads; Mini Marbles
Clearsnap by Donna Salazar ~ Twinkle Dust Glitter ~ Pralines & Cream; Sugar Shimmer
Clearsnap by Donna Salazar ~ Mix'd Media Inx - Peridot; Stormy
Lumiere Paint ~ Halo Blue Gold; Pearlescent White; Pearlescent Blue; Pearl Turquoise
Viva ~ Crackle Paint - Clear
Viva ~ Glitter Liner - Halo Iridescent
Liquitex ~ Gesso - Clear; White
Golden ~ Light Molding Paste
Higgins ~ Waterproof Drawing Ink
Spellbinders Dies by Donna Salazar ~ Carnation Creations
Spellbinders Dies by Donna Salazar ~ Rose Creations
Spellbinders Dies by Donna Salazar ~ Bitty Blossoms
Spellbinders Dies ~ Pendants in Spades; Opulent Ovals
Memory Box Dies ~ Norwich Corner; Leafy Branch
TCW ~ Mini Art Is 6" Stencil
Cloud 9 Design Stamps ~ 8x6 Love Phrase
CTMH ~ Floral Happiness
Helmar ~ Gemstone Glue
Helmar ~ 450 Quick Dry Adhesive
Zutter by Donna Salazar ~ Distrezz-it-All
Tim Holtz ~ Grid Blocks
Ranger ~ Heat It

Thanks for stopping by! I treasure your comments.
~ Blessings ~

Tuesday, September 16, 2014

Leaky Shed Studio Sneak Peek

I have a card up on the Leaky Shed Studio blog today.
Please stop by their blog HERE, to check it out.

Here's a sneak peek:

Thanks for stopping by!
~ Blessings ~

Friday, September 12, 2014

Sweet Memories Layout for Helmar

Today, I'm sharing my final project as a regular Helmar designer. I'll be popping back now and then to share projects as a guest designer. 

I thought it would be fun to share how I started using and adoring Helmar products.It all started several years ago when I responded to a joint challenge with Helmar and May Arts. My design package included a bottle of Helmar 450 Quick Dry Adhesive. I had been a tape runner gal, but as I was using more mixed media products in my work found that the elements were not staying adhered to these textures. As I used Helmar 450 Quick Dry Adhesive on that challenge layout, I became hooked. When that bottle was gone, I had to have more and had my local scrapbooking store special order it for me. (It's now available at craft stores such as Hobby Lobby.)

My favorite reasons for using Helmar 450 Quick Dry Adhesive
~ Holding Power - my projects never fall apart
~ Adjustment Time - although it dries quickly, I have a few moments to adjust and straighten my adhered elements.
~ It's not stringy
~ No warped paper

I've now had the opportunity to work with most of their fabulous products. Although 450 Quick Dry Adhesive remains my favorite, I've been delighted with all the Helmar products.

Today I've created a mixed media layout. Of course, I've featured Helmar 450 Quick Dry Adhesive. Our niece has always adored our son, Joseph. When he married Rachel, that adoration extended to our beautiful daughter-in-law as well. Here's a fun double selfie from Labor Day. Those sweet smiles show just how much they adore each other.

"Sweet Memories"

Tips and Techiques
I used Helmar 450 Quick Dry Adhesive to adhere many of the elements on my layout, but I'm showing the process I used for this piece of crackled chipboard. 

Helmar 450 Quick Dry Adhesive holds very well, so there is no need to apply glue to the entire piece, I just spread it over the oval center portion.

I included this photo so you can see just how textured the background is where I adhered the chipboard needing a very strong adhesive, indeed!

Here's a close-up of this corner all finished. The Large yellow flower is positioned using Helmar Liquid Scrap Dots. The remaining flowers and butterfly are adhered with Helmar 450 Quick Dry Adhesive.

This gorgeous Leaky Shed Studio chipboard flourish is also adhered with Helmar 450 Quick Dry Adhesive but this time to one of the paper mat layers.

I have found that using adhesive under the clear portion of these clear light bulbs often bubbles and shows through. A nice dallop of Helmar 450 Quick Dry Adhesive behind the base holds it securely in place with no chance of visible bubbles forming. All flowers are adhered with Helmar 450 Quick Dry Adhesive.

A close-up of the chipboard portion of my title. I raised and adhered the photo mats in two layers using one layer of Helmar 1/2 inch round Zapdots on the lower portion and two Zapdots stuck together under the higher portion shown here.  To adhere the thread. I spread Helmar 450 Quick Dry Adhesive under the mat and tucked the thread into it. The thread showing is not glued down, but securely adhered under the mats. The mats are colored with Pan Pastels and to fix the color, I spritzed with Helmar Crystal Kote Fixative Spray.


Helmar Products

Leaky Shed Studio Products

Other Products
7 Dots Studio ~ 9th Wave - Golden Sand, Coral Reef
Prima ~ Melisse Belle
Prima ~ Butterflies - Divine
Prima ~ Candies Flower Bucket
Prima ~ Caboodles A
Prima ~ Firefly, Stone
Petaloo ~ Beaded Peonies - Small, Pink
Petaloo ~ Penny Lane - Ruffled Roses, Vanilla
Petaloo ~ Color Me Crazy - Mii Pearl Daisies
Petaloo ~ Spring Darjeeling Collection - Mini Daisies, w/Leaves
Petaloo ~ Mini Rose Clusters - Pink
Prima ~ Junk Yard Findings - Small Typo Bulbs
Prima ~ Say It in Crystals - Circles
Prima ~ Say It in Crystals #560577
May Arts ~ Iridescent White String - Really Reasonable Ribbon
Jolee's ~ All that Bling - Pink Round Studs
Thread - Pink, Cream
Liquitex ~ Gesso - Clear, White
Golden ~ Light Molding Paste
Lumiere Paint ~ Metallic Gold, Pearlescent Magenta, Halo Violet Gold
Clearsnap ~ Mix'd Media Inx - Stormy, Berries
Ranger ~ Distress Ink - Victorian Velvet, Pumice Stone, Vintage Photo
Ranger ~ Distress - Reinkers
Stampendous ~ Fran-tage Embossing Enamel - Shabby Pink
Luminarte ~ Twinkling H2O's - Black Cherry
Pan Pastels ~ Permanent Red Tine, Magenta, Magenta Shade
Prima ~ Sunrise Sunset Stencil 6"
Glitz ~ Clear Stamps - Distressing D2961
Art Gone Wild Stamps by Donna Salazar ~ Bubble Wrap, Chicken Wire
Ranger ~ Heat It
Darice ~ Heat Tool

Thanks for stopping by today! I treasure your comments.

~ Blessings ~

Wednesday, September 10, 2014

Anniversary Card with Feathered Rose Tutorial for Donna Salazar

Today I'm sharing an anniversary card created for my parents who are celebrating 55 years of marriage. I've used Donna Salazar's Spellbinder flower dies and inks to create my flowers and have shared a tutorial for the Feathered Rose below. 

Anniversary Card

Tips and Techniques
My Feathered Rose is created with Donna's Spellbinders Rose Creations and Carnation Creations dies and colored with her Mix'd Media Inx and Smooch Spritz by Clearsnap. Please scroll down for my tutorial. 

The remaining flowers are created from Donna's Spellbinder's Bitty Blossoms dies using her Mix'd Media Stax2 Mulberry paper, patterned paper, and cardstock. The edges are distressed with Donna's Zutter Distrezz-it-All.

The background is stenciled, dry brushed with gesso, and splattered, then dripped with Donna's Pralines and Cream Smooch Spritz. I've also used Smooch to color the printed canvas and cheese cloth tucked into my cluster. The leaves are cut with Carnation Creations dies. 

For the inside I've used Mix'd Media Inx to stamp and emboss the sentiment. I've distressed the background with Donna's Art Gone Wild stamps. I then spritzed with Pralines & Cream Smooch Spritz to add a little color and lots of shimmer. 

One final shot.

Feathered Rose Tutorial
**I photographed this tutorial as I was creating a flower for another project,
so you will see variations in the color and center.

Supply List
White Cardstock
Feathers
Spellbinders ~ Donna Salazar - Carnation Creations
Spellbinders ~ Donna Salazar - Rose Creations
Clearsnap ~ Donna Salazar - Mix'd Media Inx
Foam Pad
Stylus
Round Nose Pliers or other tool to curl petals
Spellbinders ~ Artisan X-plorer

Step 1.
I've numbered my dies from each set from the smallest to the largest. 
Cut two each of the following from white cardstock:
Rose Creations #3
Rose Creations #6
Carnation Creations #5

Step 2.
Use a stylus to cup the back of each of the rose petals. (Large & small)

Step 3.
Turn the rose sections over and use the stylus to cup the center. This will also raise the petals.

Step 4.
Cup each of the carnation petals by rolling the stylus from the center to the tip of each petal.

Step 5. 
Use round nose pliers to curl each of the petals to the right on one section and in the opposite direction on the other. If you don't have round nose pliers, you can curl the petals around something slender like a bamboo skewer or thin knitting needle.

Step 6.
Color flowers.
I twisted a Mix'd Media Inx pad onto a craft mat and spritzed with water. I used this like water color paint and brushed it onto the flowers with a paint brush. The centers will be covered, so don't need colored. The petal tips are left white.

Step 7.
Glue the largest petals together, offsetting the petals as shown.

Step 8.
Select 5 or 10 similar sized feathers.
For this flower I used 5.
The flower on my card uses 10.
If using 5 feathers - adhere between each petal.
If using 10, adhere between each petal, and also in the center of each petal.
Place so the feathers extend over the edges about the same distance. They may not line up in the center equally, but that's just fine, since it will be covered up with the next layer.

Step 9.
Adhere the carnation petals together, offsetting the petals as shown.
The petals will curl into each other since they are curled in opposite directions.
Glue these petals over the feathers.

Step 10.
Use the round nose pliers to curl back the edges of the smaller rose petals.
Offset and adhere as shown.
Step 11.
Add center.
A variety of centers can be used. Here I've used a medium bitty blossom and for the flower on my card, I used stamen. You could also use a brad, button, or large rhinestone.


Here's a side view.

And a close-up from my card.


Donna Salazar Products
GCD Studios ~ Natural Beauty; Family Jeans
GCD Studios ~ Mix'd Media Stax 2
Clearsnap ~ Mix'd Media Inx - Vintage; Truffle; Pewter; Mossy
Clearsnap ~ Mix'd Media Inx CHOX - Butternut
Clearsnap ~ Mix'd Media Inx Embossing Powder - Truffle
Clearsnap ~ Smooch Spritz - Pralines & Cream; Woodstain
Spellbinders ~ Rose Creations
Spellbinders ~ Carnation Creations
Spellbinders ~ Bitty Blossoms
Art Gone Wild Stamps ~ Crackle; Heart Applique; Family Portraits
Zutter ~ Distrezz-it-All

Other Products
Cardstock ~ Kraft; White; Butterscotch
Little Yellow Bicycle ~ Canvas Stickers - Frames
Darice ~ Feathers
Cheesecloth
Stamen
White Thread
Golden ~ Light Molding Paste
Liquitex ~ Gesso, white, clear
Spellbinders ~ Radient Rectangles
TCW ~ Mini Art Is 6" Stencil
DCWV ~ Stencil - heart
Cloud 9 Design ~ Love Phrase Stamp Set
Helmar ~ 450 Quick Dry Adhesive; Premium Craft Glue
Spellbinders ~ Artisan X-plorer
Ranger ~ Heat It
Sewing Machine

Thanks for stopping by today! I treasure your comments.

~ Blessings ~

Tuesday, September 2, 2014

"Experience Fun" Layout for Leaky Shed Studio and Once Upon A...Sketch

The September Once Upon A...Sketch Challenge is open. Although there is no journaling "theme" this month, there is a twist. You must include "handwritten" journaling on your layout!

I've created a fun and funky layout featuring the Leaky Shed Studio Ferris Wheel. My sister, Terry, and I enjoy going to Knoebels Amusement Park. We travel with friends Kelly and John. He is a camera enthusiast and captured this fabulous Ferris wheel shot. When I saw this Leaky Shed Studio piece, I knew this would be the perfect photo to pair with it.

"Experience Fun"


Journaling Theme: Open theme...with a twist

For this month's challenge, you can scrap about any theme BUT you need to include your own handwritten journalling on your page!

You are free to interpret our theme ANY WAY you like. Whilst the theme is open, you MUST base it on the sketch below and include your HANDWRITTEN journaling ON YOUR PAGE. Acceptable journaling is MORE than just a sentence, or generic writing such as date/place etc. . . It needs to be present and at least 3 lines long.

September Sketch
I've flipped the sketch as follows:

For challenge details, more design team inspiration,
and to link your project go HERE.

Tips and Techniques
I heat embossed the Ferris wheel and towers with silver embossing powder. The fabulous engraved design in the center stayed in tact through this process. Each of the cars is embossed with a different color of Fran-tage embossing enamel. I added pieces of chain to the spokes for added texture and gears to the center.

In places across the page, I've spread transparent Viva Crackle Paint, then spritzed with mist to highlight the cracks. 

Yes, you know how I adore changing things up in non-traditional ways. Rather than placing all of the cars around the wheel, I've extended three of them from my photo "attaching" them with lengths of chain. 

I layered strips of sheetrock tape under the photo, then stenciled with Viva Special Effects Paste in Amber Gold to stencil around the photo.

I transformed these dated metal word pieces by brushing them with a couple colors of metallic paint, then sanding the raised portions to highlight the words. The copper gears were grunged by dabbing on some of the same metallic paint for a patina effect. 

More gears and another view of the grungy background.


Leaky Shed Studio Product

Other Products
7 Dots Studio ~ 9th Wave - Wavy Ocean
Sheetrock Tape (Hardware Store)
Chain (Jewelry Department)
Gears
Tattered Angels ~ Glimmer Mist - Sapphire
Ranger ~ Dylusions Ink Spray - Bubblegum Pink
Viva ~ Croco Crackling Colour - transparent
Viva ~ Ferro Special Effect Paste - Amber Gold
Ranger ~ Embossing Powder - Silver
Stampendous ~ Fran-tage Embossing Enamel - Aged Aqua; Aged Rose; Aged Marine; Aged Teal; Aged Scarlet; Aged Green
Lumiere Paint ~ Halo Blue Gold; Pearlescent Blue
Pigma ~ Micron 05 - Blue
Stampers Anonymous (Tim Holtz) ~ Layering Stencil - Dot Fade
TCW ~ Diamonds 12" Stencil
Tombos ~ Mono Multi Liquid Glue
Helmar ~ 450 Quick Dry Adhesive
Helmar ~ Zapdots 1/4" Square, white
Darice ~ Heat Tool

**Photo credits ~ John Petrachkoff

Thanks for stopping by today! I treasure your comments.
~ Blessings ~