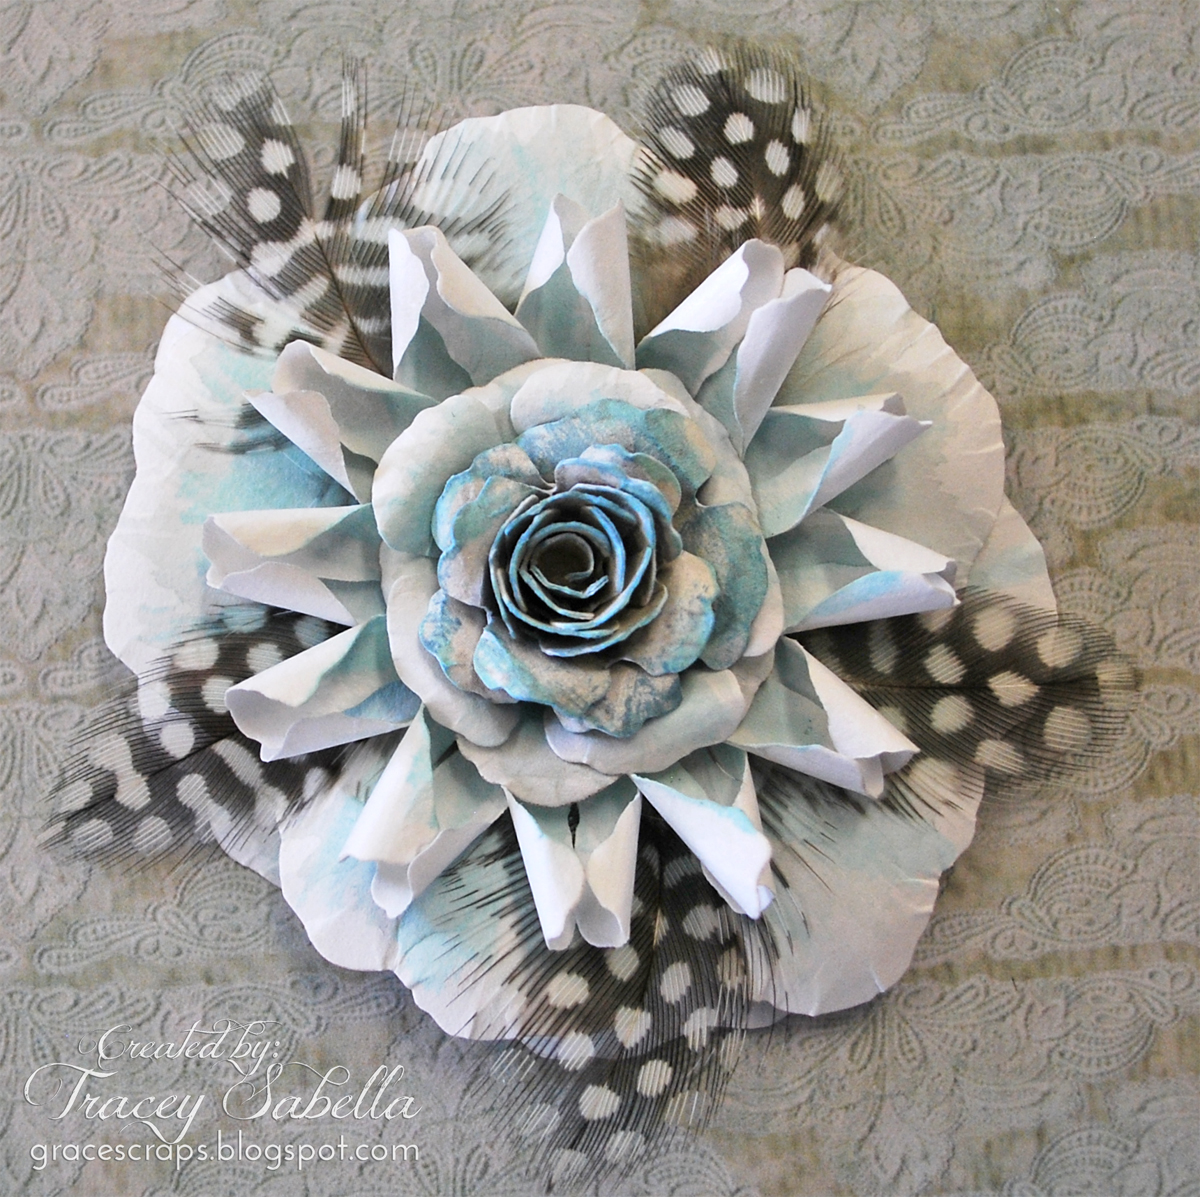
Today I'm sharing an anniversary card created for my parents who are celebrating 55 years of marriage. I've used Donna Salazar's Spellbinder flower dies and inks to create my flowers and have shared a tutorial for the Feathered Rose below.
Anniversary Card
Tips and Techniques
My Feathered Rose is created with Donna's Spellbinders Rose Creations and Carnation Creations dies and colored with her Mix'd Media Inx and Smooch Spritz by Clearsnap. Please scroll down for my tutorial.
The remaining flowers are created from Donna's Spellbinder's Bitty Blossoms dies using her Mix'd Media Stax2 Mulberry paper, patterned paper, and cardstock. The edges are distressed with Donna's Zutter Distrezz-it-All.
The background is stenciled, dry brushed with gesso, and splattered, then dripped with Donna's Pralines and Cream Smooch Spritz. I've also used Smooch to color the printed canvas and cheese cloth tucked into my cluster. The leaves are cut with Carnation Creations dies.
For the inside I've used Mix'd Media Inx to stamp and emboss the sentiment. I've distressed the background with Donna's Art Gone Wild stamps. I then spritzed with Pralines & Cream Smooch Spritz to add a little color and lots of shimmer.
One final shot.
Feathered Rose Tutorial
**I photographed this tutorial as I was creating a flower for another project,
so you will see variations in the color and center.
Supply List
White Cardstock
Feathers
Spellbinders ~ Donna Salazar - Carnation Creations
Spellbinders ~ Donna Salazar - Rose Creations
Clearsnap ~ Donna Salazar - Mix'd Media Inx
Foam Pad
Stylus
Round Nose Pliers or other tool to curl petals
Spellbinders ~ Artisan X-plorer
Step 1.
I've numbered my dies from each set from the smallest to the largest.
Cut two each of the following from white cardstock:
Rose Creations #3
Rose Creations #6
Carnation Creations #5
Step 2.
Use a stylus to cup the back of each of the rose petals. (Large & small)
Step 3.
Turn the rose sections over and use the stylus to cup the center. This will also raise the petals.
Step 4.
Cup each of the carnation petals by rolling the stylus from the center to the tip of each petal.
Step 5.
Use round nose pliers to curl each of the petals to the right on one section and in the opposite direction on the other. If you don't have round nose pliers, you can curl the petals around something slender like a bamboo skewer or thin knitting needle.
Step 6.
Color flowers.
I twisted a Mix'd Media Inx pad onto a craft mat and spritzed with water. I used this like water color paint and brushed it onto the flowers with a paint brush. The centers will be covered, so don't need colored. The petal tips are left white.
Step 7.
Glue the largest petals together, offsetting the petals as shown.
Step 8.
Select 5 or 10 similar sized feathers.
For this flower I used 5.
The flower on my card uses 10.
If using 5 feathers - adhere between each petal.
If using 10, adhere between each petal, and also in the center of each petal.
Place so the feathers extend over the edges about the same distance. They may not line up in the center equally, but that's just fine, since it will be covered up with the next layer.
Step 9.
Adhere the carnation petals together, offsetting the petals as shown.
The petals will curl into each other since they are curled in opposite directions.
Glue these petals over the feathers.
Step 10.
Use the round nose pliers to curl back the edges of the smaller rose petals.
Offset and adhere as shown.
Step 11.
Add center.
A variety of centers can be used. Here I've used a medium bitty blossom and for the flower on my card, I used stamen. You could also use a brad, button, or large rhinestone.
Here's a side view.
And a close-up from my card.
Donna Salazar Products
GCD Studios ~ Natural Beauty; Family Jeans
GCD Studios ~ Mix'd Media Stax 2
Clearsnap ~ Mix'd Media Inx - Vintage; Truffle; Pewter; Mossy
Clearsnap ~ Mix'd Media Inx CHOX - Butternut
Clearsnap ~ Mix'd Media Inx Embossing Powder - Truffle
Clearsnap ~ Smooch Spritz - Pralines & Cream; Woodstain
Spellbinders ~ Rose Creations
Spellbinders ~ Carnation Creations
Spellbinders ~ Bitty Blossoms
Art Gone Wild Stamps ~ Crackle; Heart Applique; Family Portraits
Zutter ~ Distrezz-it-All
Other Products
Cardstock ~ Kraft; White; Butterscotch
Little Yellow Bicycle ~ Canvas Stickers - Frames
Darice ~ Feathers
Cheesecloth
Stamen
White Thread
Golden ~ Light Molding Paste
Liquitex ~ Gesso, white, clear
Spellbinders ~ Radient Rectangles
TCW ~ Mini Art Is 6" Stencil
DCWV ~ Stencil - heart
Cloud 9 Design ~ Love Phrase Stamp Set
Helmar ~ 450 Quick Dry Adhesive; Premium Craft Glue
Spellbinders ~ Artisan X-plorer
Ranger ~ Heat It
Sewing Machine
Thanks for stopping by today! I treasure your comments.
~ Blessings ~


Happy Anniversary to your parents.. this card is stunning, the flower is exquisite!!
ReplyDeletewow beautiful card and flowers. x
ReplyDeletegorgeous card and flowers :)
ReplyDeleteI cannot believe you have the patience to create your own flowers.....I am in awe!! And I'm also in awe of your folks' making it to 55 years....that is WELL worth the celebration!!! Your card is beautiful....my favest bit [besides the flower & your bg!!] is that little heart cut into the corner.....says it all:):):)
ReplyDeleteWauw, celebrating 55 years married is really awesome, have a great time with them.
ReplyDeleteIt's a gorgeous card with beatiful flowers, thanks for sharing.
Greetings, Danoesja
Wow 55 years is an awesome achievement. Your card is gorgeous.
ReplyDelete