Saturday, February 11, 2012

Remember Grandpa ~ Bird is the Word using The Stamping Scrapper Sketch

When I found this older photo of Joseph and his Grandpa Sabella, I knew I wanted to do a special layout for it. The challenge over at Bird is the Word to use "Remember" gave me the perfect title for this page. Grandpa Sabella was a very special man and we miss him a lot. 


I used this January Sketch by Shannon ~ The Stamping Scrapper:


Be sure to stop by Shannon's blog to see what her talented DT created with this fab sketch and let her know what you think. She'd enjoy hearing from you if you decide to use it. 

Techniques:

Masking ~ I cut letters on my Gazelle for the word remember and backed them with Xyron adhesive. I placed them down the side of the layout and inked over top of them, then carefully removed them with Un-Du, leaving a masked image for my title. 

Postage Stamp Border ~ A 3/4 inch circle punch would have made this task so much easier, but since I didn't have one, I cut a 3/4 inch circle and used it as a template to place my half circles around these two blocks, then fussy cut the circles out of the borders. Since I was going to distress the edges, they didn't have to be perfect.

Tag ~ I cut the tag from chipboard at Scrapbooking By Lisa - our local scrapbooking store on their AccuCut machine. I then ran it through the Tim Holtz snowflake embossing folder so the the snowflakes would be raised. I painted the entire tag with crafter's acrylic paint in several shades of blue - letting portions show through as I layered the coats of paint. I then applied an antique white to the raised snowflakes. Once this was dry I decorated it with the hand written and hand stitched tag, lace, and other embellishments. 

Cutting and Inking ~ I used my Cricut and Gazelle to cut out the mats and corner feature. I inked the edges and to the corner I brushed on some stickles for some shimmer. 

Lacing ~ I placed eyelets on both sides of the postage blocks and then laced between - I was inspired by Gabrielle Pollacco's gorgeous work for the lacing and postage stamp blocks. 

Paint ~ to age the metal embellishments, I dabbed on antique white paint, and rubbed most of it off to leaving paint in the cracks and crevices, which not only gave the metals some age. It also made the lettering easier to read on the key and tags. 

I entered this at:
Scrapbook Sisters Challenge #8 ~ Snow (Feb 29)

Thanks for dropping by. I treasure your comments!

~ Blessings ~

Monday, February 6, 2012

"Get Your Game On" RAK Winner

First I'd like to remind everyone that you have until Midnight CST on Sunday February 12 to create and post your projects to be eligible for the Scrap-Friendzy Blog Hop grand prize. See my "Get Your Game On" update post for details.

Since some of you posted more than once, I created a list of commenters giving you each one chance. I then used the Random Number Generator to pick:


Which makes the lucky winner - MANDY - Congratulations Mandy for winning my crocheted flowers.

~ Blessings ~


Friday, February 3, 2012

Scrap-Friendzy's Get Your Game On Blog Hop

Welcome to Scrap-Friendzy's "Get Your Game On" Blog Hop! Our DT has come up with an exciting game plan that'll get you scrappin' this weekend! Our hop runs from now until February 5 at Midnight CST. (That's 1 am - Feb 6 for my fellow EST scrappers!)

If you're blog hopping along, you should have arrived from Amy's blog. If you just happened by and would like to join in on the fun, go to the Scrap-Frienzy blog to start at the beginning.

But this is not your average Blog Hop! We've got some extra fun with a Touchdown Challenge! At every stop on your hop, you'll find a special "ingredient" from each DT Member. Your challenge is to take any 6 of the "ingredients" and use all 6 to complete a single project. If you're brave and daring, you can make a field goal for the extra point by using 7 of the listed "ingredients" to get your name in the hat a second time for our blog hop grand prize. All you have to do is upload your project in the Gallery and link it back to the "Get Your Game On" blog hop thread in the Scrap-Friendzy forum to be eligible for the Grand Prize and earn 25 bonus Friendz Pointz for February Girlfriend of the Month!!

Don't forget ~ This BLOG HOP is just the beginning and there will be challenges all through the month of February to earn poinz for your chance to be featured as Girlfriend of the Month!

Since this is a Superbowl weekend blog hop, I have a football rivalry layout to share with you. This is a layout of our son, a Cleveland Browns fan bantering with Rachel, now his wife and an avid Pittsburgh Steelers fan. Anyone from this part of the country knows what huge rivals these two teams are.


For details on this LO see my Love is a Battlefield post.

As you can see I used plenty of metal on this layout. So the "ingredient" I have for you to use is metal - anything metal ~ it might be wire, a brad, eyelets, a button or even a key ~ you get the idea. 

Don't forget, once you create your project with 6 or 7 design team "ingredients," link your layout at Scrap-Friendzy in two places - the gallery and in the forum. I can't wait to see what you create.

What's a blog hop without prizes. If you're one of my followers (new or a regular) and leave a comment here on this post by the February 5th deadline, you're name will go in the hat for a set of hand crocheted flowers - created by me. Several each in sparkly black and sequined beige. Sorry I'm away for the day and didn't have a chance to post a photo for you.

You're next hop is our talented Amanda.

Just in case you've gotten lost along the way here's a list of hops by our Scrap-Friendzy design team.

Tracey You're Here now.

Thanks for hopping by!!

~ Blessings ~

Wednesday, February 1, 2012

Christmas Pageant ~ ScrapFIT Workout #61 Blank Canvas

This is an old photo of our oldest three children when they were little all dressed up for a home school Christmas Pageant. 


Every good layout starts out as a blank canvas! For this workout we want you to start out with a WHITE background paper and build you layout from there! This leaves your opportunity for creativity wide open!

I was so excited to see this workout challenge! I had a lot I wanted to add to my white background, so I started with a sheet of thin white chipbord so it would hold up to the inking, stamping, and embossing. How much fun to get to design my background around this precious photo. 


The winner of this workout will receive this wonderful kit from K Studio


Be sure to head over to ScrapFIT to see the gorgeous inspiration by our talented DT, then create a layout of your own to link up by February 29 for your chance to win.

Techniques:


Stamping ~ Because I planned to rub Distress Ink over my stamped images, I selected Clearly Better Ink - a permanent ink so that my images would stay crisp later when I rubbed distress ink over top. Because the Clearly Better Ink dries slowly, make sure that it is completely dry before applying the distress ink over top - you can use your heat tool to dry it if you don't want to wait for it to air dry. I'm not normally into wing images, but thought they would be perfect around this photo. I just love the personal touches that can be added when creating my own background paper.

Inking ~ Once my stamped images were dry, I rubbed a light layer of Broken China Distress Ink over the entire page.

Embossing ~ heat embossed images act as a resist, so I tapped decorative corner stamps into an embossing pad and stamped each corder, after sprinkling on clear embossing powder, I heat embossed just until the powder turns clear. If you over heat, the embossing medium will spread out and you will lose your design. I also embossed a flourish design across the bottom between the corners. 

Second Inking ~ Once you have your embossed design in place, now you can rub a darker ink over top - I used a combination of Iced Spruce and Evergreen Bough with a little Walnut Stain just at the edges. As you rub the darker ink over the embossed area, the embossed design becomes apparent as it resists any ink rubbed over top of it, while the stamped image and lighter ink still show through. When I saw the resist paper being sold, I thought it was something I could created myself. 

Embossing with Ink ~ Embossing powder can also be applied to slow drying ink. For the decorative frame around my title, I sprinkled on clear embossing powder while the ink was still wet and heated to melt. The result is a raised image.

Paper
White Chipboard - Stash

Embellishments
Petaloo Floral Embellishments Canterbury Collection - Magnolia Blossoms, Canterberry Spray, CMC Flowering Vine Spray, CMC Berry Spray

Technique Products
Zig Writer - Chocolate
TPC Studios Clearly Better - Chocolate
Ranger Distress Ink - Brushed Corduroy, Broken China, Iced Spruce, Evergreen Bough, Walnut Stain, Tumbled Glass
Ranger Embossing Powder - Clear
Cloud 9 Design Rubber Cling Stamps - 4 x 8 Banners
Bo Bunny Stamp & Store Ornamental
Visual Artistry - Stamper's Anonymous - French Connection, Purely Random, Regal Flourish
7 Gypsies Clear Stamps - Avignon, Venice
Hot Off the Press - Artful Collection

Tools
Fiskars Craft Knife
Fiskars Self-healing Mat
Visual Artistry Grid Blocks
Scotch ATG
Moo Eraser

Thanks for stopping by ~ I treasure your comments!

~ Blessings ~ 

Tuesday, January 24, 2012

Birthday Card ~ Bo Bunny Card Challenge Tuesday

I tried my hand at something a little different. We're having a Sketch-A-Thon at Scrap-Friendzy. I created a card sketch and a birthday card for our daughter who enjoys a fun and funky style.

I used the card challenge at Bo Bunny to use the following items on her card: ribbon, at least two buttons, patterned paper with dots, and chipboard. 


Here is the card sketch I posted on Scrap-Friendzy - my first. 


I enjoy dabbling in a variety of styles, so it was fun 
to create a card based on our DD's fun style.

One of the things I enjoy about using Bo Bunny Products is the ability to mix and match from different lines. For this card I used six Bo Bunny Products from six different lines: 

Bo Bunny Paper
Love Shack ~ Shimmy
Flower Child ~ Harmony
Paradise ~ Lingo

Bo Bunny Embellishments
Vicki B. ~ Buttons
Gabrielle ~ Layered Chipboard
Garden Girl ~ Noteworthy

Other Products
Black Cardstock - Stash
Distress Inks ~ Broken China, Rusty Hinge, Black Soot, Aged Mahogany
Clearly Better Ink ~ Black
Happy Birthday Stamp - Stash
Ribbon - Stash
Scotch ATG Tape Runner
Fiskar Craft Knife
Fiskar Self-Healing Mat
Martha Stewart Ruler
Boss Kut Gazelle

Techniques
Ribbon ~ The color of my ribbon was too light and too blue, so I used a foam makeup wedge to rubb Broken China and Evergreen Bough Distress Ink into the ribbon to get just the right color. The dots acted as a resist and stayed perfectly white. 

If you decide to try a card with my sketch, I'd love to see it. Leave a note and link in my comments and I'll hop right on over. Better yet, come on over to Scrap-Friendzy and join in for the Sketch-A-Thon fun!!

Thanks for stopping by ~ I treasure your comments!

~ Blessings ~

Sunday, January 15, 2012

God's Serenity ~ ScrapFIT Workout #60 - It's the Simple Things

It's time for a new Workout at ScrapFIT. I hope you'll join us in creating and posting a layout for:


Sometimes it's the simple things in life that mean the most! Show us what simple little thing means so very much to you! Is it a picture your child drew, a family heirloom, a special recipe, a book - we are dying to know!

Here's the layout I created to provide some inspiration. My parents live on charming Westville Lake, and my mom took this gorgeous photo one morning with the rays of sunshine peeking through the mist rising from the lake. The simple beauty of God's creation is awesome!!


Be sure to head on over to ScrapFIT to see the fabulous inspiration by the FITgirls.

The winner of this Workout will receive this amazing collection of goodies sponsored by Boys Rule Scrapbook Kits.


Boys Rule is a monthly scrapbook kit club for those who love to paper craft boy subjects. Cool embellies are paired with handsome papers each month that you will love to play with and includes exclusive embellies with each kit . . . all different and very unique. It's fun to create when you have a complete kit that is designed for the memories of dirt, grunge, and smell things!


I tried some new techniques on this page that I'll be posting later this afternoon, so  be sure to stop back by for some close-up shots and technique details. 

Thanks for stopping by, I treasure your comments!

~ Blessings ~


Thursday, January 5, 2012

New FITgirl Team Announced at ScrapFIT

It's official. Sara at ScrapFIT has announced the new team of FITgirls.

I am so excited to have the opportunity to return for another term along with:

Returning FITgirls:

Sara Zenger - Head Coach/Owner

Missy Whidden - Weekend Warm-Up Coach

Sheila Burns - Step Class Coach


Our New FITgirls:


Starting February 1, these talented scrap artists will inspire you to keep in tip-top scrappy shape. Hop on over to ScrapFIT to enter one of our fabulous Workouts.

~ Blessings ~ 

Sunday, January 1, 2012

Love Never Fails ~ ScrapFIT Workout #59 - Inspired by the Music!

I have to admit, I was a little stumped when I saw this challenge, but then I remembered Joseph and Rachel's engagement photos included some of Joseph in his Cleveland Browns jersey and Rachel in rival Steelers jersey "battling" it out.

ScrapFIT Workout #59 ~ Inspired by the Music!
 - Love is a Battlefield

I love 80's music and we are working out with Pat Benatar this week! Her song "Love Is A Battlefield" is your inspiration for this workout! I can't wait to see how this makes you move! Your can find the lyrics here.


I hope you are inspired to put your scrapping to the music and join us for this fun Workout. Be sure to hop on over to ScrapFIT to see the inspiration by our fabulous DT!!

The winner of this Workout will receive this amazing collection of goodies
sponsored by Boys Rule Scrapbook Kits


Boys Rule is a monthy scrapbook kit club for those who love to paper craft boy subjects. Cool embellies are paired with handsome papers each month that you will love to play with and includes exclusive embellies with each kit . . . all different and very unique. It's fun to create when you have a complete kit that is designed for the memories of dirt, grunge, and smelly things!


Techniques:


My metal, eyelet, and wire work was inspired by Misty at Perfectly Imperfect - Thanks for the inspiration, Misty!!

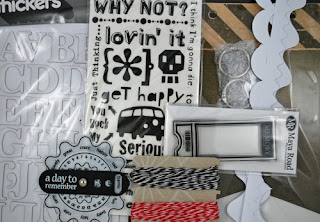
Metal Work ~ The metal work was created with aluminum tape from the hardware store - in the piping section. I adhered it to a piece of cardstock then placed it over foam. With craft metal working tools, I doodled random images into the metal then ran a couple different metal roller tools over it to give the dots and lines. Once it was sufficiently distressed, I used Ranger alcohol inks with the felt tool to apply rust, terra cotta, caramel, and espresso to the metal strips. (If you have crafting metal in your stash that is large enough - that would work as well. Of course with this distressed look - pieced together metal strips would work just as well.)

Eyelets and Wire ~ I randomly set eyelets into the outer and inner papers - 9 on each outside edge and 8 on the inside edges so the wire would share an inside eyelet at each corner. I had this old rusty scrapbook wire in my stash and knew it would be perfect here. I cut each wire a little longer than the span between the eyelets and bent each end underneath to hold it in place. I wanted a random grungy look, so I also bent most of the wires a bit to avoid a stiff look. 


Punchenella ~ I like to use what I have on hand, and a friend had given me this length of iridescent punchenella with square holes. The design was perfect, but the color not so much, so I ripped the punchenella to give rough edges and then painted it black with craft acrylic paint, Voila - transformed into the perfect grungy accent. 

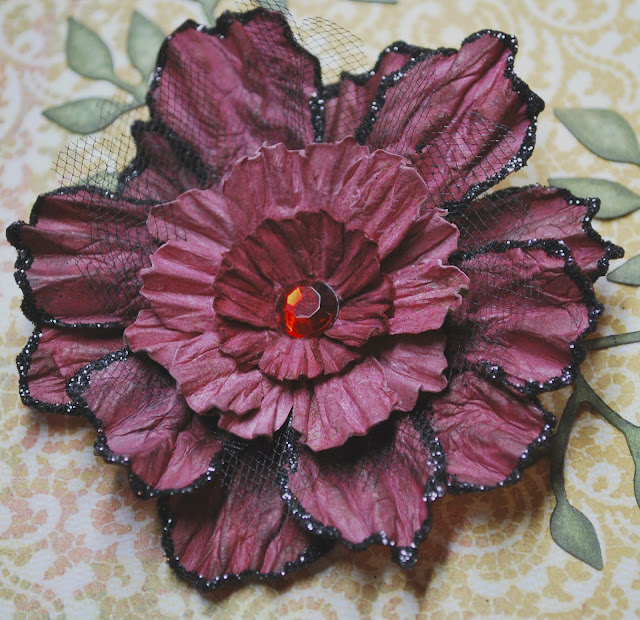
Altered Flowers ~ I had these wonderful charcoal Petaloo Flowers, but they weren't quite dark enough, so I inked two of them up with my pumice stone Distress Ink, to get the color I was looking for and removed the bright green leaves from the bottom. 

Layered Vintage Buttons ~ I have a collection of vintage buttons  inherited from my mother-in-law and picked up at yard sales. I applied black alcohol ink to a couple silver filigree buttons and  then sanded for the raised details to stand out. I used glue dots to adhere them over larger black buttons. The black buttons were old and used with wonderful wear marks/patina on them - if they were new, you could sand them randomly to give then some "age." I also included one large black button with wonderful detail without the layered metal button. If you don't have vintage buttons in your stash, fabric stores like Joanns hae a nice collection of buttons that should work with a bit of distressing. 


Dictionary Page ~ Take a look at the upper left corner of the layered dictionary page and you will see the word "battlefield" ~ a nice little tie-in for this fun Workout. I have an old unabridged dictionary that lost its cover, so I can find just the right page for my projects. I inked the page to age it and rubbed the torn edges with some black soot Distress Ink. If you don't have an old dictionary laying around (one of the benefits of being a home educator - LOL!) you can do a Google image search for dictionary pages and print one up to use on your layout. 

Misting/Stamping ~ Although my background paper has a grungy feel, I wanted even more, so I misted and then stamped with several grungy background stamps using pumice stone distress ink. Then, with the darker black soot, stamped my focal images of 1 Corinthians 13 and the grungy heart image to which I added in my handwriting "Love Never Fails" to finish out that verse and bring home the focus of this page. 

Paper
Authentique ~ Glowing - Music Notes
Idea-ology ~ 12 x 12 Paper Stack - Lost and Found

Embellishments
Around the Block ~ Flair - Big Metal Brads
Pixie Press ~ Antique Charm Collection - Rusty Metal Wire
Idea-ology ~ Keyholes, Gears, Word Sticks
Petaloo ~ Canterbury Rose - Charcoal, Canterbury Collection - Holiday Leaves, Gilded
Punchenella ~ Thanks Mandy!
Black Lace x 2 ~ Stash

Technique Products
Aluminum Tape ~ Shurtape AF912 (from hardware store)
Stripped Cardboard ~ Found Objects Stash
Glitz ~ Clear Stamps - Distressings
Recollections Rubber/Wood Stamp - Script
Prima ~ Clear Acrylic Stamp - Brick 3
Visual Artistry ~ Clear Stamps - City Central
Cloud 9 Design ~ Rubber Cling Stamps - 8 x 6 Love Phrase
Ranger Distress Inks ~ Pumice Stone, Black Soot, Rusty Hinge, Walnut Stain
Ranger Alcohol Ink ~ Ruse, Caramel, Terra Cotta, Espresso
Smooch Spritz ~ Log Cabin
Zig ~ Writer - Pure Black
Eyelets ~ Stash

My journaling was inspired by the Bird is the Word Challenge to use the word Wonder. "It's a wonder they found love despite the Browns ~ Steelers rivalry."

One more important reminder. The Scrap-Friendzy Sketch-A-Thon starts today. If you're looking to get a jump start on your 2012 scrapping, come on over and join us for a sketch every day in January along with RAK's, and games. The girlfriend with the most pointz at the end of the month gets a prize package and will be featured as the "Girlfriend of the Month" during the month of February with the opportunity to create a challenge for our February theme. I hope you'll come on over and join us!!

Thanks for dropping by! I treasure your comments.

~ Blessings ~

Friday, December 23, 2011

All Dressed with Time to Play ~ The Stamping Scrapper December Sketch Reveal


I enjoyed using Shannon’s fabulous sketch to create this layout of Joseph and his groomsmen having some fun after getting dressed and ready for the wedding.


Here is The Stamping Scrapper Sketch for December:


Be sure to head on over the The Stamping Scrapper to see what Shannon’s talented Design Team did with her sketch. I hope you’ll be inspired to try out her sketch as well.

Techniques:

I stuck with the basics on this one.

Inking – I inked the edges of each paper to give a little more  dimension. If you are using chalk ink, you can apply the ink directly from the ink pad to the paper. I’ve been using mostly distress inks these days and have found for a lighter touch I like using a foam applicator in the form of a make-up wedge to apply the ink. While other inks can be applied with a variety of applicator materials, distress inks work best with some type of foam.

The outer B/W floral paper was from a different collection and the white portions were too white so I just used the Ranger foam applicator to apply some pumice stone Distress Ink over the portion that would be showing. Often a paper that is a little off in color can be corrected by rubbing some distress ink over the paper. If in doubt try it out on a piece of scrap paper.

Die Cut Border Strips ~ These come in such large quantities that I rarely buy them. These came from a scrapping buddy who had more than they needed. Don’t you love to trade extras with scrappy friends?? Instead of using the entire strip, I cut two of them into pieces to use around the layout. I can be a little OCD when it comes to scrapping and didn’t like the white edge which would be obvious between the black/grey borders and the red backgrounds, so I used a brush marker to ink the edges of the border strips before applying to the page. 


I've entered this layout in Bird is the Word ~ Time challenge.

Thanks for stopping by! I treasure your comments.

~ Blessings ~

Thursday, December 15, 2011

Wedding Box ~ ScrapFIT Workout #58 ~ Mini Pics Reveal

It's time for a fabulous new Workout at ScrapFIT!!


It seems when something is smaller than normal size it makes it better or cuter! For this Workout you will need to work with Mini Pictures! Then need to be wallet size or smaller - you can have as many or as few as you would like. 

Rachel and Joseph had a beautiful wedding on December 10. I decided instead of a layout like I usually do, I would create a card box for the reception. I placed tiny black and white photos individually matted in a red glitter paper, from their engagement photos and one of Rachel's favorites from Thanksgiving on the edge of the box lid. I so appreciate the wonderful Workouts at ScrapFIT. I'm sure I would have never thought of this idea without this fabulous prompt. So I hope you will join me in embracing this Workout challenge. I can't wait to see what you post on Mister Linky at ScrapFIT!!


We are blessed again to have
as our sponsor for Workout #58

The winner for Workout #58 will receive this WONDERFUL "Old School" kit featuring Pink Paislee!!!


Be sure to stop by the store and check out their monthly kits for only $15 each!!

Now, hop on over to ScrapFIT to see the Design Team inspiration. 

Don't forget, Sara is looking for the next ScrapFIT Design Team and submissions are due by January 1.

Techniques:
Box ~ I used a plain cardboard box that had the shape I was looking for. I cut the top flaps off and used another large piece of cardboard to create the lid with a two inch edge. I cut the card slot, then covered the lid in black moleskin fabric. I used my Scotch ATG to adhere the fabric. I then sprayed the box one side at a time starting with the smaller sides as well as the back of the paper to adhere to the box. I went back and used the red backed tape to secure the edges of the paper as they were a little loose with just the spray adhesive. Then around the bottom, I used a band of black grosgrain ribbon.


Flowers ~ I created these flowers with the Spellbinders Rose Creations die. First I created and glued together the center "bud." Then I used 3 more of the small size petals, and 4 each of 3 larger size petals - your petal size selection will determine the final size of your roses. I inked the petal edges then spritzed them with water and scrunched around the center (I re-spritzed every few petal layers to make sure all the petals were damp. When dry, I arranged the petals so they were in different positions to give nice fullness and then painted translucent medium on the edges with a fine paint brush. I further embellished with wired Christmas berries and rose leaves rescued form the floral department trash at my favorite craft store, Pat Catan's. These roses were quite time consuming, but worth the effort. 


Photos ~ I converted the photos to black and white and sized them at 1 3/4 inches in height - not worrying about the width. I matted each with about 1/8 inch red sparkle paper then evenly spaced them across the front of the lid. 

Thanks for dropping by. I treasure your comments!

~ Blessings ~

Thursday, December 1, 2011

Family ~ ScrapFIT Workout #57 Reveal

It's time for another fabulous ScrapFIT reveal. The first Workout for December is Word of the Year.


It's almost a new year!!! What single word best describes how you want to embrace the new year? Here's your chance to think about how you want to change, improve, create, define or challenge the new year! Share with us a layout or altered project that showcases your Word of the Year!

The word I selected is Family. There are so many changes going on in our family, and I want to embrace the new directions our family is taking. Our son, Joseph, is getting married on December 10 and giving us a lovely new daughter, Rachel (bottom right photo). These photos were taken last week during our Thanksgiving celebration with extended family. We weren't all there at the same time, so I created a collage of photos to include everyone. 


We have a gorgeous Echo Park kit to give to the winner of Workout #57 donated by Paper Lovelies. Be sure to stop by their store and check out their monthly kits for only $15 each!!


I hope you'll join us in creating a project to embrace the new year. Be sure to hop on over to ScrapFIT to see the inspiration by our fabulous design team and to link up your creation. 

Techniques:


Hand Crafted Flowers ~ I used the Spellbinders Rose Creations Die to cut both the petals and rose leaves for these flowers. I just love all the different sizes and that the petals are not all exactly the same shape. This makes for more realistic flowers. 

For each blossom, I cut 3 sizes of the petals and 4 sizes for the largest flower. I wanted to use the two papers from the background, so I alternated the papers for each size. I cut two petal shapes for the largest size used for that particular flower and one of each of the other sizes. I tried two of each size initially, but found the finished flower to be more thick and fluffy than I wanted for this page. 

To get the texture, I wet the cut petals by dipping them in water. You want them damp but not sopping wet. With my fingers, I pleated each petal, then lightly twisted them together to form a bud-like shape. You can set them aside to dry over night, or if you're like me, hold them with tweezers and dry them with your heat tool. If you use the heat tool, they may not be all the way dry in spots - so be very careful in opening them, because the damp spots will tear very easily. (The completely air dried ones can rip too, but not quite as readily.) 

At this point I inked the petal edges and on the yellow petals inked lightly over the entire petal to give more visual dimension. I wanted the pattern on the black/tan paper to be prominent, so I only inked the edges of those petals. 

I put the blossoms together with a decorative brad, and arranged the petals before closing up the back of the brad. You could also use glue or glue dots to hold them together and use a stick-on decorative center as well. 

For the leaves, I fold them in half to get a center vein, then use my fingers to pinch along each side to get the smaller veins you would find in a real leaf. Then I ink the edges and lightly across the entire leaf. 

Fabric Ruffle ~ This is so easy peasy!! I just tore a strip of fabric (make little snips on the edge of the fabric the width you desire and simply rip the fabric). I machine basted down the center and then lightly gathered it up to make the ruffle. (If you don't have a sewing machine, a quick run of hand basted stitches down the center will work just as well.) I pulled some of the threads off the edges to give a rustic look. I used 3 rows of my Scotch Tape Runner to adhere it to the page.

Fussy Cutting ~ I fussy cut the bracket mat under the flower cluster and hid the bird (that I didn't think went with this layout) under the flowers and leaves. 

I want to say thanks to Amy Gaskins for the fabulous inspiration. The wonderful November Scrap-Friendzy challenges were focused on scraplifting pages from our gallery, and I selected one of Amy's gorgeous pages to lift. If you're looking for a fun forum based scrappy place to hang out with 3 challenges each week, run don't walk to ScrapFriendzy and join our uplifting group of girlz for loads of scrappy fun. December's theme is Scrap Your Stash

Paper:
My Mind's Eye ~ Lost & Found Two Sunshine Collection - 
"Memories" Blossoms, "Lovely" Plaid, "Sunshine" Music
Authentique ~ Foundations
Basic Grey ~ Fruitcake - Pine

Embellishments:
Tan Loose Weave Fabric - Stash
The Paper Studio ~ Spare-Parts - Brad Assortment Browns
Zva Creative - Adhesive Pearl Swirls

Technique Products:
Spellbinders ~ Donna Salazar - Rose Creations Dies
Ranger Distress Inks ~ Pumice Stone, Walnut Stain, Forest Moss
TPC Studio ~  Clearly Better - Chocolate
Hot Off the Press ~ Artful Collection acrylic stamps
7gypsies ~ Clear Stamp Ink - Family

Tools:
Tonic Studios ~ Paper Distresser
Sizzix ~ Big Shot
Visual Artestry ~ Stamp Gird Blocks
Fiskars ~ Kraft Knife
Fiskars ~ Self Healing Craft Mat
EK Success ~ Honey Bee Scissors (My favorite for fussy cutting)

Thanks for stopping by! I treasure your comments.

~ Blessings ~

Adore

I created this layout for "The Scrapping Stamper's" Fabulous November Sketch.

This is our son Joseph and his bride to be. I was fortunate enough to be asked to take a fall engagement photo shoot for them, and this is one of the photos taken that day. The wedding is a week from Saturday - December 10.


Here's Shannon's wonderful November sketch:
Be sure to head on over to Shannon's blog to see the fabulous inspiration by her design team.

Techniques:


Hand Stitching ~ I drew a heart template using a double wavy crisscrossing line around the edges to look like ribbon. I cut the pink paper around the outside edge and penciled in the inner line. I applied the heart to the background paper being sure not to put the adhesive where I would be stitching. I pierced holes on both lines, then used a red Copic marker to color between the two lines. Then I stitched around the heart creating the look of a wavy ribbon. 


Tattered Florals Flower ~  I'm not sure why this flower was so difficult to photograph in the context of the whole layout, but here is a much better shot. I cut two of each size Tattered Florals petals except the large daisy, which I cut from black tulle. I water distressed and inked the edges. On the largest petals, I applied Art Glitter Dries Clear Adhesive and sprinkled with ultra fine glitter. In the past when I tried to use glitter, it didn't stay put very well and made a big mess all over my page. This glue really holds onto the glitter and now I don't mind using glitter.


"Frosted" Chipboard ~ This technique is actually quite easy if you have the right supplies. I used my Crop-A-Dile Big Bite to punch holes in the chipboard hearts so that I would be able lace them together, and sanded the edges. I put a good size dab of modeling paste on my craft mat and mixed in a few drops of acrylic paint to get the pink color. I used a small paint brush (not foam) to apply a thick coat on each heart, swirling the paste to look like frosting on a sugar cookie - that was the goal anyway!! Since this is on chipboard which is a fairly stable surface - you can use either regular modeling paste or flexible modeling paste. If you apply it to cardstock, you would need to use the flexible type. (Yes, I learned this the hard way!!) No need to have both types in your stash, so if you're going out to buy some, I would recommend the flexible kind, which can be found at an art supply store. 

"Sugared Chipboard" ~ I had these grunge board letters in my stash that were the perfect size and shape for my title. I painted them a creamy white and when dry, brushed them with Mod Podge and while wet sprinkled with Diamond Dust (chunky glass glitter). Another easy technique. 

Tulle Flowers ~ I was cutting some tulle to put in my flower and decided the red didn't provide enough contrast, and set it aside - right on top of the pink heart. Wouldn't you know that I was looking for a way to add dimension/texture to the heart and this was just perfect, so I cut some more tulle using my Tattered Florals Die. I sprayed adhesive on the back to adhere them to the page. 

Paper
Basic Grey ~ Hello Lucious - Honeyed, Simply Grand
Red scrap of Basic Grey ~ Scrap Stash
Basic Grey ~ Fruit Cake - Pine
Embellishments
Pelaloo ~ Flora Doodles Brads - Retro Rage Round Gems
Martha Stewart ~ Gemstone Glitter - Onyx
Black and Dark Red Tulle ~ Stash
Cotton Twine
Zva Crystal Swirl
Technique
DMC ~ Floss - #761
Copic Ciao ~ #R59
Deco Art Crafter's Acrlic Paint ~ Redbird, Fun Fuchsia
Liquitex ~ Modeling Pase
Ranger ~ Distress Ink- Aged Mahogany, Victorian Velvet, Forest Moss
Y&C Gel Xtreme 0.7 gold
Art Glitter Dries Clear Adhesive
Tools
Sizzix Die ~ Alterations - Tattered Florals
Sizzix ~ Big Shot
EK Success ~ Honey Bee Scissors
Sizzix ~ Branch w/Leaves die


I've entered this in:
BasicGrey Challenges ~ #58 Lost and Found - My found object is the twine tying the heart banner together, and my Basic Grey project is the paper.

Thanks for stopping by!! I treasure your comments
~ Blessings ~