Thursday, July 11, 2013

Scrapping Everyday Miracles 2nd Birthday Blog Hop Celebration

Welcome to the Scrapping Everyday Miracles Birthday Celebration and Blog Hop!!


You should have arrived here from Lisa. If not and you would like to join us from the beginning, head on over to the Scrapping Everyday Miracles Blog to start hopping. 

We are so excited to have you join us for our Birthday Celebration!  It has been an exciting year here at Scrapping Everyday Miracles and we are so glad that you have chosen to explore the miracles with us throughout the year.  We have an fun hop planned for you this weekend but that is not all!!  We will also have five fun and easy challenges that you can enter to win some amazing prizes. 

Not only do we have fun activities planned for our hop, we also have birthday fun and games happening on our facebook group. Join us each day for games created just for the birthday celebration with fabulous prizes.

Each of our Design Team members and our Guest Design Team members have created a project with the birthday theme of  to show you on their blogs.  Make sure that you hop along to each blog because you never know where there might be more prizes hiding along the way!  In addition to prizes we have a special birthday scavenger hunt for you :)   On several of the blogs there will be a project photo that has birthday hats hidden in the photo.  As you hop through count how many hats you find.  When you are finished with the hop write the total number of hats you found in a comment here on the Scrapping Everyday Miracles blog hop post.  Have fun and happy hopping!

Here's the fun hat you will be looking for:

Birthdays are extra special days to celebrate for our children. Our children enjoyed inviting friends over to celebrate. There were games, food, and I always made and decorated special birthday cakes for them. This page is of our son enjoying the day and blowing out candles on his special puppy cake. Joseph is now married and may one day soon have children of his own to plan celebrations for. I hope he looks back on his childhood birthdays with fond memories. 

"Happy Birthday Joseph"

Our hop grand prize has been provided by Blue Fern Studios....

Blue Fern Studios was founded with the idea of providing unique and sophisticated papercraft designs. We offer exquisitely detailed products to inspire all styles of craft artists in all areas, including scrapbooking, mixed media, general crafting, and more! We currently offer a wide variety of chipboard designs with new items being frequently added. Be on the lookout for our upcoming paper collection and MORE ;)!


Ready to see the awesome Grand Prize for the hop...

  
The hop will remain open until Sunday night,
July 14th at midnight PST.

Remember in order to qualify for our grand prize you must leave a comment on all the blogs.


Make sure you also stop by our Facebook page for games, challenges and even more prizes.  Winners will be posted here on SEM (and on each individual blog that provides RAK) on Wednesday July 17th so don't forget to come back and see if you won any of the fabulous prizes from our sponsors!  

Your next stop on the SEM Birthday Blog hop is Jessica.

I'm am offering a prize as well. 
Six of my handcrafted Twine Flowers. 
To be eligible for my prize, all you have to do is:

~ Follow my blog
~ Leave a comment on this post.

Follow on Bloglovin

Thanks for stopping by! I treasure your comments.

~ Blessings ~

Wednesday, July 10, 2013

Birthday Card for Really Reasonable Ribbon

Birthdays are such a wonderful time to celebrate the special people in our lives. I created this card for one of our daughters who's favorite color just happens to be purple. It features fabulous ribbon and embellishments from Really Reasonable Ribbon.


Really Reasonable Ribbon Products:
Scor-Tape 6" x 6"

Be sure to check out Bonnie's BIG 3 day sale running from July 10 to 12.
All the details are posted on the RRR Blog

Tips and Techniques:

Dyed Ribbons ~ As you probably know, I like to dye and color my ribbons to coordinate with my papers and other embellishments. Here I dyed the White Wrinkled Ribbon with Alcohol Ink, then once dry, I decided I wanted a deeper purple and mottled colors. I rubbed Distress Ink on a craft mat, misted with water, then I pulled and scrunched the ribbon into the ink. Oooh la la, I love the dimension and texture this added to the color in my ribbon. I also colored the bright green ribbon from the July Ribbon Club Assortment by spritzing it with a golden brown glimmer mist, then inking the edges with purple. Another amazing transformation. You can find my Dying Ribbon with Alcohol Ink Tutorial here

Four Loop Ribbon Bow ~ I used a variation on Ginny's double loop bow to create this bow with my now colored Wrinkled Ribbon. Instead of using my fingers I used something I had on hand - the handle of my pliers. :-) You can find Ginny's Double Loop Bow Tutorial here

Bead Loops ~ These are so easy to create!! I snipped off short lengths of Bonnie's Pearlized String Beads, then formed a loop - kind of in the shape of a daisy petal with the two ends side by side. I crushed off the bottom bead on each side (with pliers) and glued the strings together. An easy way to add a nice touch of bling to any flower cluster. 

Handcrafted Flower ~ I used Spellbinders Spiral Blossom One to create this lovely rolled paper flower. 

Be sure to stop by the Really Reasonable Ribbon Store to check out Bonnie's amazing selection of ribbons, laces and other goodies.

I hope to see you on Saturday for our RRR July Blog Hop.

I have entered this at:
Word Art Wednesday Challenge #88 Anything goes. This week's Word Art is 1 Timothy 4:12. If you are looking for amazing inspirational Word Art (free), be sure to stop over there!! 

Follow on Bloglovin

Thanks for stopping by! I treasure your comments.

~ Blessings ~

Friday, July 5, 2013

The Kiss ~ GDT for Donna Salazar

It's a dream come true to be designing this month for Donna Salazar. If you follow my work, you know that I adore using her products!! I'm a girlie grunge gal for sure.

In case you missed the announcement on Monday, I was asked by Donna to be her Social Media Coordinator. I'm so excited and honored to be a part of the DSD Team! Thank you Donna and Natasha for this amazing opportunity!! 


From the time Elizabeth was a young girl, she dreamed of finding that one special guy. She committed to waiting to share her heart until that knight in shining armor came into her life. She found that young man in Andrew. Our pastor knew of her commitment and asked Andrew during the wedding ceremony if he had a large S hidden on a shirt under his suit, because he certainly must be superman to have captured Elizabeth's heart. They waited to share their very first kiss until they were man and wife. While this isn't the first kiss they shared that day, I just had to showcase this special photo taken in the archway at the reception backlit with streaming golden light.

Donna's Natural Beauty Collection is absolutely perfect to showcase this special photo. Below you will find my tutorial for the crushed voile peonies. 


Donna's Spellbinder Flower Dies are my absolute favorites, and I have used Grand Peony, Carnation Creations, and Bitty Blossoms to create these beauties. To bring in accents of gold to the background, I misted and dripped Pralines & Cream Smooch Spritz on the background and border. 

I just adore Donna's new Want2Scrap stencils and used the Polka Dot Heart with blended fiber medium above this cluster. This dotted heart kind of faded into the background so I rubbed Pewter and Denim Mix'd Media Inx softly around the edges. I'm always looking for subtle ways to accent the theme of my photos and this heart was a perfect way to reflect the love shining in this photo. 

I'm all about girlie grunge, and cut this sweet butterfly from Donna's Want2Scrap Corrugated Board with her Wonderful Wings Spellbinders dies. I used Jasmine Mix'd Meda Inx and Fairy Dust Glitter to color and topped with a Bitty Blossoms flower created from Donna's Mulberry Paper from the Mix'd Media Stax 2 collection. I extended the wings with chipboard from Want2Scrap and grunged them up with puffy paint dabbed with Mix'd Media Inx. My butterfly trail is a snippet of Donna's Build Your Own Bling by Want2Scrap. There's no easier way to distress edges than with Donna's Distrezz-It-All tool by Zutter. I'd be lost without this handy tool!! Really!! I use it on nearly every project I create. 

The top cluster includes more handcrafted flowers cut with Donna's amazing dies. The Bitty Blossoms and smaller carnation are created with Natural Beauty and Family Jeans papers. I tucked in some of Donna's Hand Drawn Swirls chippies. I'll be sharing a tutorial for these grungy, textured leaves later this month. 

I was inspired by the brick tutorial Lisa Gregory shared last month. I needed some smaller letters for my title, and the letters in Donna's alpha stencil were just right. I used fiber medium colored with Mix'd Media Inx and instead of applying to paper I used a craft mat, creating several sets to have enough letters for my title. Once dry, the letters peeled right off my mat - so easy and I was able to get just the right color and size letters needed for my title. I spread Clearsnap Glue Gloss around the edges of my page and sprinkled with Donna's Fairy Dust Glitter by Clearsnap. 

Crushed Voile Peony Tutorial


These gorgeous peonies take some time, but are really easy to create!

Supplies:

Supply List:
Crushed voile fabric (home decor fabric)
Grand Peony dies
Candle
Tweezers
Die cutting machine (not pictured)
Cardstock scraps (not pictured)
Bowl of water (not pictured)

Step 1. For each peony, cut two of each size petal. I have found that I can cut up to 4 layers of this thin crushed voile at a time. I make a sandwich to cut them. On your cutting pad, place a scrap of cardstock, then up to 4 layers of fabric trimmed a little large than the die, then the die with the cutting edge facing down. Use whatever cutting plates you would normally use to cut paper and run through your die cutting machine. Depending on how much pressure your machine has, you may have to run it through several times to get a clean cut. Just check to make sure the cardstock is cut all the way through before removing the fabric from the dies.

For each whole flower, I cut two each of five different size petal layers. Grand Peony has seven petal dies and I used all but the very largest and smallest. Depending on the size flower you want, you can vary which sizes you cut. You can also use more or fewer layers depending on the look you are going for.

If you don't have Grand Peony, you could create a similar flower using Rose Creations.

***Tip*** It's a good idea to cut a couple extras in case you get a little carried away in the next step. 

Step 2. Light a tea light or small candle. Hold the petals close to, but not touching the flame, moving each petal across the flame one at a time. The petals should roll up toward the center of the flower as they melt. You don't want to melt too much, just the edge. Be sure to have a bowl of water close by so you can quickly dip the petals into water if you accidentally get the fabric too close to the flame. (It's not a project for unsupervised children.) The petals will be uneven and some will end up smaller than others, but that's ok, since in nature, peony flowers have such gorgeous variation in the petal size as well. If you really melt a petal too much, just toss it and grab one of those extras you cut. For the smaller size petals, I use tweezers to hold them. 

Step 3. Glue the flowers together starting with the largest petals first. Offset each layer so the petals of the section you are gluing, fall between the petals of the section below it. (As shown below.) I use Beacon Fabri-Tac Glue, but any quick drying liquid scrapbooking adhesive should work as well. 

Here's a third layer.

Keep on adding layers until you have an entire peony put together.

Step 4. Add a Bitty Blossom flower to the center. You could use a variety of things for the center. I've used stamen, and you could also use a gem or button.

Thanks for stopping by today to view my layout and tutorial. Donna will be posting more of my work throughout the month of July. 

Product List

Paper:
GCD Studios: Donna Salazar Designs - Natural Beauty - Soaring
GCD Studios: Donna Salazar Designs - Natural Beauty - Wall Vines
GCD Studios: Donna Salazar Designs - Natural Beauty - Nancy's Mushrooms
GCD Studios: Donna Salazar Designs - Family Jeans - Family Eyelet
GCD Studios: Donna Salazar Designs - Mix'd Media Stax 2 - Crepe Paper, Mulberry Paper
Want2Scrap: 8" x 10" Corrugated Board

Chipboard:
Want2Scrap: Donna Salazar Designs - Hand Drawn Swirls
Want2Scrap: Style B Kissimmee

Stamps:
Art Gone Wild: Donna Salazar Designs - Cotton Lace

Color/Ink:
Clearsnap: Donna Salazar Designs Mix'd Media Inx - Black, Denim, Jasmine, Pewter
Clearsnap: Donna Salazar Designs Mix'd Media Inx CHOX - Driftwood
Clearsnap: Donna Salazar Designs Smooch Spritz - Pralines & Cream
Clearsnap: Donna Salazar Designs - Fairy Dust Glitter - Pralines & Cream

Masks/Stencils:
Want2Scrap: Donna Salazar Designs - Alphabet
Want2Scrap: Donna Salazar Designs - Love Stencil with Polka Dot Heart & Arrows

Dies:
Spellbinders: Donna Salazar Designs - Bitty Blossoms
Spellbinders: Donna Salazar Designs - Carnation Creations
Spellbinders: Donna Salazar Designs - Grand Peony
Spellbinders: Donna Salazar Designs - Wonderful Wings

Punches:
Martha Stewart - Flourish Lace

Bling:
Want2Scrap: Donna Salazar Designs - Build Your Own Bling
Want2Scrap: Rhinestones - Mother of Pearl
Darice: Sliders - Antique Silver Crystals
Art-i-cakes: Charms with Glass Accents

Tools/Machines:
Zutter: Distrezz-It-All

Adhesive:
Clearsnap: Glue Gloss
Art Glitter: Designer Dries Clear Adhesive
Beacon: 3 in 1 Advanced Craft Glue
Beacon: Fabri-Tac Glue
Helmar 450 Quick Dry Adhesive
Ranger: Glossy Accents
Tombow: Mono Multi Liquid Glue

Mixed Media:
Liquitex: Gesso
Liquitex: Blended Fibers
Beacon: Fast Finish Decoupage
Viva: Pearl Pet - Cream
Tulip: Puffy Paint - White

Other:
Crushed Voile Fabric
Vintage Doily
Lace

My post is also up on Donna's Blog.

Follow on Bloglovin

Thanks for stopping by! I treasure your comments.

~ Blessings ~

Thursday, July 4, 2013

Shimmer Tile Tutorial

Summer is at hand with lovely long days. Our broken air conditioner is now fixed and I'm nice and cool again. I hope you're able to stay cool in the heat of July. 

The Scrabble tiles in the ScrapThat! Main Kit are so cool, but since I wasn't able to spell something with the ones I received, I thought I'd try my hand at transforming them into shimmery tiles. Here's what I came up with.

Shimmer Tile Tutorial

Supplies:

Supply List:
  • Scrabble Tiles (ScrapThat! July Main Kit)
  • White Gesso
  • Prima Hello Pastel Clear Stamp (ScrapThat! July Main Kit)
  • Whispers Clear Glitter Embossing Powder (Holographic)
  • Perfect Medium or other clear embossing pad
  • Donna Salazar Mix'd Media CHOX Inx ~ Sage
  • Donna Salazar Mix'd Media Inx ~ Wisteria
  • Heat Tool (Not Pictured)
  • Paint Brush (Not Pictured)
Step 1. Place a small amount of gesso on a craft mat or paint palette. Add some water to thin down the gesso to create a wash. The amount of water will depend on how thick your gesso is. I used about 1 part water to 2 parts gesso. Brush the wash across the back and sides of the Scrabble tiles using a soft brush. Set aside to dry. I wanted just a touch of the wood grain to show through and used two coats of the gesso wash.


Step 2. Once the gesso has dried, stamp the tiles using the Prima Hello Pastel stamp included in the ScrapThat! July Kit. Ink the edges lightly. I used Donna Salazar's Mix'd Media Inx in sage and wisteria, but you can use any colors that coordinate with your page.


Step 3. Once the ink has dried. Press Perfect Medium or any clear embossing pad onto the painted and stamped side of the tile.


Step 4. Sprinkle with clear glitter (holographic) embossing powder and heat set. For even more sparkle you can repeat this step. (I used two coats of embossing powder.)

*****Tip: If you prefer a glossy finish that is not glittery, use clear embossing powder or UTEE.


Here are the finished tiles:

Thanks for dropping by to check out my tutorial! 

The July Kit is available in the ScrapThat! Store

Follow on Bloglovin

Thanks for stopping by! I treasure your comments.

~ Blessings ~

Wednesday, July 3, 2013

I've Been Published at Scrapbooking.com Magazine

It is always so exciting and such an honor to have my work published. I'd like to thank Stefan Harlin at Scrapbooking.com Magazine for featuring my work in the July 2013 Issue. Be sure to head on over there to see this month's Feature Articles.

You will find my "Abby" layout featured in the Americana section.


Follow on Bloglovin

Thanks for stopping by! I treasure your comments.

~ Blessings ~

Tuesday, July 2, 2013

SEM is having a Birthday Celebration


Have you heard Scrapping Everyday Miracles (SEM) is getting ready for our Second birthday? We have planned a huge celebration both on the SEM blog and over at our facebook group Scrapping Everday Miracles Chit Chat Group. To kick off the celebration we would like to have a little pre-party fun with this great prize to giveaway from 3 Scrappy Boys.


3 Scrappy Boys is a monthly kit club and store. We offer 3 kits per month that can be purchased individually or as a subscription. Subscribing comes with benefits like 10% off your kit cost and store purchases. We also have a facebook page where you can follow all the happenings at 3 Scrappy Boys like sales, crops, and challenges.


Wanna see the wonderful prize we are giving away?

Here is what you gotta do to enter...
We would like for you to share about our Celebration...
  • One entry for sharing in a post on your blog
  • One entry for joining SEM's Chit Chat group on Facebook
  • One entry for visiting 3 Scrappy Boys on Facebook and telling them SEM sent you.
  • One entry for sharing on Facebook, Pinterest or anywhere else that allows you to.

You can either share the advertisement found at the top of the post or this one:


You have until Sunday, July 14th 11:59pm PST to share what you did (by posting a comment on the SEM Blog post found here).

Don't forget to head over to our Facebook Group
and join so you are all ready for the big day!

The Birthday Celebration will kick off July 11th on both the SEM blog and on the FB group so make sure that you have joined the FB group before that!!!!!  We can't wait to party with you!

Follow on Bloglovin

Thanks for stopping by! I treasure your comments.

~ Blessings ~

Monday, July 1, 2013

"Artist"

Our daughter, Maria, has an artist's touch. I've been delighted and amazed to see her work as she develops this special gift. She won several awards this spring, and this page shows her with a piece that captured her age division in a local art show.

"Artist"

I used the June Prima BAP for inspiration along with lots of Prima goodies!!

My page features Really Reasonable Ribbon for the new Challenge #75 ~ Anything but a Card.

Really Reasonable Ribbon Products:

It's also my design team project for the July Scrapping Everyday Miracles Challenge - "These Are a Few of My Favorite Things." The twist is to use an office supply.

Cara created our challenge this month and here is what she has to say:

"These Are A Few of My Favorite Things"

Cara here bringing you the Main Challenge this month. I love learning new things about people, and so I wanted to do a fun challenge about getting to know someone by finding out what their most favorite things are. 

So here's my Challenge: Create a layout about someone's "favorites"...it can be a page about yourself, your child, your best friend, your spouse, your parent....well, you get the idea...it can be about anyone you choose. I think hearing what people enjoy about life can be one of the greatest ways to get to know the heart of that person. It can also be a great way to connect with someone...when we take the time to do things they enjoy, we can bless them. 

The Scrap Twist that you need to include on your project is to use some kind of "office supply item"---some ideas would be paper clips, binder clips, or staples. 

Have fun with this challenge as you show the personality of the person you scrap about through the things they love most! I'm excited to see what you come up with.

Back to me. One of our goals in educating our children was to help them discover their God given talents and to help them explore and develop them. If you asked Maria to tell you about her favorite things, art would be at the top of her list.

Tips and Techniques:
Silk Bow ~ I used Hand-dyed Silk Ribbon from Bonnie's store to tie this bow. This color is not currently available, but there are 46 gorgeous hand-dyed silk ribbons to choose from. This tutorial by Ginny shows how to tie these double loop bows.


Dyed Flowers - The top vine had white flowers which faded into the background. I brushed them with a couple shades of blue glimmer mist, and now they pop! 

Mixed Media ~ I used molding paste with the Prima Static Stencil for my background.

Twine Flowers ~ I tucked a couple twine flowers into the layers of this page. This one is created with 10lb white bamboo. My updated twine flower tutorial can be found here

Aren't these artsy embellishments from Prima so much fun? 


Gilded Leaves ~ I took some basic Prima rose leaves and applied some ink to them, then covered with a new embossing powder I recently bought. This metallic bronze powder by JudiKinz is so gorgeous!! I applied it more heavily at the edges and tapped off some in the center to allow the green to show through. Such an easy technique to add some real sparkle to a project! 

Dyed Fiber ~ I've mentioned before that I like to keep white and cream ribbon and lace on hand so that I can color them to coordinate with my projects. Here I used Bonnie's White Netting by May Arts and spritzed it with Glimmer Mist for this gorgeous blue color. 

Gesso ~ I brushed some of my flowers with gesso to lighten them a bit. 

Framing ~ I wanted to highlight Maria in this photo, so framed her with this Prima clock piece.


Leveling ~ Because the edges of my paper layers were water distressed, there was an uneven spot for my photos. I fixed this by adding Tombow 3D Foam pads to adhere the photos where they needed to be popped up. 

Buttons ~ The great folks at Craftpon.com and Stampcow.com sent me some of their gorgeous products to work with including these beautiful carved wood buttons and domed 18mm crystal buttons used for flower centers. 

Layered Metals ~ The bronze art piece is actually two Prima pieces glued together with Beacon 3 in 1 liquid glue. 

Twine Flower ~ You can see another twine flower peaking out. This one in Brown Sugar Baker's Twine

Hemp Cord Bow ~ The little bow in the heart button was created by lacing Blue Hemp Cord through the button and tying in a simple bow. This is my office supply for the SEM Main Challenge twist.

Our sponsor for the SEM challenge is:

Pure Painted Signs


Here's what Celisa has to share about her company:

My name is Celisa Schumpert and I am a wife, a mom and I have a love for all things creative.  My husband and I were blessed to spend over 20 years in youth ministry before helping begin a start up church about 3 years ago that has grown to about 1700 weekly attendance, it has been awesome watching God at work in our new adventure.  I am also a mom to three children 20, 16 and 8.  Around 7 years ago we were blessed to bring home our 8 year old from China and it doing so developed a heart for orphans and a desire to help them find forever families.  As a result, I wanted to start a business that could give to that purpose.  I am blessed to combine my two passions into my relatively new business, Pure Painted Signs.  I have always loved painting and with this endeavor I am able to give 10% to my church and 40% to orphan causes around the world, as well as supporting families who are seeking to adopt. 

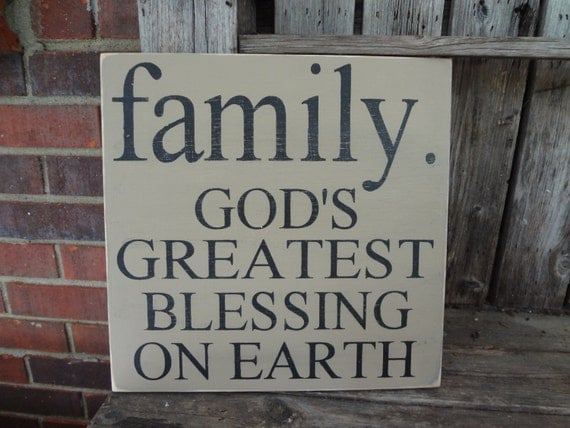
The prize is a wooden sign such as:


She is also offering a 15% discount on any orders in July the discount code is

What an awesome prize!! All you have to do is enter one of our challenges in July for a chance to win.

I hope you'll join us for both of these challenges:

Really Reasonable Ribbon Challenge #75 ~ Anything but a Card using ribbon (July 1 to 12)

Scrapping Everyday Miracles Main Challenge #30 ~ These Are a Few of My Favorite Things with a twist - use an office supply (July 1 to 31)

I have some very exciting news to share. Donna Salazar has asked me to be her Social Media Coordinator. I'm over the top excited to be part of the amazing DSD team!! Be sure to stop back on Friday to see my first project of the month as her July Guest Designer.

Here's a sneak peak:


Follow on Bloglovin

Thanks for stopping by! I treasure your comments.


~ Blessings ~