Showing posts with label ScrapThat November Kit. Show all posts

Tuesday, November 27, 2012

Beautiful ~ ScrapThat! November Kit

This morning's snowfall has melted away, but left a hint of the winter to come. I have one final layout from the gorgeous November ScrapThat! Kit to share with you today. It was really a joy to work with this amazing kit featuring Bo Bunny Serenade and full of so many wonderful embellishments.

This photo of Rachel and her bridesmaids taken before the wedding is one that really caught my eye. I talked with her about it over Thanksgiving and found out that it is a shot that Rachel suggested to the photographer. I love how the girls look like they are having so much fun peaking out from behind the columns. 

"Beautiful" 
~Using the MK, EAO, & FAO Kits ~

I used Amy's gorgeous November Sketch:

Tips and Techniques:


Corrugated Board ~ You can see the corrugated board layered behind my photo. I have so much fun with this household item. Whenever I get some packaging that has the narrow little corrugation, it goes into my stash. Here I used a foam brush to lightly apply some black paint to the top ridges of the corrugation and edges. When dry, I applied some Ranger Rock Candy Crackle Paint for some great texture. 

Hand Stitching ~ After the paint was dry on the corrugated board, I used my handy piercing tool to create stitching holes around the curved edge along with some x's.

Misted Rock Salt Chipboard ~ My tutorial for the grungy finish on the chipboard door can be found here.

Curled Vine ~ The jeweled Prima leaves came with brown wire stems, which I pulled off to create the vines in my cluster. I wrapped the wire around a narrow metal bar for making wire coils, but anything like  a knitting needle, or paint brush would work. 


Flowers ~ The November ScrapThat! main kit included this gorgeous WOC poppy and the sweet little white poppies. The Flower Add-On Kit included the amazing Prima Gracie vine and lovely Cabaletta blossoms in white, black, and Grey. I layered some of the black tulle under the red poppy.

Punched Frame ~ I needed a different size frame than my punch set would allow, so I punched it larger, trimmed the ends and overlapped the ends resulting in the lovely corner.

Chipboard ~ I simply used some metallic paint on this Dusty Attic Holly piece to tuck under the flower cluster.

Distressing ~ Of course I used my Distrezz-It-All to distress all the straight edges.

My sweet friend, Helen Tilbury, is having an amazing give-away on her blog, Scrap Addict. It is international and open to everyone. You just need to be one of her followers. Her work is amazing, and you will enjoy following her gorgeous work!! Look what all she is including in her package:


Thanks for stopping by! I treasure your comments.

~ Blessings ~ 

Tuesday, November 20, 2012

Misted Rock Salt Chipboard Tutorial

I hope you are having a lovely week! This Thursday is Thanksgiving here in the US, so I've been busy preparing for my part our Thanksgiving meal and reflecting on all I have to be thankful for. We will be going to celebrate the day with my husband's family. He's Italian, so it's a tradition to have ravioli along with the traditional turkey and fixings.

If you're a regular follower, you know I enjoy doing fun things with chipboard. I altered a technique by Michelle Grant to suit the Maya Road Doors in the ScrapThat! November Kit.


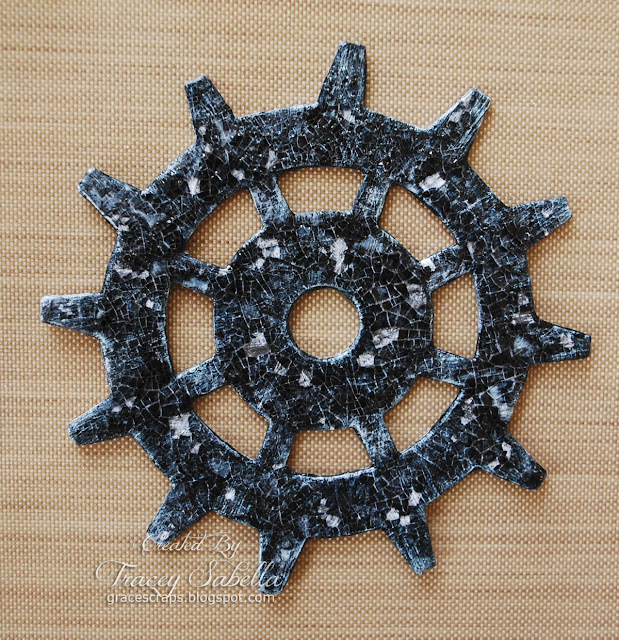
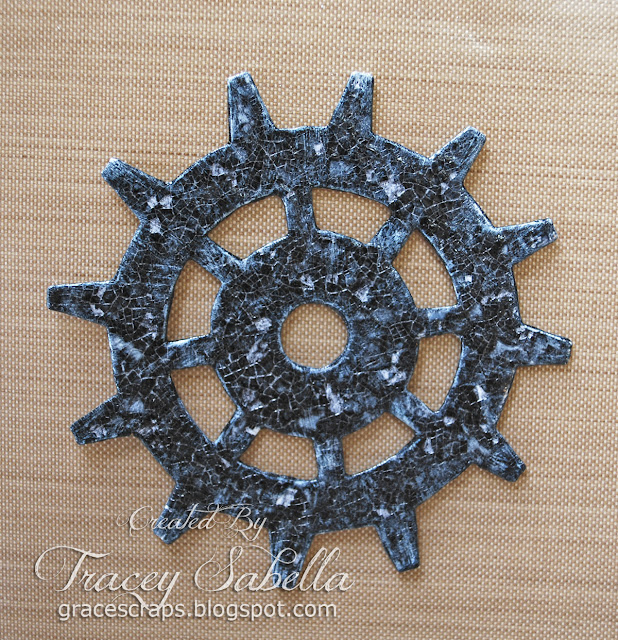
 I've recreated this technique for you using a chipboard gear from my stash. 

Misted Rock Salt Chipboard Tutorial

Supplies:
Chipboard
White gesso or acrylic paint
Tattered Angels Glimmer Mist ~ Almost Black
Rock Salt **
Ranger Crackle Accents
Mod Podge - Glossy
Prima Distress tool, or other wire brush.
Paint brush
Craft Mat (Optional)
Heat tool (optional)

**I have been asked what kind of rock salt to use. There are a number of options, but any pure salt that is chunky like in the photos will work. That includes rock salt for ice cream makers (What I used), Rock salt for deicing your sidewalks and driveways (Make sure it is pure salt with no chemical additives), kosher salt, or the chunky salt that goes into salt grinders. Regular table salt is too fine to work properly for this techniques.


Step 1: Paint chipboard piece with white gesso or acrylic paint. Allow to dry or use a heat tool to speed things up. If you use a heat tool, don’t hold it too close to the painted chipboard and keep it moving or your wet gesso can overheat and form bubbles.


Step 2: Mist with a dark mist. I used Tattered Angels Almost Black mist, but you could use any non-paint based brand or color that is translucent or even make your own from re-inker.


Step 3: Immediately cover the chipboard with rock salt. The salt draws the wet mist on the surface and leaves a beautifully splotchy and distressed surface as it dries. If you have a more solid chipboard piece, you could use less rock salt and spread it out some. With the door in the kit and this gear shape, the chipboard is narrow so I used a heavy coverage of rock salt. You can let this sit overnight, or give it 10 minutes or so for the rock salt to draw up the ink, then use your heat tool to speed the drying time.


Step 4: Once the rock salt is sprinkled/piled on, mist again.


Step 5: Once the mist is completely dry, brush off the rock salt. This really has some nice distressing. I could have easily stopped here but wanted even more dimension and kept on going.


Step 6: Use a stiff wire brush to remove some of the mist, leaving scratch marks.


Step 7: Squeeze some Crackle Accents across the piece, then spread it out with your finger.  Set aside to dry. Do NOT use the heat tool. (You could also use Ranger’s Clear Rock Candy Crackle paint for a similar effect.)


Spread out:

When dry:


Step 8: When the crackle is completely dry, it will be loose in spots and flakes off easily. I decided to go with this and chipped off some of the crackle here and there for a more weathered, distressed look.


Step 9: Using a paint brush, apply a sealant so the crackle will stay in place. I used glossy Mod Podge. If you don’t have a sealant product, you can thin down regular white glue that dries clear. (Elmers or similar product).


Now here is what it looks like when dry:


I hope you have learned something new, and will have fun playing with this technique. You can stop at nearly any point along the way if you like what you see or experiment with different colors and products.

If you give this a try, be sure to share your finished product in our ScrapThat! Gallery.

More of our Design Team's tutorials can be located in our ScrapThat! Forum.

Thanks for stopping by! I treasure your comments.
~ Blessings~ 

Friday, November 16, 2012

ScrapThat! November Challenge Details


Our ScrapThat! November DT Challenge has been posted by our newest DT member, Sarah Routledge. Here is her challenge:

I can't believe Autumn is winding to a close already. To celebrate this wonderful season, we have an Autumn Colours Challenge for you! (Who doesn't love a colour challenge?) Here are the colours you must use on your layout for this month's
DT Challenge:

Here is Sarah's example using using the 
ScrapThat! November Kit. 


Check out the post in the ScrapThat! Forum for the contest guidelines and prize information.

I hope you will come on over to ScrapThat! and join us for this fun challenge. 

Thanks for stopping by! I treasure your comments.
~ Blessings ~

Tuesday, October 30, 2012

ScrapThat! with Sketchabilities Reveal

Welcome to day two of our November "Remember When . . . " Kit Reveal. 

ScrapThat! is honored to be the Sponsor for today's sketch challenge at Sketchabilities 


Sketchabilites has a sister card sketch site, Cardabilities.

 Our talented ScrapThat! Design Team has used our November "Remember When . . ." kit to design layouts for this amazing sketch:

Head on over to Sketchabilities to see their Design Team's fabulous work with this sketch and to link up your project for a chance to win our gorgeous September "Victorian Dream" Main Kit featuring Graphic45's A Ladies' Diary Collection.
(Actual shipping costs from Canada to be paid for by the winner.)
 
For details about the
ScrapThat! November "Remember When . . ." Kit,
please see our reveal post.
We are currently accepting new
Kit Club Members.
For more information,
complete the form on the link below:

The team at ScrapThat! would like to take the opportunity to say thank you to our amazingly talented designer, Marilyn Rivera, who has been an asset to our team during her term ending this month. We wish you all the best in your future endeavors. 

What an amazing combination to work with our fabulous November ScrapThat! Kit and the amazing Sketchabilities sketch!! Here is my take:

Created using the November Main Kit

I added some mixed media products, eyelets for my lacing, embroidery thread and tiny rhinestones for the small flower centers ~ all things that most of us have in our stash. 

I created a card box with these engagement photos across the front of the lid for Joseph and Rachel's December wedding. When I saw this sketch, I thought it would be fun to use them for this page. 

Here are a few close-ups with some tips and techniques:
Chipboard Door ~ Be sure to stop back in November for my tutorial on how I created the amazing distressed texture on this chipboard door.

Tulle Lacing ~ Normally I enjoy lots of distressed layering, but this paper has so many gorgeous details like the fabulous dragonfly that I decided to showcase rather than cover. To get the feel of the large mat in the sketch, I added lacing across the page. I set two rows of eyelets for my lacing. The tulle was cut into three two-inch strips, then threaded onto a large yarn needle to pull it through the eyelets. I added a twist between each set of eyelets as I was lacing.

Dragonfly ~ You can't see it too well in the photo, but in real life this dragonfly sparkles. I brushed Distress Stickles onto the wings and body of this gorgeous image. When dry I hand stitched the edges.


Flower Clusters ~ I created the delicate yellow flowers using the kit cardstock and my Martha Stewart Hydrangea punch set. I used the kit pearls for the large and medium flower centers and some tiny rhinestones from my stash that I  colored with alcohol ink. The daisy flowers were created with Donna Salazar's Bitty Blossom die set. I fussy cut leaves from Serenade Vines to add a couple branches to each cluster. (My close-up shot was taken before I added the vines; however, you can see them in the large photo.)

Paint Splatter ~ I dipped a small, very stiff paint brush into gesso and pulled my finger across the tip to achieve the splatter. You could also use an old toothbrush. Be prepared to have dirty hands for this one!! 

Paint Drip ~ Easy peasy - just a blob of black gesso, then a bit of page tapping to get the drip to form. The trick here is giving it time to dry so I don't put a big mark on my drip, and yes I've done that trying to work with my page before it's dry, so I've learned to do this before I go to bed and let it sit overnight. The flower placed in the torn opening is another rolled flower from the Bitty Blossoms dies. 

I am entering this in the Bo Bunny Sketch Challenge to use two or more photos, a tag, and one of these photos for inspiration. I actually pulled inspiration from each of them. 

I was inspired by the scattered flowers in this one, although mine are a creamy yellow.

And the round orange sliced inspired my orange daisy flowers.
My love tag is attached to the chipboard door. 

Thanks for stopping by! I treasure your comments.
~ Blessings ~