Showing posts with label ScrapThat July 2013 Kit. Show all posts

Wednesday, July 17, 2013

A Symbol of Our Love Details for ScrapThat!

There are so many fabulous photos that are captured during a wedding day. These photos of Elizabeth and Andrew's rings laid down on 1 Corinthians 13, the love chapter in the Bible represent their love for each other and our Lord.

This page is created with the July ScrapThat! kit featuring the gorgeous Pink Paislee Hope Chest Collection. The July Kit and add-ons are available in the ScrapThat! Store.

"A Symbol of Our Love"
MK, EAO, FAO

I used the June Dusty Attic sketch for inspiration:

Tips and Techniques: 

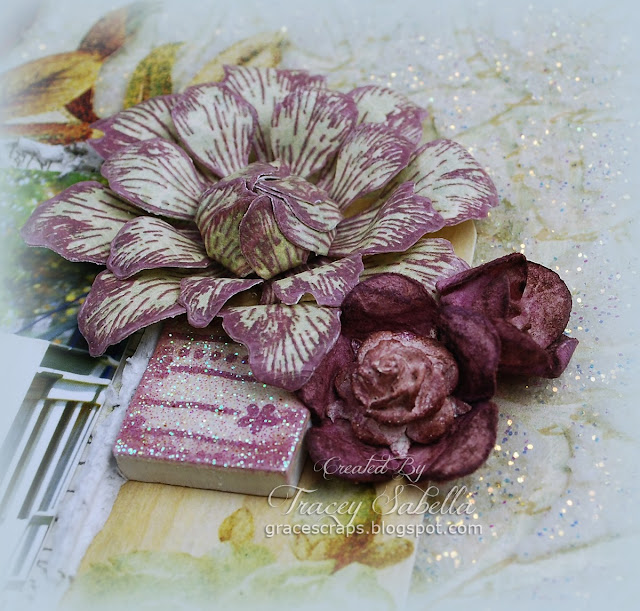
Gessoed Flowers ~ To lighten these gorgeous FAO Prima flowers, I dry brushed them with a bit of Gesso.

Mixed Media ~ The center mat behind the photos was whitewashed with gesso mixed with water, then molding paste applied with the interlocking ring stencil (to represent the wedding rings), then misted.


Altered Roses ~ The little yellow roses in the main kit were just the right size to tuck into and fill out my clusters, but not quite the right color. I painted them with gesso, then misted with Cork Glimmer Mist. The end result is an almost resin-like rose. 

Metals ~ The charming heart skeleton key and metal leaf from the Craftpon.com Etsy Shop were also whitewashed with gesso, then rubbed to remove some of the gesso to let the metal beneath shine through. Stampcow.com is their stamp Etsy store. 


Altered Leaf ~ I also washed and misted the kit leaf.

Vines ~ I save everything and the vines are created with the floral stems from the kit flowers. I simply wrapped the wire around a small diameter paintbrush and then pulled and bent to create the vines. 

Water Distressing ~ The edge of my mat was spritzed with water, pushed and crinkled with my fingers, then set aside to dry. 

Altered Felt Lace ~ The green felt lace was a bit bright, so I whitewashed it with gesso and tucked some into my layers. 


Embossed Alphas ~ I just adore the cork Thickers included in the kit, but since the cork color/design didn't work here, I heat embossed the letters with Fran-tage embossing powders.

Random Punching with Pearls ~ I randomly punched edges around my page, and added kit pearls which had been spritzed with Cork Glimmer Mist. 

Fussy Cutting ~ The journal blocks in the main kit have some fabulous doily images which I fussy cut and tucked into the layers. 

The darling butterfly is from the Embellishment Add-On Kit and the first part of the title are Prima alphabet letters from a previous ScrapThat! Kit. 


This intricate DA piece is from my stash. It was heat embossed, painted, and inked.

This July Kit and add-ons are available in the ScrapThat! Store.

Be sure to stop back tomorrow for my next Donna Salazar Project and a tutorial for these Grungy Corrugated Leaves. Here is a sneak peek:


Follow on Bloglovin

Thanks for stopping by! I treasure your comments.

~ Blessings ~

Monday, July 15, 2013

Beautiful Bride ~ Details for ScrapThat!

I hope you are having a lovely and fun summer, staying cool as the hot July weather settles in. This page may look familiar since it is one of my pages created with the July ScrapThat! Kit. Today, I'd like to share some close-ups and technique details. 

I'm enjoying creating wedding layouts. This page features one of Elizabeth's favorite photos taken on her wedding day. 

"Beautiful Bride"
MK, EAO, FAO

Tips and Techniques: 
Background ~ I white washed the kit paper by thinning down some gesso with water and brushing it across the page. I then added paint rings, grid stamps and paint splatter.

Altered Doily ~ Don't let color prevent you from using that embellishment in your stash that is the perfect size and shape, but all the wrong color. The heart doily (from my stash) tucked behind the photo started out a bright, dark pink. It took several coats of white gesso to tame it down.

Border Punch ~ Instead of punching the edge of my paper, I punched a scrap, and placed it at the border. 


Altered Prima Flowers ~ I wanted to go with a light and airy feel on this page, so transformed the darker FAO Prima fowers. First, I applied texture paste to the two sets of outer leaves, then painted the entire flower with gesso. Some I misted lightly with a minty green color spray and others I rubbed with Pewter Mixed Media Inx by Donna Salazar. I also removed and reused some of the centers, replacing them with the charming Maya Road resin roses from the EAO Kit. 

Whitewashed Butterflies ~  I brushed the EAO Kit Pink Paislee Canvas Butterflies with watered down gesso to keep them light and airy.  

I added a key from Craftpon.com which was painted and distressed and Dusty Attic chipboard from my stash topped with pearl medium. The alpha is from a previous ScrapThat! kit.

Tulle Picks ~ I cut out rectangles of MK tulle, folded them in half lengthwise, then pinched and gathered the folded edge with my fingers. I wrapped the pinched edge and wrapped it with craft wire. I then tucked them into my clusters for a subtle reference to the beautiful veil in the photo.

Whitewashed Leaves ~ I simply brushed watered down gesso onto the MK leaves. This lightened them, but still left some of the green showing through.

Puffy Hearts ~ To enhance the love theme, I used Martha Stewart White texture effects with Donna Salazar's new Want2Scrap Heart Stencil to add to the mixed media background.

This Prima flower from the FAO kit and MK cherry blossom took the mixed media treatment so beautifully! The leaf is a sweet trinket from the Craftpon.com Etsy store. Craftpon also has a companion Etsy Shop ~ Stamcow.com which sells cute little rubber stamps.

This gorgeous July Kit and add-ons are now available for purchase by nonsubscribers in our ScrapThat! Store

Follow on Bloglovin

Thanks for stopping by! I treasure your comments.

~ Blessings ~

Thursday, July 4, 2013

Shimmer Tile Tutorial

Summer is at hand with lovely long days. Our broken air conditioner is now fixed and I'm nice and cool again. I hope you're able to stay cool in the heat of July. 

The Scrabble tiles in the ScrapThat! Main Kit are so cool, but since I wasn't able to spell something with the ones I received, I thought I'd try my hand at transforming them into shimmery tiles. Here's what I came up with.

Shimmer Tile Tutorial

Supplies:

Supply List:
  • Scrabble Tiles (ScrapThat! July Main Kit)
  • White Gesso
  • Prima Hello Pastel Clear Stamp (ScrapThat! July Main Kit)
  • Whispers Clear Glitter Embossing Powder (Holographic)
  • Perfect Medium or other clear embossing pad
  • Donna Salazar Mix'd Media CHOX Inx ~ Sage
  • Donna Salazar Mix'd Media Inx ~ Wisteria
  • Heat Tool (Not Pictured)
  • Paint Brush (Not Pictured)
Step 1. Place a small amount of gesso on a craft mat or paint palette. Add some water to thin down the gesso to create a wash. The amount of water will depend on how thick your gesso is. I used about 1 part water to 2 parts gesso. Brush the wash across the back and sides of the Scrabble tiles using a soft brush. Set aside to dry. I wanted just a touch of the wood grain to show through and used two coats of the gesso wash.


Step 2. Once the gesso has dried, stamp the tiles using the Prima Hello Pastel stamp included in the ScrapThat! July Kit. Ink the edges lightly. I used Donna Salazar's Mix'd Media Inx in sage and wisteria, but you can use any colors that coordinate with your page.


Step 3. Once the ink has dried. Press Perfect Medium or any clear embossing pad onto the painted and stamped side of the tile.


Step 4. Sprinkle with clear glitter (holographic) embossing powder and heat set. For even more sparkle you can repeat this step. (I used two coats of embossing powder.)

*****Tip: If you prefer a glossy finish that is not glittery, use clear embossing powder or UTEE.


Here are the finished tiles:

Thanks for dropping by to check out my tutorial! 

The July Kit is available in the ScrapThat! Store

Follow on Bloglovin

Thanks for stopping by! I treasure your comments.

~ Blessings ~

Sunday, June 30, 2013

Really Reasonable Ribbon Feature and Journey of a Lifetime details for ScrapThat!

If you are here for the ScrapThat! July Reveal and Blog Hop thanks for going here to my previous post. 

It's so hard to believe that it's the last day of June already!! I hope you are staying cool. Our air conditioning went out, but fortunately we've had a cool front move in just in time!! 

Joseph met the girl of his dreams in Rachel. It is amazing how well suited they are for each other. Rachel is a wonderful pastor's wife and helps him in his ministry. They also run an eBay business together. This fun photo was taken during a photo shoot when they became engaged. We went to a park and Joseph coaxed Rachel into this wooden train. It's just the beginning of a journey that I pray lasts a long and beautiful lifetime together. 

This page was created using the ScrapThat! July "Hope Chest" Kit and is my feature project for today's post over at Really Reasonable Ribbon

"Journey of a Lifetime"

I used the ScrapThat! June Sketch for inspiration: 

To join the June "Hope Chest" Sketch Challenge, stop by the forum.


Tips and Techniques:
Banner and Ribbon ~ I love to combine distressed paper banners with gorgeous ribbons like I did here to mix up the textures and add dimension. First I cut the paper banners, distressed the edges, wet, and crinkled up the paper. After allowing them to dry, I opened and kind of flattened out the flags. 

Next I selected these gorgeous ribbons from Really Reasonable Ribbon to pair up with this banner. First, I selected the Cream Mesh Ribbon. This is one of my favorites in Bonnie's store. I love the shabby, stringy texture. I cut a length of ribbon just a little shorter than the paper flags. This ribbon is held together by clear thread, so I pulled out the thread from one end to fray. Then I cut down the center of the ribbon, carefully cutting between two threads. I also cut off the edges that have the clear plastic strand running through them. This left me with two gorgeous frayed ribbons which I adhered atop the flags. Next I selected the Ivory Sheer Box Pleats Ribbon. I just adore the shimmer this sheer ribbon adds to a project!! I just snipped off two pieces and adhered them among the other ribbons and paper banner flags. Scor-Tape is my go to adhesive of choice for adhering ribbon. 

Altered Flowers ~ The smaller kit flowers were altered with paint and mist to change up the color. 

Handcrafted Flowers ~ I used Heartfelt Creations stamps and dies to created the larger focal flowers. 

Ribbon ~ Another close-up of the gorgeous ribbon

Chipboard ~ I added this Dusty Attic Chipboard from my stash. I colored it and applied crackle medium. Once dry I inked again to highlight the cracks. 

Tile ~ I altered this Scrabble tile and will be posting the tutorial in July. 

Mixed Media Background ~ I used a TCW stencil to apply sparkle texture effects. Although it's not as noticeable in my main project photo, you can see the sparkle and design here. 

The July kits will be available in the ScrapThat! Store on July 1. Be sure grab yours before they are all gone. 

Follow on Bloglovin

If you are looking to purchase ribbon, be sure to stop by Really Reasonable Ribbon to see Bonnie's amazing selection of ribbon, lace, natural fibers, and more . . .

Thanks for stopping by! I treasure your comments.

~ Blessings ~

Friday, June 28, 2013

ScrapThat! July "Hope Chest" Kit Reveal and Blog Hop

Welcome to ScrapThat! 
It's our July Kit Reveal and Blog Hop!! 


If  you came here from:
the Tracey Gregory 
you are on the right track

Now that we are in the full swing of warmer weather,
 we are so excited to show you our soothing and refreshing July Collection.
Should you lose your way, here is the Blog Hop order:

ScrapThat! 

We are so happy to welcome the amazing 
Natasha Naranjo Aguirre
as our July Guest Designer!!!


Hi!  My name is Natasha & I’m the mother of two wonderful children & the wife of an amazing, supportive man. I am a floral designer by day and a scrapbook designer by night. I love to incorporate different techniques in my work and use a variety of elements. Every day I am inspired by the work and talent of others, and I hope to be able to inspire others with my work as well. 

Be sure to stop by her blog to see more of her gorgeous creations: http://www.moments-of-tranquility.com/

Now, without further ado....  

Introducing our July Kit,
 "Hope Chest"

Featuring the Hope Chest collection by Pink Paislee, we are sure you will love this kit packed with gentle neutrals and sages combined with pops of Prima color! Whatever your scrapping style is, you can capture the beauty of nature and the photos and memories you hold dear.

Take a look:

Main Kit*

*The Circles are not part of this kit-sorry for the mix-up

Paper Add-On

Flower Add-On

 Embellishment Add-On


More details on this collection can be found here:
We are currently accepting new

Kit Club Members. 
For more information,
complete the form on the link below:
New Subscriber  

Summer Promotion 
ScrapThat! is having a fabulous summer promotion. If you start a subscription during the months of July or August, after 6 paid months, you can pick a retired kit from the ScrapThat! store for free. It will be shipped along with your 6th month kit. If you are already subscriber and want to get in on the action, refer a friend. For each friend you refer, you will both receive a free kit after you each complete 6 months from the time the referral starts. The person you refer must give your name when they subscribe. Stop by the ScrapThat! Store to start your subscription today.

Look at the beautiful sketch Amarilys has created for July:


See details about the challenge here: Sketch Challenges
The DT Challenge this month is hosted by Tracey G:"Create A Canvas"
Due to popular request, Sandi will also be hosting a Round Robin challenge!

Everyone is welcome to participate in all challenges.
Entries for all challenges are due by Wednesday, July 24.
 All winners of our challenges, including Layout of the Week, are eligible to receive 10% off any 2012 Kits ~ including Add-ons!

My first project is based on Amy's gorgeous sketch and uses the Main Kit without any of the add-on kits. This is an engagement photo of our son Joseph and Rachel. They've been married now for nearly 2 years. I pray they will have an amazing and long journey through life together. 

"Journey of a Lifetime"
MK

These Pink Paislee papers are gorgeous with so many grungy and vintage images. I fussy cut flowers to tuck around the photo and next to the title. I colored the kit roses and cherry blossoms and the larger flowers are handcrafted from kit paper using Heartfelt creations stamps and dies. I just love the cork print alpha and used the adhesive cork to die cut the second part of my title. The pliable mesh included in the main kit was put to use stamping the bottom and side edges with gesso. I also gessoed the green felt lace. I added a DA chippie and some Really Reasonable Ribbon from my stash. I'll be sharing a tutorial in July showing you how to convert the Scrabble tiles into the elegant sparkly tile tucked into my top cluster. 

~ ~ ~ ~ ~ ~ ~

Next up is a page featuring Elizabeth and Andrew's wedding rings, appropriately
placed on this Scripture passage about enduring love. 

"A Symbol of Our Love"
MK, EAO, FAO

The border paper with documents reminds me of old marriage documents - just perfect for these photos. I used several techniques like water distressing, stenciling, gesso wash, and misting. I smudged more gesso onto the FAO and MK flowers to lighten and soften them. The journal cards included in the MK have some great doily images I fussy cut to tuck into the outer layers. I also distressed one of them to tuck behind a photo. I added a DA Chippie and the gold leaves and heart key are from the Craftpon Etsy Shop. I colored the MK pearls with glimmer mist before placing them on the punched border around the title. An easy way to color the kit alpha is with embossing powder.

This final layout features a gorgeous photo of our daughter Elizabeth on her
wedding day. This is one of her favorite photos taken that day. 

"Beautiful Bride"
MK, EAO, FAO

I coated the outer petals of the larger flowers with molding paste, then colored with gesso, mist, and inks. To lighted the background paper, I whitewashed the paper with watered down gesso, then splattered, and stamped as well. I just adore the combination of grunge and bling, so these Pink Paislee glitter embedded burlap butterflies were so fun to use!! The pretty glittered title uses an alpha set from a previous ScrapThat! kit. I've added another of the leaves, heart keys and DA chippies. I removed the flower centers from a few of the Prima flowers and replaced them with the sweet Maya Road resin roses from the EAO Kit. The MK tulle was absolutely perfect to tuck into my clusters to reflect the tulle of Elizabeth's veil. 

Now for details about our blog hop:

Our Blog Hop features 9 fabulous hop sites including our Design Team blogs. 
We have been scrapping away and are so excited to show you our  creations! 

The July Blog Hop Prize is our retired "Summer In My Garden" Main Kit featuring Fabscrap's Organic collection

To qualify for this month's FABULOUS Prize, you must complete the following:
  • Visit each blog listed on the hop to see what each designer has created using this month's kit and sketch (comments are very much appreciated).
  • Each designer's blog hop post will feature a word or two that will make up a secret sentence, collect these words along the way.
  • You must become a FOLLOWER of each blog along the way and LIKE us on our Facebook Page!
  • Subscribe to Kelly's YouTube Channel at http://www.youtube.com/user/kellycreates
  • Post the ScrapThat! Blinkie on your blog.
  • For your last stop on our Blog Hop return here to the ScrapThat! Chat Blog. Leave a comment letting us know you have completed the hop.(Please do NOT include the secret sentence in your comments.)
  • Email the secret sentence to Tracey Sabella: tracey@scrapthat.ca
The Blog Hop ends Sunday, June 30 at Midnight EST.
The prize MUST be claimed within 3 days of the forum announcement which will also be made on the ScrapThat! Blog.
~ If left unclaimed a NEW winner will be chosen ~
**Winner will pay actual shipping costs for sending the kit from Canada.**
Shipping costs will be invoiced via PayPal unless you are a kit member,
 then your prize will be shipped with your monthly kit.
Prizes won during the month will be mailed out the first week of the following month.
Due to Customs clearance, International mailings sometimes take 30-75 days to receive.

My secret words are:
a hope

Next hop over to

For your final stop, return here to the ScrapThat! Blog 
to let us know you have completed the hop.
Remember ~ only send the secret sentence to tracey@scrapthat.ca

Happy Hopping!

Follow on Bloglovin

Wednesday, June 26, 2013

ScrapThat! July Sneak Peeks

Our ScrapThat! Design Team has been creating some inspiration for you with the fabulous July Kit. Just look at these gorgeous Sneak Peeks!! I hope you'll join us on Friday for our full Reveal and Blog Hop.


Just to tantalize you a little more, here are a some peeks from my projects:


As you can see, there is so much shabby chic goodness in this gorgeous kit.
See you on Friday!!

Follow on Bloglovin

Thanks for stopping by! I treasure your comments.

~ Blessings ~