Welcome to my creative space!
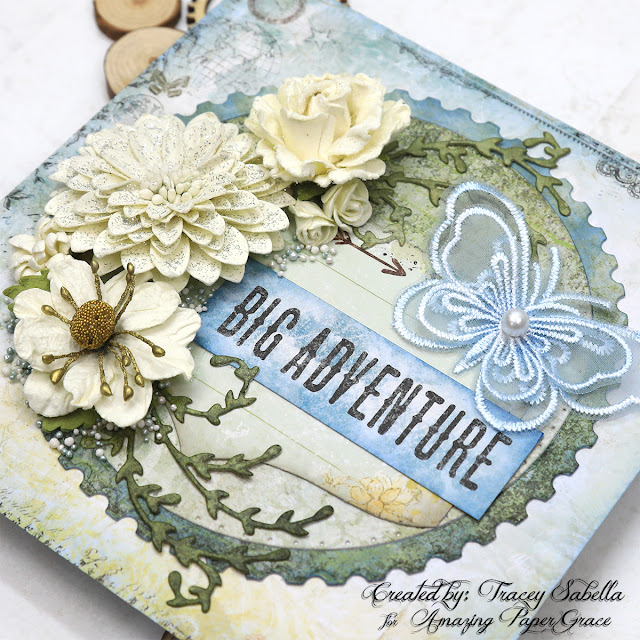
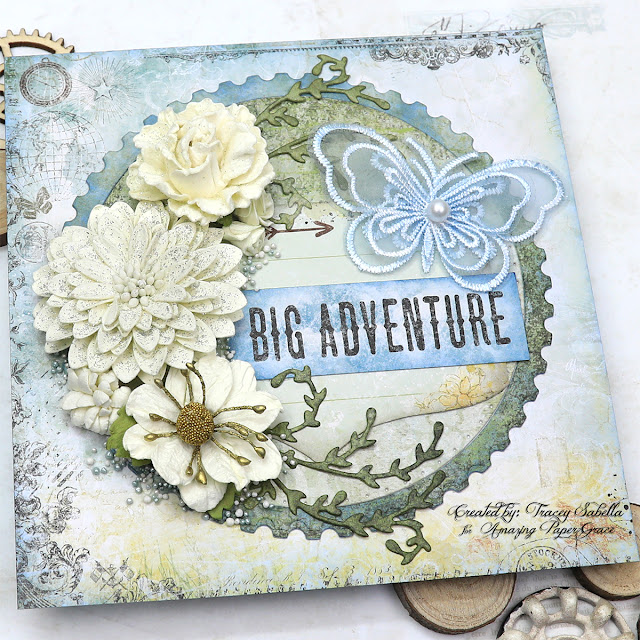
I thought it would be nice to bring a hint of summer warmth after the recent wintry weather we have experienced recently. This beautiful card features the Amazing Paper Grace Postage Edge Circles die set (S5-539). I just adore the versatility of this fabulous postage edge collection.
The postage edge and pierced inner circle were cut in one pass with the same section of patterned paper. The outer postage ring is inked and turned to highlight and give definition. Premade flowers from Little Birdie Crafts are paired with gorgeous foliage die cut with fabulous leaf dies from the My Sweet Friend set (S5-512).
I enjoy creating versatile cards that can be used for a variety of occasions. This card could be a send off for someone taking an adventurous trip, a new job, graduation, or milestone birthday.
For more close-ups and all the details on how to create this card, be sure to scroll down through the Tips and Techniques section below.
Thank you Amazing Paper Grace for providing the dies used in this project.
As mentioned earlier, I die cut the postage edge ring and inner pierced circle from the same patterned paper in one pass. I wanted the ring to have definition while coordinating with the inner circle so rubbed it randomly with Faded Jeans Distress Ink. The edges of the inner circle are inked with Pumice Stone Distress Ink to make the pierced design more visible and to add to the contrast between the two pieces.
The white lace butterfly is also rubbed with the Faded Jeans ink to give it a soft blue hue.
This circle design is perfect for arranging a flowing floral cluster along one side as I did here. I arranged pre-made Little Birdie flowers from the Shabby Chic collection, then to extend the design around the circle I die cut foliage with a soft curve from the My Sweet Friend die set (S5-512) from a darker green section of the same patterned paper. The leafy section is cut into two pieces to use on each end of the cluster and inked with Forest Moss Distress Ink to add contrast.
This close-up also shows how gorgeous this postage edge design is. You may notice that I also rotated the outer ring so that the darker part of the ring is against the lighter part of the circle. This adds more contrast to the design. By rotating and inking the postal edged ring, it looks like two different patterned paper were used.
To add texture and fill in areas around the cluster I brushed matte gel medium around the edges and sprinkled with two colors of Prills. This is an easy way to add a bit of sparkling texture to your project.
The Wanderlust paper collection included a page with 6x6" designs that could be cut for card bases. The background paper is one of those pieces and coordinates perfectly with the round postage designs. The edges look stamped, but this is part of the patterned paper. I did add a bit of light inking with Faded Jeans around the edges of the background and sentiment.
Below you can find the products I used to create this project including some with compensated affiliate links to Scrapbook.com and Spellbinders. These links are at absolutely no cost to you. When you shop through the links below, I receive a small commission from the companies. These commissions help me cover the costs of my blog and other expenses, which allows me to continue to provide you with FREE inspiration along with detailed Tips and Techniques provided for every project. Thank you so much for your love and support!
Amazing Paper Grace Sets:
Paper:
- Core'dinations - 8.5 x 11 Cardstock - Value Pack: White, 110lb
- Blue Fern Studios - Wanderlust Collection (retired)
Ink:
Mixed Media:
- Prima - Finnabair - Soft Matte Gel
Embellishments:
- Little Birdie Crafts - Shabby Chic Flowers: Wendy; Nancy; Bonita; Julita: Micro Roses
- Prima - My Sweet Butterfly Lace
- US ArtQuest - Mini Prills: Mint To Be; Minnie Pearls
Adhesives:
- Scrapbook.com - Clear Double Sided Adhesive Roll - 1/4 Inch - Permanent
- Tombow - Mono Multi Liquid Glue
- Beacon - 3-IN-1: Fabri-Tac
Tools:
- New & Improved Platinum Six Machine with Universal Plate System - Spellbinders
- Spellbinders - Platinum 6 - Die Cutting and Embossing Machine with Universal Plate System - New and Improved - Scrapbook.com
- EK Success - EK Tools - Craft Tweezers
- Tonic Studios - Tim Holtz - Non-Stick Micro Serrated Scissors - 7 Inches
- Tonic Studios - Tim Holtz - 12.25 Inch Maxi Guillotine Trimmer
- Sizzix - Tim Holtz - Alterations Collection - Sidekick - Starter Kit - Black
- Maker Forte - Maker Tool Kit Collection - To The Point - Bone Folder - Teflon
Thank so much for stopping by to view this warm summery card.
I hope you've been inspired.


That's lovely, Tracey!!
ReplyDelete