Welcome to my creative space.
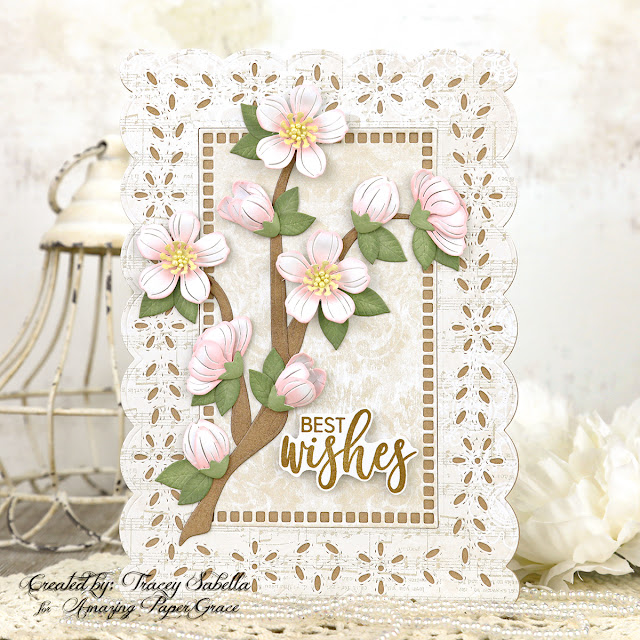
It's the season for weddings, and I thought these Amazing Paper Grace cherry blossoms would be perfect for a spring wedding card. I just adore that this fabulous Layered Cherry Blossoms set (S4-1194) has four distinctively different blossoms and includes leaf dies as well as three stem dies so that you can vary the design depending on the size and shape of your card.
I've created a shaped card using the elegant Eyelet Lace Frame die set (S6-184), The frame is a lovely music printed paper and the center is a delicate and elegant damask, a perfect backdrop for these beautiful cherry blossoms.
Be sure to scroll down through the "Tips and Techniques" section below for close-ups and all the details on how to create this beautiful card and sweet handcrafted flowers.
Thank you Amazing Paper Grace for providing the dies used in this project.
Tips and Techniques:
Aren't these blossoms so sweet and beautiful? Each of the four different blossoms has an individual die that cuts all the pieces to form that flower, making these so easy to put together. I used a finger dabber to apply light pink ink into the centers and bases of the petals and just lightly around the edges. I cupped the petals with a stylus on a foam pad, but they could easily be shaped with your fingers if you don't have a stylus in the right size. I inked white cardstock with green ink to die cut the bases for the buds and partially opened blossoms.
I inked a small piece of cardstock with light yellow ink to die cut the stamen which are added to the centers of the fully opened blossoms and adhered a few prills into the middle of these stamen.
I used more of the green inked paper to die cut the leaves. There are four leaf dies in two sizes which allows for a more natural, organic look. I've used a shaped base cut with the Eyelet Lace Frame die set (S6-184) and backed it with a light brown paper to show through the eyelets.
The sentiment is stamped in a coordinating brown ink. I didn't have quite the right color of ink, so stamped it using a stamp platform with a lighter brown first, that was just a little too green, then lightly stamped over that with a darker brown that was a bit too dark on its own to get the perfect color. Once it was good and dry, I fussy cut it out and popped it up using foam tape, then arranged the floral branches around it.
There are three branch dies making it easy to give a lot of versatility to this set. You can cut as many branches as desired, but I've just cut each one once for this branch of blossoms. I cut them from the same brown paper that's peeking through the eyelets, then inked it to highlight the embossing.
I also went in and added a bit of extra green ink around the leave edges to add some natural shading.
Amazing Paper Grace Dies:
Paper:
- Studio75 ~ Forever in Love Collection 12x12"
- Cardstock ~ White 110lb
- Tim Holtz ~ Kraft-Core Nostalgic Collection
Ink:
- Ranger ~ Spun Sugar; Bundled Sage; Gathered Twigs; Scattered Straw
- Ranger ~ Archival: Coffee
- Concord & 9th ~ Dye Ink: Wheat
Stamps:
- Waffle Flower: Essential Sentiments
Embellishments:
- US ArtQuest ~ Prills: Lemon Chiffon
Adhesives:
- Ranger ~ Distress Collage Medium
- Beacon ~ 3-IN-1 Advanced Craft Glue
- Beacon ~ Fabri-Tac
- Double Sided Tape ~ 1/4"
Tools:
- Spellbinders ~ Platinum 6
- Tim Holtz with Tonic Studios ~ Haberdashery Scissor - 5 Inches
Thanks for stopping by! I treasure your comments.
~ Blessings ~


No comments:
Post a Comment
Thanks for taking the time to stop by and leave a message! I treasure your comments.