Pages

Tuesday, July 30, 2013

Want2Scrap Top Secret Birthday Party Blog Hop

Welcome to the Want2Scrap Birthday Party Blog Hop for Michele Parrish. If you would like to start at the beginning, head on over to the Want2Scrap Blog.

Happy 50th Birthday, Michele!! I hope you have a fabulous day!!

Bling is the theme!! 

Michele loves pink and bling.
Here's the card I created for her:


I've been a big fan of Michele's Want2Scrap bling and chipboard for a long time. My newest Want2Scrap must have products are her wonderful stencils designed by Donna Salazar!!

Project Details
Aren't the Want2Scrap chipboard pieces so gorgeous heat embossed with Fran-tage embossing powders? I used Donna Salazar's Spellbinders Grand Peony Dies to create these Crushed Voile Peonies centered with one of her Bitty Blossoms flowers. My tutorial for these flowers can be found here. The triple looped bow is created with white organza ribbon. All of these items from the delicate flowers to the heavier chipboard are adhered with Helmar 450 Quick Dry Adhesive. 

Here's another view showing off the gorgeous Want2Scrap Chipboard and pearl flourish.

Can I just say how much I adore these teardrop pearls?? Let's just say, I have several packages in my stash!! They are just perfect to accent this doily!! I colored the doily using DSD Mix'd Media Inx and ran some embroidery floss around the center circle. I stamped and embossed the sentiment then inked the cardstock background. I just love how Donna's Inx work so well with her papers. I used her Natural Beauty collection here. My DSD Distrezz-It-All made quick work of distressing the edges. 

Want2Scrap Products

Other Products
Donna Salazar Designs, GCD Studios ~ Natural Beauty - Twiggy
Donna Salazar Designs, GCD Studios ~ Family Jeans - Family Eyelet
Donna Salazar Designs, GCD Studios ~ Mix'd Media Stax 2
Donna Salazar Designs, Spellbinders ~ Bitty Blossoms
Donna Salazar Designs, Spellbinders ~ Grand Peony
Donna Salazar Designs, Clearsnap ~ Mix'd Media Inx
Donna Salazar Designs, Zutter ~ Distrezz-It-All
Crushed Voile Fabric
Sewing Machine ~ Viking Husqvarna Designer 1
White Thread
DMC Embroidery Thread
Doily
White Organza Ribbon
Helmar 450 Quick Dry Adhesive

Be sure to check out the RaffleCopter to find extra ways to enter the giveaway drawing. 

Here's a mobil link for entries:

I'm so glad you have joined us to wish Michele a very happy 50th birthday. 

Follow on Bloglovin

Thanks for stopping by! I treasure your comments.

~ Blessings ~

Monday, July 29, 2013

"Celebrate" details for ScrapThat! with Really Reasonable Ribbon.

Weddings are a time for celebration, and I just adore this photo of the wedding party celebrating Elizabeth and Andrew's special day. I created this layout with the ScrapThat! August Kit and also feature several gorgeous ribbons, lace, and cording from the Really Reasonable Ribbon Store.

"Celebrate"
MK, EAO, FAO

Tips and Techniques:
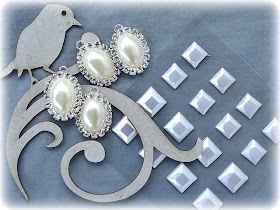
Gem Banner ~ Aren't these crystal encircled pearl gems in the EAO Kit just gorgeous? I used them all in one fell swoop, adding decorative jewelry links from my stash to create this corner feature. I used Tombow 3-D Foam Tabs from RRR to adhere the pearl gems. 

Mixed Media Background ~ I enjoy supporting my photo in subtle ways. This Heartfelt Creations script stamp is 1 Corinthians 13, the Love Chapter. I used Donna Salazar Mix'd Media Inx to stamp. The leaves are created with a DecoArt stencil and molding paste. 

Borders ~ We all have punches in our stash, and I used several to randomly punch around the border, then stitched varying straight, zigzag and curved stitches around the page. 

Corrugated Butterfly and Heart ~ These are hand crafted from corrugated board with tiny ridges, the kind in postal shipping boxes. The heart was wrapped with RRR Iridescent White Metallic String by May Arts and topped with a FAO Prima rose. The Iridescent String is one of Bonnie's must have's from her store. I love the sparkly bling this sweet thread adds to my projects!! My Corrugated Butterfly Tutorial can be found here

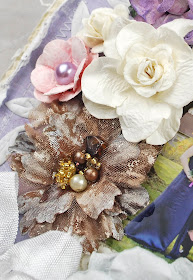
Flower Clusters ~ What an amazing variety of gorgeous flowers in the Main Kit and FAO Kit! I separated some of the pink flowers into two pieces and the Beaded Coffee Petaloo flower was brushed with the Moonlight Smooch Accents to soften. I also dabbed a couple shades of purple ink onto the open rose to add visual dimension. 

Ribbon Leaves ~ I wanted the ribbon leaves to be tucked into my cluster, so I cut off lengths of May Arts White Ribbon Leaves with just one or two leaves and placed them around my flowers. 

Chipboard ~ I "painted" on some Smooch Accents in moonlight to add the creamy pearlized accents to this Dusty Attic chipboard from my stash.

Four Loop Ribbon Bow ~ I used a variation on Ginny's double loop bow to create this bow with gorgeous white Seam Binding. Instead of using my fingers, I got creative and used the handles of my pliers. You can find Ginny's Double Loop Bow Tutorial here

Lace ~ I used the gorgeous white rose lace from the MK to accent the photo. I also tucked Juliet Natural Crochet Lace into the borders.

Glittered Butterfly ~ The Etsy butterfly in the MK is so pretty, but just a little dark for this page, so I rubbed some Jasmine Mix'd Media Inx lightly onto the wings, then spread Lavender and Gold Stickles on for some bling. The Want2Scrap pearl flourish is from my stash. 

Distressing ~ My Donna Salazar Distrezz-It-All made quick work of distressing my edges and mat. 

I used this Bird Is the Word sketch and featured word, "Celebrate" as inspiration.

This gorgeous ScrapThat! Kit will be available for purchase to non-subscribers on August 1. Stop by the ScrapThat! Store for details and complete listing of kit contents once the kit is available. Previous kits are currently available for sale. 

If you are looking for a place to buy lovely ribbons and lace stop by the Really Reasonable Ribbon Store.

Really Reasonable Ribbon Products:

Follow on Bloglovin

Thanks for stopping by! I treasure your comments.

~ Blessings ~

Friday, July 26, 2013

ScrapThat! August "Days to Remember" Kit Reveal and Blog Hop

Hello and Welcome to our August Kit Reveal and Blog Hop!

You should have arrived here from Tracey Gregory. 

If not, you can start at the beginning at the ScrapThat! Blog.

If you lose your way, here is the order:
We are so blessed to have the sweet and uber-talented, 
Lisa Gregory 
as our Guest DT for August!


Hi, My name is Lisa and by profession I am a registered nurse. I am married to my high school sweetheart and we have 2 children who are now successful young adults.  I have been a crafter my whole life. Back in 2005, when my son was doing his senior project with his girlfriend (who is now his wife) They were creating a scrapbook of their lives. They elicited my help as I was the crafty one. I found Scrapbook.com and saw the kind of scrap booking the artists did. I was amazed at the styles. It just wasn't cut and paste and stickers. It was 3 dimensional, it was gorgeous, and oh so inspiring. So I created a gallery, created my first layout and the rest is history. My style has changed a bit throughout the years, but playing with and scissors is still so therapeutic for me. I am honored and excited to be Guest Designing for Scrap That for the month of August. 

Stop by Lisa's Blog
to see her gorgeous work.

We are also excited to introduce a new addition to our DT-
Monica Lowrance

Hi all! My name is Monica Lowrance.
I'm so excited to be here!! I'm excited, humbled, and honored to be here. I’ve been scrapping for many years. I fell in love with it. I love creating. I have a love for flowers, chippies and beautiful papers. Actually I love all things connected with scrapping! I love trying new techniques and colors. I also try a variety of different styles, and mixed media intrigues me.
I look forward to getting to know you all and working with you. I can’t wait to see your wonderful projects. I am so excited at the chance to work with these kits. They are gorgeous!! Please join me in my next adventure here at ScrapThat!
Feel free to stop by my blog and say hi: Happy Scrappn 2.
Now without further ado, we are proud to introduce our August kit, 
"Days To Remember"
featuring the shabby loveliness of the Maja Design "Vintage Spring" Collection. This is one of those kits that you will just keep saying,"Oh, how pretty!" as you unpack every item. The colors are soft and muted and paired with elegant embellishments and delicate flowers. Take a look:

Main Kit

Embellishment Add-On Kit

Flower Add-On Kit

Paper Add-On Kit
More details on this collection can be found here:
ScrapThat! Store

We are currently accepting new
Kit Club Members.
complete the form on the link below:
Summer Promotion 
ScrapThat! is having a fabulous summer promotion. If you start a subscription during the months of July or August, after 6 paid months, you can pick a retired kit from the ScrapThat! store for free. It will be shipped along with your 6th month kit. If you are already subscriber and want to get in on the action, refer a friend. For each friend you refer, you will both receive a free kit after you each complete 6 months from the time the referral starts. The person you refer must give your name when they subscribe. Stop by the ScrapThat! Store to start your subscription today. 

Look at the elegant sketch Amarilys has created for August!


See details about the challenge here:
 Sketch Challenges

My first project is based on Amy's lovely August sketch using the Main Kit without any of the Add-On Kits. This is our Elizabeth about 20 years ago. Yes, this adorable spiky hair baby is our daughter bride in the next layout as well.

"Love Sweet Elizabeth"
MK


This gorgeous Maja collection is so versatile and offers some fabulous fussy cutting opportunities as showcased here. The kit is just packed with gorgeous coordinating embellishments like these wonderful I Am Roses flowers. I used the loose rose petals to create the larger white focal flower. I decided to get creative with the Pink Paislee rings by painting them white and crocheting a lace border onto them. You can get so many looks with the kraft butterflies. Here I used a combination of embossing powder and glitter flakes, adding a butterfly charm from my stash. 

~ ~ ~ ~ ~ ~ ~

This next page shows Elizabeth all grown up with the wedding party celebrating her and Andrew's special day. 

"Celebrate"
MK, EAO, FAO

The purples in this kit are a perfect pairing to the marine blue of the bridesmaids' dresses. I've used the Main Kit along with the Embellishment and Flower Add-On Kits. Don't the EAO pearl gems make a gorgeous banner in the corner? I enjoy sneaking in subtle references to the theme of my photo and the stamped script on the background is a Heartfelt Creations stamp of 1 Corinthians 13 - the love chapter. My DT Challenge this month is to use stamping on your project. Stop by the forum to join us. I used the July Bird is the Word sketch and theme word, celebrate, for inspiration:

~ ~ ~ ~ ~ ~ ~
My final project for you this month is a pair of tags. Be sure to watch for my build a tag tutorial later this month. 

"Live in the Moment Tag"
MK, EAO, FAO

"Butterfly Tag"
MK, EAO

The gorgeous papers, butterflies, flowers and lace come together so beautifully for tags and cards!

~ ~ ~ ~ ~ ~ ~

We are having multiple DT Challenges this month-be sure to check them out!
Tracey S.: Spice it up with Stamping 
Monica: Chipboard from Cereal Box
Laura: Black & White Photo
Tracey G: Trash to Treasure

Everyone is welcome to participate in all challenges !
You do NOT have to be a subscriber to play along!
Entries for all challenges are due by Wednesday, August 28.
 All winners of our challenges, including Layout of the Week, are eligible to receive 10% off any 2012 Kits ~ including Add-ons!
Our Blog Hop features 9 fabulous hop sites including our Design Team blogs. 
We have been scrapping away and are so excited to show you our  creations! 

The August Blog Hop Prize is our retired 
"Once Upon a Dream" Main Kit featuring Kaisercraft Charlotte's Dream
To qualify for this month's FABULOUS Prize, you must complete the following:
  • Visit each blog listed on the hop to see what each designer has created using this month's kit and sketch (comments are very much appreciated).
  • Each designer's blog hop post will feature a word or two that will make up a secret sentence, collect these words along the way.
  • You must become a FOLLOWER of each blog along the way and LIKE us on our Facebook Page!
  • Post the ScrapThat! Blinkie on your blog.
  • For your last stop on our Blog Hop return here to the ScrapThat! Chat Blog. Leave a comment letting us know you have completed the hop.(Please do NOT include the secret sentence in your comments.)
  • Email the secret sentence to Tracey Sabella: tracey@scrapthat.ca
The Blog Hop ends Sunday, July 29th at Midnight EST.
The prize MUST be claimed within 3 days of the forum announcement which will also be made on the ScrapThat! Blog.
~ If left unclaimed a NEW winner will be chosen ~
**Winner will pay actual shipping costs for sending the kit from Canada.**
Shipping costs will be invoiced via PayPal unless you are a kit member,
 then your prize will be shipped with your monthly kit.
Prizes won during the month will be mailed out the first week of the following month.
Due to Customs clearance, International mailings sometimes take 30-75 days to receive.

My first secret word is:
made

Next hop over to see the work of our talented
Sandi Clarkson

For your final stop, return here to the ScrapThat! Blog 
to let us know you have completed the hop.
Remember ~ only send the secret sentence to tracey@scrapthat.ca
Happy Hopping!

Follow on Bloglovin

Thanks for stopping by! I treasure your comments.

~ Blessings ~

Wednesday, July 24, 2013

ScrapThat! August Sneak Peeks

The ScrapThat! Design Team has been hard at work creating with our gorgeous August "Days to Remember" Kit. I've really enjoyed working with these beautiful papers, flowers, and embellishments!!

Take a look at these fabulous sneak peeks:


And a few from my projects:


Be sure to stop back by on Friday for our full reveal and blog hop.

Follow on Bloglovin

Thanks for stopping by! I treasure your comments.

~ Blessings ~

Monday, July 22, 2013

SEM Blog Hop Winner

I would like to thank each of you who hopped along for the Scrapping Everyday Miracles 2nd Birthday Celebration Bog Hop. Random.org has helped me select a winner for my twine flower package. I've also included a corrugated heart and butterfly. 


My winner is  . . . . . .

Debi who said:

"Beautiful scrapbook page. Love the monochromatic blue. Really like how you used the various punches around the page. Great idea."

Congratulations Debi!! 

Please contact me with your shipping address.
My email address is located on my Contact Me page

Follow on Bloglovin

Thanks for stopping by! I treasure your comments.

~ Blessings ~

Sunday, July 21, 2013

Happiness is . . . Card and Pleated Ribbon Tutorial for Really Reasonable Ribbon

Gary and I are celebrating our 31st anniversary in a few days. Here is the card I created for him featuring a variety of natural, masculine ribbons from Really Reasonable Ribbon

"Happiness is . . . Being with you"

Really Reasonable Ribbon Products:

Tips and Techniques:

Pleated Ribbon ~ This May Arts Burlap Wired Ribbon is a dream to work with and pleat. I've included a tutorial to create pleated ribbon below. 

Layered and Wrapped Ribbons ~ I layered four of Bonnie's fabulous natural ribbons starting with the Natural Jute Ribbon topped by Wired Pleated Burlap Ribbon, then 5/8" Jute Ribbon, and finally wrapped with white Bamboo Cording.

Twine Flower ~ Who says you can't use flowers on a masculine project? This one is created with 20lb Natural Hemp Cord using my Twine Flower Tutorial found here. I topped it with a button from the Natural Button Grab Bag. There is such a nice variety of buttons in the grab bags! 

Leaves ~ I trimmed several small sections of May Arts White Leaves and tucked around my flower. 

Trinkets ~ The lovely Heart Skeleton Key which perfectly fits the anniversary theme is from the Craftpon.com Etsy Store. The heart lock is from my stash. 

~ ~ ~ ~ ~ ~ ~

Pleated Burlap Wired Ribbon Tutorial


Supplies:
Ruler
Pencil

To determine the length of ribbon needed, each 1 inch pleat takes 2 inches of ribbon with an extra ½ inch on each end, so the 6 inch section of pleated ribbon on my card required 13 inches of wired burlap ribbon. You can work directly off your roll of ribbon, so there is no need to cut until your pleating is completed, but this guide will help you assure that you have enough ribbon for your project. 

Step 1. On the back of your ribbon, make a small pencil mark at 1.5 inches from the end, then ½ inch from that mark, then repeat across the length of your ribbon. Your pattern will be 1.5 inches, ½ inch, 1.5 inches, ½ inch, 1.5 inches, ½ inch etc . .


Step 2. Fold the end of the ribbon at the first 1.5 inch mark towards the back with wrong sides together.


Step 3.  At the next mark, ½ inch further into the ribbon fold in the opposite direction this time with right sides together to create your first pleat.

Here’s what it should look like from the top side:

Here’s a side view so you can see the direction of the folds:

Step 4. Fold again on the next mark 1.5 inches further into the ribbon with wrong sides together.

Here’s a view from the back side after this fold:

Step 5. Fold again on the next mark ½ inch further into the ribbon with right sides together.

Here’s a view from the top of the ribbon after the fold.

And a side view:

Step 6. Continue to repeat these folds until you get the length of pleated ribbon required for your project:

Note, I have shown the side view with the folds slightly open so you can see the direction of the folds. You will actually pinch the wired ribbon so it lays flat:


The wired ribbon holds the pleats well, but I tucked a piece of Scor-Tape in the fabric layers to hold the pleats in place before adhering to my card with more Score-Tape

Be sure to stop by the Really Reasonable Ribbon Store to check out Bonnie's amazing selection of ribbon. 

Follow on Bloglovin

Thanks for stopping by! I treasure your comments.

~ Blessings ~