Pages

Thursday, October 31, 2013

"Creativity" for Once Upon A...Sketch November Challenge featuring Really Reasonable Ribbon

Nadia has created another fabulous challenge for our November Once Upon A...Sketch Challenge. This month's theme is "My Happy Place." There are a number of happy places in my life that I share in my journaling. One of those special "places" is expressing my creativity. Creativity has always been an important part of my life. Even as a little girl, I could be found sewing up doll clothes, crocheting little book marks, crafting gifts for family and friends . . .  Paper crafting has been a fabulous creative outlet for me. This layout is about how creativity is my happy place and features ribbon, flowers, and adhesives from the Really Reasonable Ribbon Store

"Creativity"


Journaling Theme: "My Happy Place"
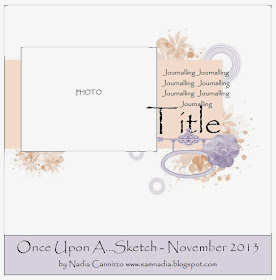
You are free to interpret our theme ANY WAY you like. It is for your inspiration and this theme word DOES NOT need to be part of your title or journaling. But please make sure your layout is based on the sketch below and includes journaling (hidden journaling is fine). Acceptable journaling is MORE than just a sentence, or generic writing such as date/place etc. It need to be present and at least 3 lines long. Remember, hidden journaling is perfectly fine but please DO let us know in your post where your journaling is!


Tips and Techniques:
Here you can see the cluster with the Grungy Wrinkled Ribbon bow. My tutorial for this ribbon technique can be found here. I started with White Seam Binding and used my Zutter Bow-it-All to tie the bow. This tool is quite handy and if you are interested in learning how to use it, the best videos I've seen are by RRR owner, Bonnie Garby. And you are in luck, Zutter has provided a Bow-it-All for her to give away. You can find links to her fabulous videos and enter the Bow-it-All giveaway drawing here

You can see my mixed media background where I've stenciled, misted, and brushed with gesso. The gorgeous Dusty Attic Ornate Gate chipboard is simply painted with white spray gesso. 

I used a mix of flowers from Really Reasonable Ribbon and my stash. Here you can see the 20mm White Open Rose and Chrysanthemum. I dry brushed most of my flowers and metal flourish with gesso. 
More Really Reasonable Ribbon Flowers ~ Chrysanthemum, Cottage Rose, and Open Rose. I've been trying to use up items from my stash and here you can see these sweet epoxy stickers that I tucked around this cluster. I tucked in some White Crochet Lace below and above my photo. Scor-Tape works beautifully for adhering lace and ribbon!!

I recently went to an auction with a friend. Oh my, there were rows and rows of odd lots and boxes of stuff. One of the things that caught my eye was this basket of old paint brushes. I've been seeing some pretty cool decor projects using old used up paint brushes and thought these would be perfect for decorating. They got grouped with some other odd boxes and I lost the bid, however, the woman who purchased the lot was delighted to sell them to me for a dollar. When I saw this month's OUAS challenge, I thought this rustic basket of brushes would be the perfect object to express the idea of creativity. The old weathered chair and gorgeous fall mums are a perfect backdrop for this charming basket. 

I painted this butterfly chipboard piece with metallic paints and dry brushed with gesso. The metal piece is also brushed with gesso. This cluster features WOC Chrysanthemums, Cherry Blossom, Cosmos, and a sweet Open Rose from Really Reasonable Ribbon.

Here is what my journaling says, "There are many things in my life that bring joy . . . my Lord, my family, the beauty of God's creation . . .  Something that has always been a happy place for me is creativity. Pulling out mixed media supplies to paper craft brings joy to my day."


Really Reasonable Ribbon Products:
Seam Binding ~ White 1/2"
White Crochet Lace ~ May Arts 3/8"
Wild Orchid Crafts Mulberry Flowers ~ 20mm Open Roses - White
Wild Orchid Crafts Mulberry Flowers ~ 25mm Cottage Rose - Mixed White/Cream
Wild Orchid Crafts Mulberry Flowers ~ Cherry Blossoms - White/Cream
Wild Orchid Crafts Mulberry Flowers ~ Chrysanthemums - Mixed Pink/White
Wild Orchid Crafts Mulberry Flowers ~ Cosmos Daisy Stem Flowers - Pink/White
Wild Orchid Crafts Mulberry Flowers ~ Sweetheart Blossoms - White
Wild Orchid Crafts Mulberry Flowers ~ Sweetheart Blossoms - 2-Tone Baby Pink
Zutter Bow-it-All
Scor-Tape 6" x 6"
Other Products:
7 Dots Studio ~ 9th Wave Collection
Prima flowers, stencils
Dusty Attic chipboard
Heidi Grace Epoxy word stickers
Momenta metal flourishes
Tattered Angels Glimmer Mist
Mister Huey Color Mist
Gesso
Light Molding Paste
Clear epoxy circles
Be sure to stop back by tomorrow (Friday) afternoon
for some exciting news I'll be sharing!!
Follow on Bloglovin

Thanks for stopping by! I treasure your comments.

~ Blessings ~

Tuesday, October 29, 2013

Donna Salazar Giveaways

Hi peeps!! I just have to share. Donna Salazar has two fabulous giveaways going on right now. You all know how much I enjoy using her products, and here's a chance for you to win some for yourself!! 

First, Donna just started a new Youtube channel and would like you to subscribe, so she's having a Mega Prize Giveaway. All you need to do to enter is subscribe to her new Youtube channel: http://www.youtube.com/user/donnasalazar/videos She'll be giving this away in November, so head right on over to get your name in the hat for this fabulous prize package.

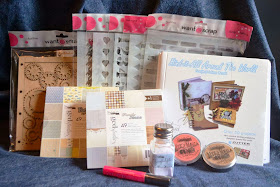
Just look at this prize package valued at more than $100.

The second giveaway is for her brand new Zutter Distrezz-it-All V3.0. Ok, if you follow me on a regular basis, you must know that the Distrezz-it-All is my all time favorite scrappy tool, and I use it on nearly all of my projects!! This new Distrezz-it-All V3.0 works just the same as V2.0. The only changes are the power cord and color. Stop by Donna's blog and use Rafflecopter to enter as well as liking the Distrezz-it-All Facebook page. As soon as this page gets 2,000 likes, Donna will be drawing a winner. All the details can be found here. Be sure to watch Donna's Wednesday Webisodes Video demonstrating all the cool distressing techniques you can achieve with the Distrezz-it-All. It can be viewed here.

Zutter Distrezz-it-All V3.0

PS . . . be sure to watch the bloopers on Donna's videos. They are sure to bring a smile to your face as you see her goofs and absolutely adorable grandson, Hunter. 

Thanks for stopping by! I treasure your comments.

~ Blessings ~

Monday, October 28, 2013

Thank You Card for Helmar with Glitter Glue Tutorial

The days are getting shorter as the temperatures cool down, but the fall color is still gorgeous here in Ohio. I've created a thank you card up on the Helmar blog today featuring Helmar Gemstone GlueI've included a tutorial on how to create your own glitter glue.

One of my favorite mediums to include on projects to give beautiful sparkle and shine is super fine glitter. There's only one problem, this sparkle has a way of invading my workspace, even spreading into the rest of our home, not to mention making me sparkle. If you've used glitter, you know exactly what I'm talking about. I've come up with a wonderful solution, so be sure to scroll down to check out my tutorial for making your own glitter glue.

Thank You Card

I used the Cardabilites #85 sketch for inspiration:
I've also used the Color Board for Challenge #10
over at A Mixed Media Color Challenge:

Tips and Techniques
Here's a close-up of my glittered flower. I die cut the layers from printed paper and printed cardstock, then misted. When dry, I brushed with my handmade glitter glue. Even though I secured the flower with a brad in the center, I like to glue each of my petal layers together to make sure the petals will stay offset. To adhere paper to paper, my go to adhesive is Helmar Premium Craft Glue. Below the flower you can see some of my die cut layers.

Here you can see the pearls and sequins I scattered across the top corner of my tag. I used Helmar Gemstone Glue to secure them in place. I squeeze some of the glue onto a craft sheet or scrap of wax paper that I can toss when finished. Then I pick up a pearl or sequin with craft tweezers, dip the base into the glue, and place on my card.

Another view of the flower, pearls as well as the heat embossed sentiment. I found my homemade glitter glue to be slightly tacky when dry, so after I put my flower together and before adding the brad center, I sprayed it with Crystal Kote Gloss Varnish Spray to give this gorgeous glowing finish that still allowes the glitter to sparkle.

A side view of my card. You can see my mixed media background. Any time I need to afix something to mixed media, my go to adhesive is Helmar 450 Quick Dry Adhesive, which adheres well to mixed media surfaces and texture.

Now I'll share my Glitter Glue Tutorial. As you can guess by my previous comments, I love the look of glitter on my projects, however, not how it invades my space and home. I got to thinking . . . Helmar Gemstone Glue dries perfectly clear so what would happen if I mixed my glitter into the glue? Yes, there are several glitter glues on the market, but none of them have the sparkle that I get with Fairy Dust Glitter which is super fine and has several sizes of glitter flakes mixed together. My little experiment gave me some happy results that I will be using over and over on my future projects!!

Glitter Glue Tutorial

Supplies
Superfine Glitter ~ I used Clearsnap Fairy Dust Glitter by Donna Salazar Designs
Something to mix the glitter on ~ I used wax paper
Something to mix the glitter glue ~ I used a toothpick
  • Step 1. Squeeze out some Helmar Gemstone Glue onto the wax paper. The amount you use will be determined by how much area you have to cover.
  • Step 2. Place a small scoop of glitter next to the Helmar Gemstone Glue. You can vary the amount of glitter depending on how much sparkle you want to achieve. I like sparkle, so used a lot of glitter.

A close-up of the Helmar Gemstone Glue and glitter:
  • Step 4. Use a paintbrush to apply the glitter glue to your project. A stiffer brush works better. You can apply this glitter glue to flowers, decorative elements, or even to your page background ~ anywhere you want glitter.

Here's what it looks like right after applying:

And another photo after drying. You can see that the Helmar Gemstone Glue dries perfectly clear, allowing that glitter to sparkle and shine in all its glory!!

Hint ~ I did notice as mentioned previously that there was just a slight tackiness that remained even when completely dry. That was easily taken care of with another fabulous Helmar product. I simply spritzed with Helmar Crystal Kote Gloss Varnish Spray. The glitter still sparkled just as brightly and the flower took on a lovely glow from the glossy varnish.

Here's a photo of the finished flower on my card:

I can't wait to see the projects you create with your own homemade glitter glue!!

Helmar products used to create my card:
(I highly recommend getting the larger Gemstone Glue if you want
to try this technique, because you won't want to stop!!)

Other products used: Donna Salazar Designs Products: Clearsnap Fairydust Glitter ~ Pralines and Cream, GCD Studios Antiquities Collecton and Crafy Chronicles, Clearsnap Mix'd Media Inx and Embossing Powder, Zutter Distrezz-it-All by Donna Spellbinders Grand Peony Dies. Additional products: Spellbinders and Sizzix dies, Tattered Angels Chalkboard Mist, Heidi Swap Color Shine Mist, Stencils by TCW and Pink Paislee, CTMH stamp.


If you have a moment, I'd love for you to stop by the Helmar blog to leave a comment.

Thanks for stopping by! I treasure your comments.

~ Blessings ~

Wednesday, October 23, 2013

A Lifetime Is . . . for Helmar with Rusty Metal Chipboard Tutorial

I'm so excited to be sharing my first Helmar design team project with you. If you have a spare moment, please stop by the Helmar Blog to leave some love. 

The photo in this layout is one taken of our son, Joseph, and his bride, Rachel, on their sunny Florida honeymoon. I adore the way sun rays stream over the two of them. They will be celebrating two years of marriage in December already. Rachel is so precious to us and a wonderful wife for Joseph. 

For today's project, I have featured Helmar Acid Free Glue to create this "Rusty Metal Chipboard." I've included a tutorial so you can create some rusty goodness for your next project. I've also used other Helmar products which I will be telling you about as I describe my page.

 "A Lifetime Is Not Long Enough to Love You"
 
I used the October Prima BAP sketch for inspiration along with lots of Prima goodies!!

I've also used this gorgeous October Mood Board at Berry71Bleu

Tips and Techniques
Here's a close-up of one of my "Rusty Metal Chipboard" pieces. Check out my tutorial below. I adhere all my heavier embellishments like chipboard using Helmar 450 Quick Dry Adhesive.

Another Rusty Metal Chipboard close-up with this fab texture! Here you can see some of my mixed media background. I stamped and then stenciled with molding paste and mist. 

The flowers and wood veneer pieces all started out white or natural and were spritzed with mists in yellows and teals. 

The photo mat is raised by adhering with Helmar White Round 1/2" Zapdots so that I can tuck flowers and other embellishments under the mat. All of my dimensional items like these flowers and veneer pieces are adhered with Helmar 450 Quick Dry Adhesive to make sure they stay in place. For paper to paper, like for my photo mat, I like to use Helmar Premium Craft Glue  It does not warp the paper at all and when you put the papers together, you have a few moments to move things around and make any necessary adjustments. 

 A close-up of the flower cluster near the title with wood veneers and button.

Here you can see my mixed media background with stenciled molding paste and misting beneath my flower cluster tucked in and under the photo mats. If you are starting to work with mixed media, you will find that it can be a challenge to get your elements to stick to the media used. Helmar 450 Quick Dry Adhesive is higher in solids content and works wonderfully to get a great hold when attaching your embellishments.

I painted and inked this Dusty Attic chipboard title and adhered with Helmar 450 Quick Dry Adhesive.

Now it's time to share how I created the Rusty Metal Chipboard. Who said glue is just for adhering? I've used it as a mixed media product to create this grungy, textured, rusty looking chipboard!

Rusty Metal Chipboard Tutorial
Supplies:
Rusty Metal Chipboard Tutorial for Helmar ~ Tracey Sabella gracescraps.blogspot.com
Supplies:
Helmar Acid Free Glue
Chipboard (Dusty Attic Key Holes used)
Ranger Alcohol Ink in rusty colors
Heat Tool
Nonstick Craft Sheet (Ranger used) Wax paper or foil could also be used
Small tip paint brush
  • Step 1. Cover chipboard piece liberally with Helmar Acid Free Glue. Be sure to get all the way to the edges. If you are working with a larger chipboard piece you can apply the glue and heat in phases instead of all at once.
Note ~ do NOT attempt this technique with glues that are flammable such as Helmar 450 or Helmar Premium Craft Glue.

Rusty Metal Chipboard Tutorial for Helmar ~ Tracey Sabella gracescraps.blogspot.com Step 1
  • Step 2. Apply heat to the glue using a heat tool until it bubbles up and even pops. Sometimes the heat causes bubbles that are quite large, when you're done heating and it is cool enough to handle, you can push those bubbles down. You will see the glue look like it is bubbling and boiling down below the surface - that's what you want to see. It's OK if some of the glue get's a little browned since you will be covering it.
Rusty Metal Chipboard Tutorial for Helmar ~ Tracey Sabella gracescraps.blogspot.com Step 2

  • Step 3. Select colors of Alcohol Ink that resemble the color of rust you would like to achieve. Place a small pool of each on a craft sheet or scrap of waxed paper or foil.
Rusty Metal Chipboard Tutorial for Helmar ~ Tracey Sabella gracescraps.blogspot.com Step 3
  • Step 4. Start by brushing some of the lighter colors of alcohol ink onto your bubbled glue chipboard piece.

  • Step 5. Brush on rust and red alcohol ink to blend with the golds. I don't clean the brush between colors, but let the colors blend and bleed into each other, pooling in and darkening the cracks and crevices.

Here's the finished "Rusty Metal Chipboard" keyhole on the layout:

I hope you will give this fun technique a try!

Helmar Products used on this page:
Helmar Zapdots

Prima Products:
Sunrise Sunset Collection: Celsius; Corona; Aura; Del Sol; Aperture
Romance Novel Collection: Wordsmith
Cottage Blossoms ~ Canary
Mini Sachet Collection ~ Pearl
Wood Icons ~ Leaves & Flowers
Craftsman Collection ~ Wood Embellishments - Clocks and Tickets
Toggle ~ Wood Buttons - Quirky
Junk Yard Findings ~ Small Typo Bulbs
Sarah Flowers
Say It In Crystals ~ Hearts
Stencil ~ Static, Flourish
Build-A-Frame Collection 1 & 2

Other Products Used:
Dusty Attic ~ Baroque Frame Circle DA0542; "A Lifetime Is . . ." DA0910; Decorative Keyholes DA0224
Clearsnap ~ Donna Salazar Designs - Mix'd Media Inx
Clearsnap ~ Donna Salazar Designs - CHOX Mix'd Media Inx
Tattered Angels Glimmer Mist
Heidi Swapp Color Mist
Golden Light Molding Paste
Dusty Attic Acrylic Paint
Ranger Distress Ink
Zutter ~ Donna Salazar Designs - Distrezz-it-All
Darice Heat Tool
Tonic Scissors

Thanks for stopping by! I treasure your comments.

~ Blessings ~
Tuesday, October 22, 2013

Thanks A Bunch for Donna Salazar Designs and Really Reasonable Ribbon

There's something so special about a handcrafted thank you card. I've created one to have on hand featuring Donna Salazar Designs products along with Ribbon and Wild Orchid Crafts Flowers from Really Reasonable Ribbon for this girlie grunge card.

Be sure to check out my tutorials included in this post. I show how I create my Bitty Blossoms Roses. They are so easy to make and can be used on any kind of paper crafting project from layouts to cards and altered pieces. I cut my paper scraps with the Bitty Blossoms dies and use spare time riding in the car or watching television to make them up to have on hand for my projects. I've also included a tutorial for the Grungy Wrinkled Ribbon I used for my bow using seam binding. 

"Thanks A Bunch"

Tips and Techniques
Here's a close-up of the flower cluster featuring my Bitty Blossoms Roses. The tutorial on how I make them can be found later in this post. I dabbed my flowers and the edges of the card with Clearsnap Glue Gloss, then sprinkled with Clear Fairy Dusty Glitter. I love the sparkle Donna's glitter adds to this card!!


Really Reasonable Ribbon carries a wide selection of gorgeous Wild Orchid Crafts Mulberry Flowers. Here I've used Chrysanthemums, Sweetheart Blossoms, and Open Roses along with some hand crafted flowers using Spellbinders Bitty Blossoms and Carnation Creation dies by Donna Salazar. 

You can also see some of the mixed media background behind the flowers. I stamped the top corner with Donna Salazar Designs Dear Sir Stamp by Art Gone Wild with Jasmine Mix'd Media Inx, then heat embossed with Jasmine MMI Embossing Powder. I spritzed with Clearsnap Smooch Spritz in Tea Party. Then in the bottom corner I used Donna's Brass Corner Stamp again with Jasmine MMI and then embossed with Clearsnap Top Boss Clear Embossing powder. Here I rubbed Petals MMI CHOX over the embossed image. 

I die cut Donna's GCD Studio Natural Beauty paper from the 6" x 6" paper pad using her Spellbinders Pockets and Swirls die set. I adore the design printed on the denim paper and placed the smallest pocket die so that the design would go across the top of the pocket. I embossed the pieces while they were still in the dies. Once I removed the die cuts, I highlighted by rubbing MMI over the embossed areas.

The smallest pocket die pierces holes around the design which I used to hand stitch using blue embroidery floss.

 
Can I just say how much I adore the seam binding from Really Reasonable Ribbon? It is so versatile. Bonnie carries a huge selection of colors. I have collected my share of them, but my go to color is white, and I had to buy an entire spool!! In my tutorial below, I show how to color, wrinkle, and grunge it up - so perfect for those shabby chic projects!! 

I finished my sentiment inside the card using Donna's GCD Studios Family Jeans Chipboard Alphas highlighted with Denim Mix'd Media Ink, which I also rubbed around the inside card edge. 

Bitty Blossoms Tutorial

Supply List
Spellbinders ~ Donna Salazar Designs - Bitty Blossoms Dies
SpellBinders ~ Artisan X-plorer
Large Tip Stylus and Foam Pad
Glue
Quilling Tool (Optional)
Round Nose Pliars (Optional, but very helpful)

Step 1. Die cut one Medium Bitty Blossoms Flower with your die cut machine. I used my Spellbinders Artisan X-plorer. 

Step 2. The next thing you want to do is to cup your petals so the flower will look more natural. Use a stylus with a large tip and use a circular motion to cup each petal. Start on the small end on the right side and cup the first two petals. 

Step 3. Turn the flower over on your mat so that the back side is showing. Continue to cup each petal with the stylus. This photo shows how your flower should look when all the petals are cupped: 

Step 4. Starting on the end with the larger petals with the right side facing up, use a round nose plier to roll the first 10 petals back as shown. You could also curl the petals around a skewer or something similar. However, if you own Bitty Blossoms and plan to make them regularly for your projects, the round nose pliers will make things go much faster!! 

Step 5. For the 10 petals you rolled, go back and this time roll back each side as shown:

Step 6. Using a quilling tool on the small end, start rolling your flower. The design on the right side will be on the inside as you roll, so in the photo below I will be turning the quilling tool in a counter clockwise direction. I have found that it helps to use my fingers to help mold and wrap the paper around the quilling tool to keep it from tearing. 

Hint: If you don't own a quilling tool, don't worry, you can just roll the flower with your fingers (which is Donna's preferred method of rolling.) For me personally, I've found I can roll the flowers up more quickly using the quilling tool.

Step 7. Continue rolling with the quilling tool until you reach the petals you rolled back in steps 4 and 5. Remove the quilling tool and hold the rolled flower in place. 

Step 8. Continue to roll with your fingers to the end. Bend the glue flap into place. Release the flower and it will uncurl/loosen up just a little: 

A view of the back. You can see how the back looks in this shot:

Step 9. Pull the flap open and apply glue to it. Fold it back into place and while the glue is still wet, arrange your flower making sure the outside petals are offset. 

Here you can see a finished Bitty Blossoms Rose.

You can use Bitty Blossoms Roses individually in clusters or as flower centers for larger flowers. I have used them both ways on my card:


Now for my second tutorial of the day:

Grungy Wrinkled Ribbon Tutorial

Supplies

Supply List
Mix'd Media Inx, Jasmine
Mix'd Media Inx CHOX - Petals
Water in a misting bottle
Heat Tool (Darice)
Nonstick Craft Sheet (Ranger)
Tweezers (EK Success)

Step 1. Measure out the length of ribbon needed for your particular project. Remember there will be some shrinking during this process, so you will want to add some length to account for this. I used 23 inches of ribbon for the triple loop bow on my card. Notice how nice and smooth this ribbon is coming right off the spool. It won't be that way for long!! 

Step 2. Rub ink color(s) of choice onto a nonstick craft sheet. This pink was a little darker and brighter than I wanted for my ribbon, so I also put down some Jasmine (white) ink to mix with the pink. You can use any color of water based ink for this technique.

***Hint*** If you would like to keep your rayon ribbon the original color, you can spritz the ribbon with water and skip the coloring part of the tutorial. 

Step 3. Spritz the ink(s) with a light misting of water. 

Step 4. Rub the ribbon through the inks - blending and mixing the two together as you go. I didn't mix them together first, because I wanted the ribbon to be blotchy with darker and lighter pink areas and even some small areas that were left white. 

Step 5. Scrunch the ribbon up and hold with a pair of tweezers. Don't over think this step and don't try to make it pretty - just randomly scrunch. Also don't worry if some of the edges get a little frayed looking. That's part of the grungy, shabby look I was going for. You could also do this with ribbon that is already colored to add wrinkles. Skip the coloring/ink steps and just spritz the ribbon with water and follow the remaining steps here. 

Step 6. Dry with a heat tool. To get the center of the bunched up ribbon dry, you may need to take the ribbon out of the tweezers and bunch it up again to expose more of the damp section. Repeat until it is all dry. It just takes a couple minutes for this type of ribbon. Also if you overheat the ribbon, it will singe and turn a little yellow. Again, that was fine with me. If you don't want any yellowing, you could allow the ribbon to air dry over night scrunched up in the tweezers or keep the heat tool further away from the ribbon and keep it moving. 

Here is a photo of the ribbon once it is dry. You can see the color variations and the wrinkles that result from this process. 

I tied a triple loop bow on my fingers using Ginny's tutorial found here. You could also whip out one of these bows in a jiffy using the Zutter Bow-it-All, now carried in the RRR Store

Supplies:
Paper
GCD Studios ~ Donna Salazar Designs - Natural Beauty 6" x 6" pad, Wall Vines A, Rosy B
GCD Studios ~ Donna Salazar Designs - Family Jeans Heirloom B, Family Clouds B, Family Dots B
ChipboardGCD Studios ~ Donna Salazar Designs - Family Jeans Chipboard
AlphasColors/Inks/Mists
Clearsnap ~ Donna Salazar Designs - Mix's Media Inx: Jasmine, Denim
Clearsnap ~ Donna Salazar Designs - Mix's Media Inx CHOX: Sparrow, Petals
Clearsnap ~ Donna Salazar Designs - Mix's Media Inx Embossing Powder: Jasmine
Clearsnap ~ Top Boss Embossing Powder - Clear
Clearsnap ~ Donna Salazar Designs - Smooch Spritz: Tea Party
Dies
Spellbinders ~ Donna Salazar Designs - Bitty Blossoms, Carnation Creations, Pockets and Swirls
Stamps
Art Gone Wild ~ Donna Salazar Designs - Dear Sir, Brass Corner
Bling
Want2Scrap ~ Donna Salazar Designs - Build Your Own Bling 1
Embellishments
Ribbons/Fibers
Really Reasonable Ribbon ~ White Seam Binding
Mixed Media
Clearsnap ~ Donna Salazar Designs - Fairy Dust Glitter: Clear
Tools
Zutter ~ Donna Salazar Designs - Distrezz-it-All Spellbinders Artisan X-plorer
Heat Tool
Adhesive
Clearsnap Glue Gloss
Helmar ~ 450 Quick Dry Adhesive, Premium Craft Glue

Thanks for stopping by! I treasure your comments.

~ Blessings ~